Community resources
Community resources
Community resources
How to connect GitLab to your Jira Cloud Instance
GitLab is an extremely effective version control system used primarily for software and web development projects. This Version Control System (VCS) helps you to work efficiently and agilely on your projects, because it allows you to work on a project with several developers at the same time.
Users of the project management software Jira by Atlassian can benefit greatly from GitLab. The two agile tools can be combined and simplify your development process thereby immensely. Once you have integrated your GitLab project into your Jira instance, you can automatically identify and compare activities between the GitLab project and all your projects in Jira.
In our article, we explain how to connect GitLab with Jira and give you a practical step-by-step guide. We’ll show you all needed steps in Jira Cloud and GitLab.
A practical guide for an effective connection of the two agile tools
Preconditions
A) You have an existing GitLab instance and the administrator permissions for it.
B) You have an existing Jira Cloud instance and the administrator permissions for it.
Connect GitLab with Jira Cloud – Here’s what to do in Jira Cloud
Install the GitLab app in Jira:
- Go to your settings in Jira Cloud.
- Click on “Find new apps“.
- Enter “GitLab“ in the search field.
- Click on “GitLab.com for Jira Cloud“.
- Install the app on your instance.

Start the GitLab app in Jira
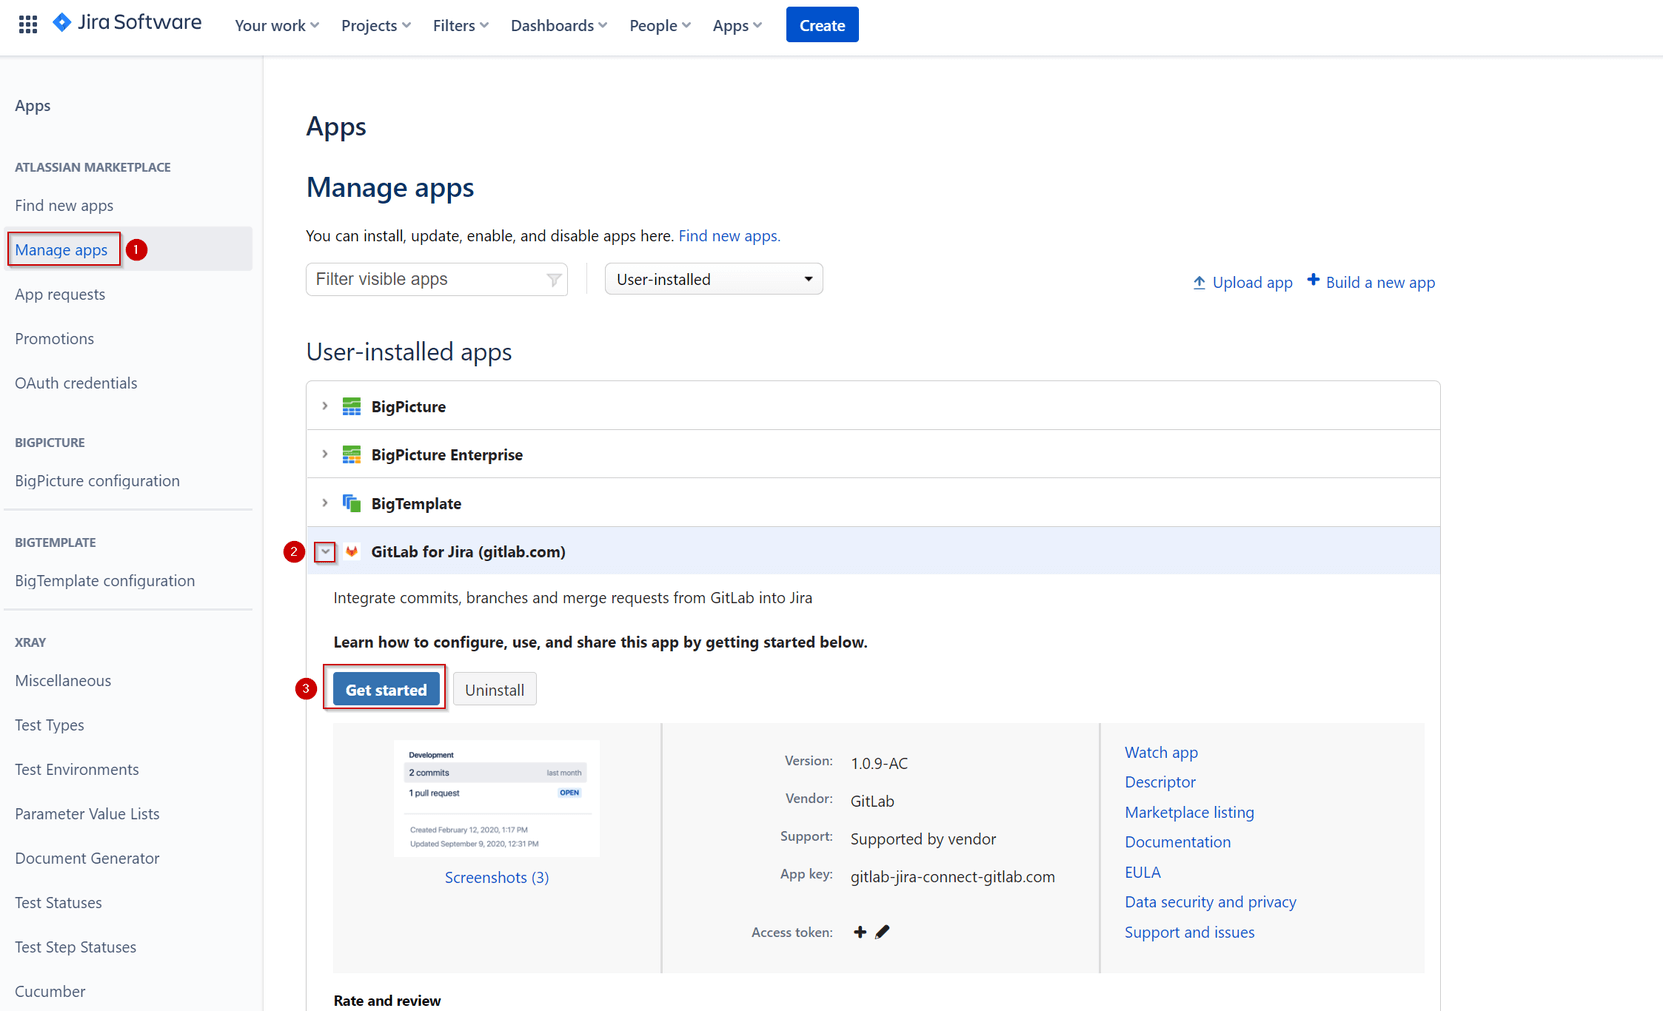
- Go to “Manage apps“.
- Click the down arrow in “GitLab for Jira (gitlab.com)“ to see the app details.
- Click on “Get started“.
Optional: Check if your loose connection to GitLab is working
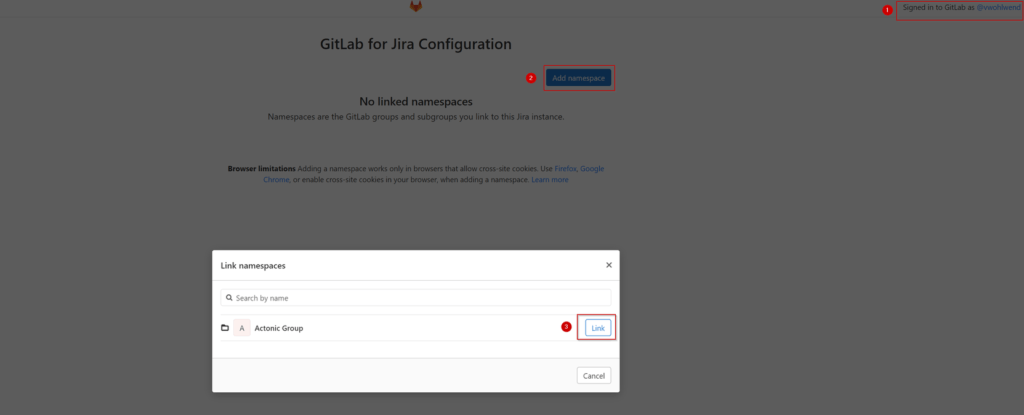
If you are logged in as “@ExampleUsername“, your connection to GitLab is available.
If not:
- Click on “Add namespace“ on the page shown in the following screenshot.
- Link the corresponding GitLab instance you want to connect by clicking “Link“.
The connection to the Jira Cloud page is now complete.
Connect GitLab with Jira Cloud – Here’s what to do in GitLap
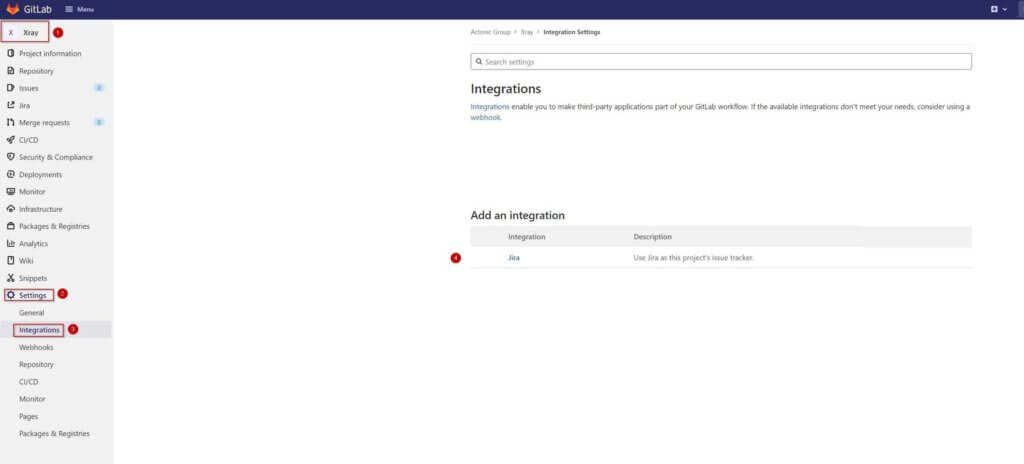
- Visit your GitLab instance and check if you are in the right project. If not, go to “Menu“ at the top.
- Click on “Settings“.
- Click on “Integrations“.
- Select the Jira integration and click on “Jira“.
Optional: Change the default settings to your custom solution
After completing step 4 and clicking on “Jira“, you will get the view shown in the screenshot below. Fill in the fields marked in the screenshot as follows:
- Web URL: Enter the URL of your Jira Cloud instance. Use the format: https:// <your instance> .atlassian. net.
- Username or e-mail: Enter your e-mail address.
- Enter new password or API token: Fill in your API token. How to get an API token is explained below in the following section.
- Test settings Button: Test your settings with the “Test settings“ button. (This step is optional).
- Save changes Button: Save your changes by clicking on this button after you have inserted all credentials.

The connection on the GitLab page is now complete.
For 3. Enter new password or API token – How to get your API token
- Visit id. atlassian . com / manage-profile/security/api-tokens.
- Click on “Create API token“.
- Label the API token as you like (for example: “Git token“).
- Copy your new token. Caution: After closing this window, you will not be able to view it again and may have to create a new token.
Results & Features
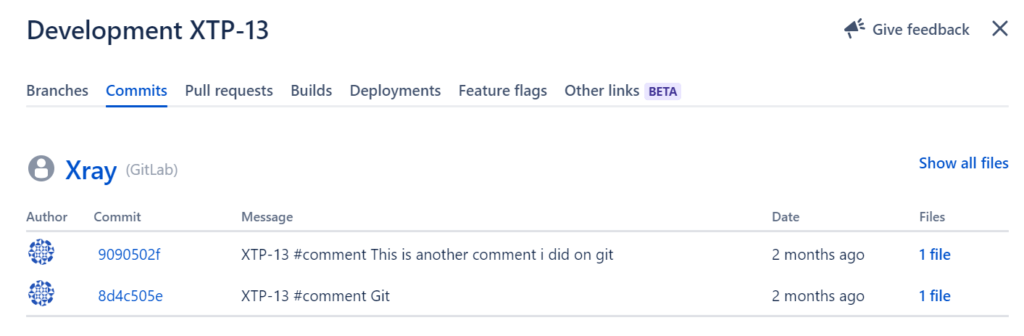
If you use GitLab and Jira together, you can view the features that GitLab has on your Jira issues in Jira under the newly created “Development“ field.
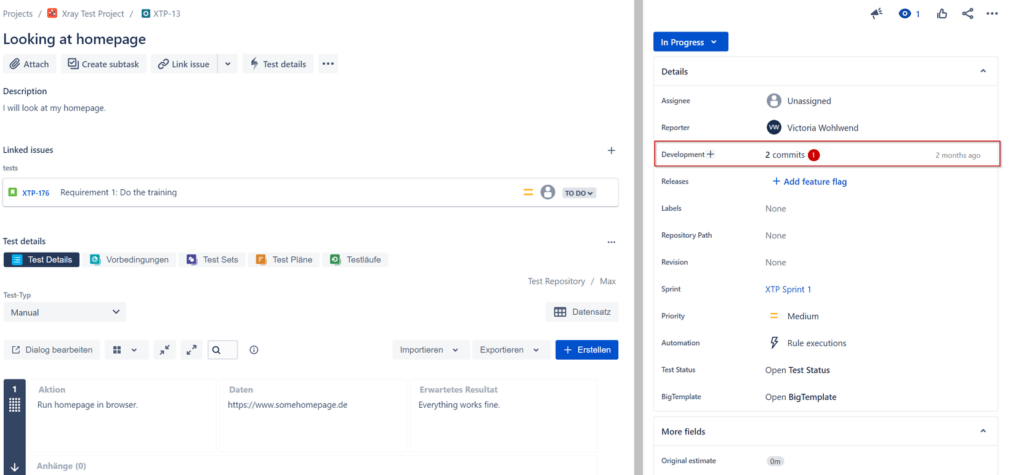
This field shows you all the information about your GitLab project that you recently activated (see information in the screenshot below).
Beside the Development Panel you can also enable the Code feature, which gives you greater visibility of your teams' work by automatically linking and displaying your teams' code repositories in your project. Learn more here.
Your Possibilities through GitHub References for Jira – A Quick Overview
Use the issue key and “#“ to include references to Jira in your GitLab.
Attention: To do this, the correct options must be set to enable several actions. See the second screenshot under “How to do it on GitLab“.
Two examples

Was this helpful?
Thanks!
Andreas Springer _Actonic_
0 comments