When a new company-managed project is created, by default, some issue types share the same screen scheme.
Using different screens schemes for issue types is ideal with the following scenarios:
-
You want to use specific fields for Bugs, so when necessary you can add the fields to the screen without affecting the screen of Epic and Story, for example.
-
Agents/Developers that work on specific issues can have a clear view of the ticket since it will show only the fields they need.
In this article, I’ll cover a step-by-step guide on how to associate a different screen scheme to a single issue type on a project.
" data-emoji-text="⚠">"> " width="20" height="20" data-emoji-short-name="
 " data-emoji-id="26a0" data-emoji-text="⚠" /> Note: You need to be a Jira administrator and a Project administrator to perform the below steps.
1. Create a screen
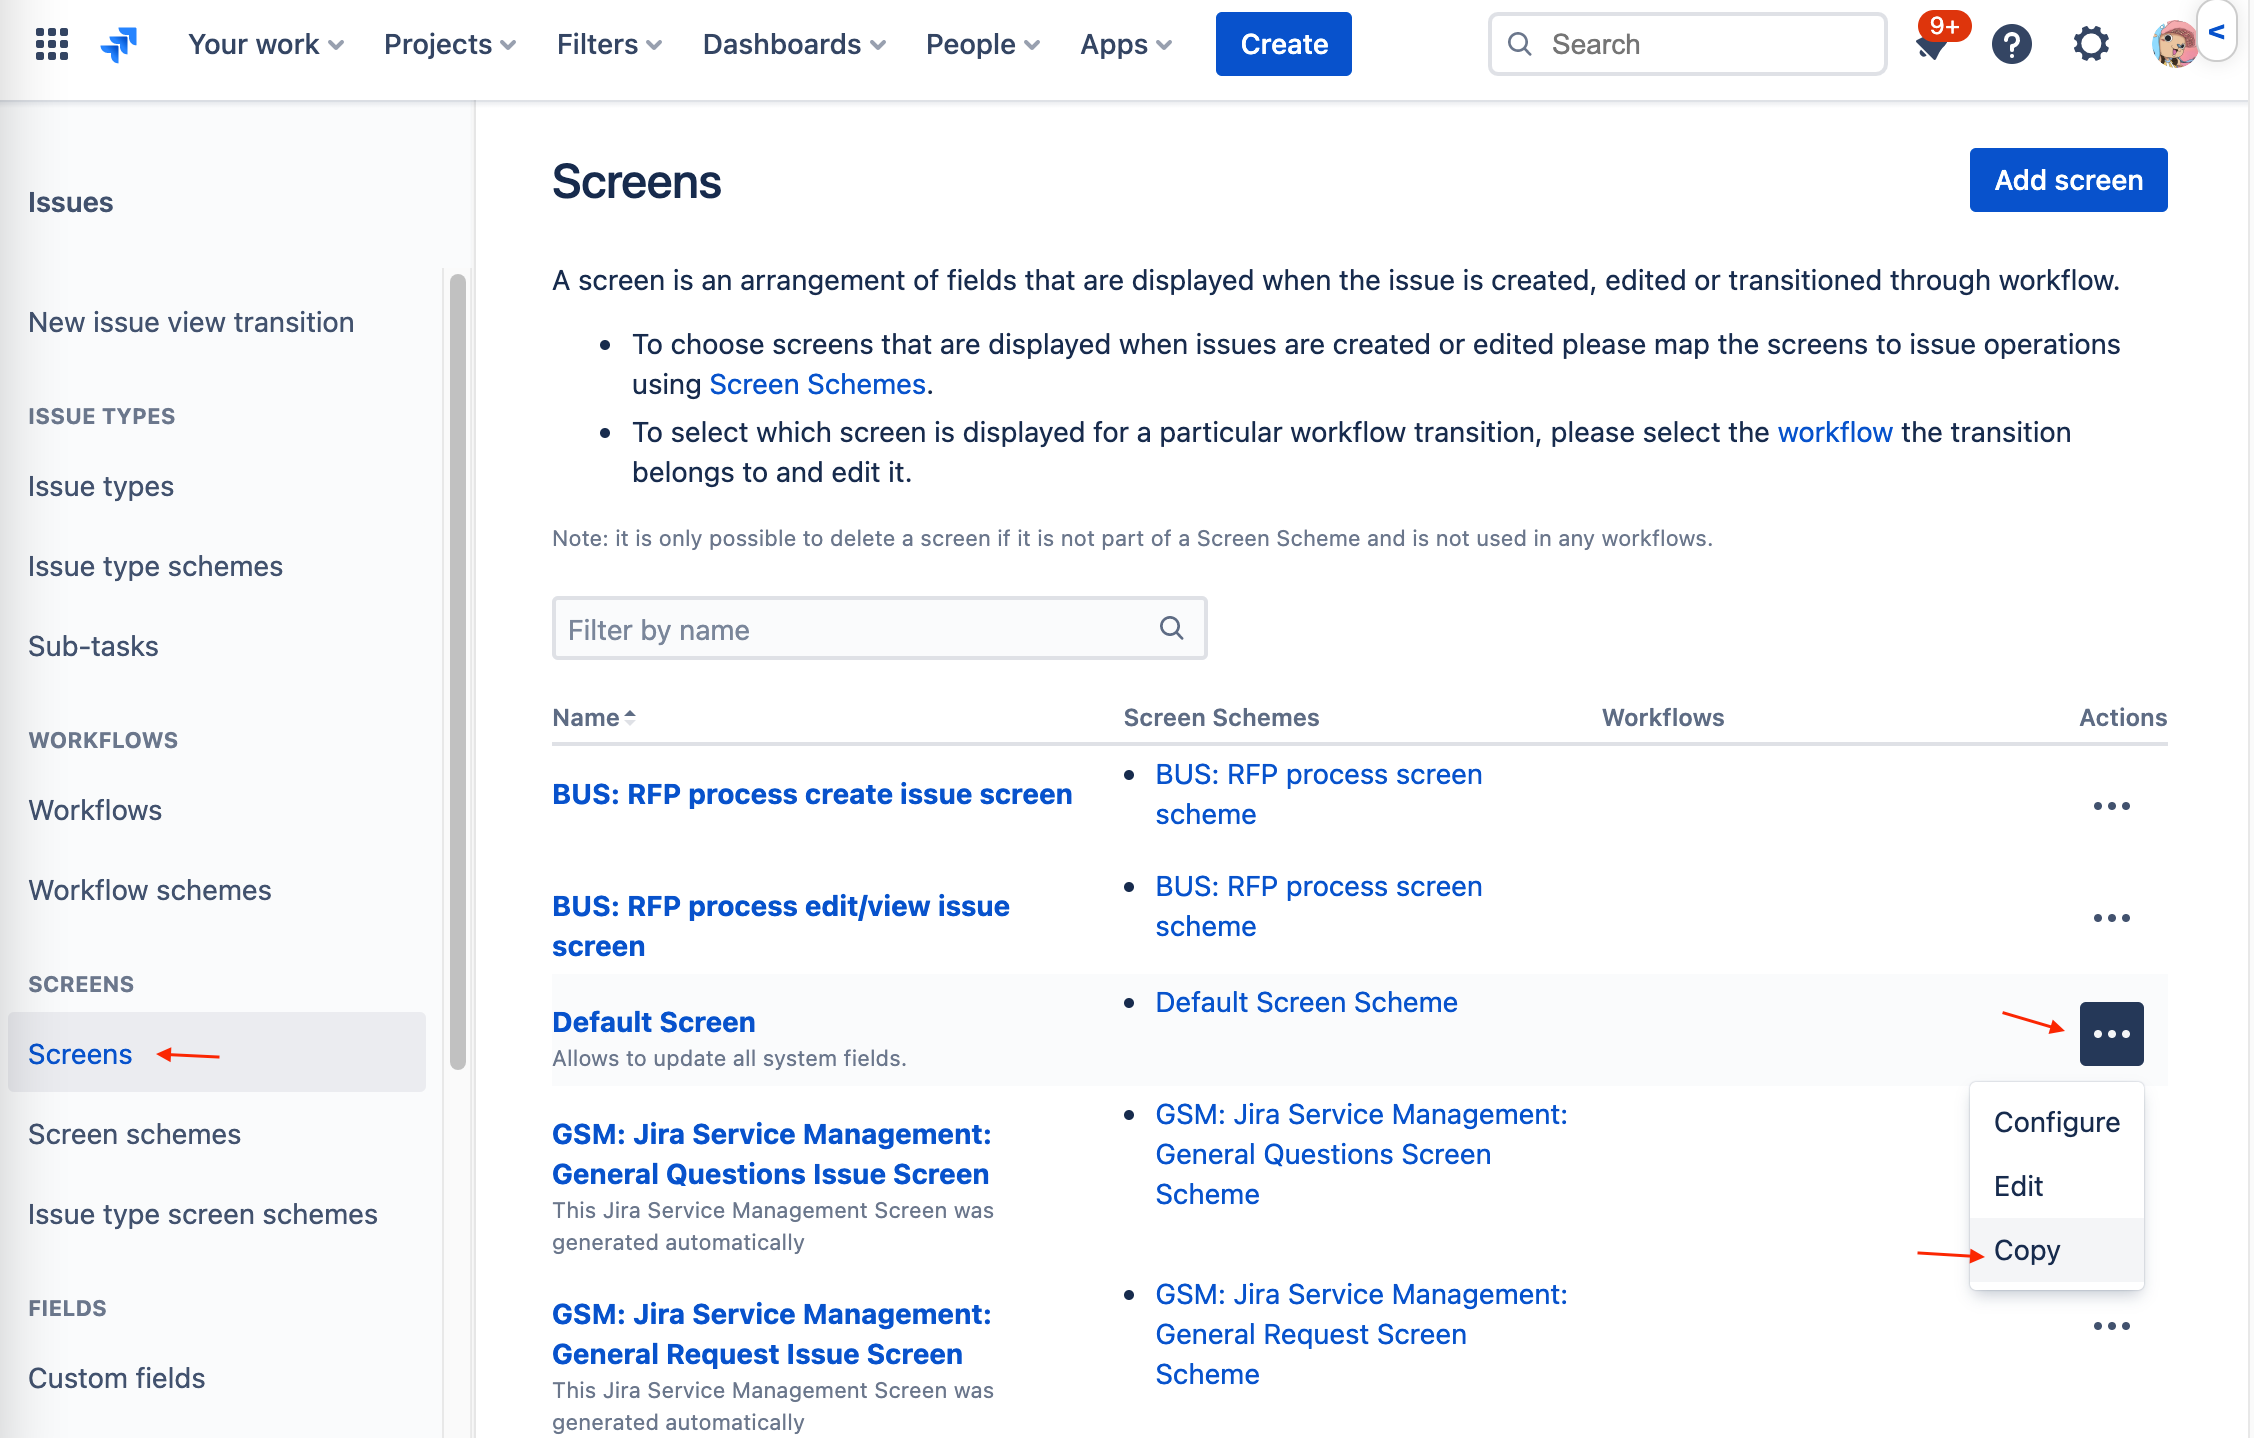
1. Go to Cog icon > Issues > Screens.
2. On this page, you can click on Add screen in case you want to create a screen from scratch, by manually adding all the fields, or you can just copy an existing screen and remove the fields you don’t need.
In this example, I will create a screen for Epics by copying the Default Screen.
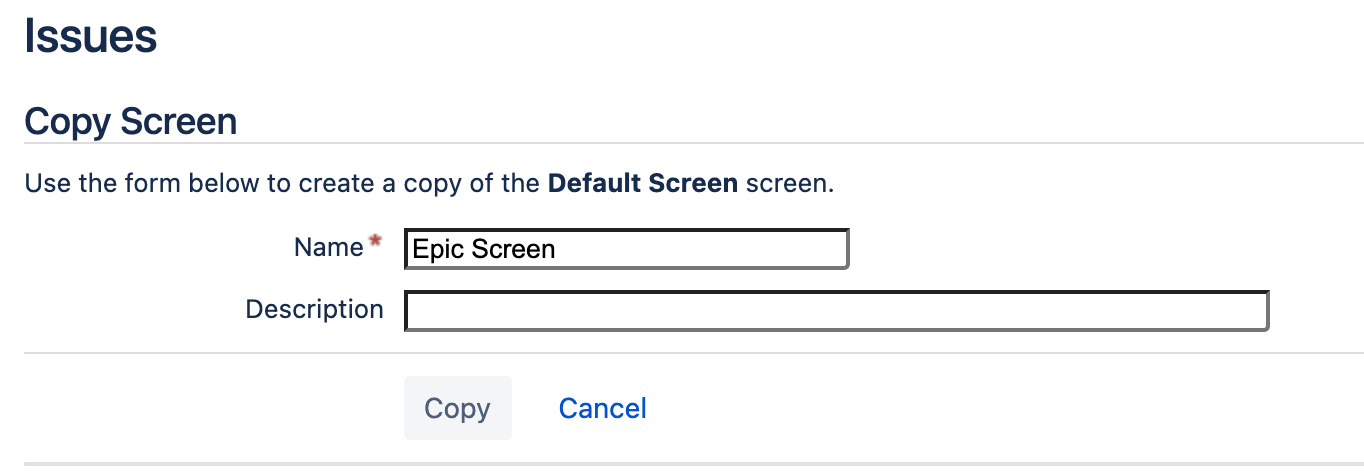
3. On the next page, add a name for this new screen and click on Copy.
4. Click on the new screen and add/remove the necessary fields.
 When adding or removing fields from a screen, it will be automatically saved.
2. Creating a Screen scheme
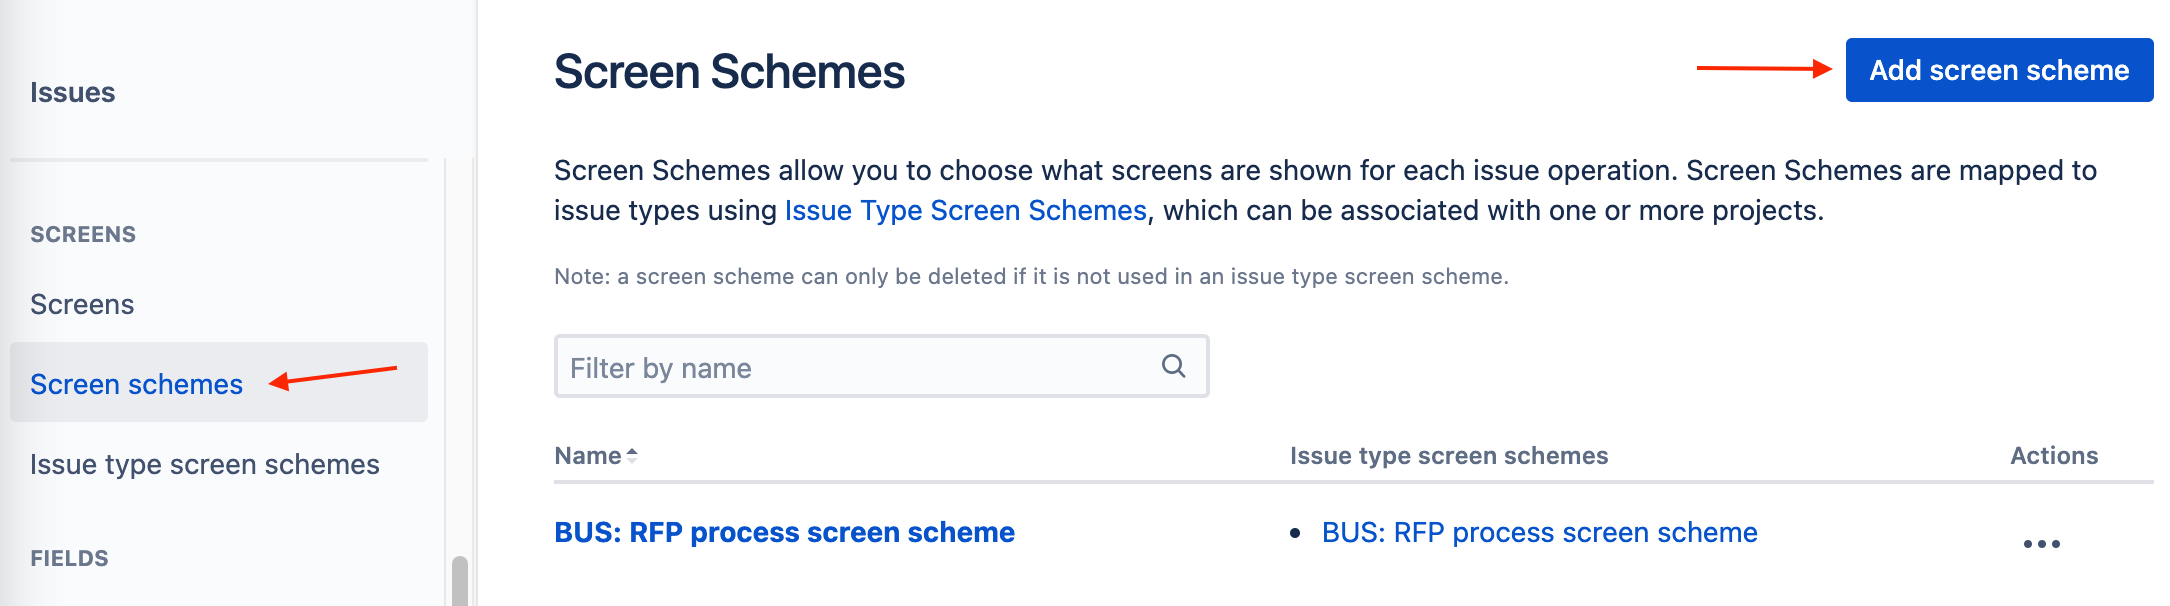
1. Go to Cog icon > Issues > Screen schemes.
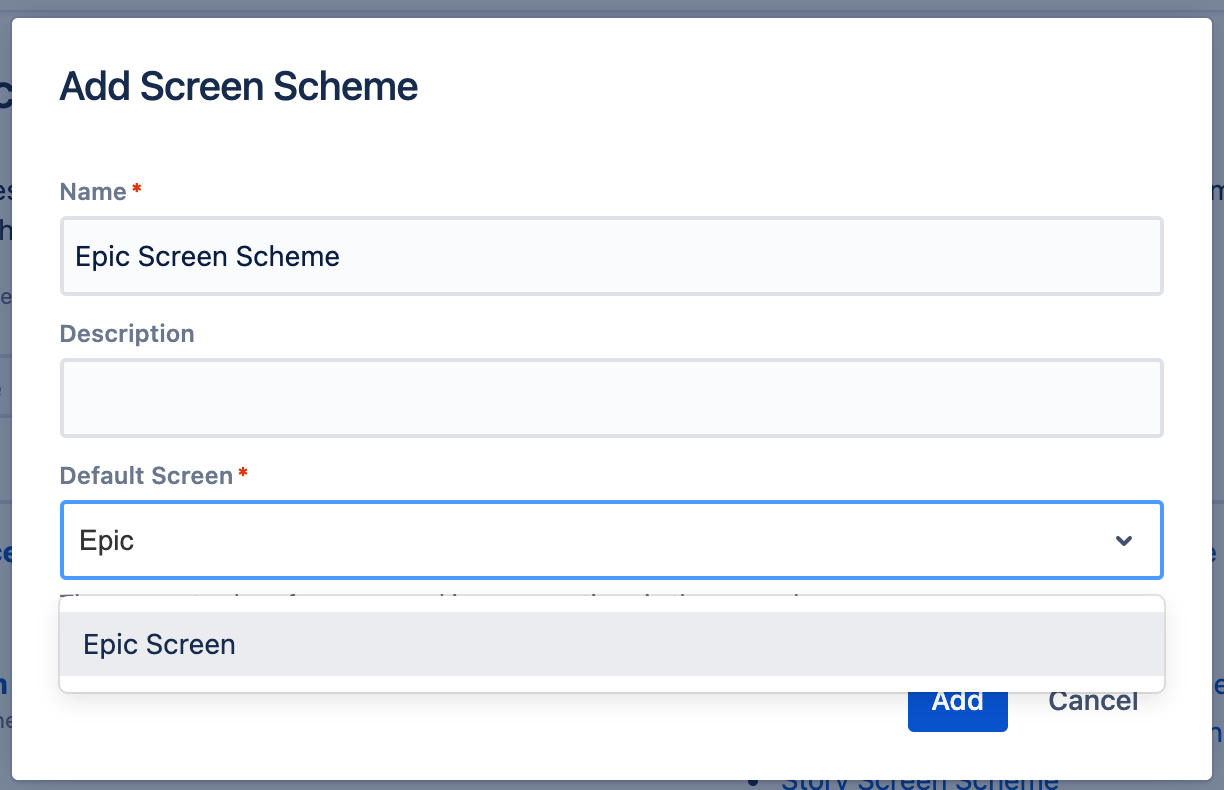
2. Click on Add screen scheme, add a name and on the Default screen select the screen you created before.
3. Associate an issue operation with a screen
1. From the Screen schemes page, click on the new scheme you created.
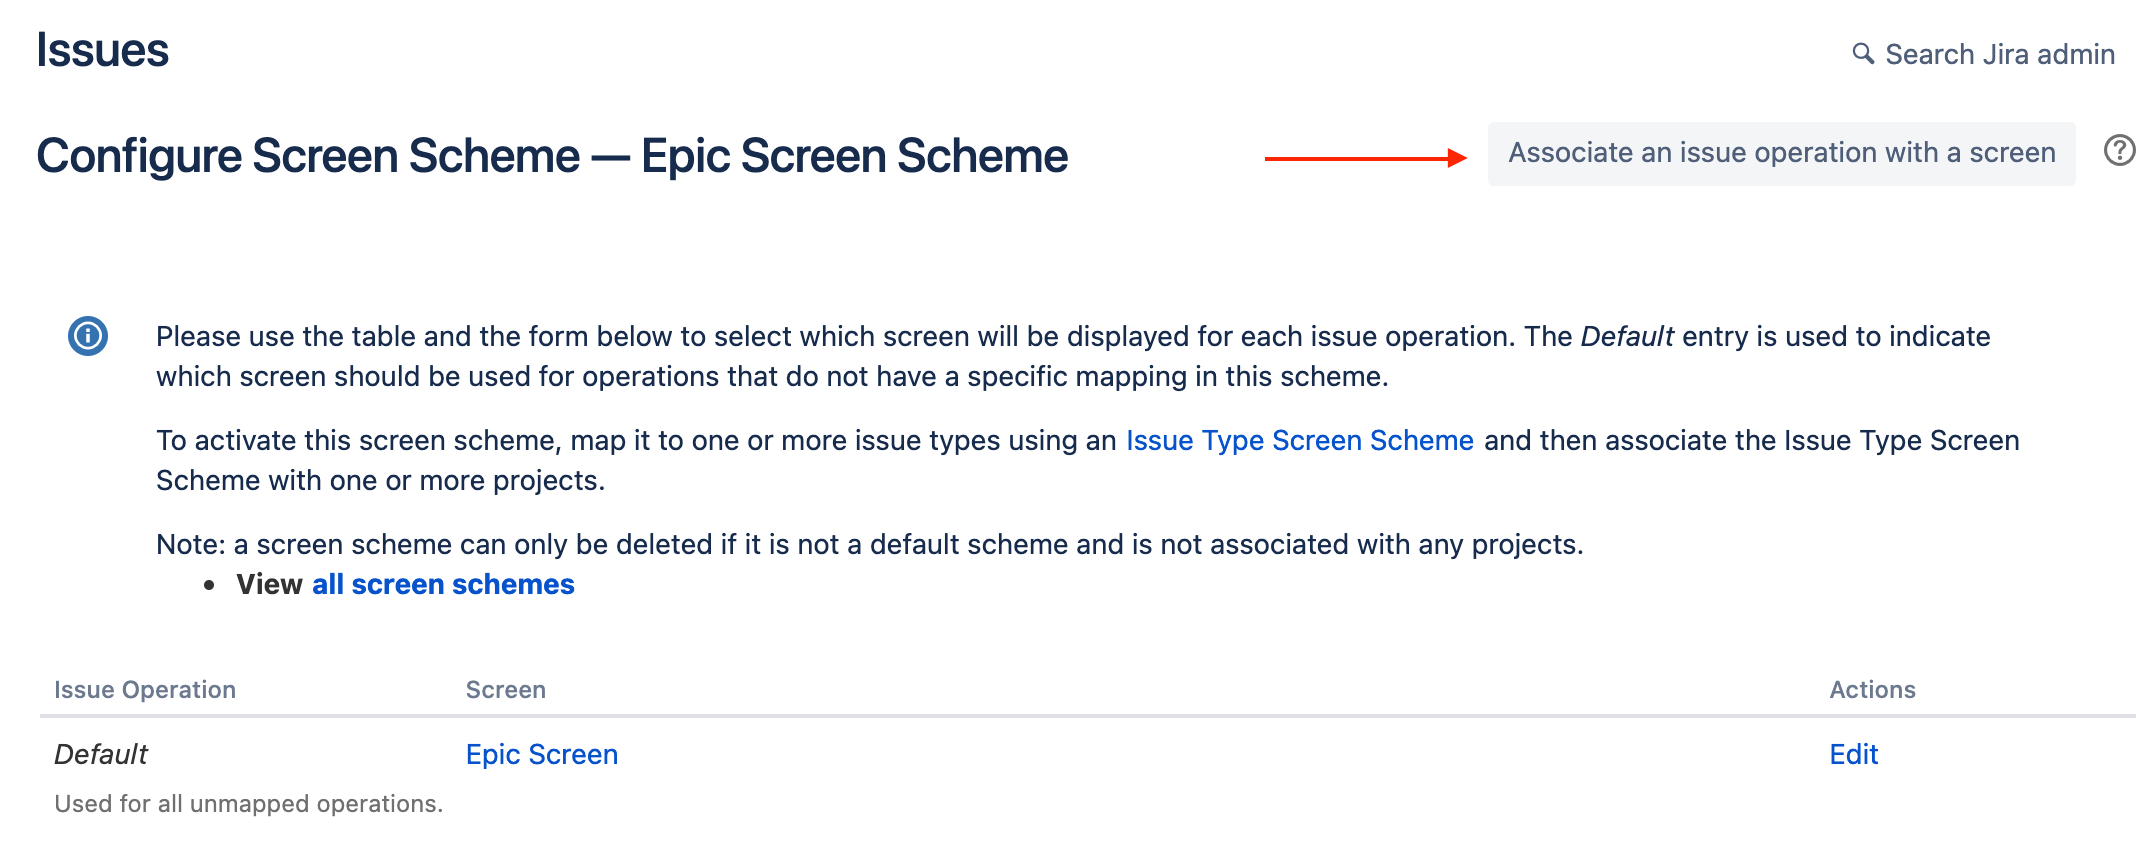
2. On the next page, click on Associate an issue operation with a screen.
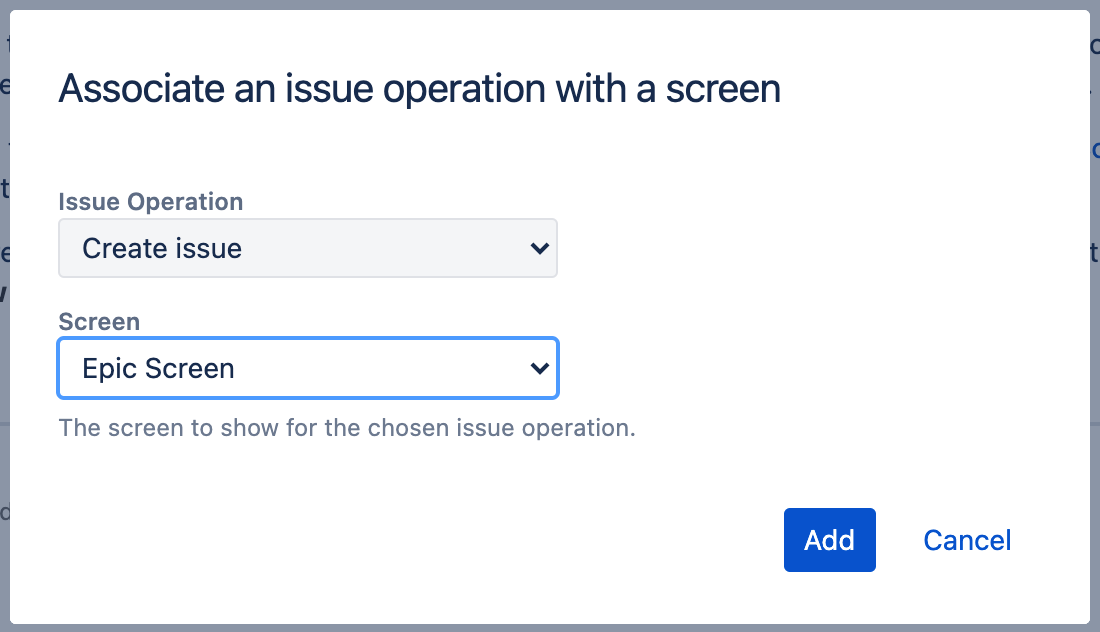
3. The operations are Create, View, and Edit issue screens, so follow these steps (Associate > Operation > Screen > Add) for the desired operations that you want to associate with the screen.
4. Associating the Screen scheme with the Issue type
1. Go to the Project settings > Screens > Actions > Edit screens.
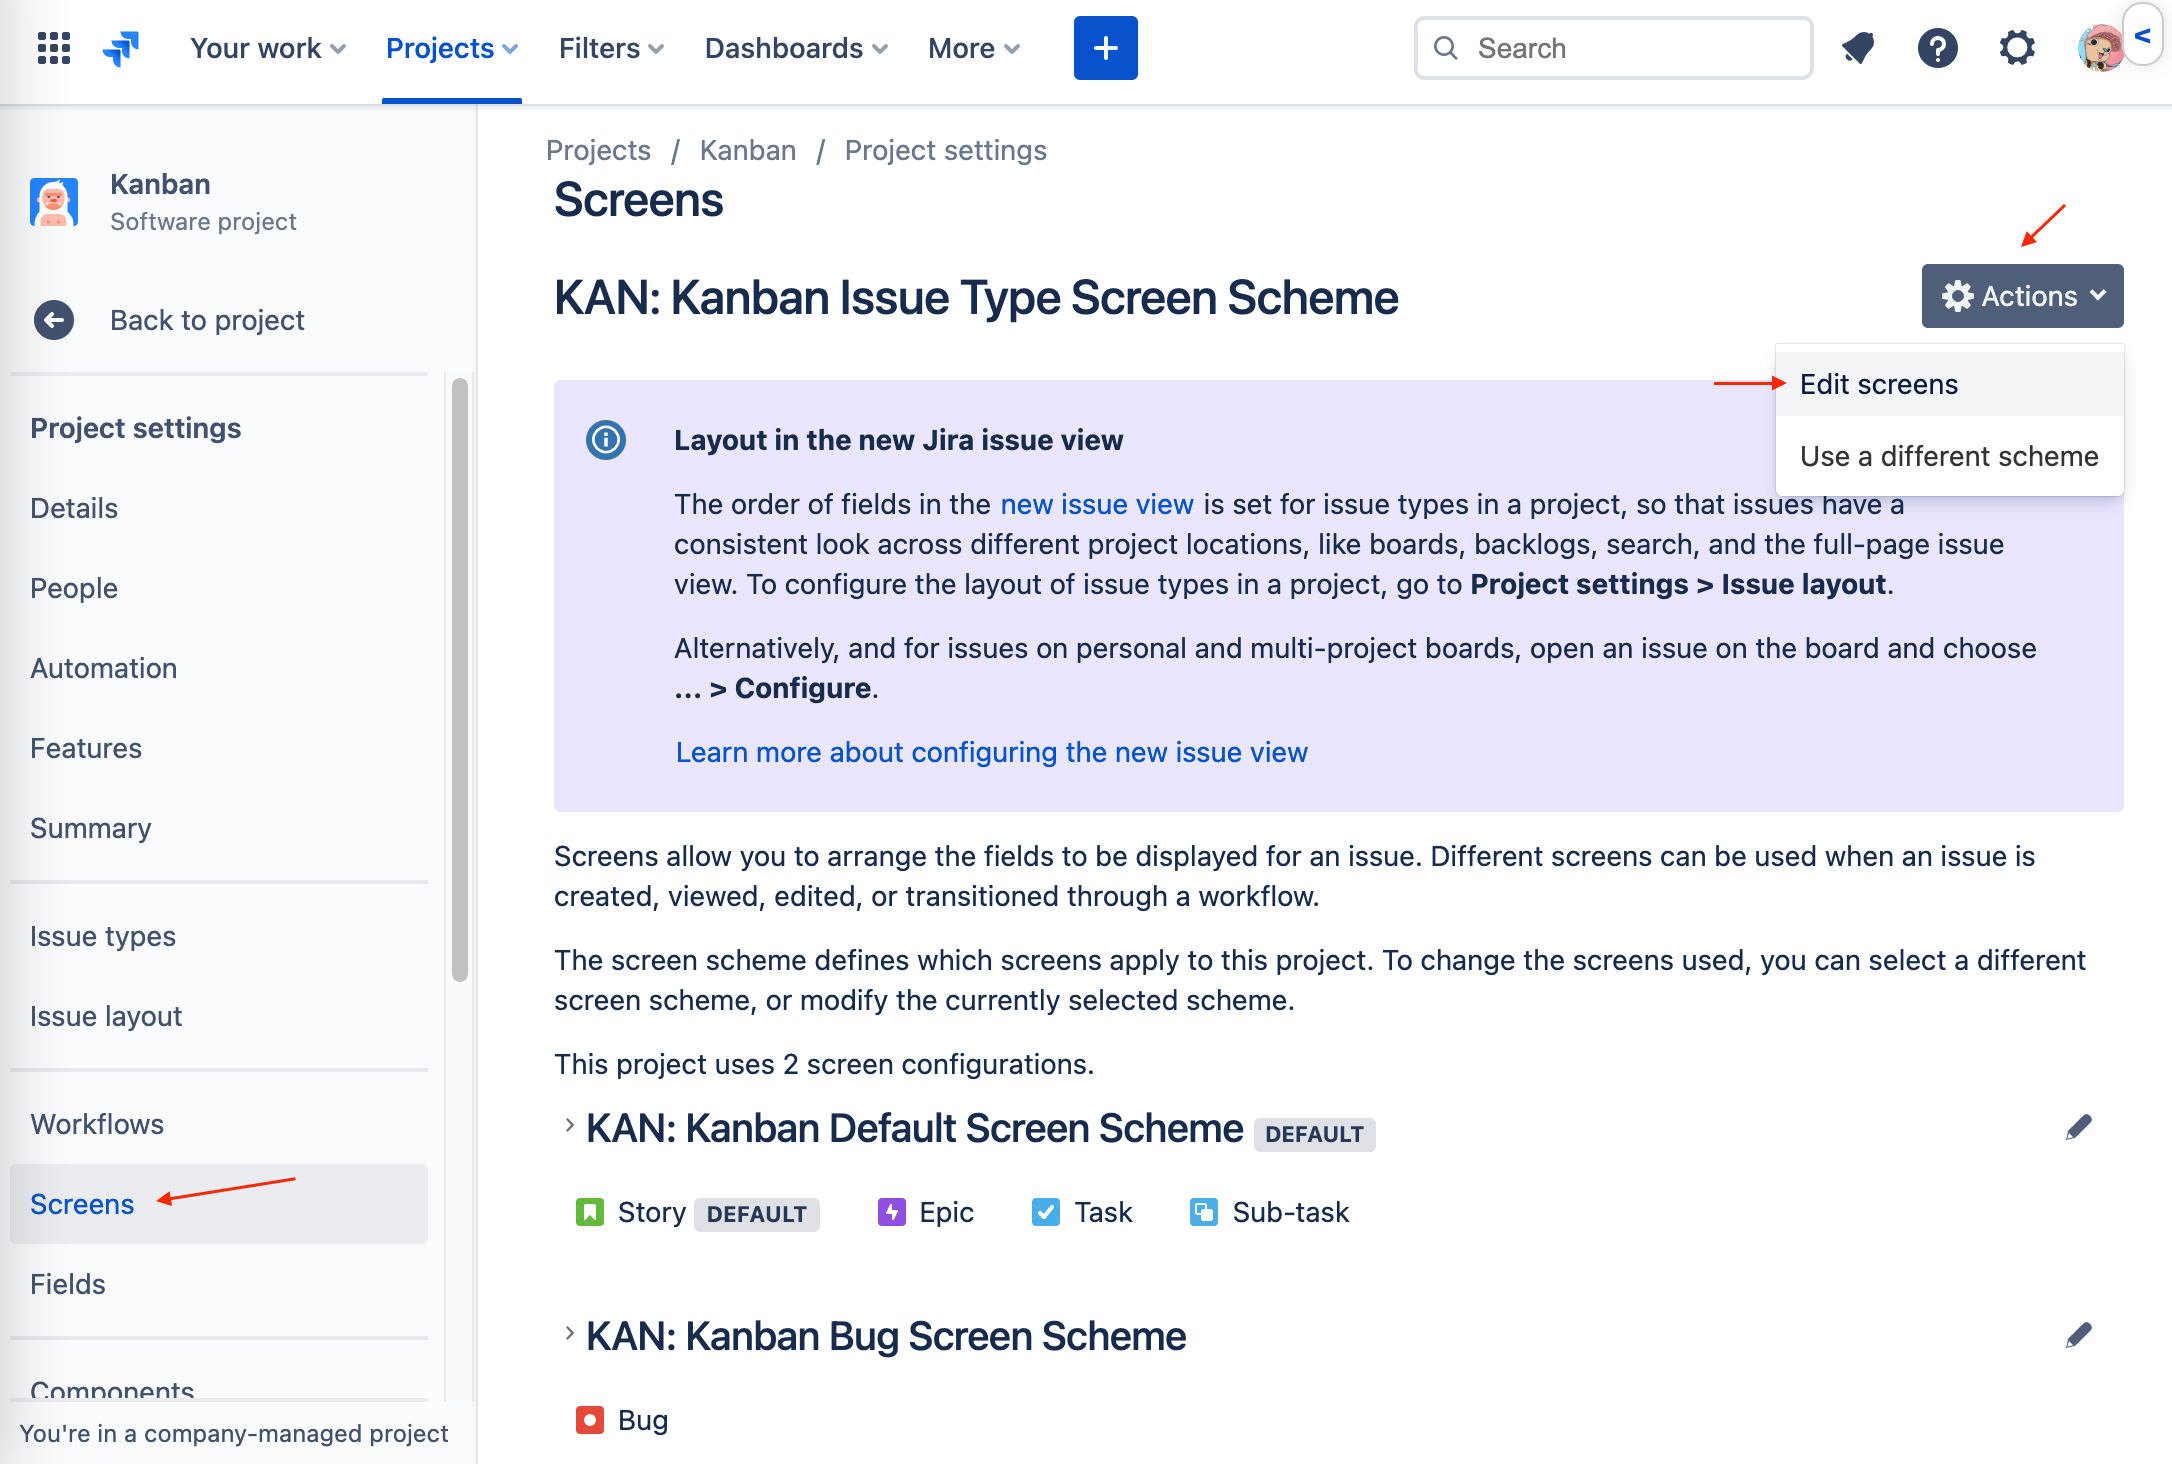
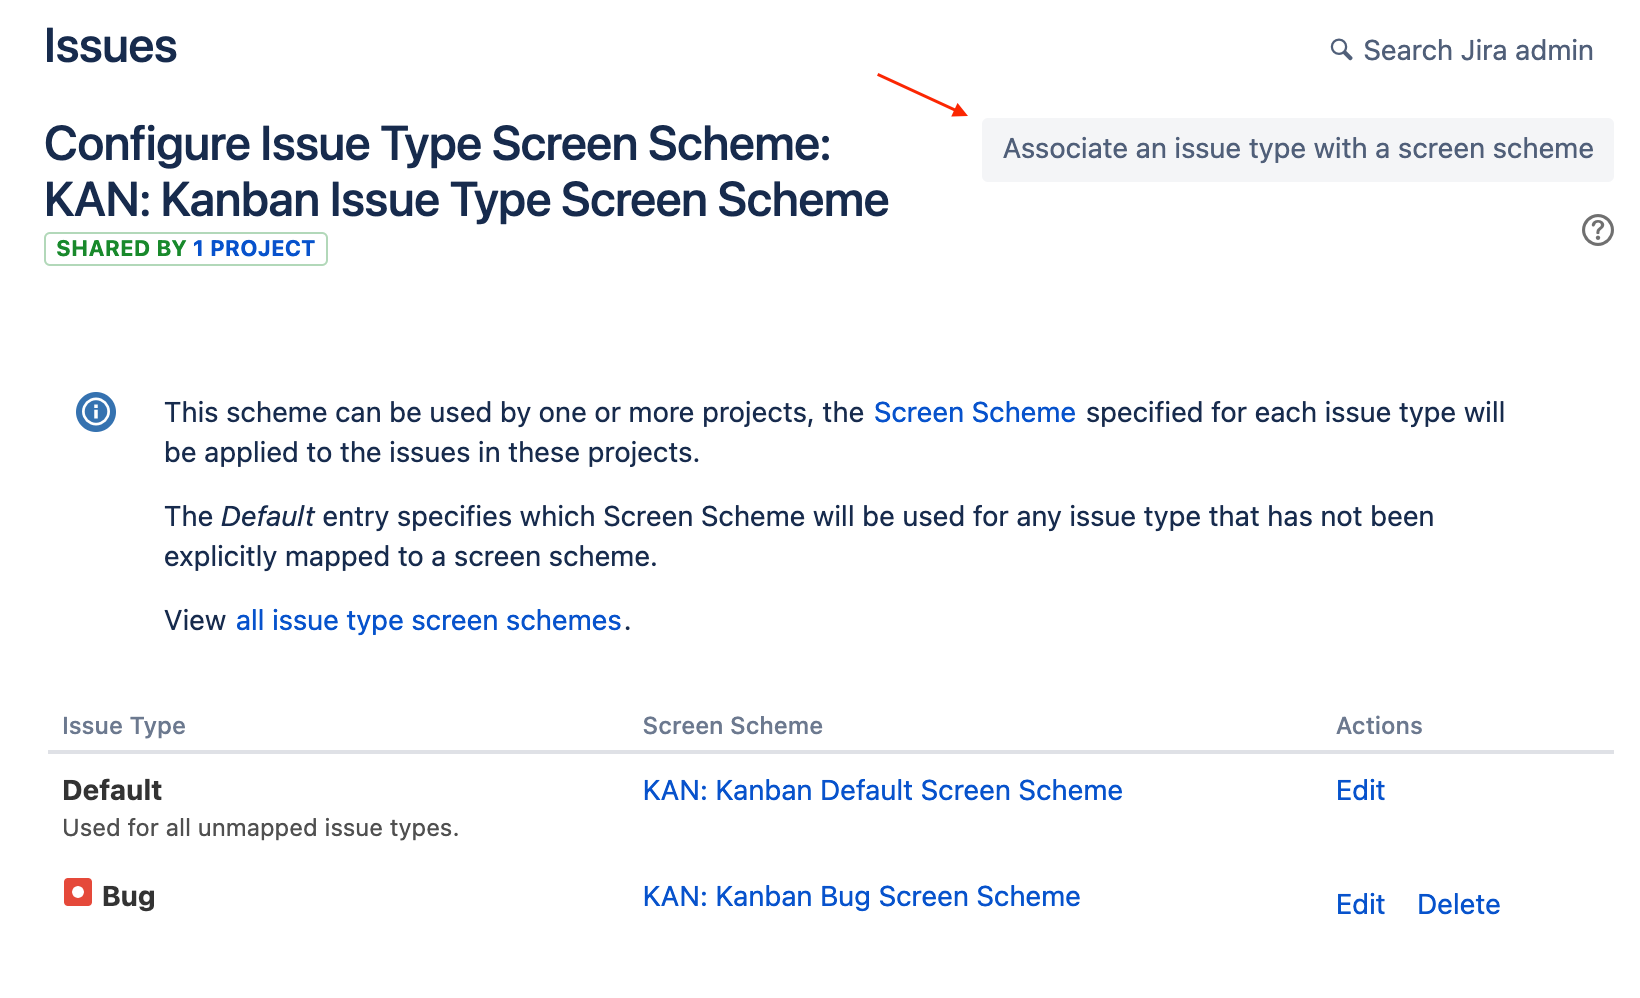
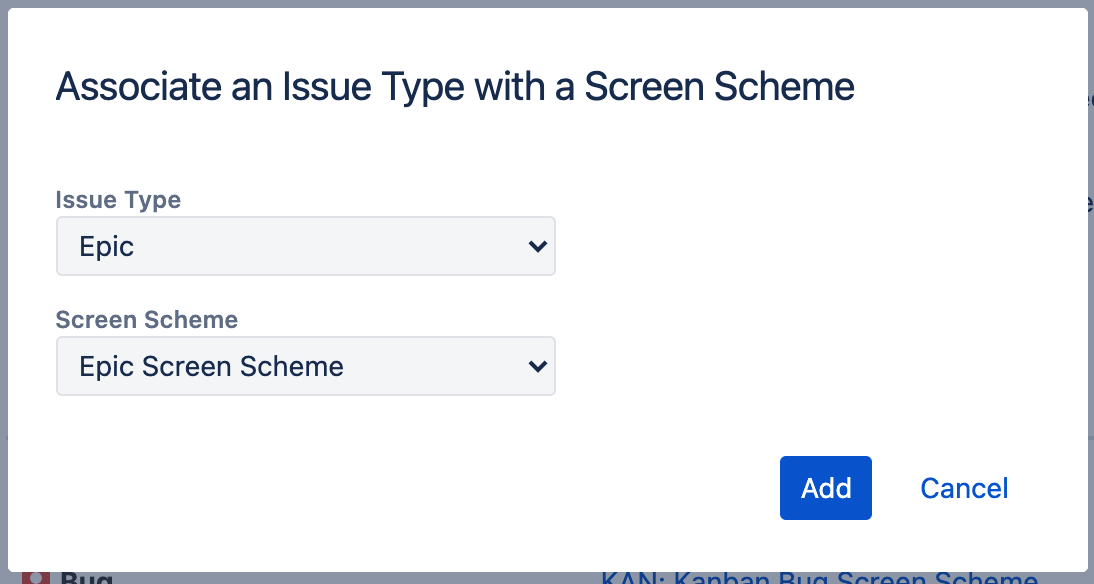
2. Click on Associate an issue type with a screen scheme and then on the pop-up screen that appears, select the Issue type and the Screen scheme created before and Add.
You are all set!
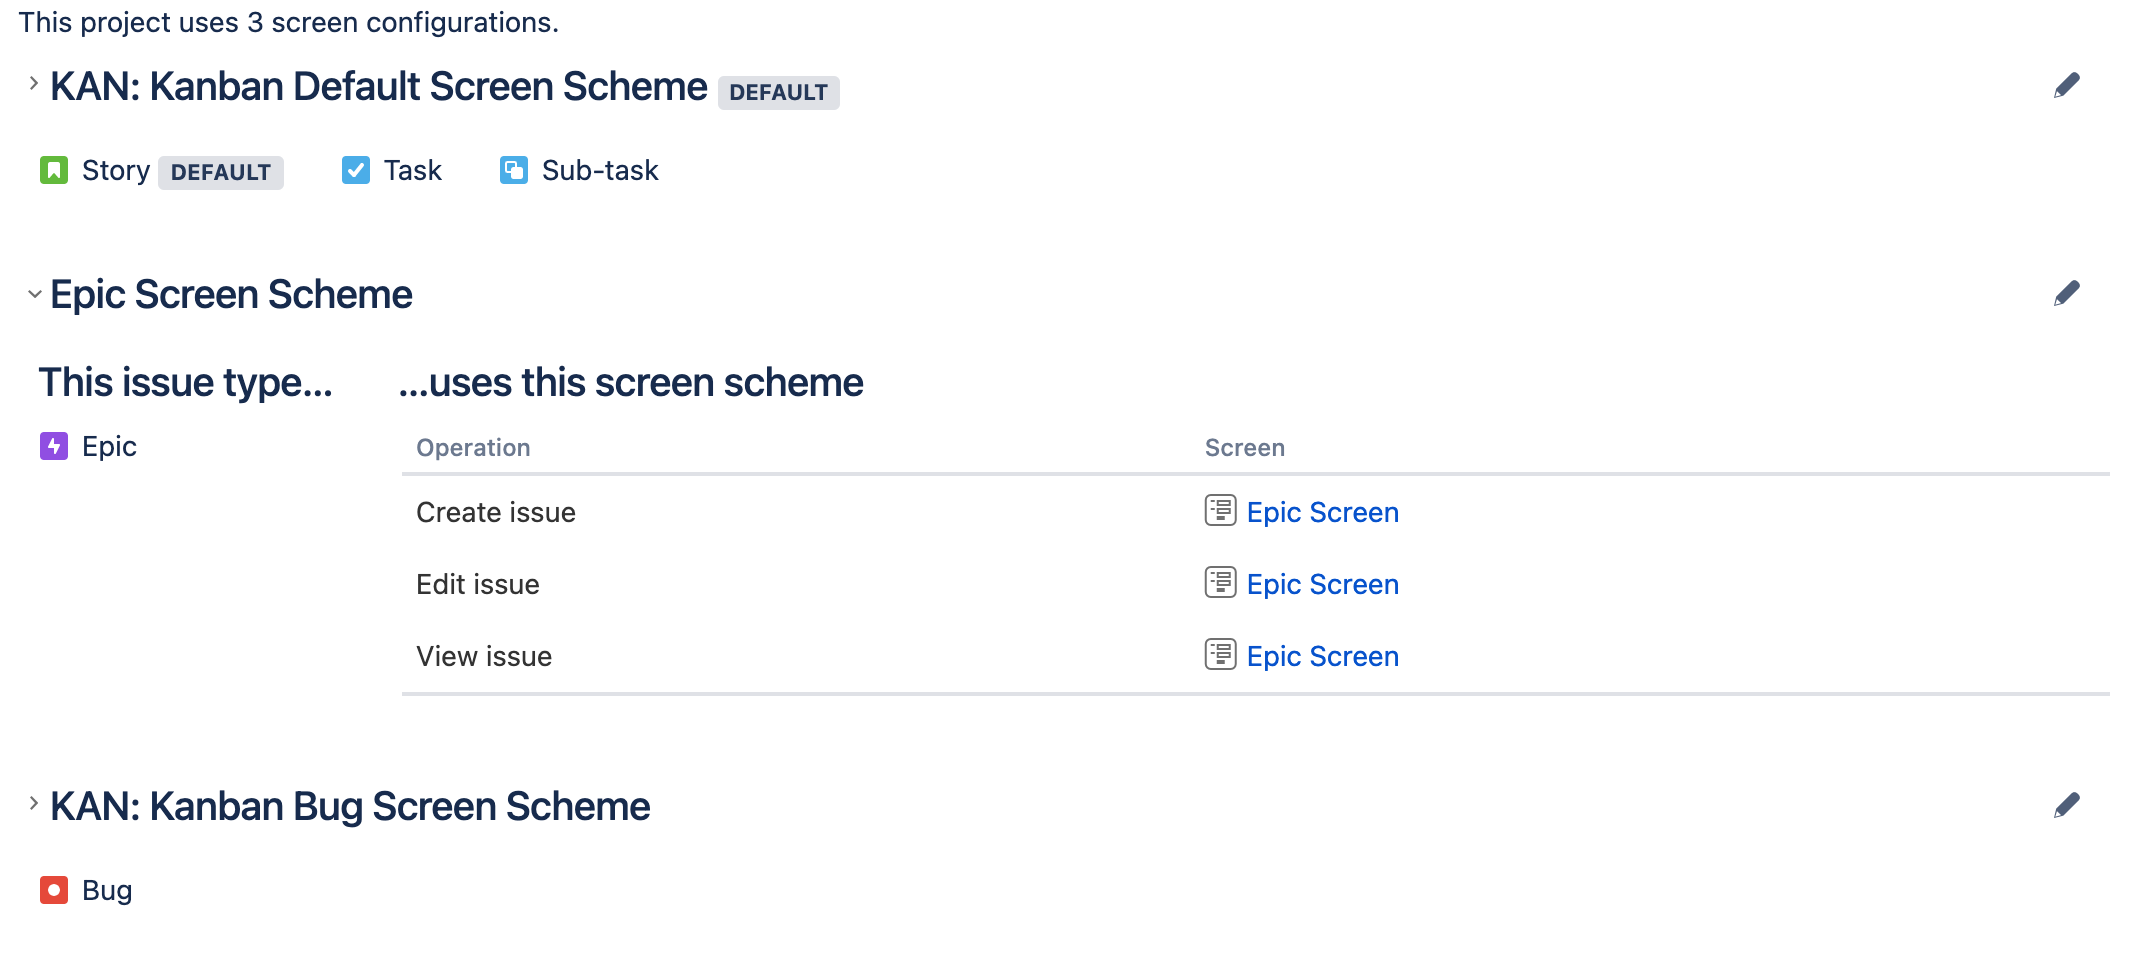
If you go to Project settings > Screens, you can now see the new scheme.
5. Links
Similar Community content:
Documentation:
Hope this article helps you " data-emoji-text="😃">"> " width="20" height="20" data-emoji-short-name="
 " data-emoji-id="1f603" data-emoji-text="😃" />
" data-emoji-text="😃">">Warm regards,
Angélica


