Community resources
Community resources
Community resources
Tips for Creating Good Jira Forms and Screens
This is the next article in our series on Form Design. Previous articles include:
- Why Form Design Matters
- Form Layout and Flow
- Good Form Questions - Open Questions
- Good Form Questions Part 2 - Choice and Conditional Logic
- Things to Think About when Converting Forms to Jira
- Efficient Jira Screens and Jira Service Desk Request Forms
Now that you know why good form design is important and how to ask good questions, here are some quick ways to improve Jira screens and Jira Service Desk request forms.
Jira
Use these easy field tips in Jira.
1. Limit fields on the Create screen
When you create a project, Jira automatically creates screens and schemes for it. A “Kanban Default Issue Screen” includes 14 fields! By the time you’ve added additional custom fields, screens are often long and cumbersome. Just because info is needed, doesn’t mean it’s needed at the same time the issue is created. Group your fields into the following categories:
- information needed immediately (Ex: Description and Requested date),
- information needed later in the workflow (Ex: Estimate and Due date),
- and information needed before an issue is completed (Ex: Time tracking and Root Cause).
Fields for a Simple Create Screen
Only show fields in the first category on the “Create” screen. Fewer fields make issues easier to create, especially for non-technical users.
Also only ask for information the creator can immediately provide. For example, if the creator isn’t the person who calculates the estimate or determines the release date, omit those fields. You can collect that information, during a scheduling process, later in the workflow.
If you have “Edit” and “View” screens, include all the relevant fields, so info is easy to update at any time. Usually these actions can share the same screen but sometimes they are different. Example: A field has a value but editing it is not desired. In this case, the “View” screen shows the field but the “Edit” screen does not. As a reminder, for Jira Cloud Next-gen projects, there’s just one screen per project or per issue type and no distinction between the create, edit, and view operations.
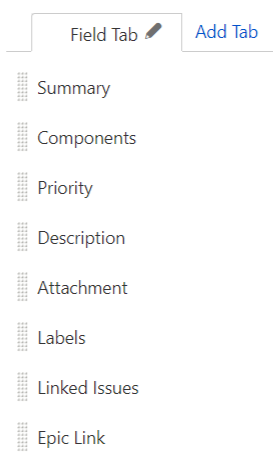
2. Use tabs to group similar fields
If there are many fields, use the “tabs” feature to group them. In the screenshot, all user picker fields are together in the “People” tab and all date and version fields are in the “Internal” tab.
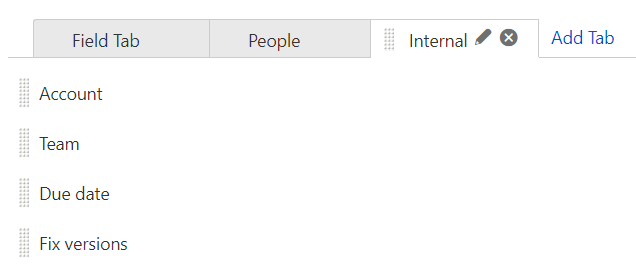
Two Custom Tabs on a Screen
3. Collect additional information during the workflow
Determine when in the workflow other fields should be completed. For example, fields like “Assignee”, “Due date”, and “Original Estimate” should be filled before an issue reaches the “In Progress” status. Use a workflow transition screen, and validators, to require entry. If you’re using ProForma you can create separate forms to collect information at different times in the workflow.
4. Order fields strategically
List fields in the order the user is likely to supply the information. Place more important fields at the top.
Always place the “Priority” field before a “Requested” date field. It may help set realistic expectations to ask for the importance before the date.
5. Order fields consistently
Use a consistent field order for all issue types and projects. Users expect and appreciate a standard.
6. Only create fields that are reported on
Don’t show unnecessary fields, collect information you won’t use, or create custom fields that aren’t queried. Instead, use the standard “Description” and “Comment” fields and train users what information to provide.
7. Utilize best practices and standard web form conventions
When creating screens, be aware of the web and application standard conventions that users expect. Here are some tips for effective and useful web forms.
- Don’t ask too many questions
Only ask for information you’ll use. For example, if you plan to respond to issues via email, only ask for an email address (not an email address, a phone number, and a mailing address.) If you already have the reporter’s email address on file, don’t ask them to type it. Short web forms are more likely to be completed. Users dislike providing many ways for you to contact (aka spam, annoy) them. - Ask specific questions
Use field descriptions to ask the user for specific information or to provide formatting instructions. Asking a specific question gives you better information than a blank or “Enter your message here” description. Examples: “What software do you need installed?” or “What is the expected result of the defect?” - If a field has validation requirements, tell the user exactly what to enter
Give clear and easy to understand directions. Don’t wait for a user to enter data incorrectly before providing them with formatting instructions. For example, tell the user to enter their phone number in the format: ###-###-#### rather than provide the vague error “Please enter a valid phone number.” - Confirm successful submissions
After a user clicks the submit button, there should be a confirmation that the message was received or an error message if there were any problems. Jira handles this functionality by default. - Post and adhere to your privacy policy
Any time you collect user information, you should have an easily accessible privacy statement that addresses what you collect, how you use it, and under what circumstances, if any, you disclose it. If completing a form means you’ll add their email address to your newsletter system, for example, that needs to be clear. This is important for public instances and when you use Jira for customer support. - Consider your audience
As with everything web related, create forms with the end user and their specific goals in mind. You may need separate forms for existing customers, new prospects, or different situations. Don’t try to serve all users and all conditions with the same form.
Jira Service Desk
With Jira Service Desk, you have a different audience to consider. In Jira, the create form should be as short as possible. But in Jira Service Desk, it’s important to collect all the important details up front, to avoid multiple rounds of follow-up questions. This is especially important when working with external customers in different time zones.
Use the Jira tips above and these additional tips for JSD.
1. Use “Introduction text” to provide portal instructions
Enter a custom message to help users understand support options and share additional help resources. The intro message is especially important when there are multiple Service Desk portals. Intro message space is available in addition to the temporary announcement banner. (Both are pictured below.) Visit Project Settings > Portal settings to enter introduction text.
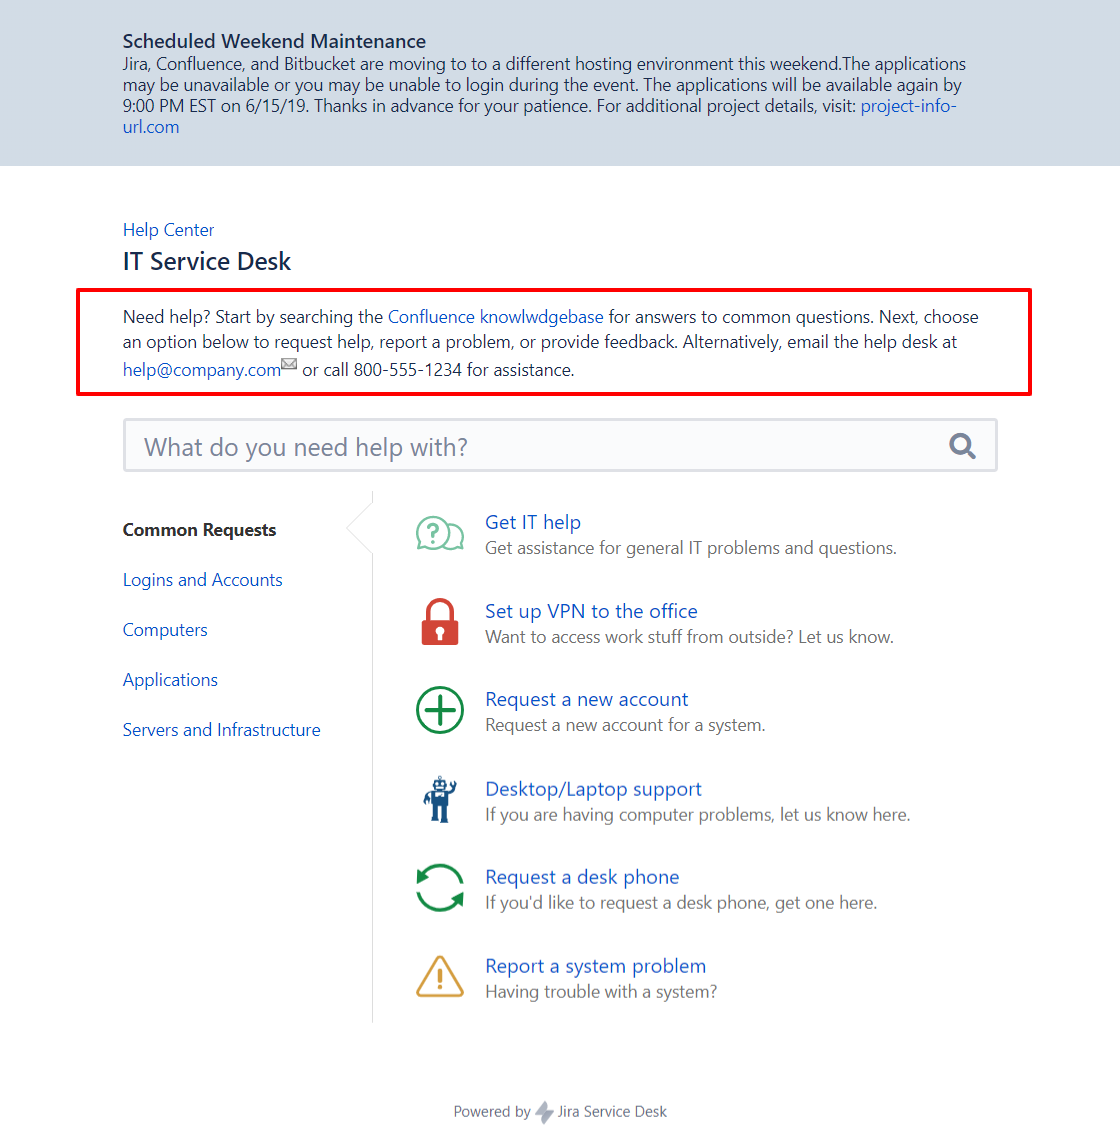
Sample Portal Introduction Message
2. Use the “Description” field to help users select the correct form
Add a short description for each request form, so users can determine the best selection for their request.
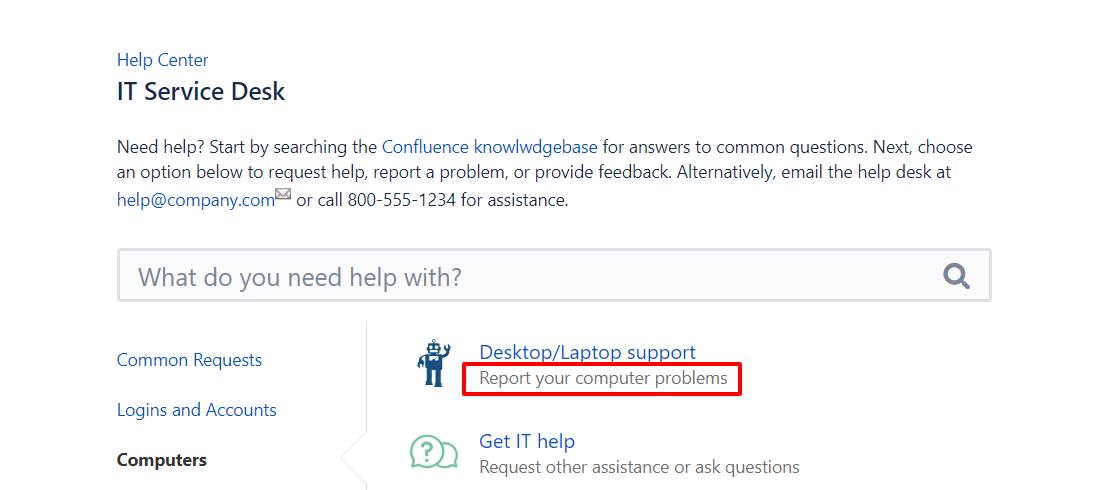
Sample Form Description
Always provide a selection for “all other requests”. In the screenshot above, there’s a generic form titled “Get IT help.”
3. Use the “Help and instructions” field to set request expectations
Enter custom instructions for each request form so users know what information is needed and how long it usually takes to receive a response. In the screenshot below, the user can expect help within 2 hours for this type of support request.
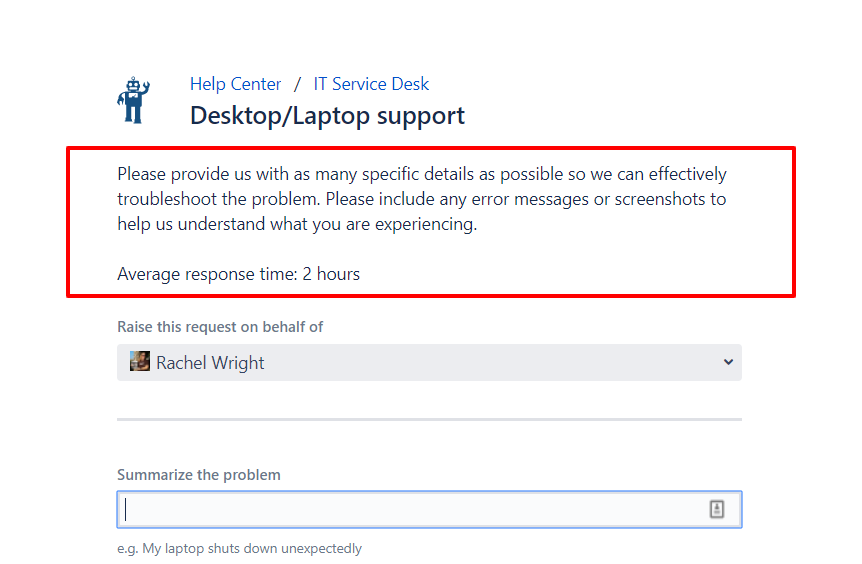
Sample Request Message
4. Customize field labels and add field descriptions
In JSD you can customize a Jira field’s label. For example, I often change the default “Summary” label to the more descriptive “Summarize the problem.”
Similarly, you can also customize field descriptions. Use the Jira field description for Jira users and tailor language in the Portal to that audience.
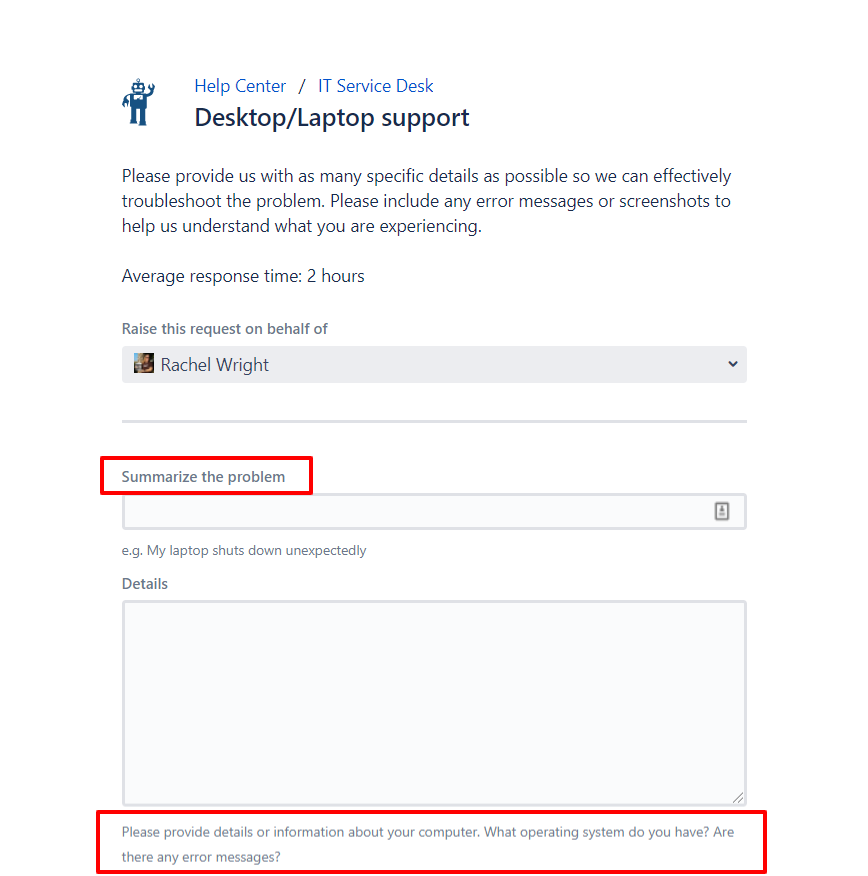
Custom Field Labels and Descriptions
5. Group forms by request type
In my former role as a web developer, I always considered a user’s capacity for processing information. Too many form choices can overwhelm a user. If you have more than 5 request forms, use the JSD “groups” feature to categorize the list.

Five Sample Form Categories
6. Use unique form icons
Each request form has an icon. Make each unique and choose icons that visually communicate what each request form is for. If you can’t find the right icon, you can make your own. Atlassian recommends a 20px grid with 24px padding. Read more
Finally, and most importantly, make it easy, intuitive, and painless to complete Jira screens and Jira Service Desk request forms. The process should be simple for all users.
Was this helpful?
Thanks!
Rachel Wright
1 comment