Community resources
Community resources
Community resources
The WHAT, WHEN, WHO, and How to SCRUM(part 2)

Hi!
This is a continuation of my previous article(https://medium.com/tech-bella/the-what-when-and-how-to-scrum-part-1-4ab0e09b302f)
Who’s this article for?
This article is for and useful to:
- Product Managers
- Product Owners
- Scrum Masters
- Project Managers
- Software Team Managers
At the end of this article, you should be able to
- know when to use Scrum in your projects
- Know how best to implement Scrum
Deciding when to use Scrum will depend on a number of factors, which we’re going to go through one after the other.
To fully decide on when to use the Scrum framework, look at the possible reasons below;
- When the Team understands the Agile methodology and is Agile: Before you think of using the Scrum framework, your team had to be agile and know what it means to be agile and open-minded. In the Scrum framework, there will be a lot of iterations from users, so understanding and being willing to be agile is the first thing you need to put in place.
- When the scope of the project is not fully known and Complex: Remember that the Sprint is the heart of Scrum and Sprints help to set complex software projects into short periods. Complex projects will mostly not be clearly defined from the onset hence the use of Scrum.
- When the Team is wholly self-organizing and understands Scrum as an agile framework: Scrum teams should be self-organizing because no one is really the head of the Scrum team. The team should be able to carry out Scrum practices as an agile framework without hassles.
- When there is a Product Owner: In as much Scrum teams are self-organizing, the presence of a Product Owner is fully required and goes a long way in making the team a success. You can check part 1 of this article to understand the role of the product owner and other key humans of Scrum.
Now that you know when to use the Scrum framework, I’ll go ahead to show you how to implement it.
I’ll be using Jira from Atlassian to show this. Jira is a great management software for product teams used to manage software projects. Jira can be used to implement other agile frameworks like Kanban, but for the sake of this tutorial, I’ll be showing how to use and implement Scrum with Jira with the steps below;
- First things first, you’ll have to create an account on Jira and yes it has a free version that contains up to 10 team members. So head to Jira.com and create an account if you do not already have one.
- Now, you will be able to sign in to your account. Once you’re in, the next thing is to create a Scrum Project, to do that locate the Create Project menu link at the top right or use the Projects dropdown option to create a Scrum Project. Make sure to select the Scrum project when creating it.
 Create a Project
3. Once you have created your first Scrum project, you’ll need to fill up your backlog. You will see an empty backlog where you can start adding tasks. A backlog is simply a list of tasks that you think should be implemented in the project. In Jira, an issue is a general name for a ticket for the members of the team(this can be a simple task, a user story, a bug, an improvement, etc. you can also set up a custom issue to suit your team).
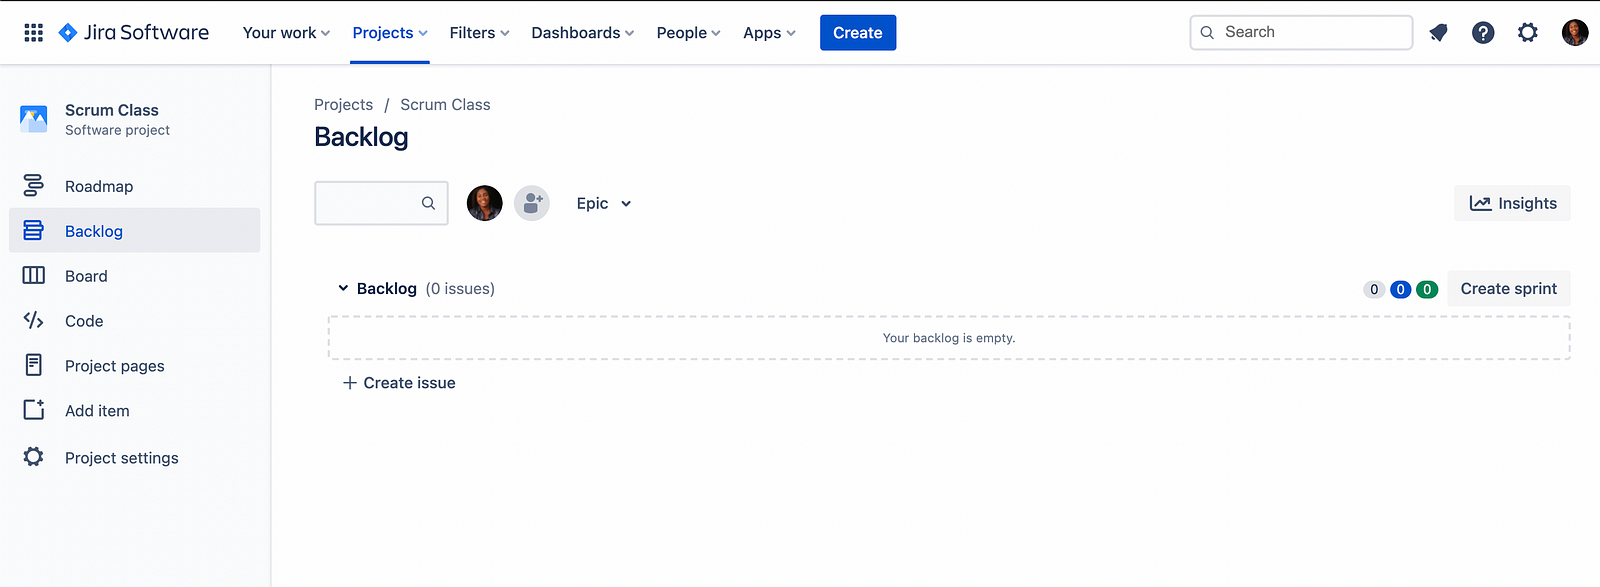 Empty Backlog
The above is what a typical empty backlog looks like. So now you have to fill this backlog. Remember that most times, a Scrum Project is not clearly defined from the onset, so the backlog lists will most likely not be definite. I will create a user story task type to fill in this backlog. A User Story is a user-centric way to define software features. By user-centric, I mean that they’re written with a user in mind. The user story answers the questions, what(scope) and why(value) and this is why product owners and managers should be the ones creating them since that’s basically what they do. User stories should be written with this format; As a {type of user}, I want {goal} so that I {receive benefit}.
 Backlog with user stories
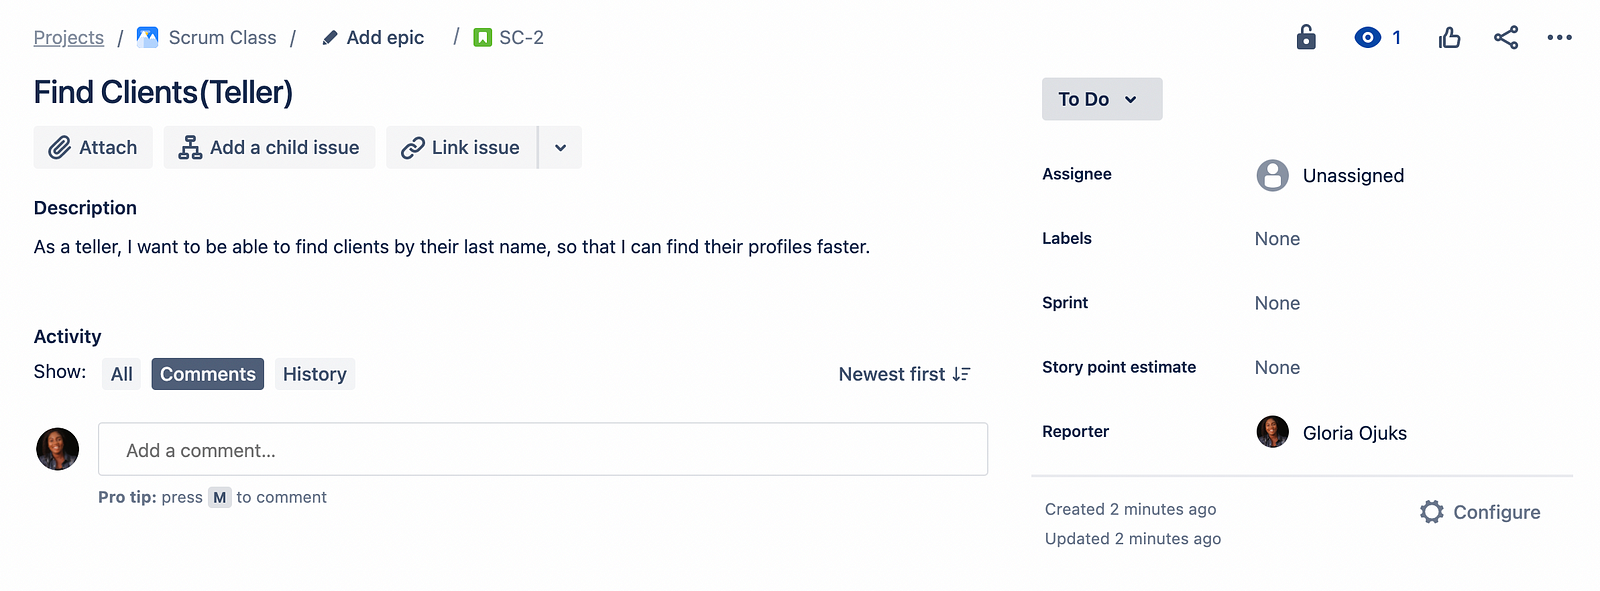 Particular user story
The images above show how tasks are arranged in a backlog and how it looks when opened respectively.
4. Create and plan a Sprint: Now that you have a list of issues, the next thing will be to create and plan a sprint. By now, you must have known that the Sprint is the heart of the Scrum framework and a Scrum project cannot be one without a Sprint.
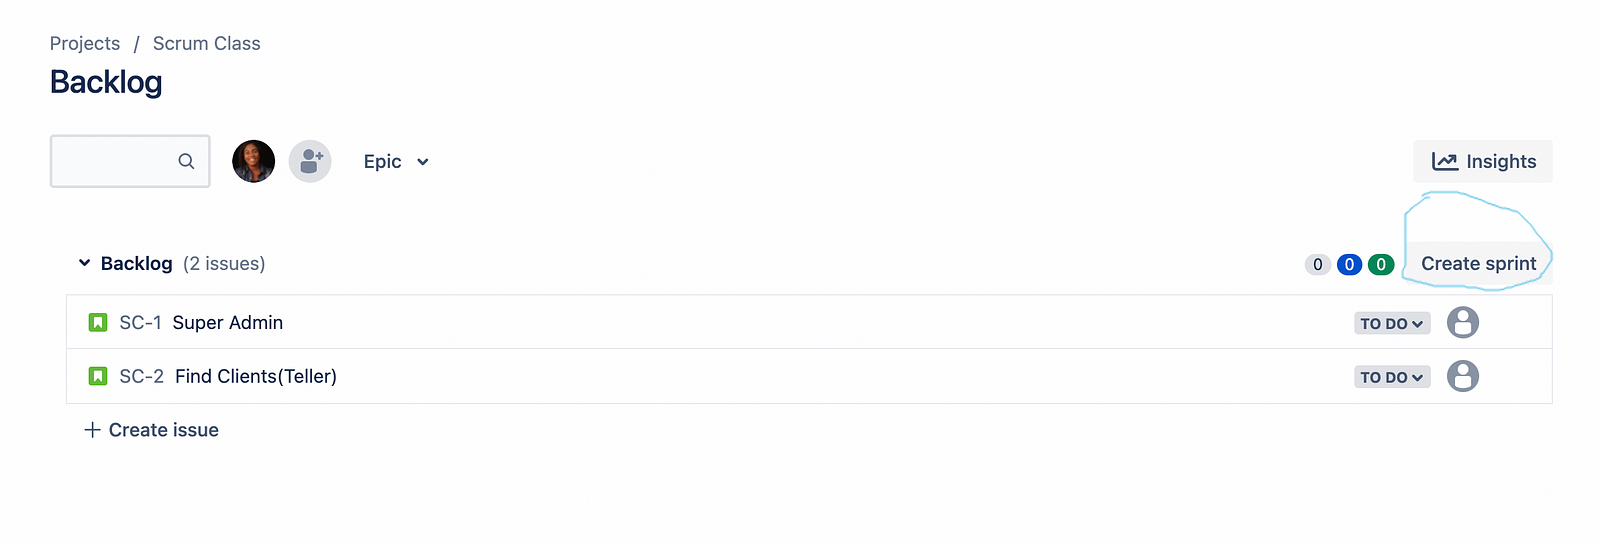 Create a Sprint
In a Scrum team, members are meant to complete a set number of user stories and other tasks during a period of time(ideally 2 weeks). Also, note that it is a good practice to have a particular time for your sprints, i.e, if you choose 2 weeks, you should always stick to it. This will enable the team, especially the project manager to gain some estimation skills and predict the future velocity of projects in the team.
Now that the sprint is created, it is required to plan the sprint with the team to ensure a successful sprint. This is called the Sprint Planning Meeting. See part 1 of this article to find out how to hold proper sprint planning.
5. Kick off the Sprint: The next thing after creating and planning the sprint would be to commence it. To start a Sprint in Jira, you will need to move the tasks you plan to complete in that sprint into the sprint, then click the start sprint button as shown below.
 Start a Sprint
Notice that once you start the sprint, you’re redirected to a page that shows the active sprint and the sprint tasks automatically appear in the Todo column of the Scrum board. The default columns that appear in these boards are; Todo, In-progress, and Done, but you can always add more columns depending on your team structure.
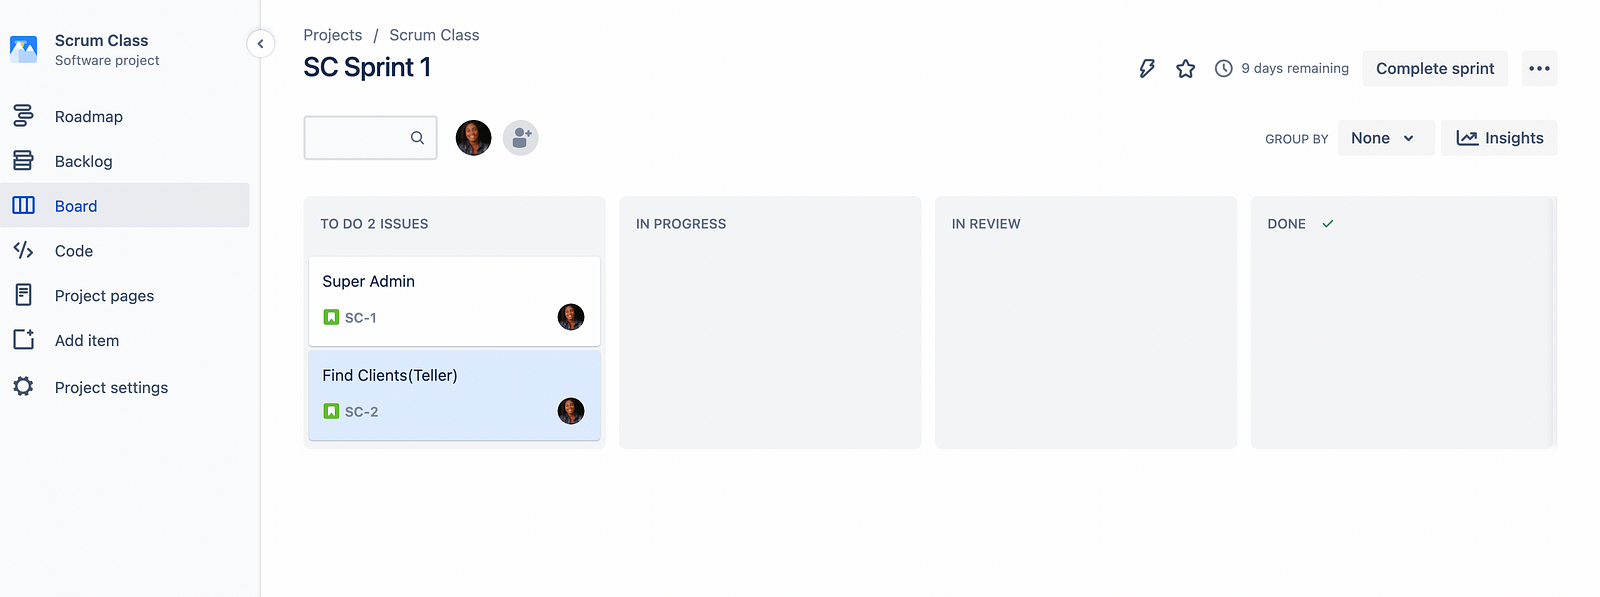 Active Sprint
From the To-do column, the members of the team can move items and start working on them, first in In-progress till it gets Done. To understand what it means for an item to get Done, take a look at my previous article on Kanban methodology.
Now that you have an active sprint, the team is self-organizing and work can be getting done. But there are things you have to keep doing to make sure the sprint is really successful. These are known as;
6. Scrum Events/Ceremonies: There are about 4 of them as listed below;
- Sprint Planning(already explained above)
- Daily Scrum or Daily Standups
- Sprint Review
- Sprint Retrospective
Refer to part 1 of this article to understand how to implement these events.
Aside from these events listed above, you need always measure the sprint without waiting for it to end. This will enable the team to always correct errors or improve where necessary. To measure the sprint, you’ll need to;
7. Monitor the Burndown Chart: The Burndown Chart shows the actual and estimated amount of work to be done in a sprint. To access the chart, navigate to project settings > features > reports and make sure the reports are enabled, if not you’ll not be able to see it among the list in the side menu. When this activated, click on reports from the side menu and select the Burndown chart.
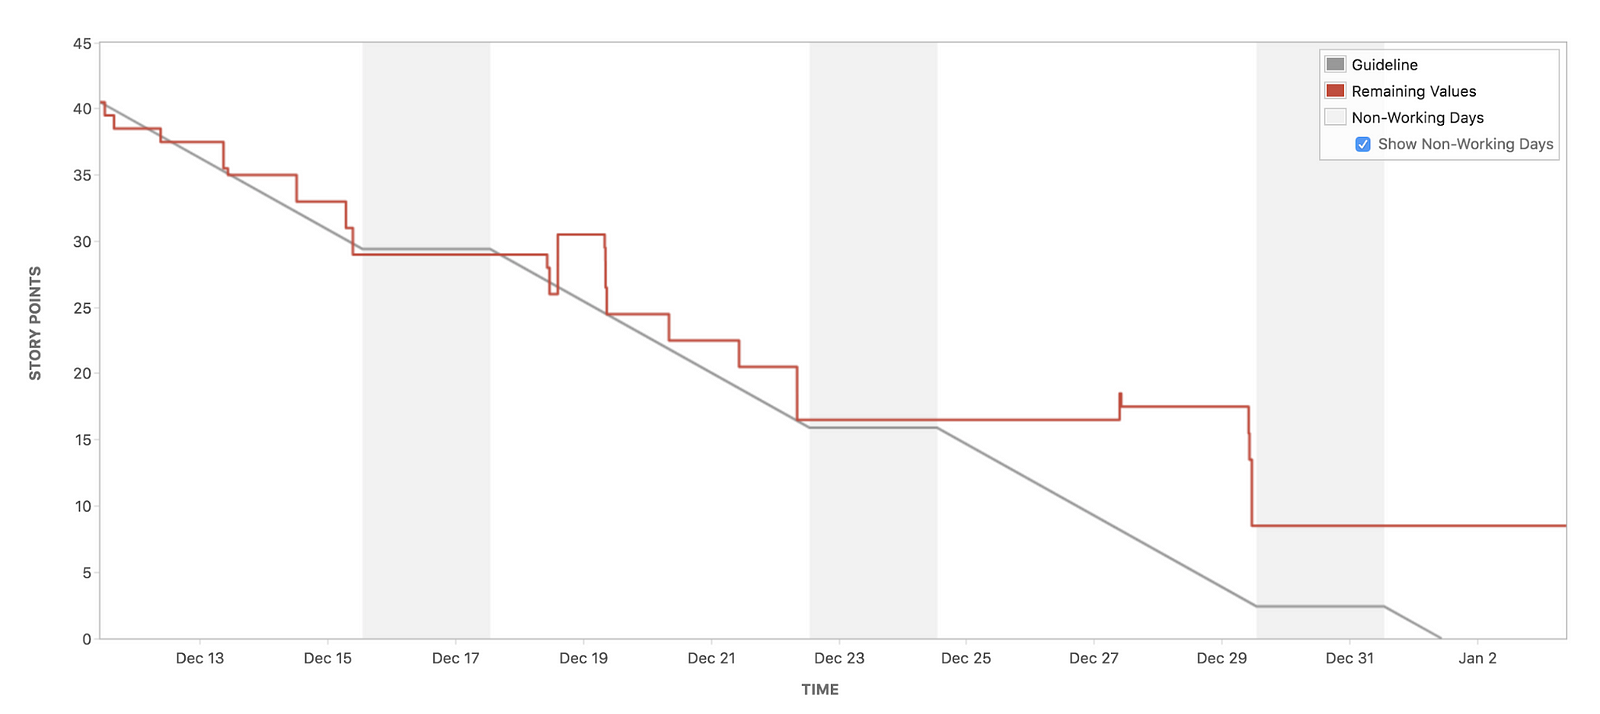
To get more insights on how to read the chart, click on the “how to read the report” link by the top right of the page.
8. Complete the Sprint: By the end of the 2 weeks(for a 2-week sprint). You must have completed the steps above and ready to complete the sprint. The sprint must be completed in order to move to the next level, whether the goal was met or not.
At the end of the Sprint, you can;
- Move the issue(s) to the backlog.
- Move the issue(s) to a future sprint.
- Move the issue(s) to newsprint, which Jira will create for you.
At this point, you should be thinking of starting a new sprint(repeat the process as described above and you’re good to go) and you should make sure to note the challenges you faced in the previous sprint and the reasons behind them, this will enable you to improve in the next sprint.
Now, you must have got the basics on running a Scrum Project, right from backlog creation through ending the sprint.
Note that there are more advanced topics in Scrum, however, I’ll be covering that in a future article. For now, have fun implementing the basic Scrum.
Was this helpful?
Thanks!
Gloria Ojukwu
About this author
Product/Project Manager| Atlassian Lover I Community Builder
Phreetech
Nigeria
5 accepted answers
0 comments