Community resources
Community resources
Community resources
Forge app development. Part 1. App creation

So, some time ago Atlassian presented new developer platform for their cloud solutions. Meet Forge. The main idea behind this platform is that developer can concentrate on app logic instead of tinkering with infrastructure. In this tutorial we will create simple issue notes app for Jira. Prepare a cup of coffee and...let's go!
First of all, visit this page and follow all instructions. As a result you'll obtain Forge installation, developer site and successful login in Forge.
Navigate to the directory where you want to create the app and run: forge create
Enter a name for your app. Let it be notes. Select jira-issue-activity template. Ok, you've got new directory called notes. Switch to this directory and run: forge deploy
This will deploy your app on your development environment (read more here). Next run: forge install
Select Jira as a product and provide URL to your development environment which you've already created. You'll be prompted to follow URL which lead to consent screen. Choose your developement environment and approve!
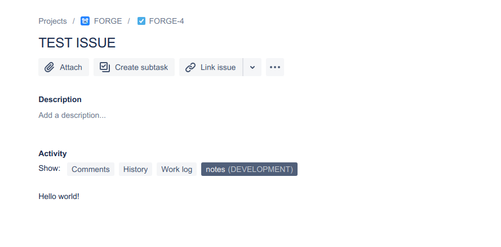
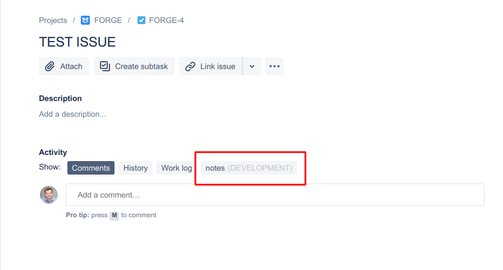
Next, go to your Jira development environment, open any issue...and gotcha:
Click this tab and world will say you "hello":

Planning and implementing our app
Now we've prepared everything for development, let's think about components our app will consist off. Forge looks similar to React, so we will split app into components too:
- Note - a single element for NotesList
- NotesList - container for our notes
- NewNoteForm - a form for creating new note
- DeleteNoteForm - a form for deleting note
Go to src directory in your app folder and create new directory called components, switch to it.
Note
Create new file called Note.js and place this code in it:
import ForgeUI, {Fragment, Text, Avatar} from '@forge/ui'

const Note = ({text, accountId}) => (
    <Fragment>
        <Avatar accountId={accountId}/>
        <Text>{text}</Text>
    </Fragment>
)

export default Note
What's going on here? We use Forge UI components to build our Note. We must use Fragment in order to display two adjacent components (it is totally like React fragment).
NotesList
Create new file called NotesList.js and place this code in it:
import ForgeUI, { Fragment } from '@forge/ui'
import Note from './Note'

const NotesList = ({notes}) => (
    <Fragment> {notes.map(note => <Note text={note.text} accountId=    {note.accountId}/>)}
    </Fragment>
)

export default NotesList
It is rather simple. We just iterating through notes array.
Let's see what we did in action, and for this we will prepare test data.
Go to src folder of your app and create file data.js. and place this code:
export const data = [
 {accountId: '557058:a26fbc8e-dafe-4afa-a406-2876f8569f92', text: 'First note!'},
 {accountId: '557058:a26fbc8e-dafe-4afa-a406-2876f8569f92', text: 'Second note!'},
 {accountId: '557058:a26fbc8e-dafe-4afa-a406-2876f8569f92', text: 'Third note!'},
 {accountId: '557058:a26fbc8e-dafe-4afa-a406-2876f8569f92', text: 'Fourth note!'},
{accountId: '557058:a26fbc8e-dafe-4afa-a406-2876f8569f92', text: 'Fifth note!'},
 ]
What you see in accountId is my own accountId value. Later we will get it in our app automatically, but now you can read how to obtain it here.
index.jsx
It's time to get everything together. Place this code in your index.jsx file:
import ForgeUI, {render, IssueActivity } from '@forge/ui'
import NotesList from './components/NotesList'
import {data} from './data'

export const run = render(
 <IssueActivity>
     <NotesList notes={data}/>
 </IssueActivity>
);
run function is the main function of our app, it is mentioned in manifest.yml file.
Running our app
Run: forge deploy
Or instead (if you are on development environment) run: forge tunnel.
Read more about tunneling here.
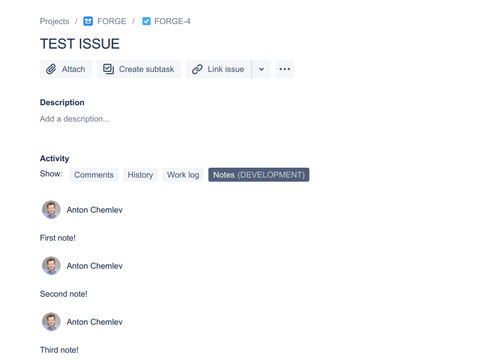
Next, go to your development instance, choose issue and...
We can see our notes!
Next
In next part of this tutorial we will learn how to store data against issue, i.e. how to add and delete notes. Let's be kinda immutable without editing them
Do you develop any app for Forge?
4 comments

Part 2 added! :)

Excelent. Thank you
Nice Tutorial, sounds great.
While trying your code I got an Validation error.
String must be used within one of [Text, Heading].
Were there any updates in forge that I need to consider?
Greetings

Nice tutorial! its a shame that the official tutorials are so barebones..
I found out that <Avatar> component was removed so, for this tutorial to work, we have to use <User> component instead.
Was this helpful?
Thanks!
- FAQ
- Community Guidelines
- About
- Privacy policy
- Notice at Collection
- Terms of use
- © 2024 Atlassian


