Community resources
Community resources
Community resources
How to comply with the CCPA Right to Know | Easily create Cookie Banners + Privacy Policies in Jira
CCPA compliance made easy
In our ultimate guide to CCPA compliance, we already told you about the different subject rights under CCPA. In this article, we'd like to show you concretely how to easily comply with the right to disclose (or right to know) under Section 1798.100 of the CCPA in your organization using Jira.
What is CCPA anyway?
CCPA stands for: California Consumer Privacy Act and refers to a privacy law that unifies the rights of California consumers. If you run a profit-oriented business that processes the data of California citizens, you must comply with the guidelines of the CCPA. For more information on when CCPA applies to your business, the various rights a subject has under CCPA/CPRA, and what else you need to be aware of, have a look at our CCPA Compliance Guide.
Today, we’re going to dive deeper into the CCPA right to know/disclosure and how cookie banners and privacy policies in Jira can be the game-changer.
What is the CCPA right to know?
Section 1798.100 of the CCPA explains the right to know. This is about giving California consumers full transparency about exactly what data is being processed by your company.
To achieve this, a subject covered by CCPA can request that a company reveals the following information at any time:
-
The categories of personal data stored
-
The categories of sources from which the company has collected personal data (internet service provider, government agency, consumer directly)
-
The purposes for which the company uses the personal data (marketing, improving the user experience, preventing scams)
-
The categories of third parties with whom the company shares the personal data (social networks, internet service providers, governments)
-
The categories of information the company sells or shares with third parties
So basically, as a company, you can be prepared to answer the familiar Wh-questions at any given time. So:
-
When is data stored?
-
Where?
-
Why?
Comply with the CCPA Right to Know
An important step of CCPA compliance and adherence to the right to know is to inform consumers about data processing BEFORE it occurs. This can be implemented, for example, by a cookie banner that appears on your website when people first visit it. And if you don’t click away the message, meaning you accept it, you can’t view the content – so no data is collected yet.
CAUTION!
Many people refer to CCPA/CPRA as a pure opt-out privacy law. This means, for example, that it is sufficient to create a cookie banner and inform consumers about the following data processing. The right to opt-out of data processing is stated in the CCPA, but adult California citizens do not have to give their consent to data processing. However, there is a special exception: If data is collected and sold from individuals who are under the age of 16, opt-in consent must be obtained! Here, a cookie banner would be ideal, where you can not only accept the text you see, but also reject it.
CCPA Right to Know and Cookies
Ordinary first-party cookies typically contain only anonymous data. Third-party cookies, however, store various types of personally identifiable information (PII), such as IP addresses. So yes, information collected by cookies is also considered personally identifiable information under the CCPA. Therefore, CCPA and CPRA require website operators to disclose what data is collected in cookies – before the data collection occurs.
Does CCPA require a cookie banner?
According to CCPA legislative text, explicit cookie consent and a cookie banner are not required. However, there is a way you must inform your consumers before the time of data collection. Furthermore, you may have customers who are younger than 16, which also calls for deeper caution.
Additionally, in compliance with the CCPA, you must provide the ability to opt-out in the form of a website titled: “Do Not Sell My Personal Information.” A cookie banner is the ideal way to add a link to the mandatory page.
Privacy Policy for Right to Know Compliance
To comply with the Right to Know in your organization under CCPA, you must provide a link to an updated privacy policy. This can be done via a prominent link with the word “Privacy” in the footer or header of your website. Or through a pop-up.
The privacy policy must be reviewed and updated every 12 months – especially if you haven’t done so this year. That’s because new regulations have been enacted since the CPRA went into effect on January 01, 2023.
To help subjects get the important information disclosed, you should describe how you collect, use, share with third parties, and sell personal information in the CCPA Privacy Policy. Again, it’s best to stick to the Wh-questions described.
Once you make a material change to your privacy policy, you must also provide an update notice to your consumers.
Comply with CCPA Right to Know
To comply with the CCPA right to know/disclosure, you must do the following things, among others:
-
Create a meaningful cookie banner (stating “Do not sell my Personal Information”).
-
Publish the updated privacy policy
For both of these cases, we have a great toolkit if you are working in Jira or Confluence.
CCPA Right of Disclosure in Jira
As soon as you start using Jira as a customer support platform, or even simply if your employees use it daily, you need to be CCPA compliant here, meaning adding cookie banners and updated privacy policies. After all, according to the CCPA, employees are also considered “consumers”.
If you use Jira in the Cloud variant, Atlassian acts as a data processor and has committed to comply with the CCPA, as you can read in Atlassian’s CCPA Commitment statement. However, if you are hosting Jira (or Confluence) on-premise in Server or Data Center yourself, YOU need to take care of CCPA compliance in Jira yourself.
But we have a goodie for you to help you master data protection compliance easily, namely the Data Protection and Security Toolkit for Jira.
Master the CCPA Right to Know in Jira with Data Protection Toolkit
With Data Protection and Security Toolkit for Jira, you can quickly and easily create cookie banners as well as privacy policies to easily comply with the CCPA Right to Know/Disclosure.
We will show in 7 steps how to do it:
Step 1: Navigate to the Dashboard
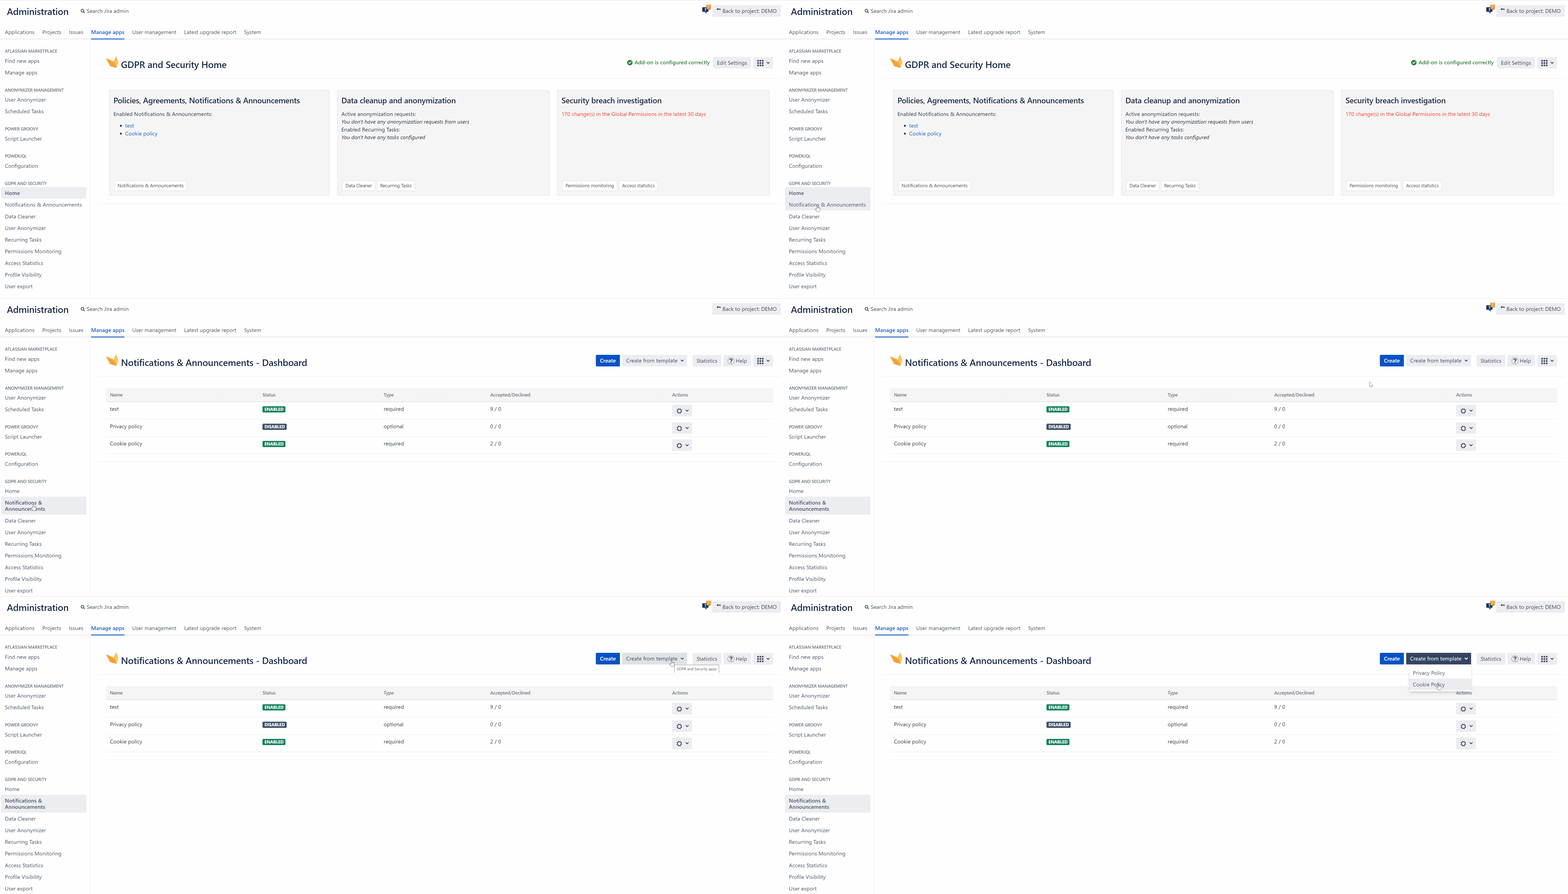
In Jira, open the Manage Apps tab and navigate to the Data Protection and Security Toolkit Home section. Find the Notifications and Announcements button, click on it, and you will see the Notifications and Announcements dashboard. It is the main page where administrators can manage all announcements.
Step 2: Create a Cookie Banner
You can create an announcement for CCPA using a template. To do so, choose one of two predefined templates (Private Policy or Cookie Policy). Alternatively, you can create a new announcement by clicking the Create button.
Step 3: Choose a Cookie Banner Template
Let’s make it easy for ourselves and select a template.
Please note: Currently, both templates are focused on the GDPR, but they can be a perfect help and guidance for you in any other privacy concern.
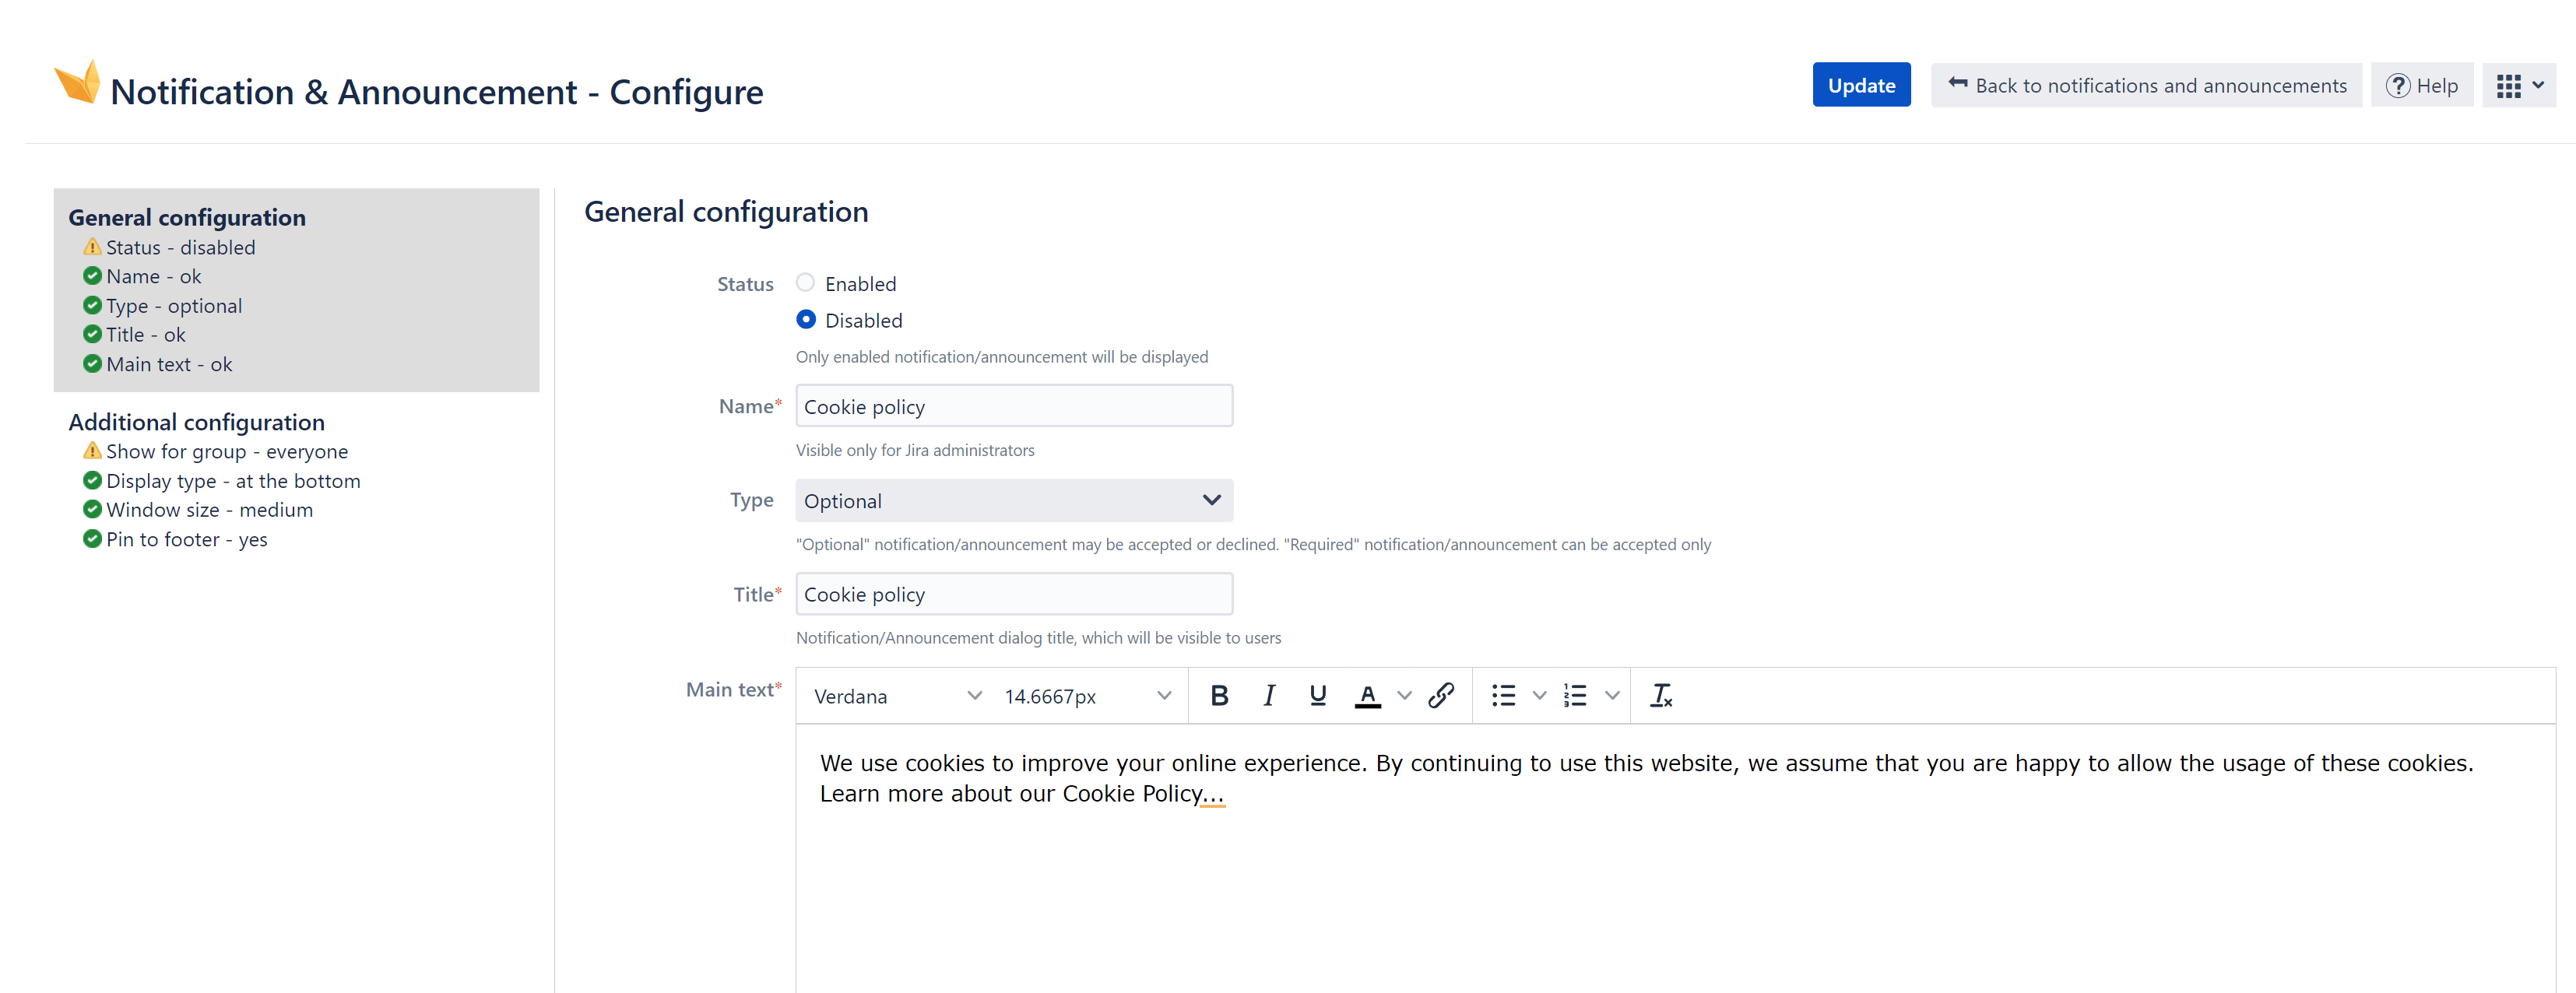
Now, you can see the configuration page. The configuration of a new announcement consists of two tabs: General and Additional configuration.
Let’s take a look at it in detail.
Step 4: Select general configurations
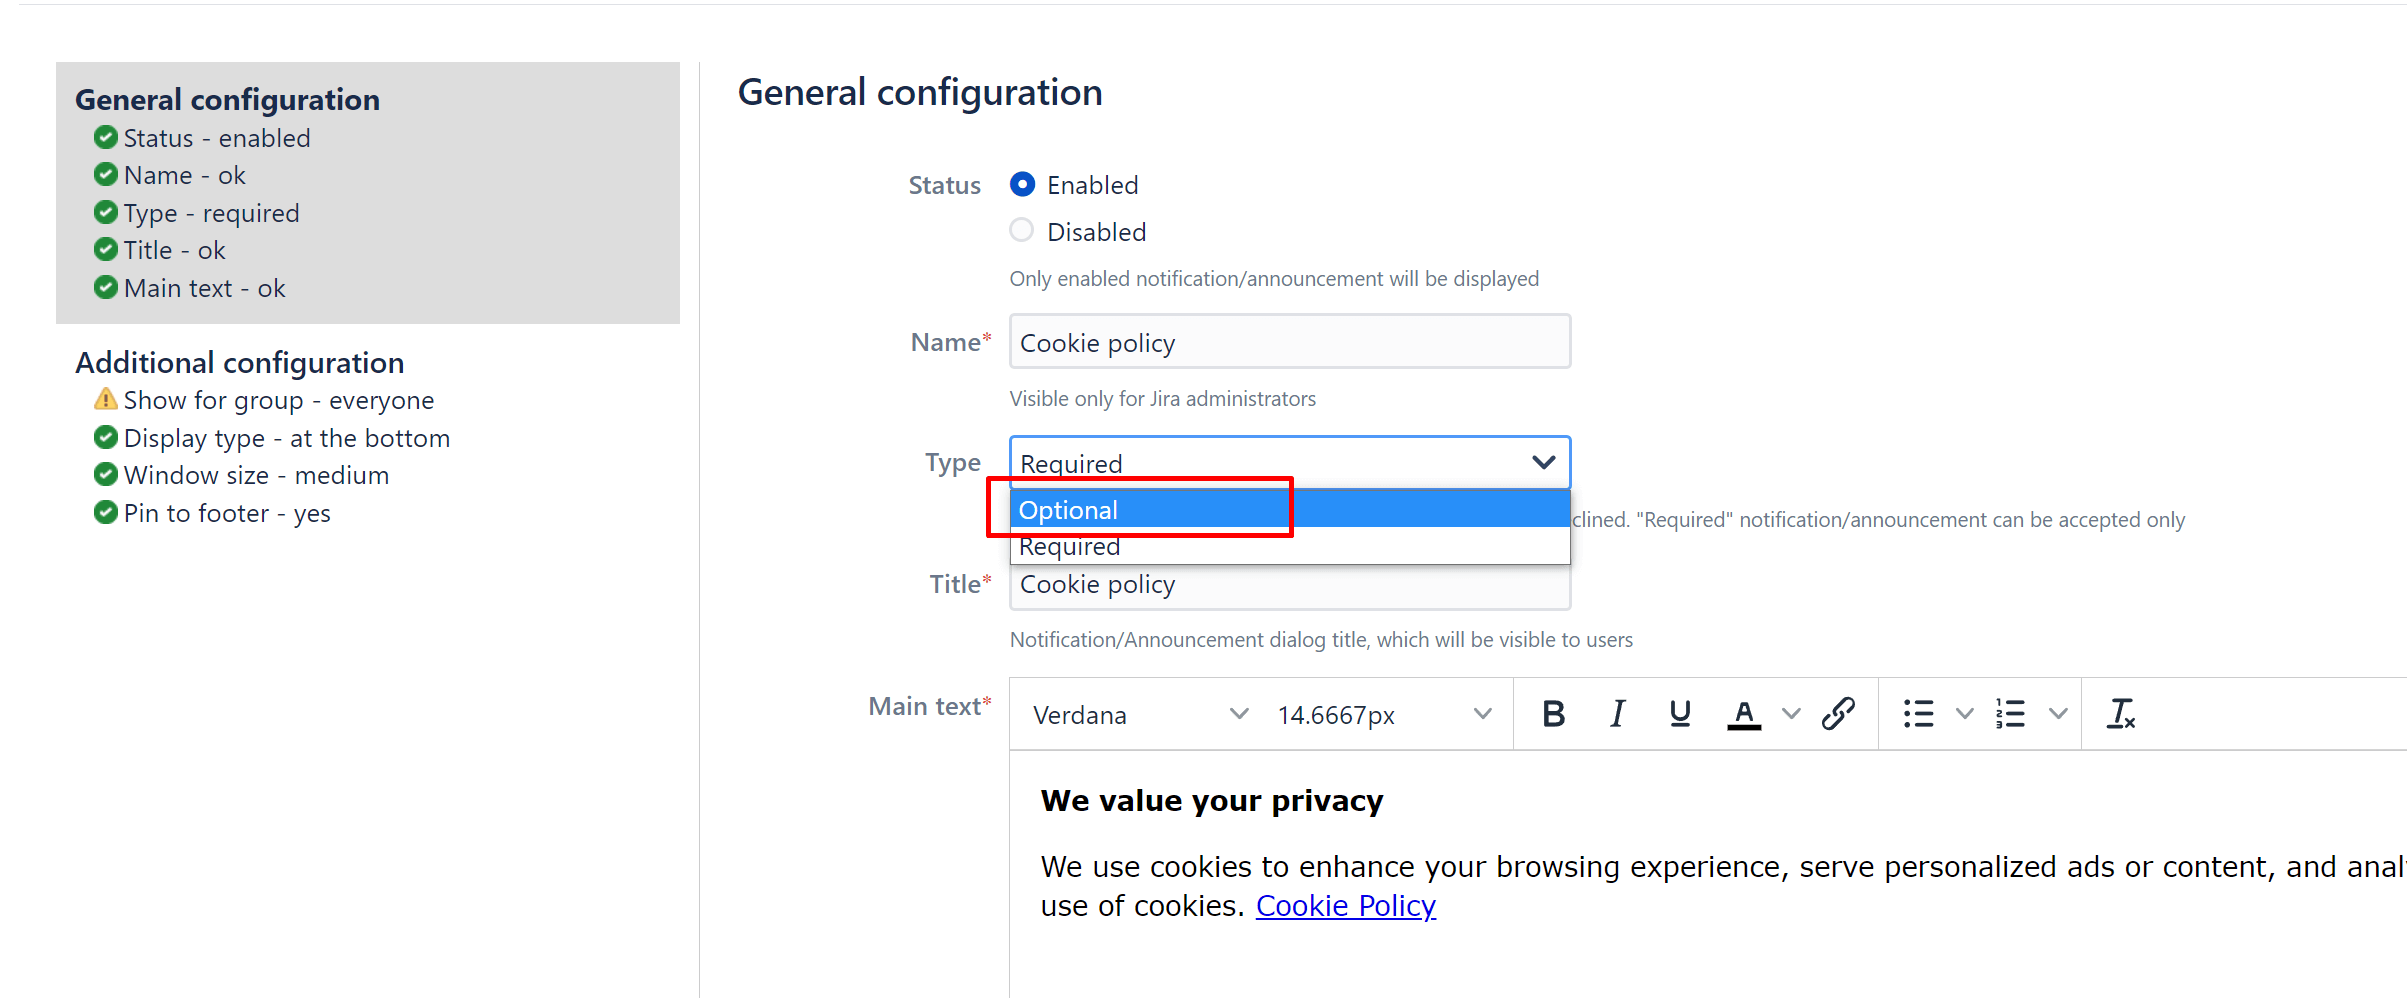
At Status, choose whether you want to enable the cookie banner for CCPA now or later. Pick a name and description and decide if the banner should be optional or required. Required would be pure information with a single button, like:
-
Text with: “We collect your data. You hereby acknowledge this.”
-
Button: “Ah, okay.”
So, there is only one button and no other options. The button must be clicked, or the banner will not disappear.
However, if you must assume that children are among your consumers, you also have to consider the opt-in function. In this case, the optional variant is recommended.
-
Text with: “We collect your data. Do you agree?”
-
Button 1: “Ah, okay. Sure!”
-
Button 2: “No.”
Now, in the text box, you can additionally link your privacy policy or even the “Don’t sell my personal information” page.
Step 5: Set additional configurations
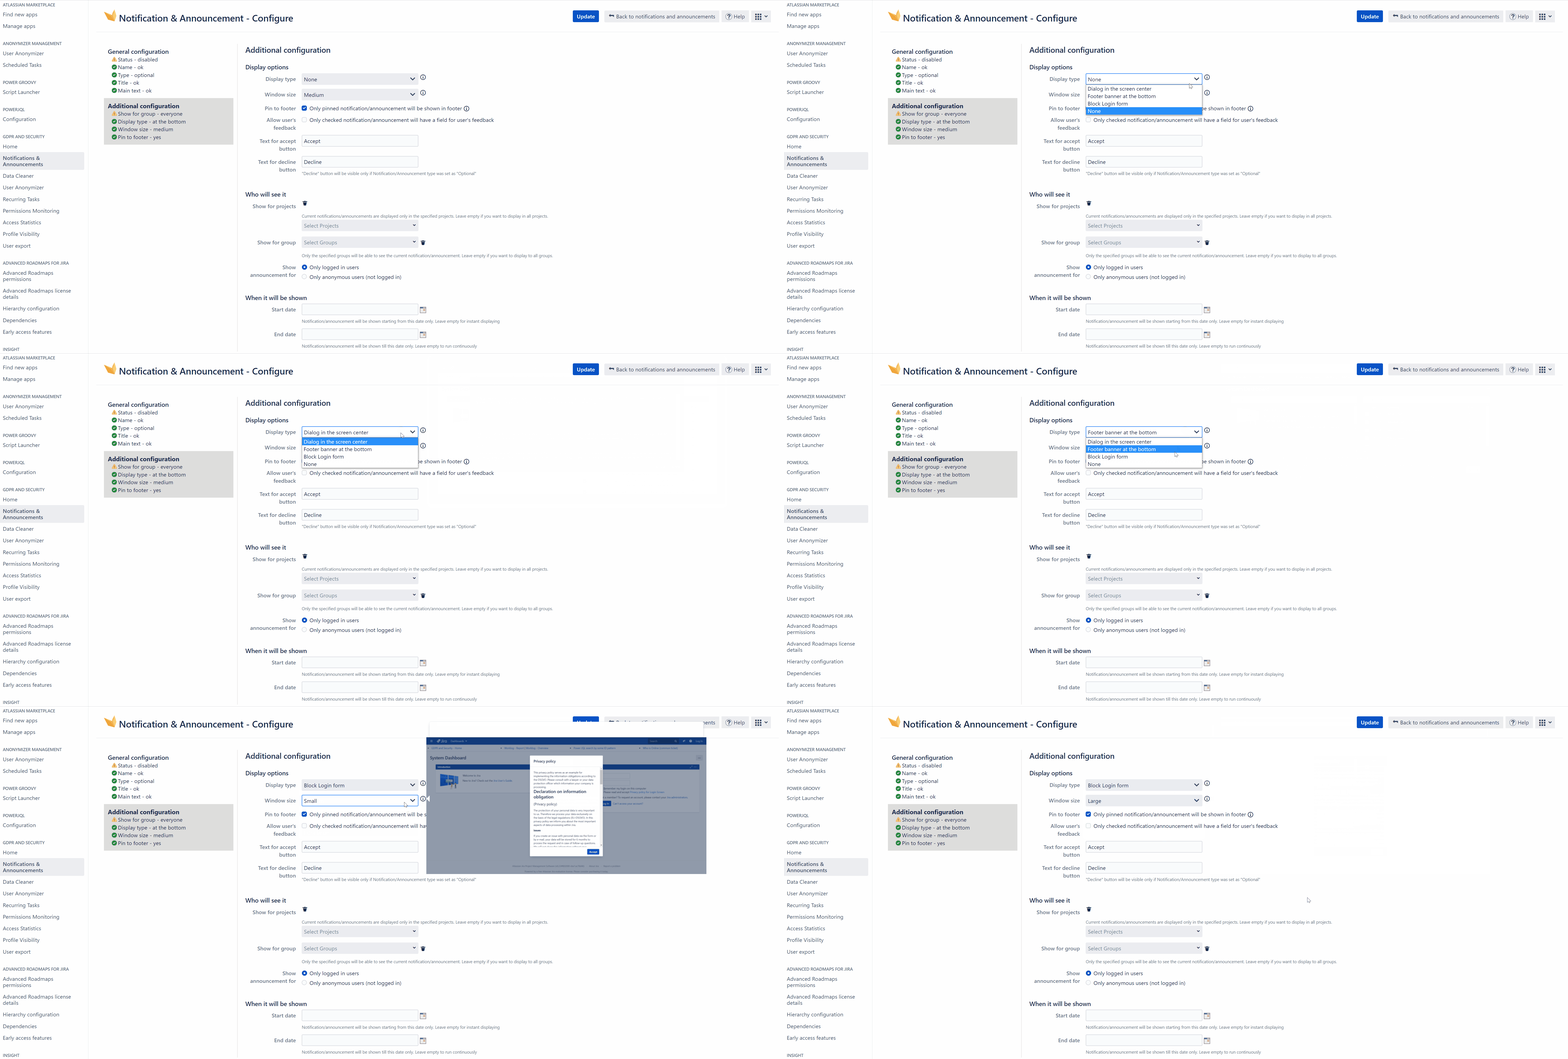
In the additional configurations of your cookie banner in Data Protection and Security Toolkit, you can choose where the announcement should be placed and how large.
In our case, for right-to-know compliance in a cookie banner, it is, of course, recommended pinning the announcement to the footer. However, other variants may be suitable for privacy policies.
Step 6: Define visibility
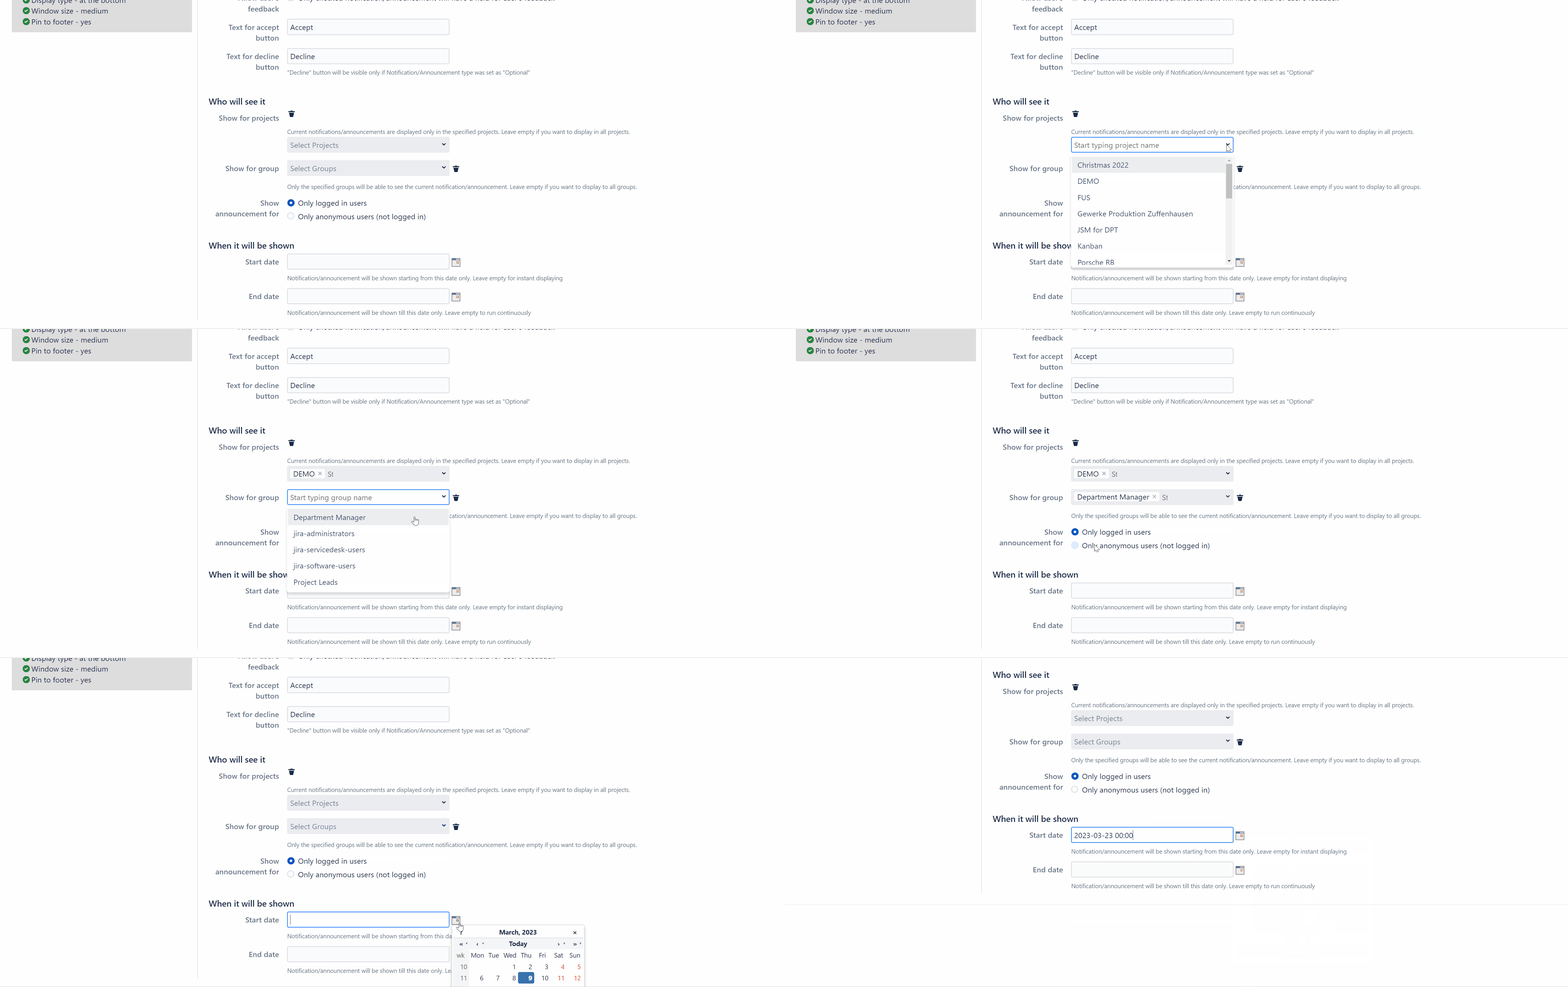
A special highlight of this app: You define who exactly should see the banner. Selecting different Jira groups and also Jira projects gives you full flexibility in managing CCPA policies. Start and end times can also be defined individually here.
Pro-tip: Define who should see the announcement: The “Anonymous users” option gives customers the possibility to show the privacy notification to anyone who has access to their board. Like a public Jira board for example, so they can still be compliant to any data security act. In other words: With the Data Protection Toolkit, you can set to see the cookie banner BEFORE you are logged in, so before you see any data, and it is collected. In other words, perfect for complying with the right to know/disclosure under CCPA.
Step 7: Save
Before saving, you can also select to allow user feedback.
Click the Save button at the top of the page when all parameters are set, and your cookie banner is successfully created!
After saving
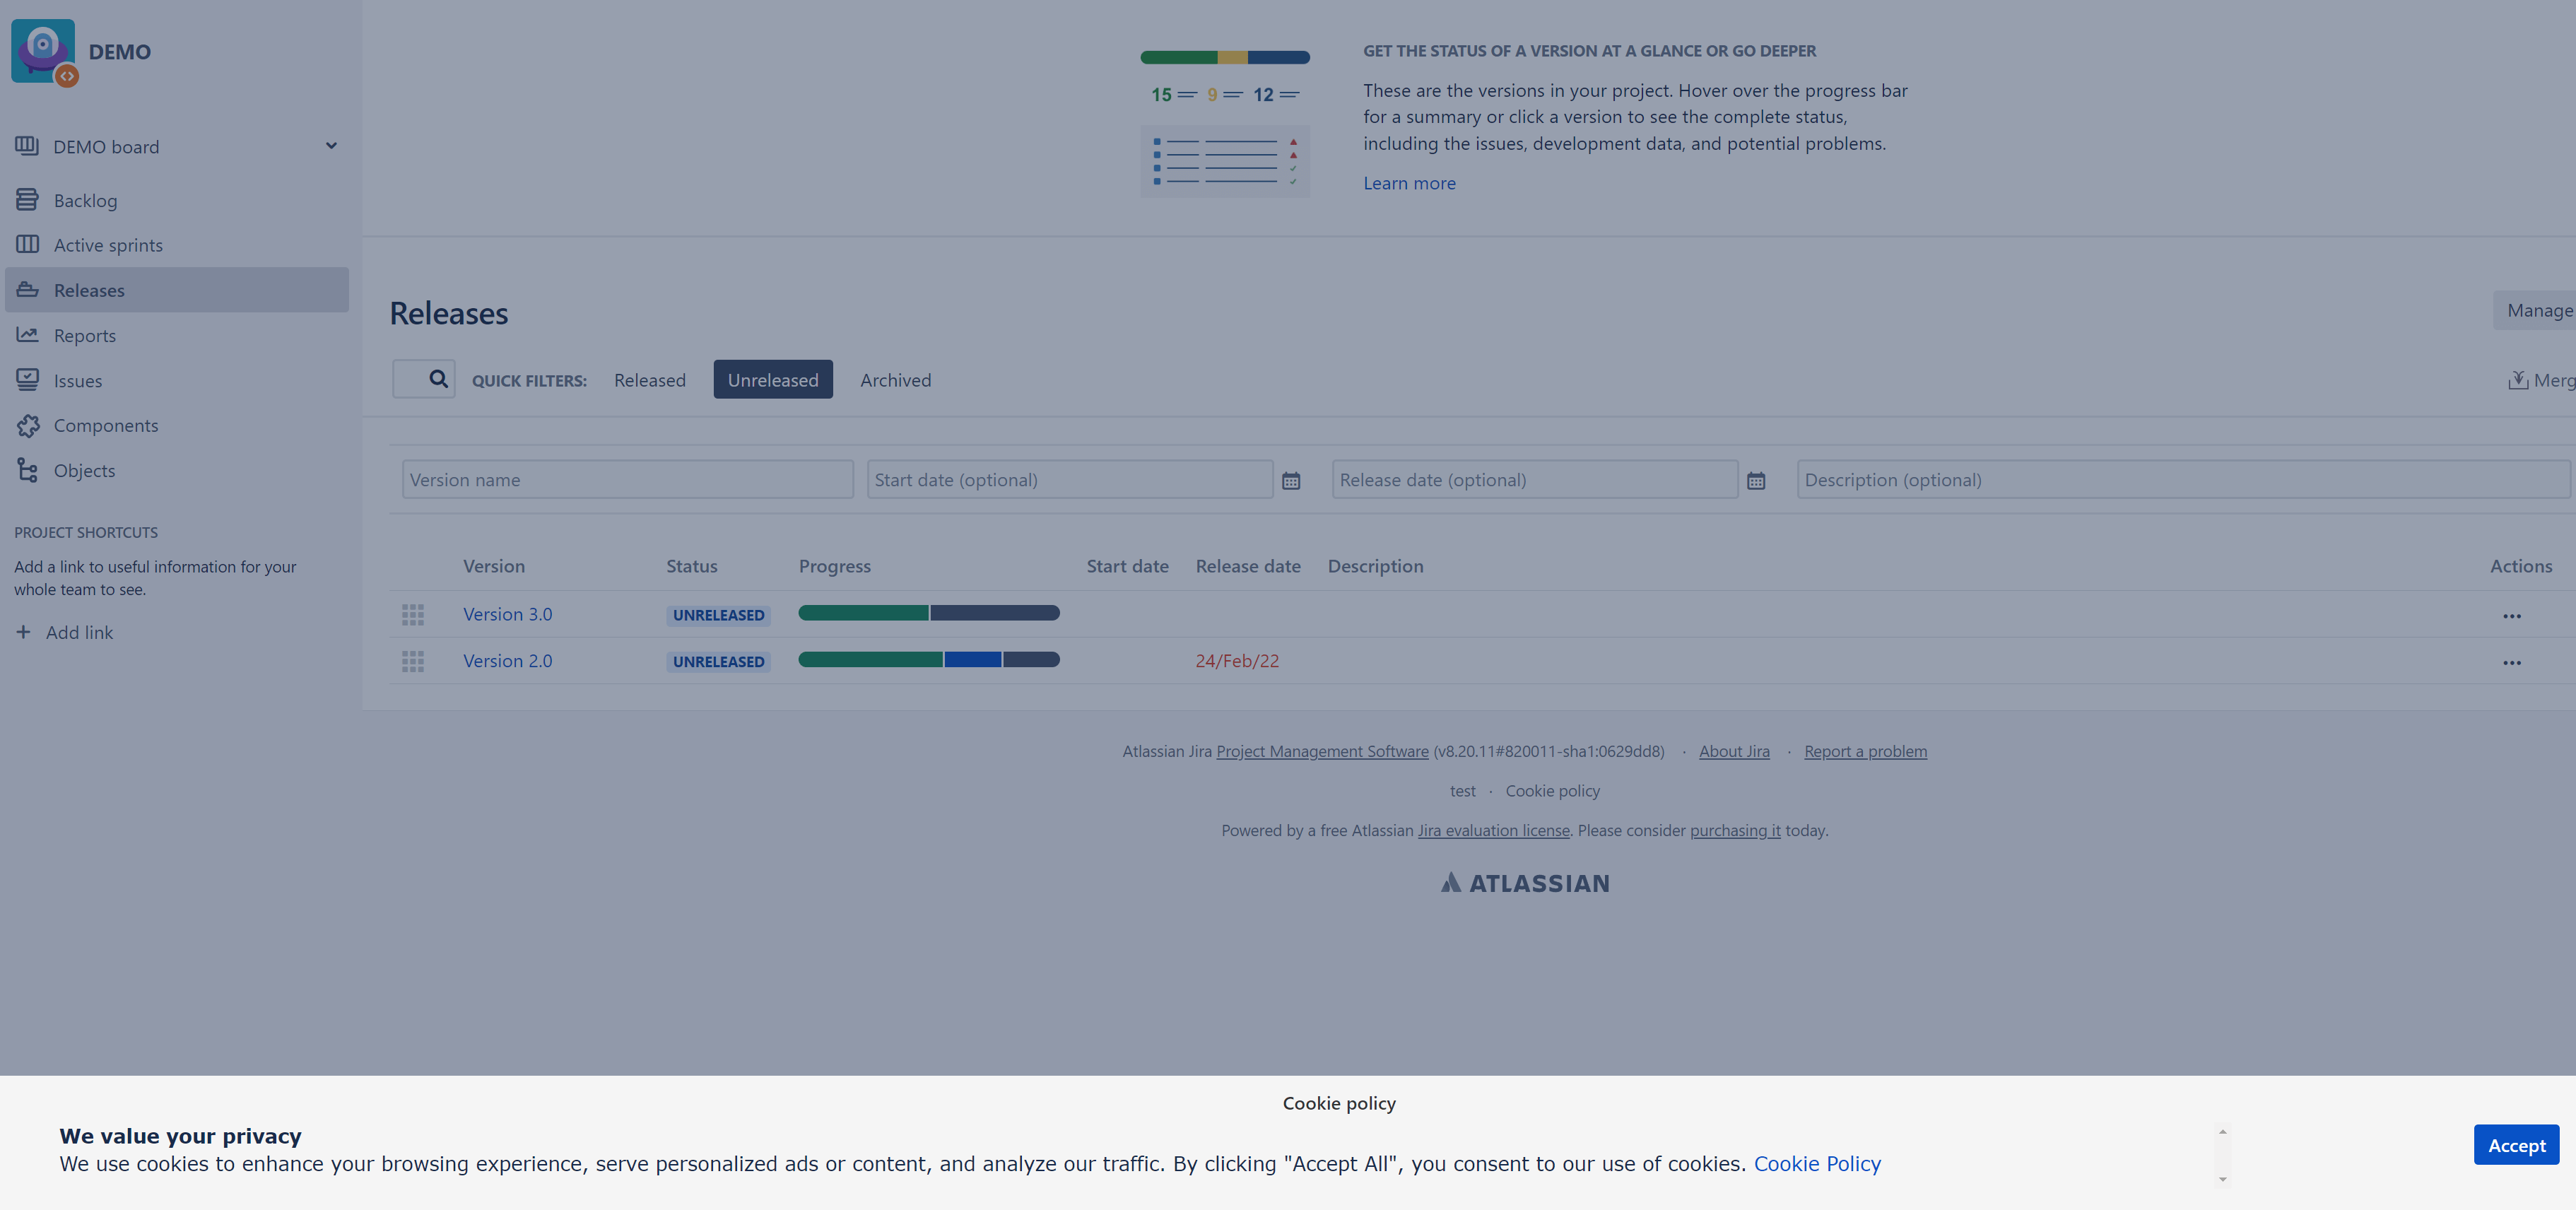
After saving, a possible Jira cookie banner looks like this:
If you want to make the opt-in right stronger, for example because you collect data from under 16-year-olds, simply select optional in the settings:
The result will look like this:
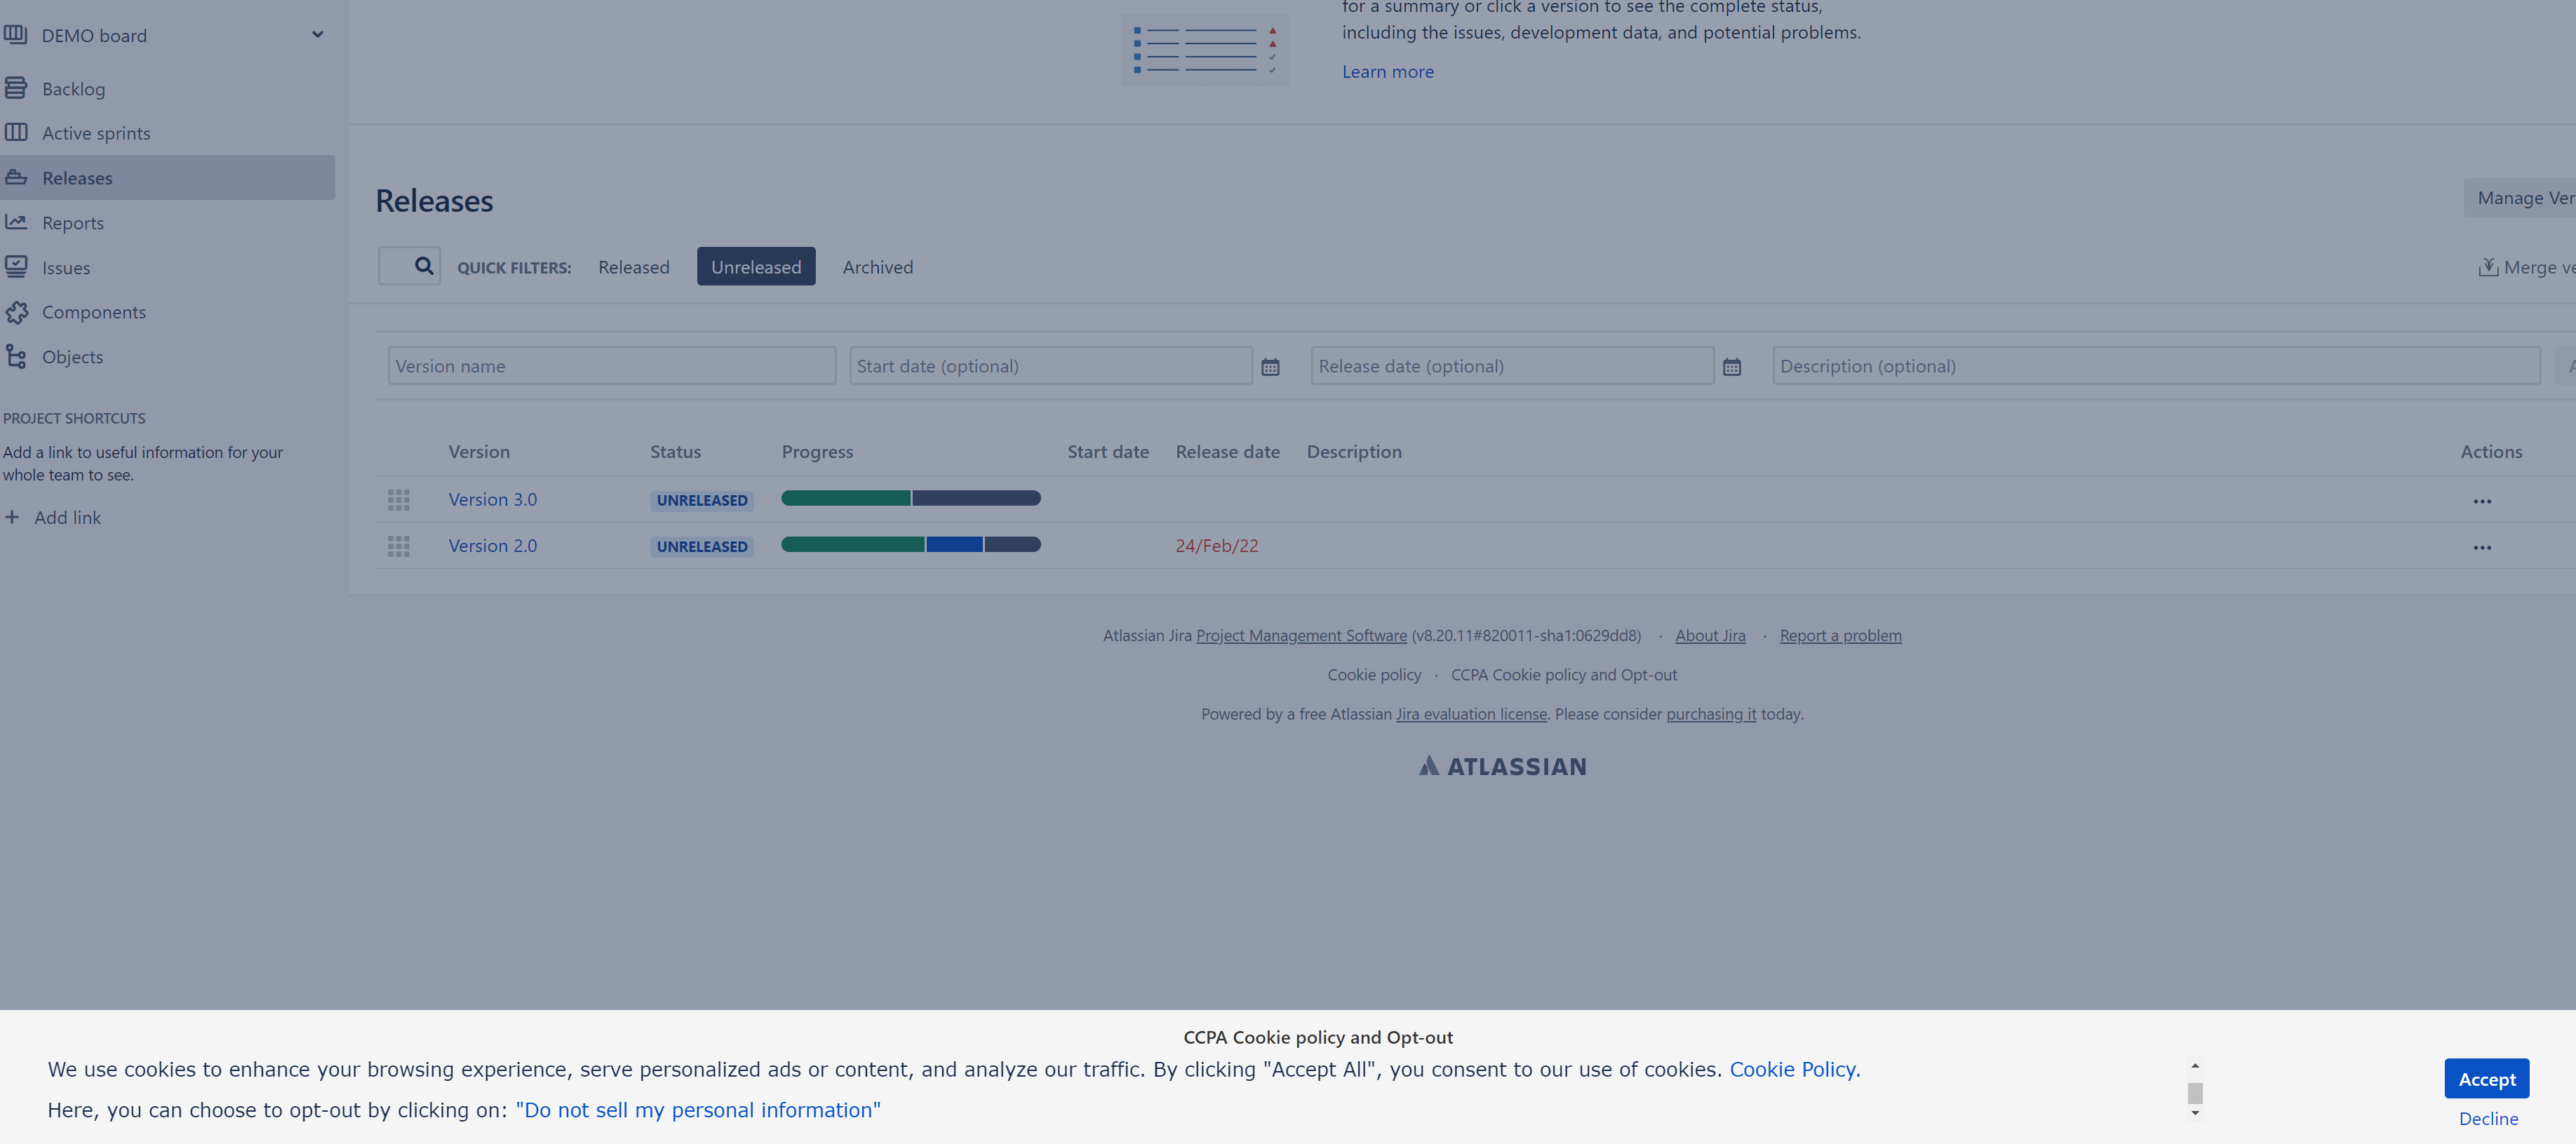
CCPA will not be fully complied with if you do not implement the “Do not sell my Personal Information” web page. Just add the link to the page to the cookie banner, and you’re on the safe side:
Manage statistics
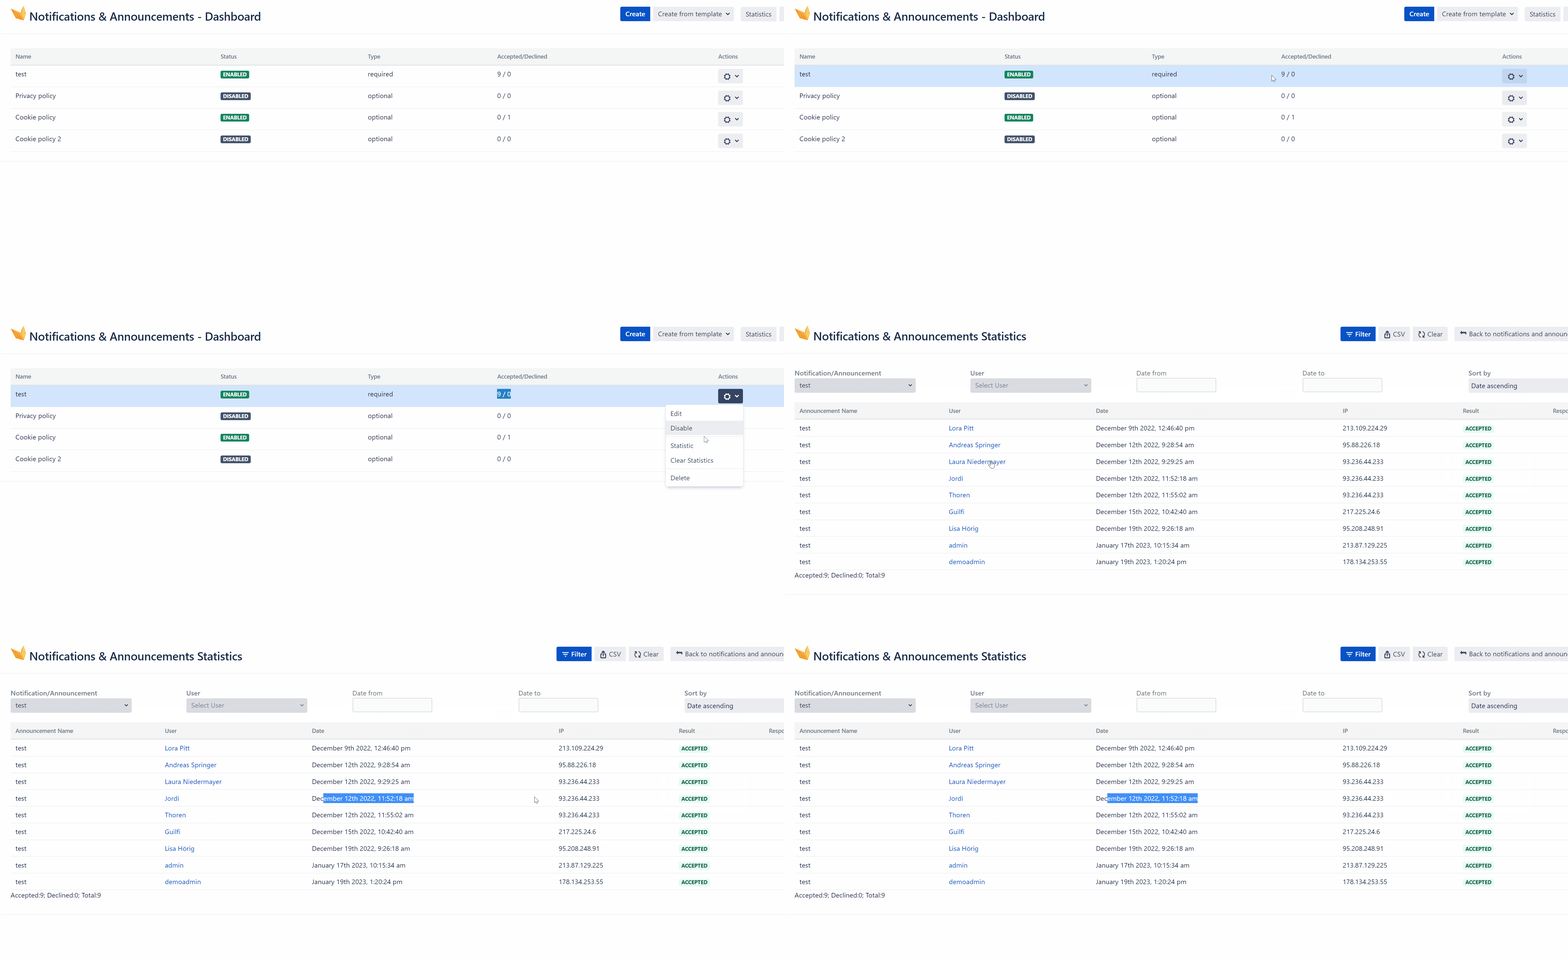
In the structured overview page of Data Protection and Security Toolkit for Jira, you can see all the announcements, cookie banners or privacy policies you have created. You can see at a glance how many users have rejected or accepted something.
One click takes you to more detailed statistics. This is ideal for complying with the right of information, as you must explain at any time upon request what data is collected and where. A look at the statistics is a good starting point here.
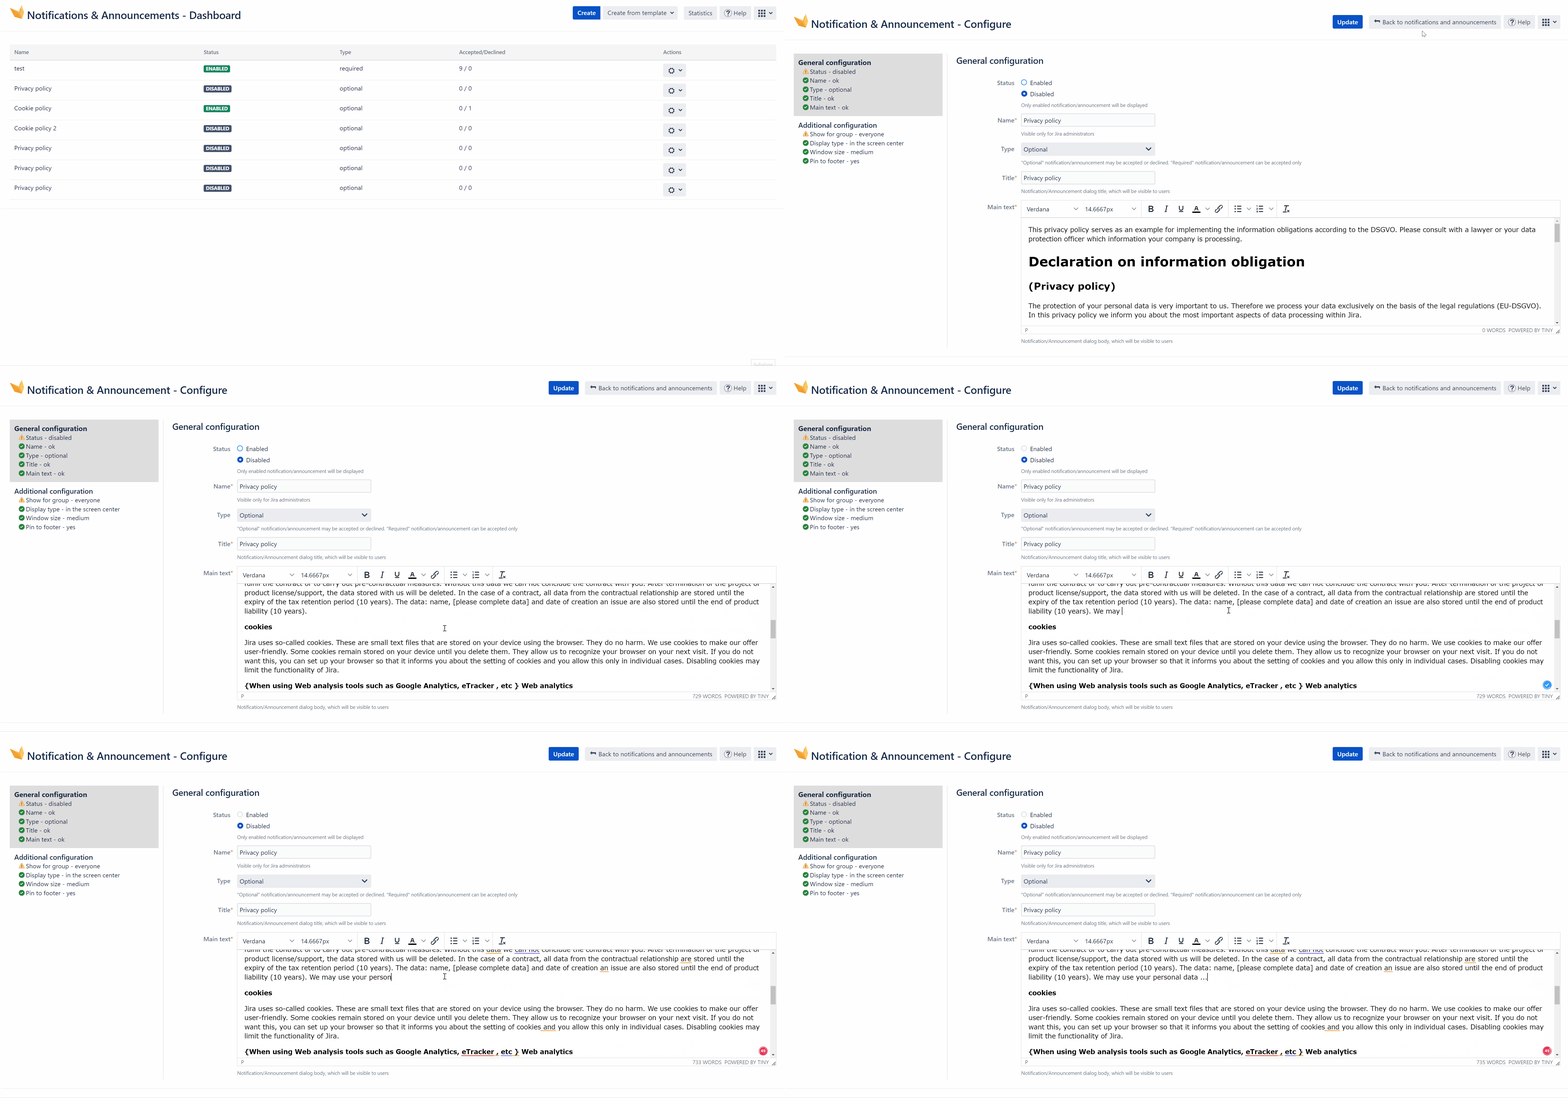
Create a privacy policy
The steps just shown can also be applied to privacy policies. Again, you can benefit from a directional template. Simply select the appropriate template from the drop-down menu and a text serves as inspiration.
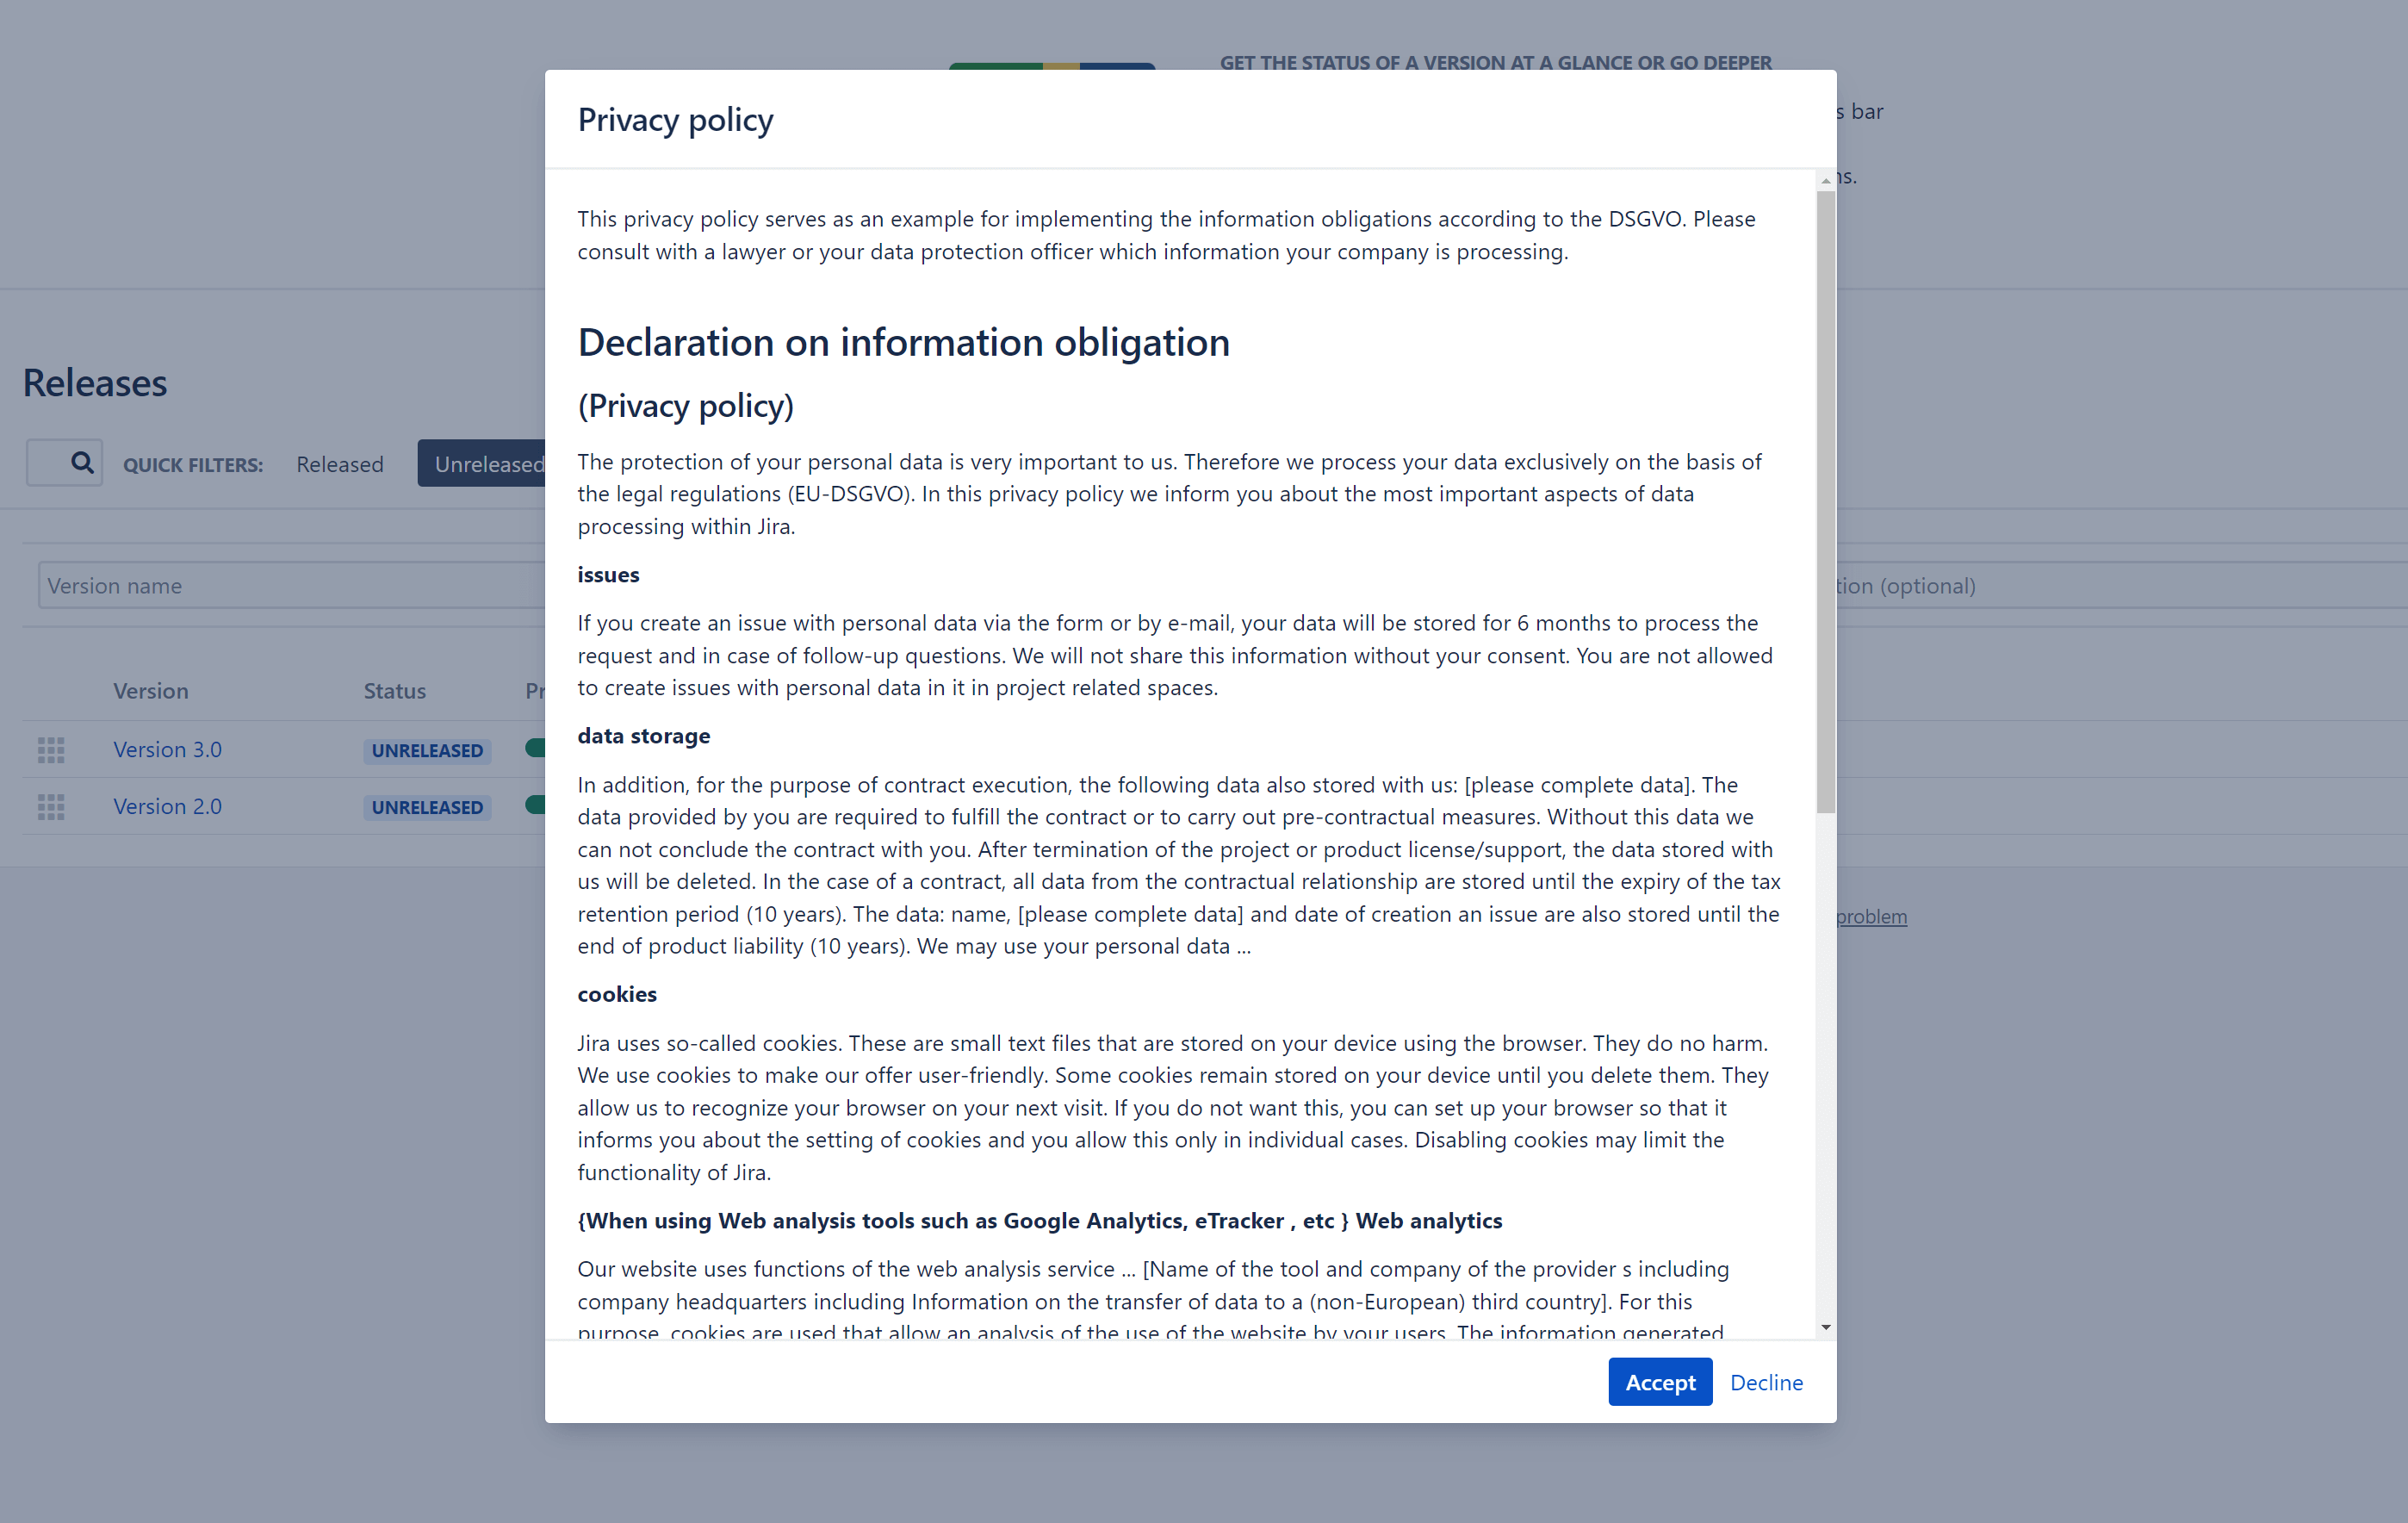
As already explained, you can select here how big the pop-up should be and where in Jira it will be placed. As with the cookie banner, you can choose between required and optional here. A privacy policy in a pop-up can look like this with the Data Protection Toolkit:
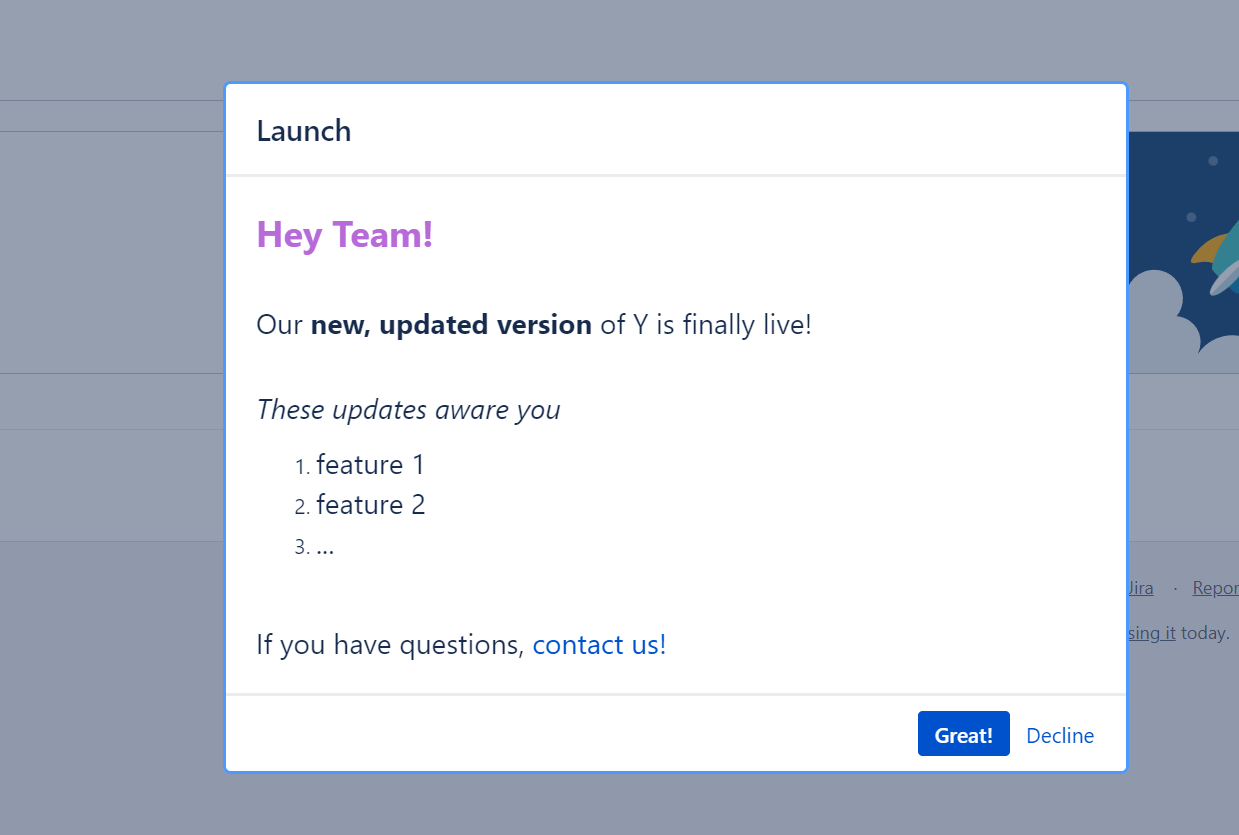
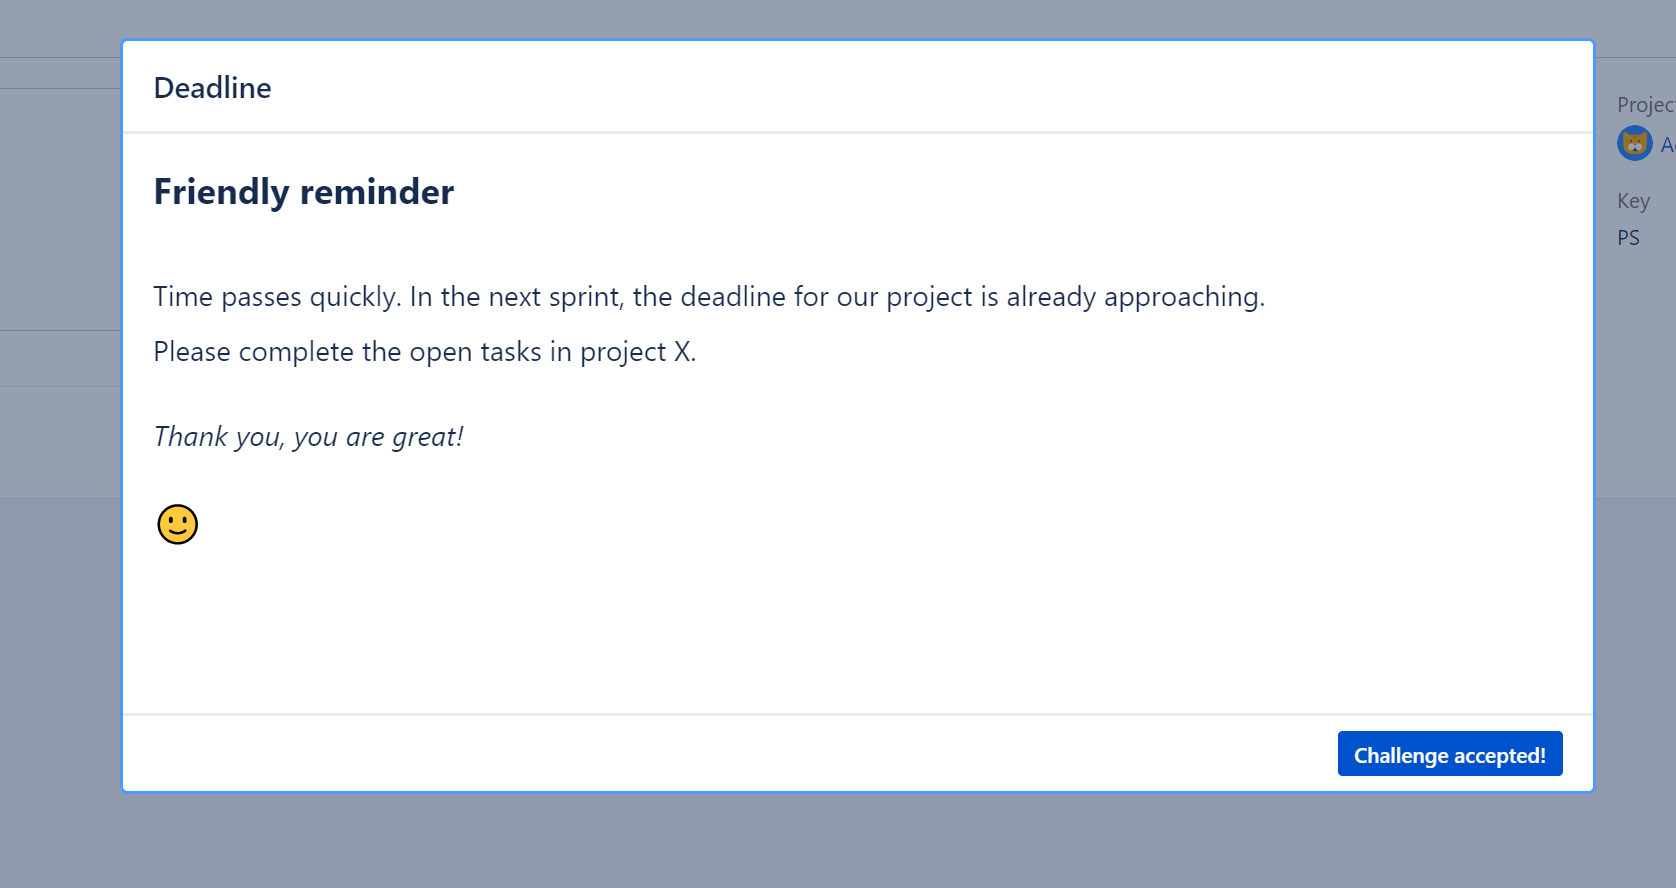
You can also use this privacy tool feature for other types of announcements. Here are a few examples:
Scheduling or announcing maintenance
Deadlines and reminders to the team
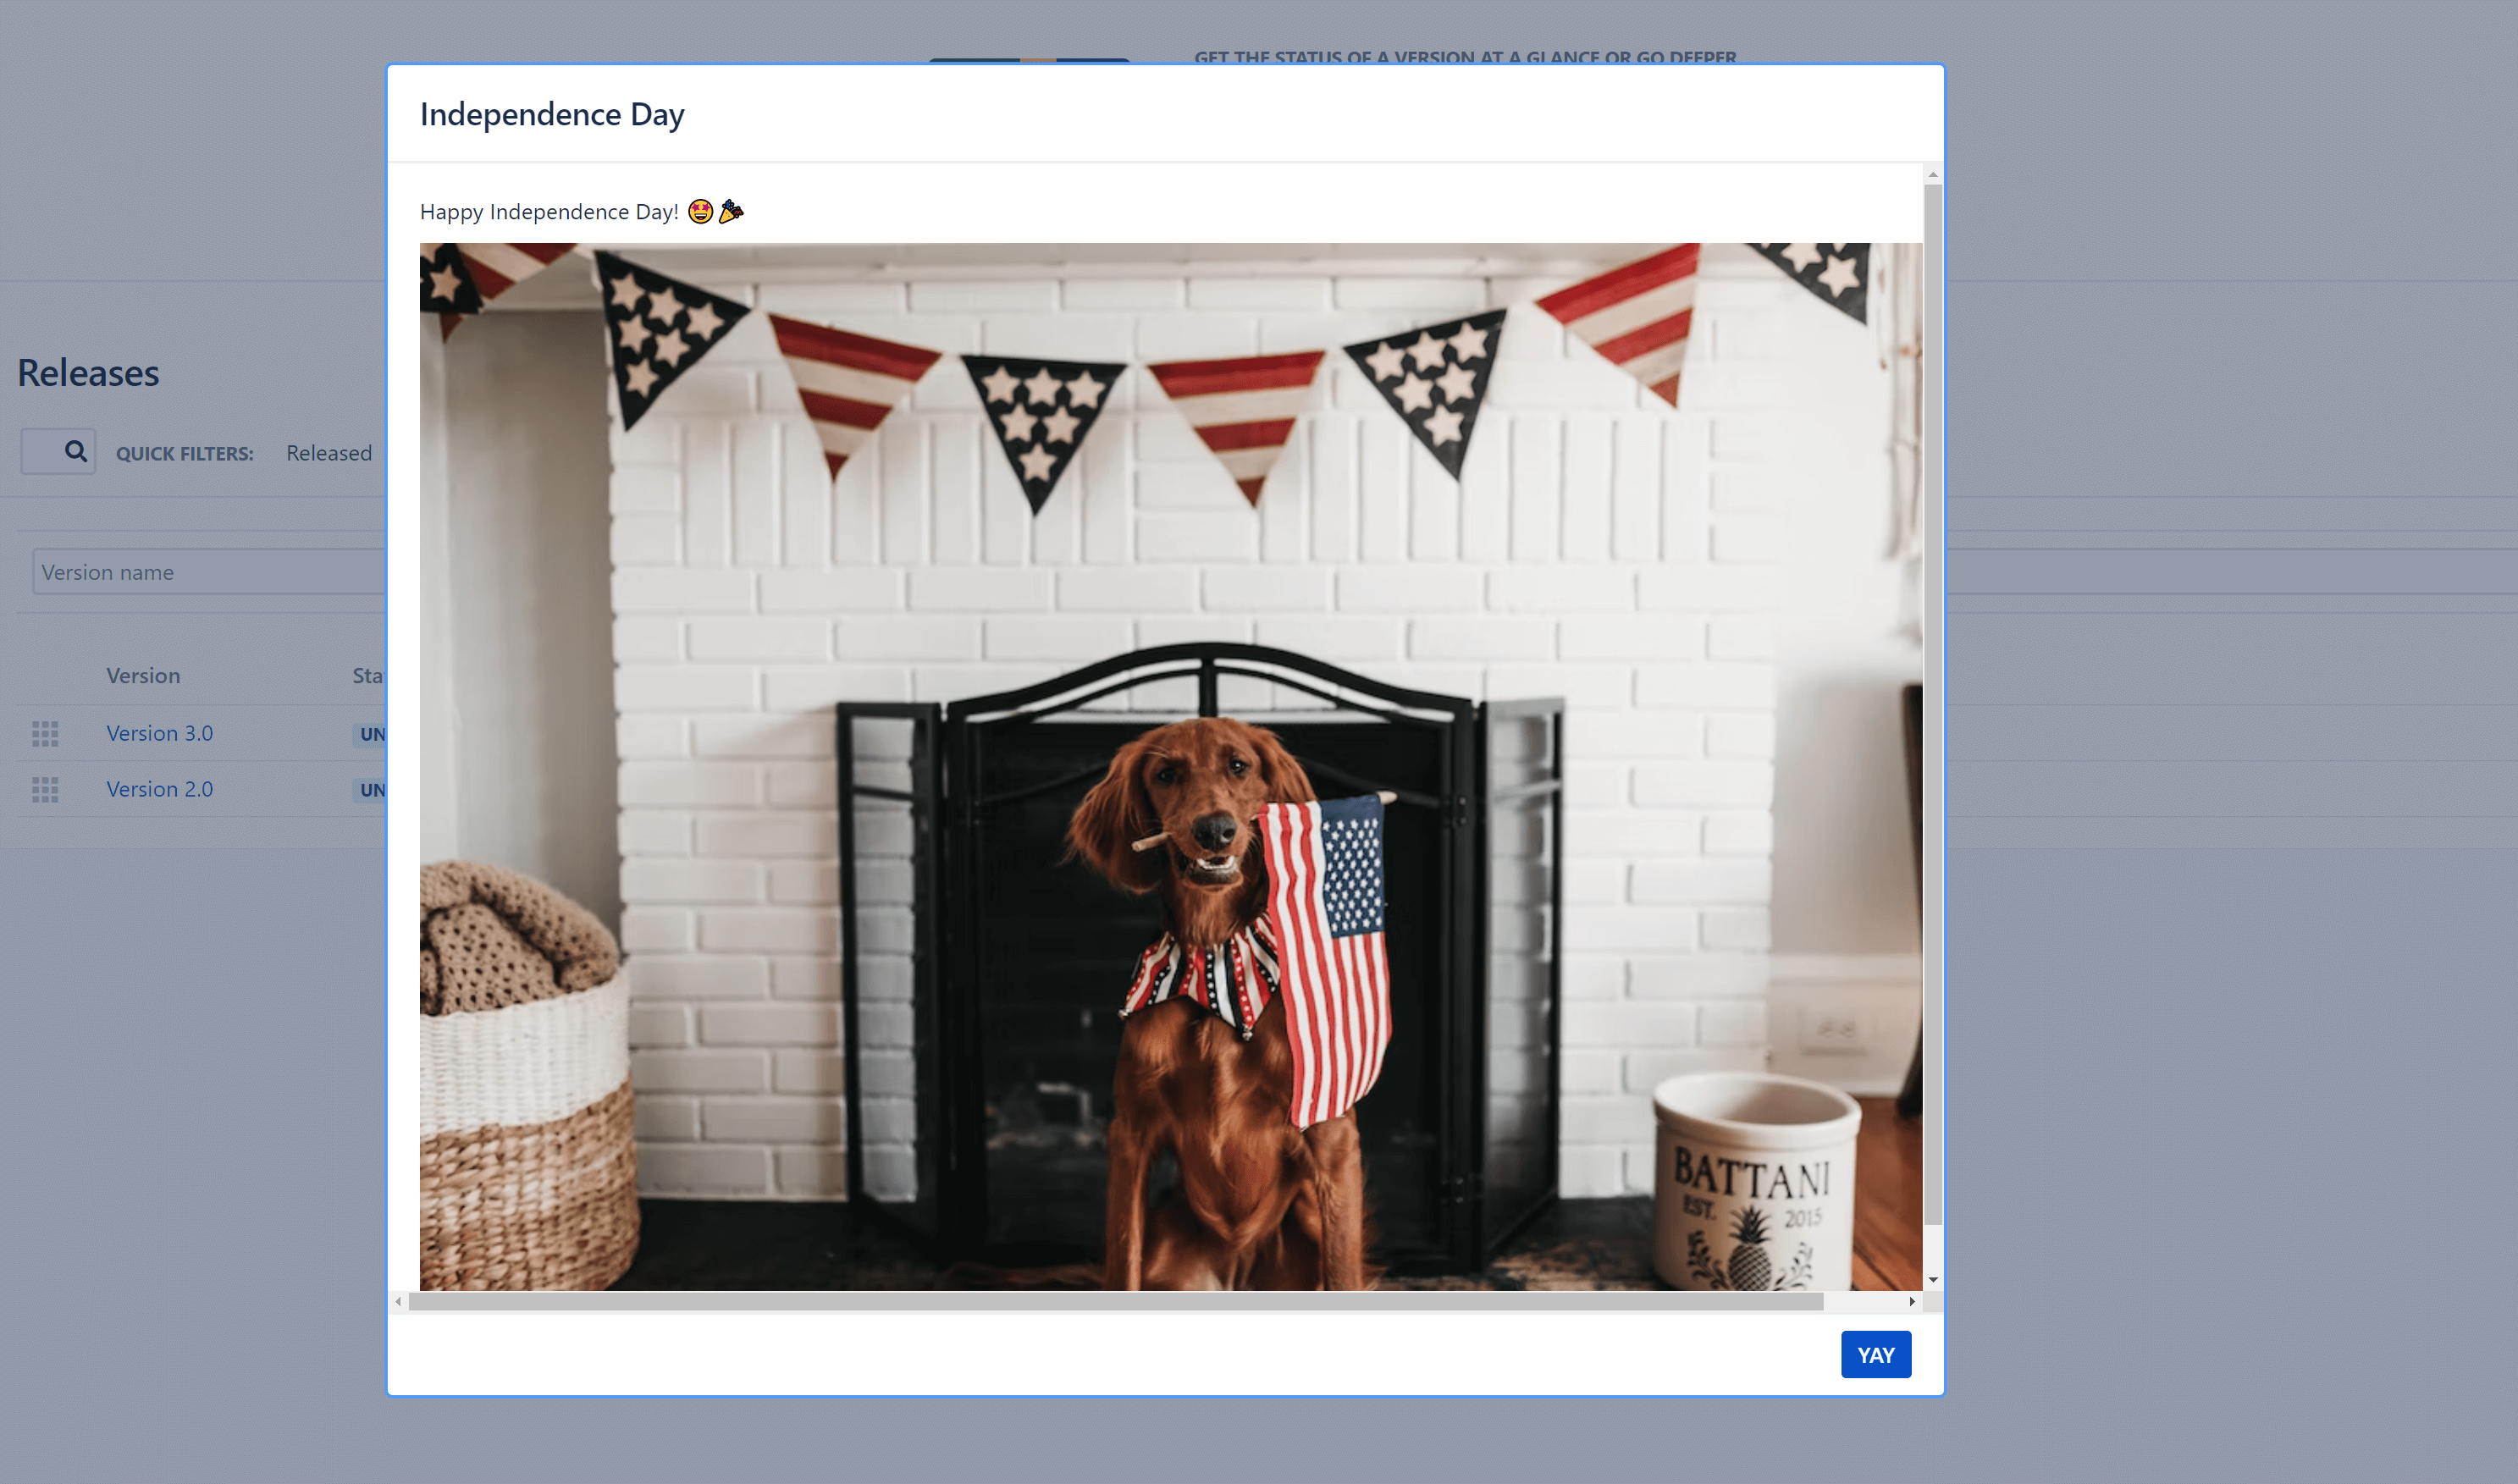
Or when there is something to celebrate
For more inspiration on how to create visually appealing Jira announcements, have a look at our article: Jira announcement banners: creative examples.
Benefits of Data Protection and Security Toolkit to comply with CCPA Right to Know
Complying with CCPA data privacy can be a lot of work. But it doesn’t have to be. If you use this tool for Jira, you will get immense benefits:
-
Easy creation of cookie banners
-
Ability to add opt-in features to them (for children)
-
Gather user feedback
-
Linking to the “Do not sell my Personal Information” page
-
Additional announcements, for example when the privacy policy has changed
-
Select a privacy policy from a template and customize it
-
Define specific target groups for announcements
-
Set start and end dates
-
Clear statistics to view the collected data
Conclusion: Comply with CCPA Right to Know in Jira
With these tips, complying with the right to know/disclosure in CCPA is no longer a Sisyphean task! On the contrary, using the Data Protection and Security Toolkit for Jira delivers additional benefits beyond privacy policies, such as a flexible use of announcements. Cookie banners and privacy policies in Jira have never been so quick and easy to create, manage, and at the same time so visually inviting. The best part? Our tool is not only available for Jira, but also for Confluence!
So don’t hesitate for long, see for yourself how a single tool can help you comply with CCPA easier than ever!
Was this helpful?
Thanks!
Andreas Springer _Actonic_
About this author
Head of Marketing
Actonic GmbH
Germany
2 accepted answers
Atlassian Community Events
- FAQ
- Community Guidelines
- About
- Privacy policy
- Notice at Collection
- Terms of use
- © 2025 Atlassian



0 comments