Community resources
Community resources
Easy time tracking: How to use “My Timesheets” from Report Builder
We are all familiar with timesheets and schedules from school. The topics of each day are accurately assigned to the time of completion. In school, the timesheet often brought displeasure, but it had one advantage: perfect clarity. At Actonic, we take this benefit and combine it with the exciting tasks you complete every day in Jira.
Do you also ask yourself how many hours you spent working on project X? How many total hours do you spend on a task? Or how productive you were this month compared to the last?
Just use Report Builder's "My Timesheets" module, and the questions will clear up all by themselves. Learn more about the structured visualization of your time and work recording in a step-by-step guide here.
What is “My Timesheets”?
“My Timesheets” is a module of the Jira App Report Builder: Timesheets and Data Analysis. The application is a real productivity booster and helps you accurately track your working time and make realistic estimates for task efforts. With just a few clicks, you can create fully customizable and comprehensive timesheets that can be used to generate structured reports.
The basis for comparing your work performance across tasks, projects, and months is the “My Timesheets” module.
What the module offers:
-
Easy tracking of time spent on Jira tickets.
-
Customize data using many filters
-
Quickly check the total number of hours.
-
Enables project managers to create accurate reports
-
Your performance at a glance
There are two different views that you can easily switch between.
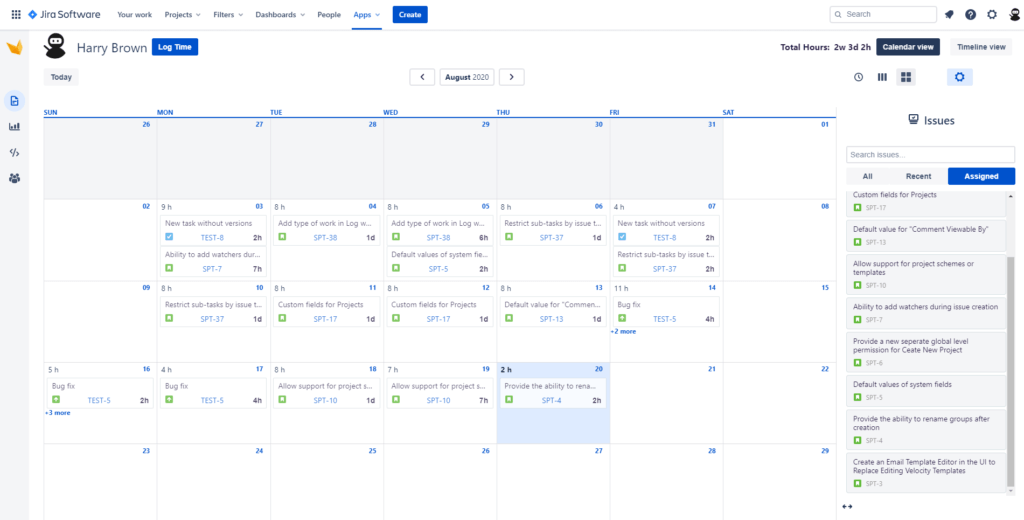
The calendar view
The calendar view provides you with a transparent overview of a specific period. For example, select the view of an entire month:
Or view which tickets you have edited and completed in a week:
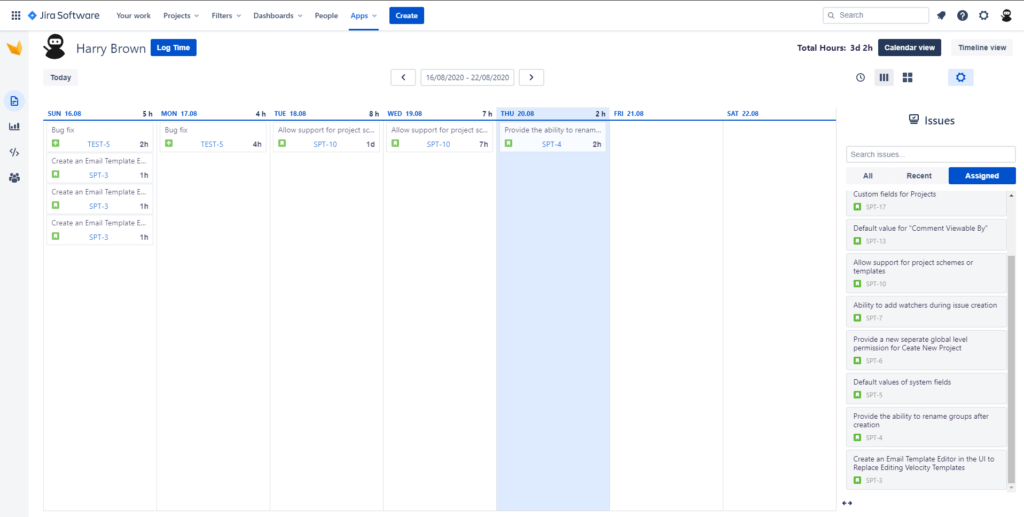
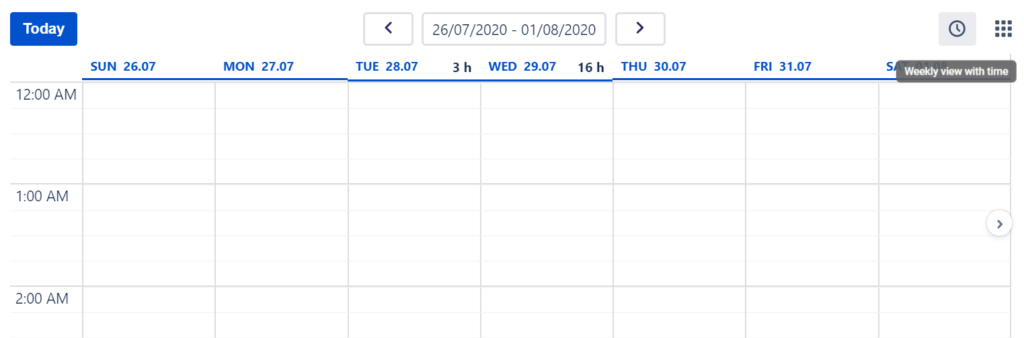
In the weekly view, you also have the option of displaying the time precisely in hours:
You can also visualize weekends or the status color of tickets.
The timeline view
Or are you more of a table person? Then the timeline view is just the right thing for you.
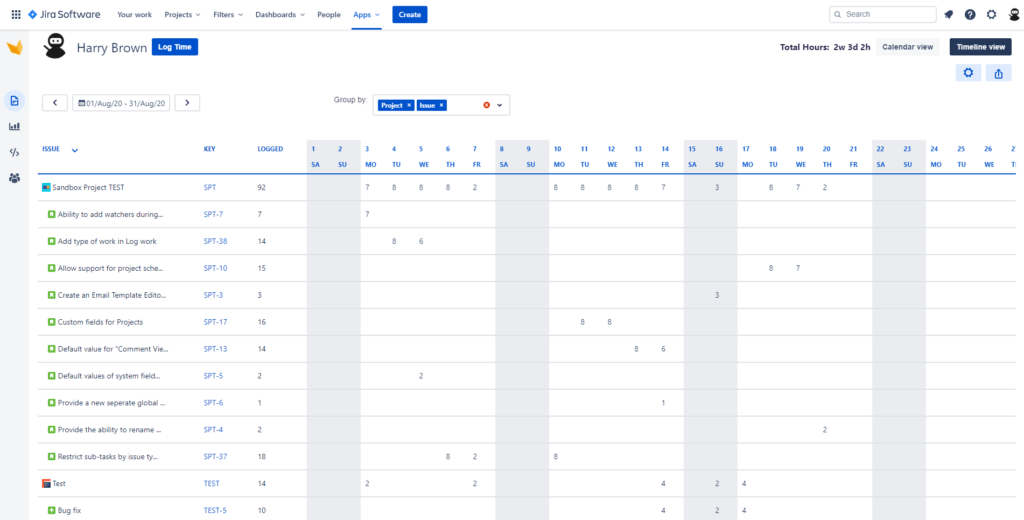
A unique feature in this view is the selection of many individual filters like projects or tasks. Click on “Group by” and drag and drop the desired components to the left for confirmation. The screen output will refresh automatically with each additional filter.
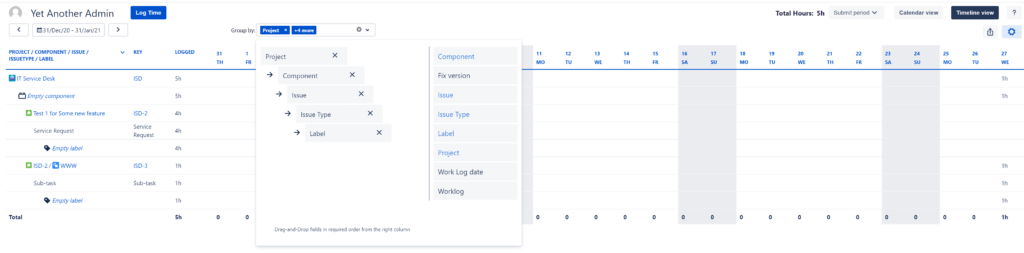
You choose whether you want to display the time in hours, days, or minutes in both views.
To help you record and visualize your time optimally, we would like to provide you with a small guide.
Record times quickly: step by step.
There are several ways to track your working time:
Enter times directly into the table
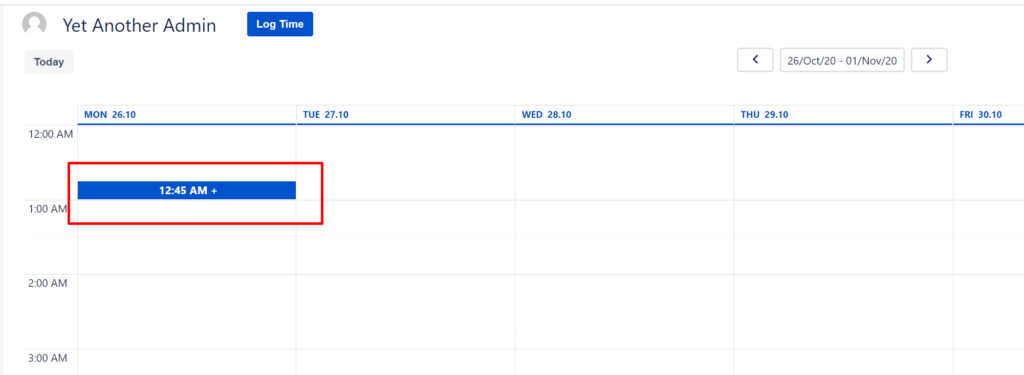
1. To capture times especially quickly in your timesheet, hover over the current day and time you want to enter a task. As soon as you hover over the field, a blue button with a white plus in it will appear. Click on the area.
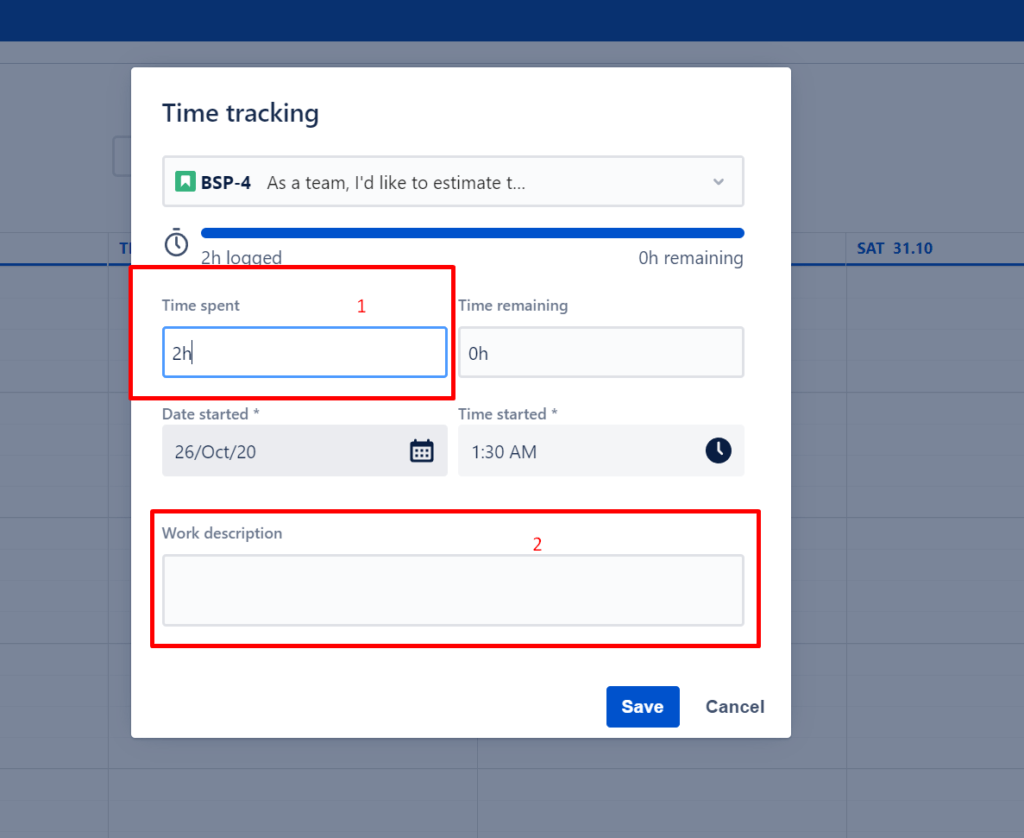
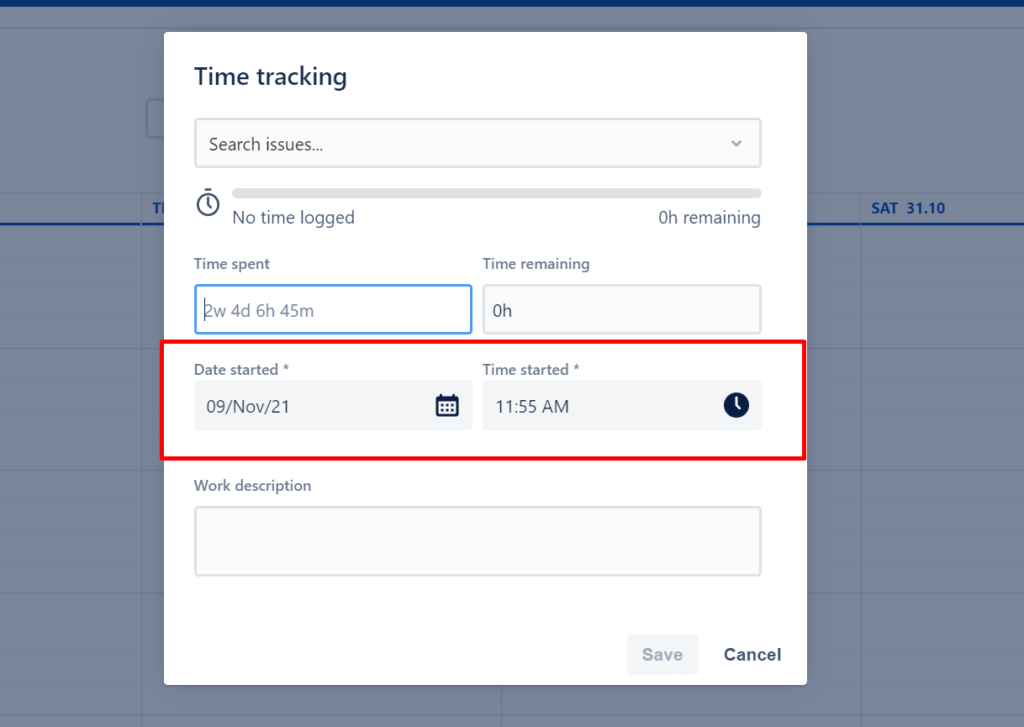
2. A pop-up with the name “Time tracking” appears immediately. Here, first, select the ticket for which you want to record time. Next, navigate through the tabs and filter by recently viewed, recently edited, or tickets assigned to you.

3. Once you have clicked on a Jira ticket, you can add the spent time (step 1) and the activity description (step 2).
-
Extra tip: Be more detailed in your description. This is not only helpful for your colleagues but also yourself. For example, do you know what was discussed three months ago on that evening at 7 p.m. — if the description was just “meeting”?
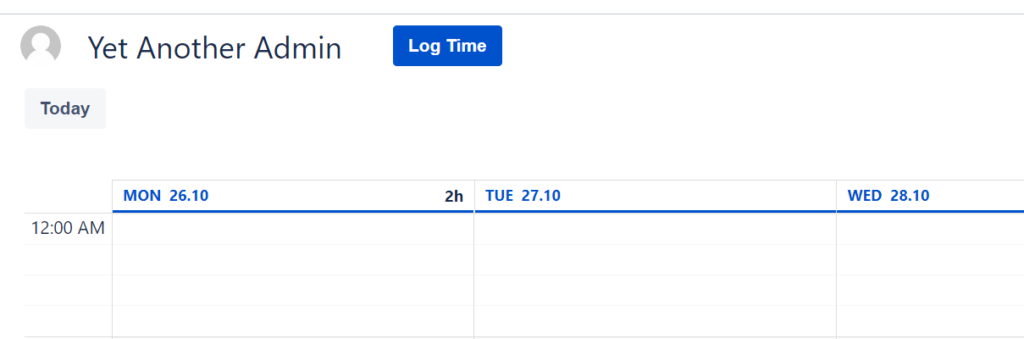
4. After you have saved your entry, the block of working time appears in your timesheet, and you can open it again with a simple double-click and edit it again.

Calculating times with “Log Time”
1. Instead of hovering over the timesheet, you can also click on “Log Time” in the upper left area of the screen.
2. The same editing screen appears here. The default time is when you click the button. So don’t forget to adjust the date and time according to your requirements.
From here on, the working time recording process is the same as explained above.
Drag-and-drop
On the right side of your screen, you will see the listing of all Jira tickets created.
1. Now, you can easily select a ticket and drag it to the desired area of your timesheet.
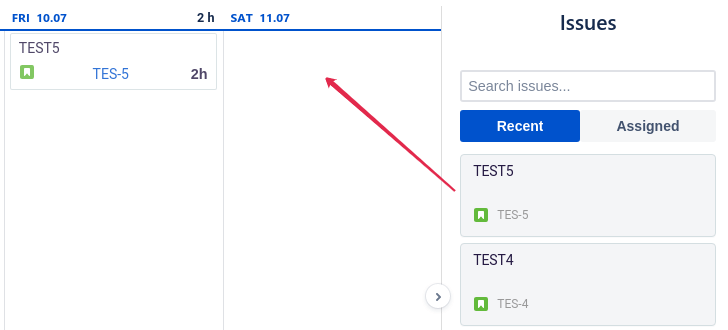
As with the other operation methods, you can proceed to specify the time in more detail.
You can export all timesheets to Excel, CSV, or PDF format.
Note: If you track your time in the Sprint or Backlog and enter it directly into the Jira ticket, Report Builder “My Timesheets” will automatically apply the changes without you having to create a time slot first. This way, you save a lot of time and don’t have to worry about your timesheet any further, as all changes are applied simultaneously without any additional effort.
Only a few clicks to the perfect timesheet
The “My Timesheets” module of Report Builder convinces with its intuitive handling, structured view, and export options. However, creating individual timesheets and configuring them with filters and groupings has never been so easy.
And what if you have recorded your working time? How do you convert your data into a visually appealing report? Find out in our article on Report Builder Universal Report.
With our guide, you can optimize your agile workflow immensely because comparing your working time will allow you to estimate more accurately in the future: This is how modern time management works.
Was this helpful?
Thanks!
Andreas Springer _Actonic_
About this author
Head of Marketing
Actonic GmbH
Germany
2 accepted answers
0 comments