Writing a Test Case with AgileTest
Step 1: Define Requirements
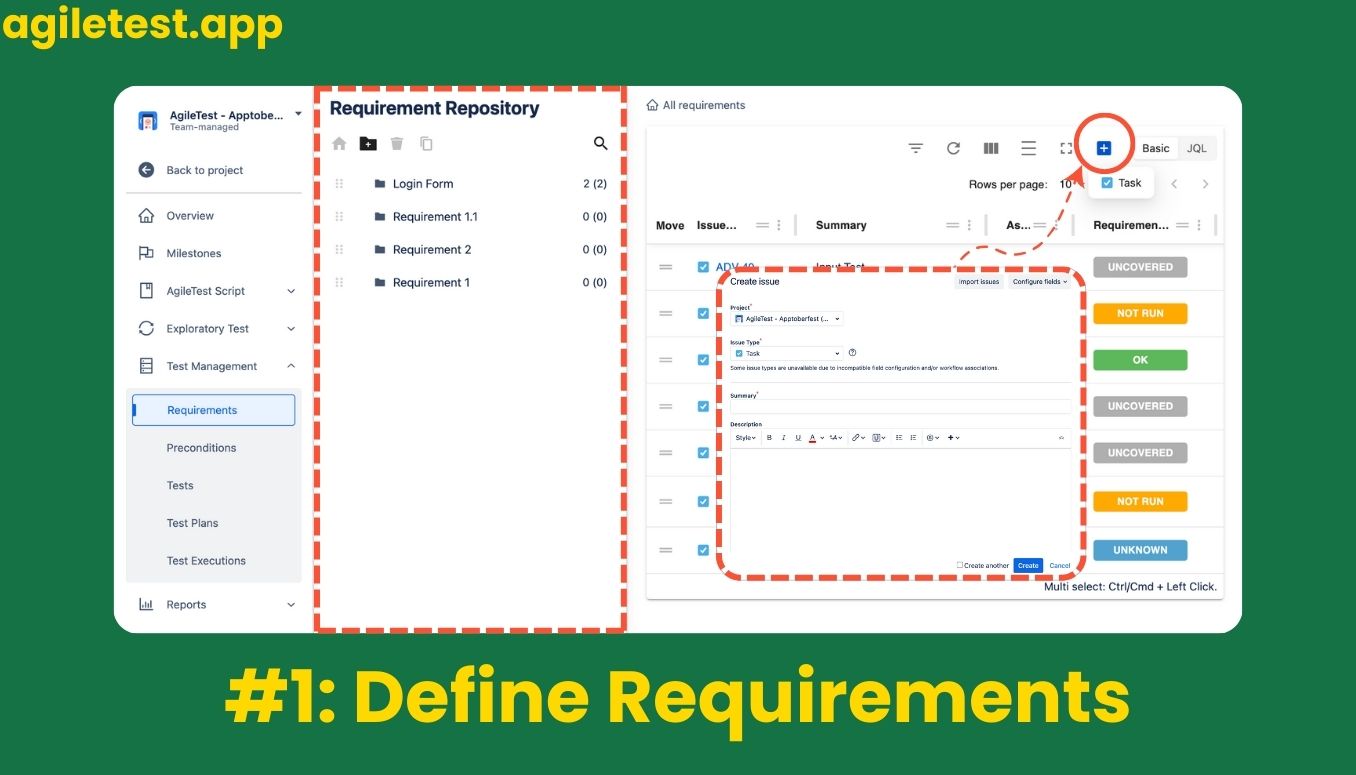
We begin creating a test case by establishing its requirements. AgileTest simplifies this process with a repository section where users can track each feature, resolving the version control issues common in document-based methods.
Step 2: Create Test Case
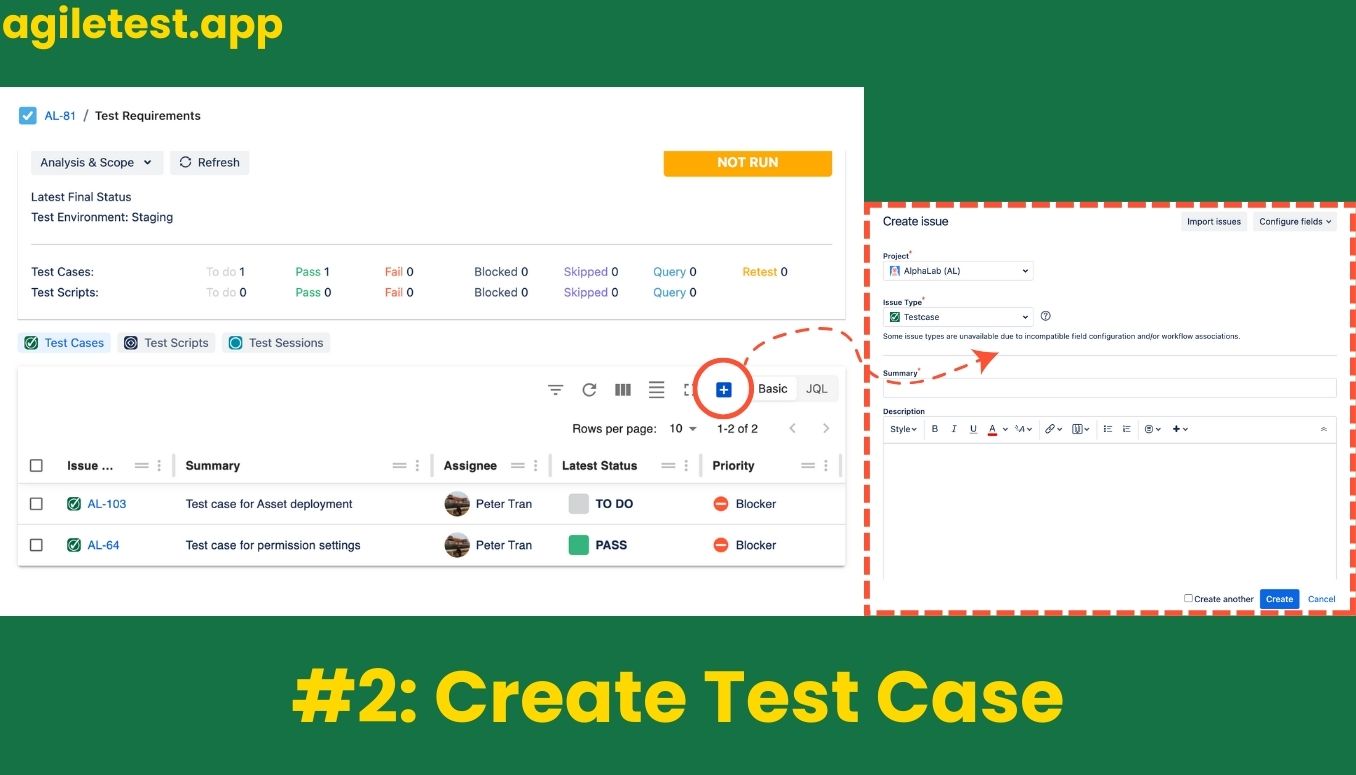
We can navigate to the Test section under the Test Management menu to assign newly created requirements to a use case. Alternatively, we can create a new test case within the requirements to streamline the process further.
Step 3: Add Test Steps and Preconditions
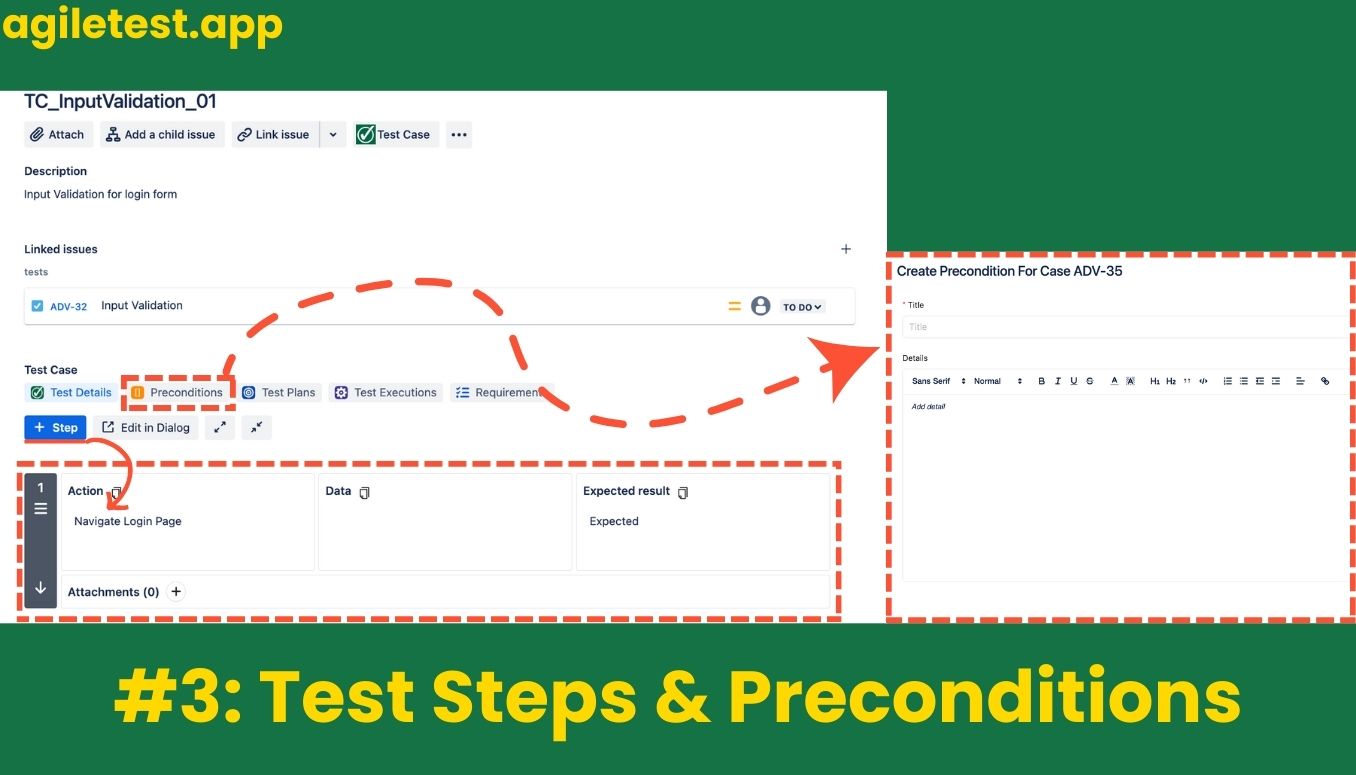
After assigning the requirements, testers can add specific test steps by selecting the test case. AgileTest also simplifies precondition setup, supporting team collaboration and real-time updates.
Executing a Test Case with AgileTest
Step 4: Create Test Plan & Assign Test Cases
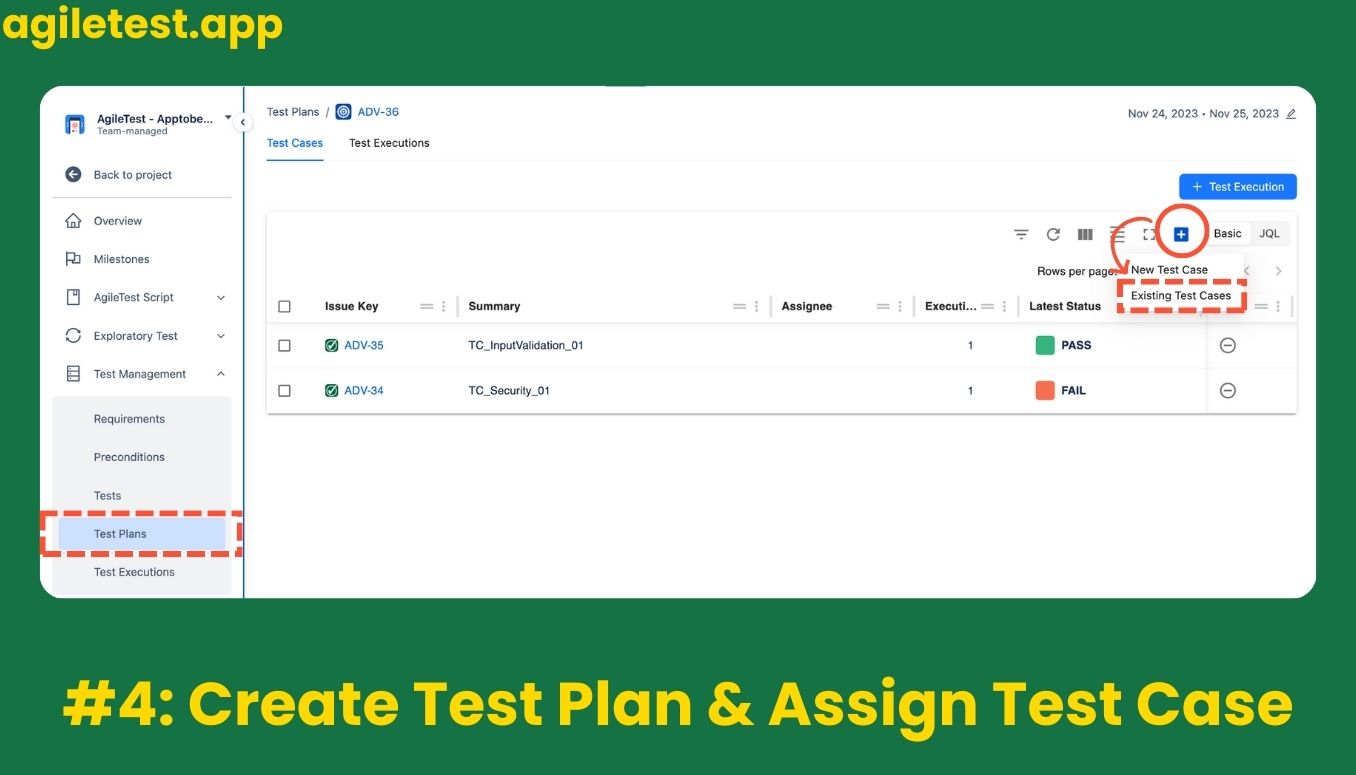
We can create and assign test plans to test cases, which allows for structured and time-framed testing.
Step 5: Create Test Executions
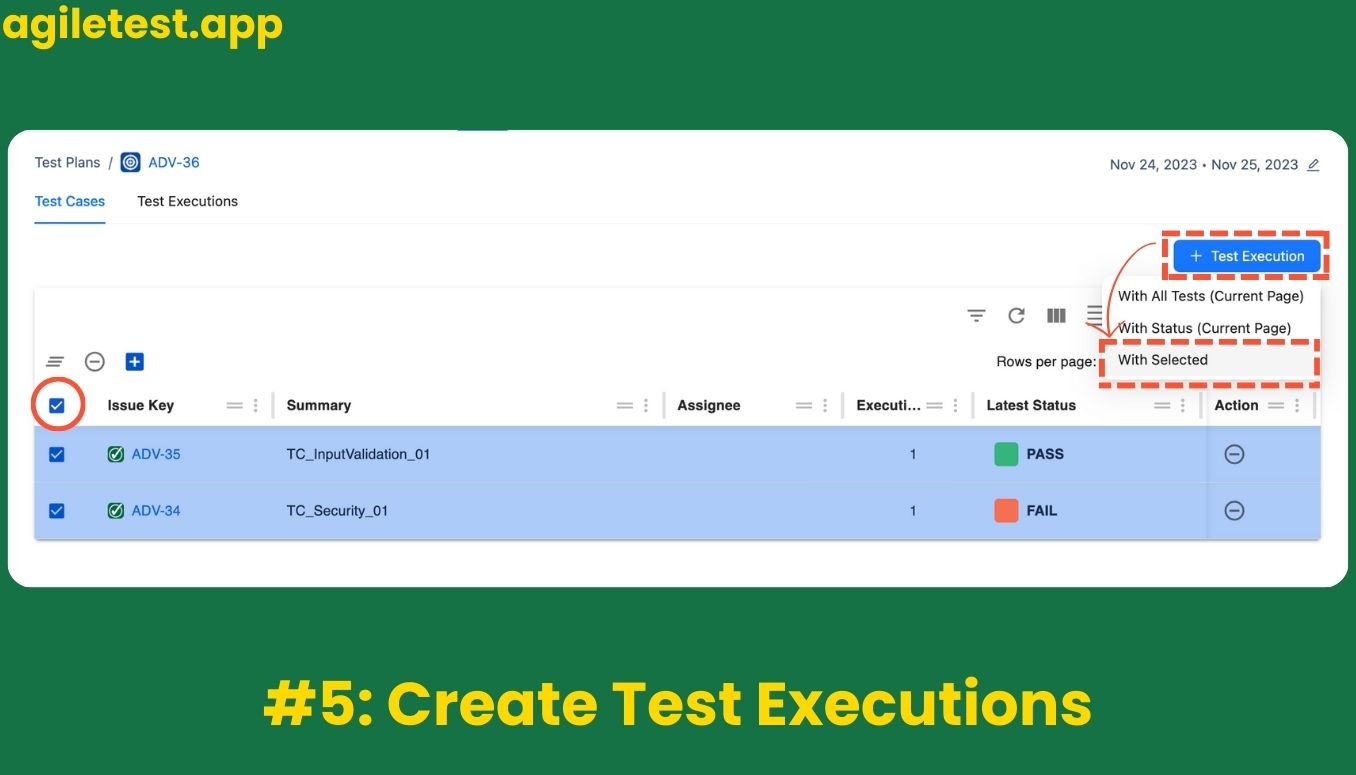
In test plan, users can manage test executions (test runs) within the assigned test cases.
Step 6: Manage Test Executions
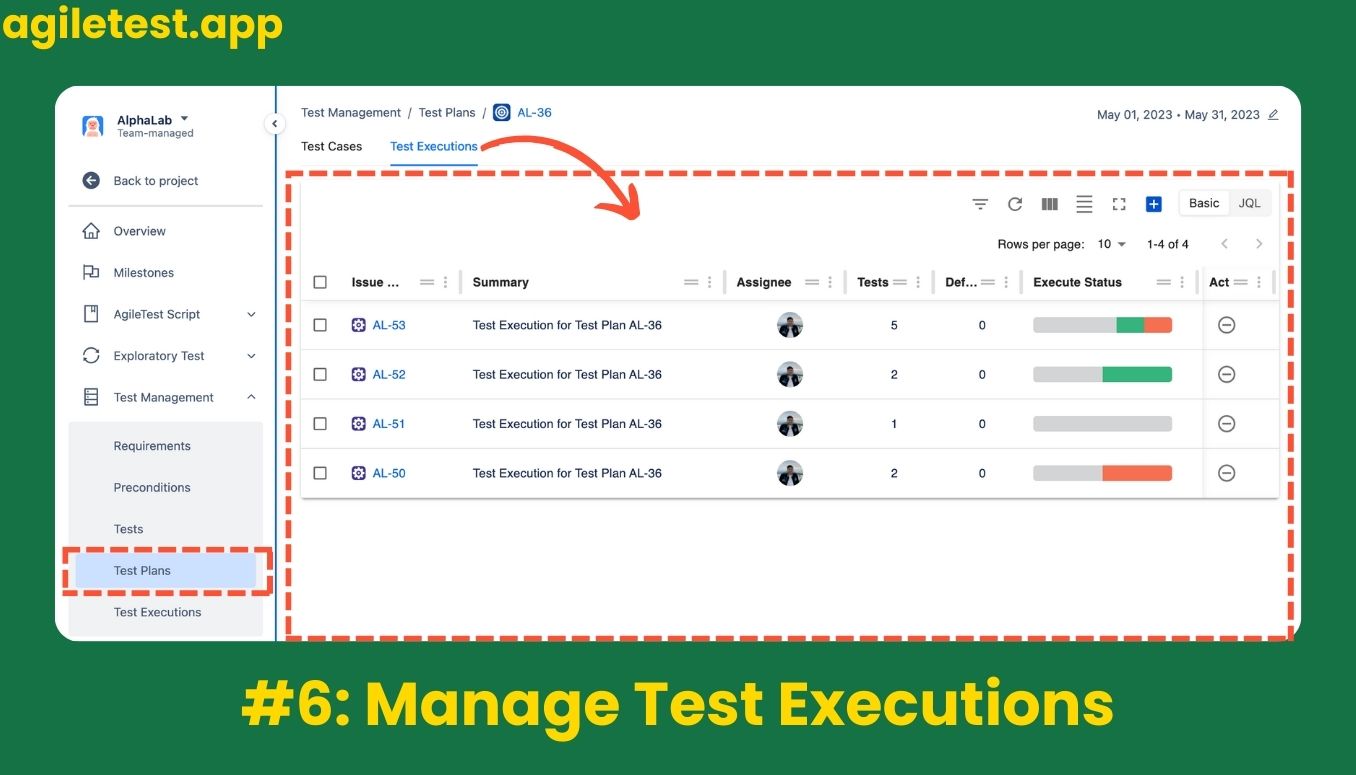
Within the test plan, we can view and manage all test executions, making it easy to monitor the progress and results of each test.
Conclusion
AgileTest and Enterprise Test Management for Jira have revolutionized the test case writing and execution process. This seamless integration of requirements management, test design, execution, and real-time collaboration enables testers to achieve more in less time, ensuring that no testing challenge is too great, regardless of the project scope. With this tool, writing and executing a test case in under 5 minutes is not just possible; it is a reality.
If you love the testing experiences, try our app on the Atlassian Marketplace!

