Community resources
Community resources
Community resources
Jira Subtasks: Essential Tricks and Insights for Project Managers
Jira subtasks is a powerful tool that helps break down large projects into manageable pieces. If you’re not using subtasks yet, or if you’re unsure of how to maximize their potential, this guide will help you understand, organize, and track work more effectively.
1. What exactly is a Jira subtask?
A Jira subtask is essentially a small, manageable unit of work that belongs to a larger task. While a task is typically a more general unit of work, a subtask breaks down this task into smaller, more detailed steps. Tasks can stand alone, while subtasks rely on their parent task for context.
2. When should I use subtasks versus regular tasks?
This is one of the most common points of confusion. Here’s a simple rule of thumb:
- Use tasks when you need a clear deliverable or milestone. If the work can be completed in a few days, it’s likely a task.
- Use subtasks when you want to break down that deliverable into actionable units of work that can be completed quickly (usually in a few hours or a day).
Example:
- Developing a new feature (epic) → Design UI (task) → Create wireframes (subtask) → Code UI components (subtask) → Test UI (subtask)
3. How to create subtasks in Jira?
Creating subtasks is simple. Here’s how:
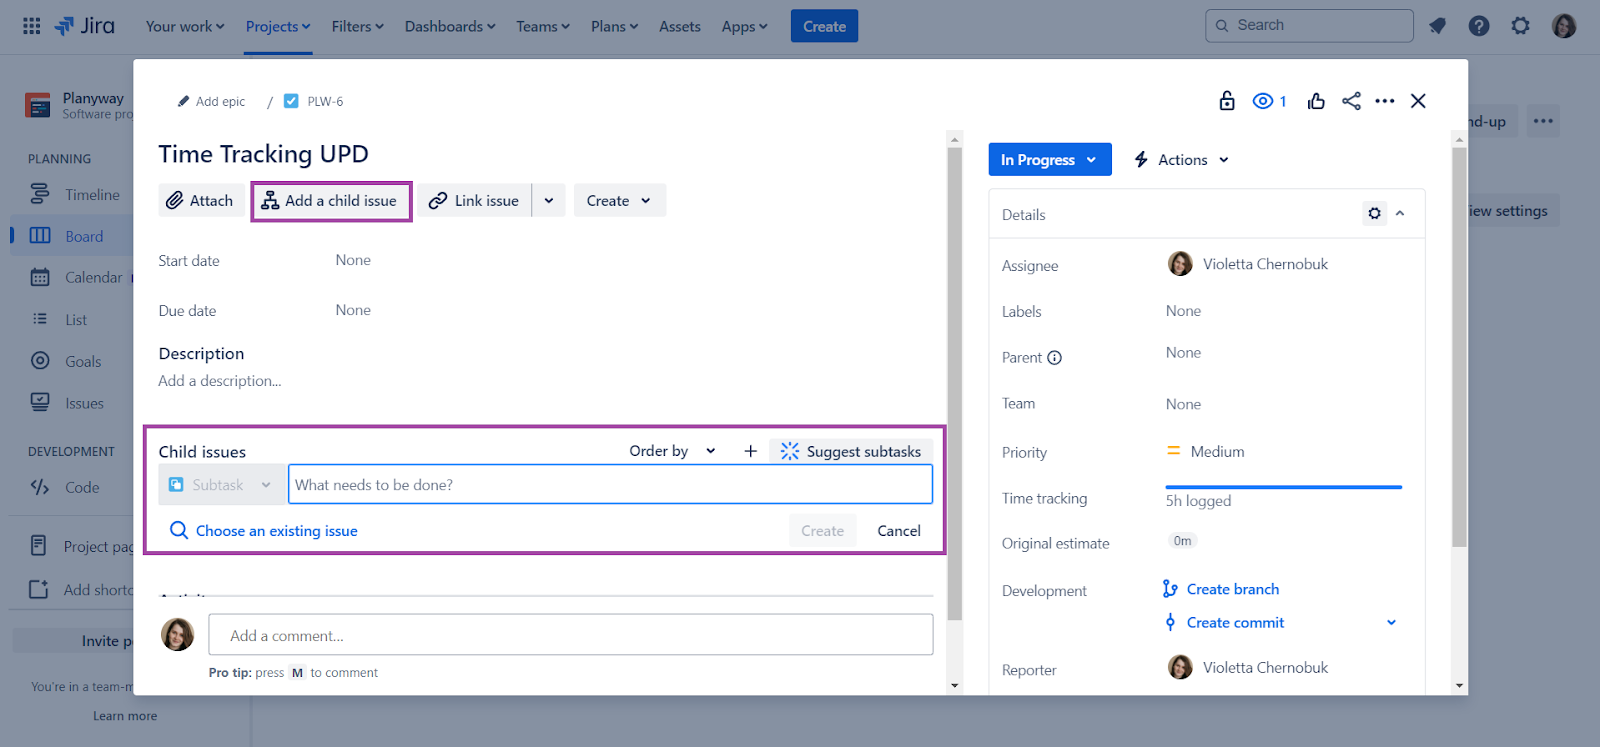
- From a task: go to the task you want to break down, click on the “Add a child issue” button. Fill in the details (like title and description), assign it to a person, and click Create.
- From the backlog: you can also create subtasks from the backlog by selecting a task and clicking on the Create Subtask option.
4. Can subtasks have their own subtasks?
No, by default, subtasks cannot have their own subtasks in Jira. Jira restricts this hierarchical structure to maintain simplicity.
5. How do subtasks relate to parent tasks and epics?
A subtask is always connected to a parent task. This relationship is important because it helps you track progress and see how individual pieces fit into the larger picture.
- Epics are high-level goals or themes, typically spanning across multiple tasks.
- Tasks are specific deliverables or work items.
- Subtasks break down the task into smaller actionable steps.
The progress of a subtask contributes to the overall progress of its parent task, and tasks within an epic reflect the completion of larger milestones. By understanding this, you can track both detailed and high-level progress.
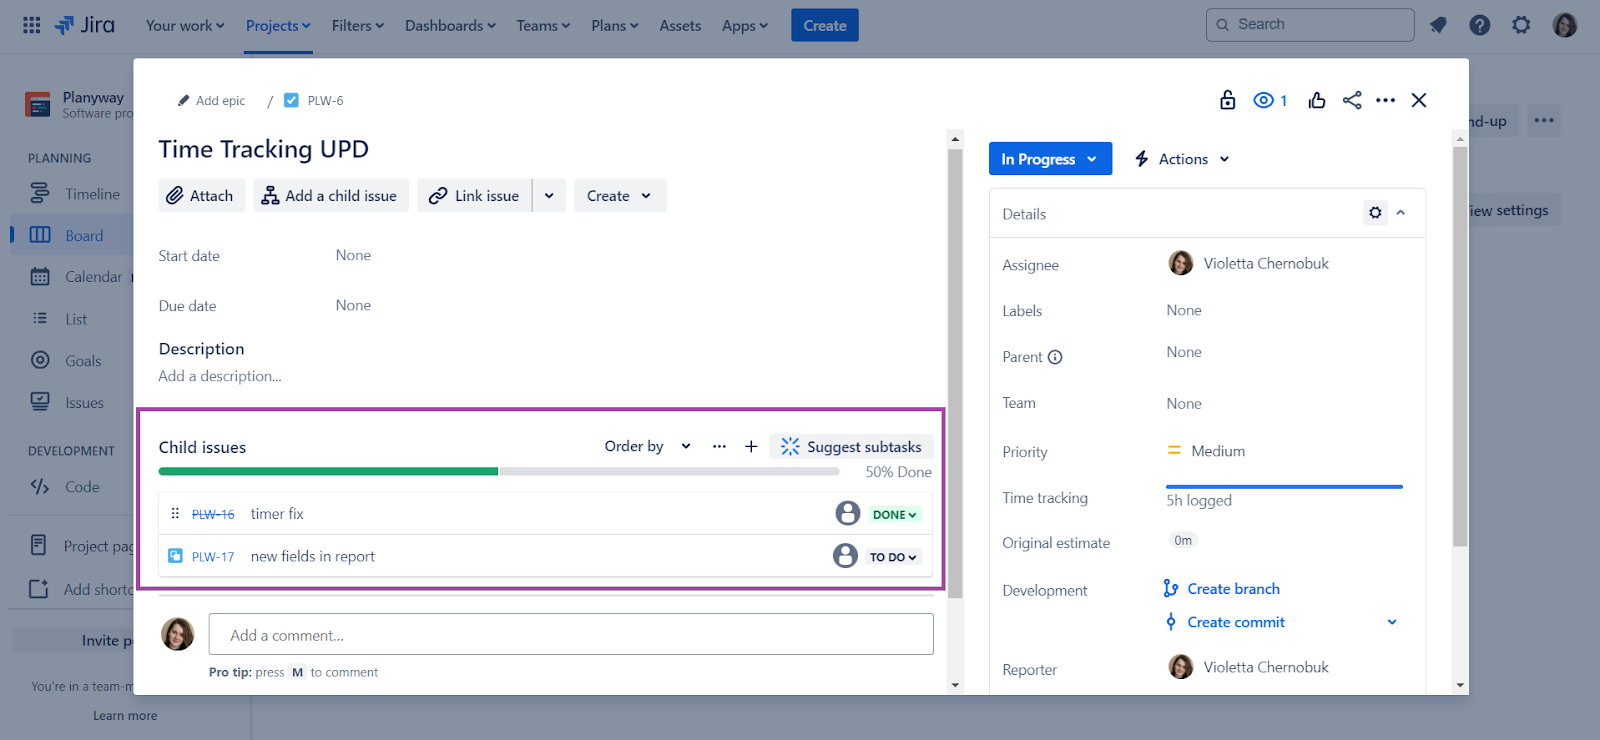
6. How can I track the progress of subtasks?
Tracking subtasks is easy with a few simple methods:
- Status updates: each subtask has a status (e.g., “To Do,” “In Progress,” “Done”). As they move through these stages, you’ll get a clear view of how much work remains.
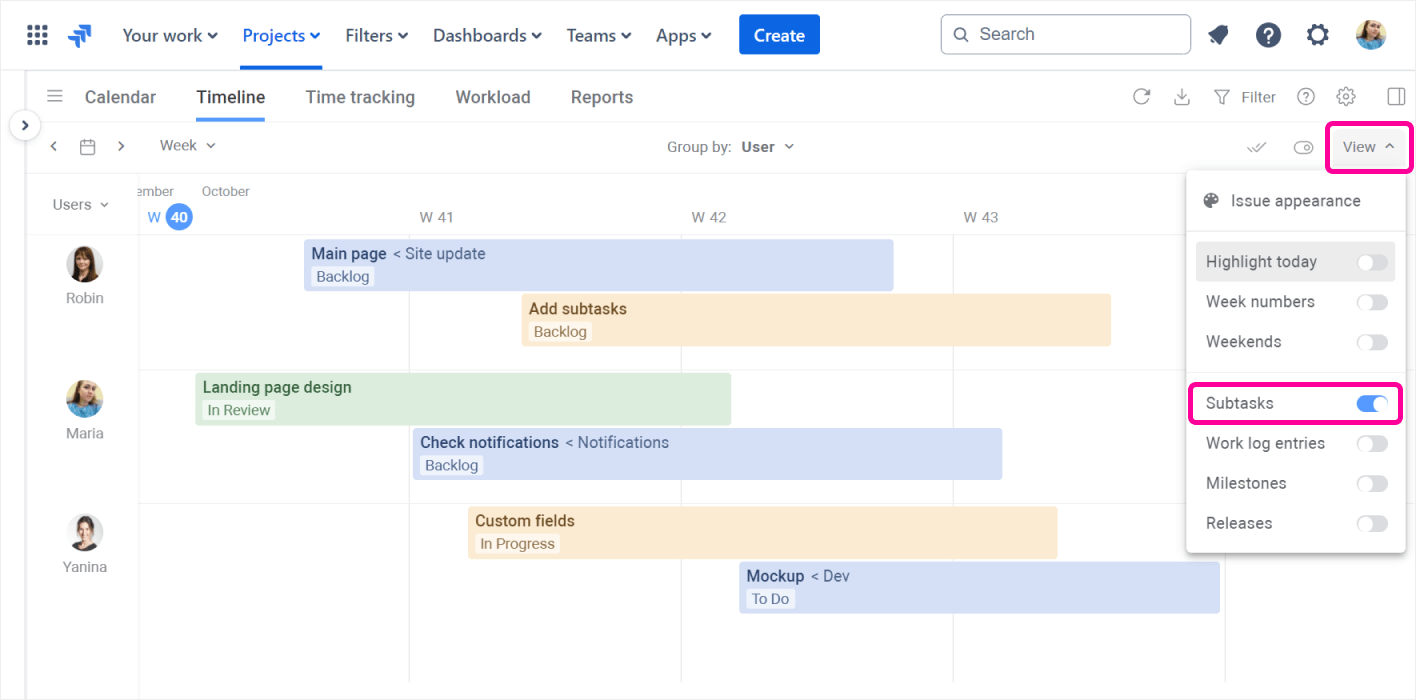
- Visualizing on the dashboard: using Planyway, a project management dashboard, you can visualize the progress of subtasks in relation to their parent task. Planyway offers an intuitive way to track tasks, subtasks, and sprints, providing a timeline that helps visualize dependencies and team workloads.
7. Best practices for managing subtasks
Managing subtasks is not just about creating them – it's about using them efficiently. Here are some best practices:
- Each subtask should represent one clear, actionable step that can be completed in a few hours or a day.
- Ensure that each subtask has a responsible person to maintain accountability.
- Make sure that subtasks have clear definitions of "done" so everyone knows what’s expected.
- Don’t create a massive list of tiny subtasks that confuse more than help. Be sure that each subtask serves a clear purpose.
8. Can subtasks be assigned to different people than the parent task?
Yes, and it can be beneficial. Assigning different people to subtasks allows for specialization and better workload distribution.
9. How do subtasks impact reporting in Jira?
Subtasks play a crucial role in tracking the progress of a project:
- Sprint reports: they contribute to sprint reporting by breaking down larger tasks into smaller increments, showing progress in more detail.
- Burndown charts: subtasks are reflected in burndown charts, helping you visualize progress and predict whether the project will finish on time.
- Project visibility: Planyway integrates with Jira, providing a clear view of how each subtask contributes to the overall project. This can be incredibly useful for progress tracking, workload management and stakeholder communication.

10. Common pitfalls to avoid
While subtasks are incredibly helpful, they can also be misused. Here are some common pitfalls to avoid:
- Creating "mega-subtasks".
- Forgetting to update subtasks.
- Using subtasks for work that doesn’t directly relate to the parent task. Keep them focused on specific, actionable work that can be completed quickly.
Wrapping it up
In a nutshell, Jira subtasks are your secret weapon for getting more done without feeling like you’re drowning in to-dos. Whether you’re managing a massive project or just need to keep your daily tasks in check, subtasks make it easy to stay organized and productive.
So the next time you’re facing a big task, don’t stress—just break it down into subtasks and get to work like the productivity pro you are. 👊
Happy planning!
Was this helpful?
Thanks!
Mary from Planyway
0 comments