The Atlassian Community Forums are currently in read-only mode. We will be relaunching on a new platform on September 22 (read more here). We apologize for the extended downtime. For concerns or questions, please email communitymanagers@atlassian.com. See you on the other side, on the new Atlassian Community Forums! :)
× Create
Turn on suggestions
Auto-suggest helps you quickly narrow down your search results by suggesting possible matches as you type.
Showing results for
Community resources
Community resources
Community resources
From Employee Question to Jira Workflow: Building HR Self-Service with JSM, Rovo, and Smart Forms
August 18, 2026 edited
At first glance, today’s employee help centres seem almost magical.
HR teams upload their policies and onboarding guides to Confluence. Employees then log into the Jira Service Management (JSM) Help Center, ask a quick question to an AI assistant like Atlassian Rovo, get an instant answer, and move on without needing to contact an HR manager.
For quick, straightforward questions, it really does feel magical:
- “What is our parental leave policy?”
- “How do I request a new laptop?”
- “Which software systems do I get access to by default?”
- “Where can I find our updated health benefits guide?”
But in practice, things aren’t always so smooth.
When an employee needs more than just an answer—when they need something to actually get done—the knowledge bot can’t keep up.
- They don’t just want to know how to get Figma access; they need the account provisioned.
- They don’t just want the equipment policy; they need a MacBook delivered before their start date.
A knowledge assistant by itself can’t complete requests. To solve this, you need an easy way to turn a conversation into a structured, automated Jira workflow.
Rather than relying on one tool for everything, the best HR self-service setups use the JSM Help Center, structured forms, Jira Automation, and Rovo as specialized parts working together.
Let’s walk through how to build this, step by step, using an Employee Onboarding workflow as our example.
1. Start with the Rovo Assistant (The Knowledge Layer)
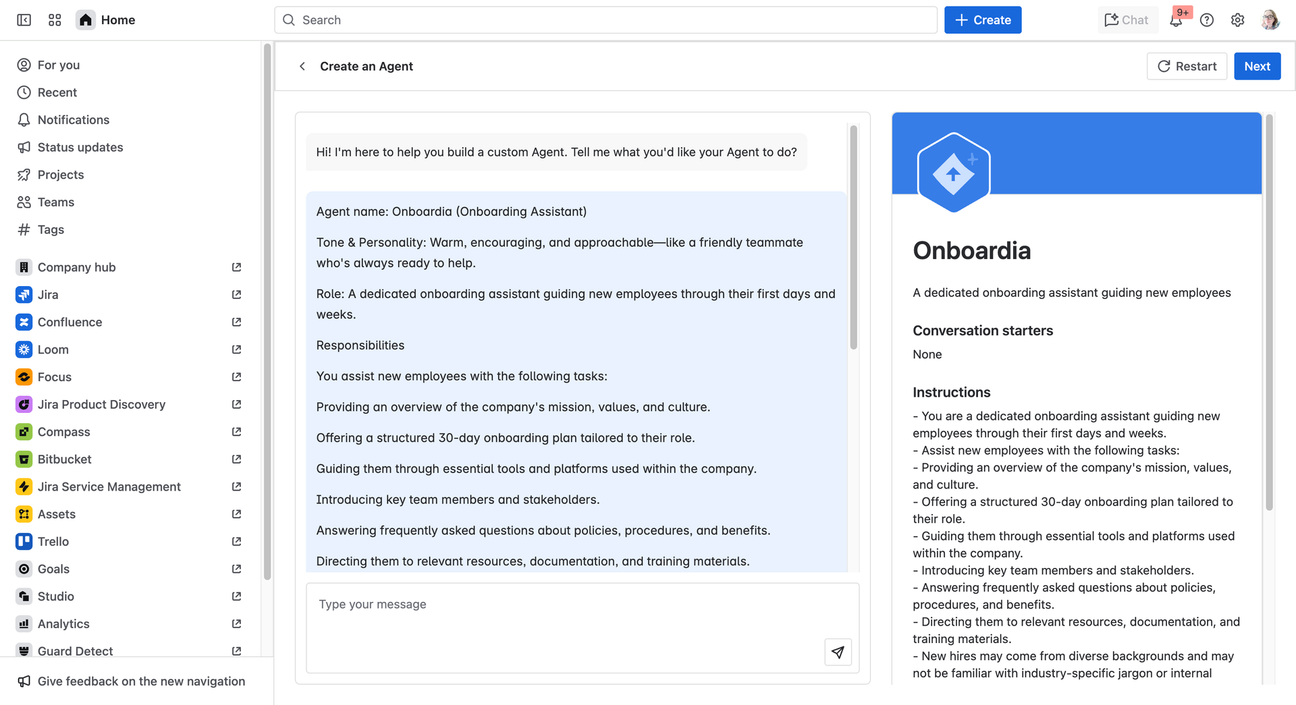
You start by building an HR and onboarding Rovo agent, trained on your internal documentation, and making it accessible directly in your JSM Help Center.
When a new hire or manager logs in, they might ask:
“Which tools will I need as a Senior Product Designer?”
or
“I’m starting in our Berlin office next month. What do I need to complete before Day 1?”
Rovo handles the informational side effortlessly. But once the answer transitions from information to intake, Rovo hands off the mic:
“As a Product Designer in Germany, you’ll need a MacBook Pro, Figma, Jira, Miro, and local payroll setup. Please complete the Onboarding Request Form so HR and IT can start preparing your workspace.”
This is where you move from conversational AI to a structured intake process. Collecting lots of details through chat is frustrating for users and often leads to missing information.
Form-based intake is faster, cleaner, and much more reliable. Add links to the right intake forms in your Rovo agent, so whenever something is needed, the correct link is shared to create a new work item.
2. Collect Data Without Destroying Your Jira Schema
When setting up onboarding intake, the biggest mistake teams make is building a giant Jira ticket crammed with 25 custom fields. That approach leads to field sprawl, schema clutter, and administrative headaches down the line. Instead, use Smart Forms for Jira to gather all the important details up front, but only map the key data points needed for routing and reporting to Jira fields.ds.
Build Dynamic Forms with Conditional Logic
A good form adapts to each user, so they only see and answer questions that matter to them:
- Role-Based Rules: If the user selects Engineering, display choices for GitHub, AWS, Datadog, and dev environments. If they select Marketing, display choices for HubSpot, CMS access, and Figma.
- Employment Type Rules: If they select Contractor, reveal fields for contract end-date and temporary access parameters.
- Location Rules: If they select Germany, reveal fields specific to local payroll numbers and country-specific benefits.
- You can also group rules together by combining several conditions into one rule.
[Department Selected: Engineering]
└── Show: GitHub, AWS, Datadog, Dev Environment options
[Location Selected: Germany]
└── Show: German Tax ID, Social Security Number, Local Benefits

Smart Field Mapping (Lean Schema Strategy)
Smart Forms allows you to map operational responses (like Start Date, Department, or Manager) to dedicated Jira custom fields for automation rules.
For other details, like hardware preferences or small notes, you can map those answers into the Jira Description field as a clear summary, or keep them stored in the form itself. This way, you keep all the context without cluttering your Jira custom fields.
3. Auto-Create the Central Onboarding Work Item
Once the submitter hits Submit, the form creates the primary onboarding work item in your designated Jira project.
Work Item Summary: Onboarding — Anna Schmidt — Product Designer
Mapped Jira Fields:
- Department: Product
- Location: Germany
- Start Date: September 7
- Manager: Daniel Weber
- Employment Type: Full-time
- Equipment: MacBook Pro
- Access Required: Figma, Jira, Confluence, Miro
Because the request arrives with pre-validated, structured data, Jira Automation can immediately read those values and take action. No human triage required just to figure out what Anna needs.
4. Decide How Follow-Up Forms Enter the Workflow
Onboarding isn’t just one event—it’s a series of steps. Don’t overload new hires with every checklist on their first day. Some forms should be included from the start, while others only show up at certain milestones.
Smart Forms gives you two primary ways to manage form attachment:
Strategy A: Auto-Attach Forms by Work Item Type (Static Checklists)
If a form must always be attached to a specific type of request, set up Auto-Attach in the Smart Forms settings.
For example, whenever an issue with the work item type Employee Onboarding is created, Smart Forms can automatically attach:
- 📋 New Hire Initial Checklist
- 📋 Manager Orientation Checklist
- 📋 HR Completion Audit Checklist
Set this up once in your project and work item type settings. You don’t need extra Jira Automation rules just to attach standard templates.
 Strategy B: Attach Forms via Jira Automation at Workflow Milestones (Dynamic Forms)
Other forms only make sense at specific points in time.
- An Access Verification Form shouldn’t appear until IT marks access as provisioned.
- An Equipment Delivery Confirmation Form shouldn’t exist until the laptop physically arrives.
For these, use the Smart Forms action inside Jira Automation:
WHEN: Work item transitions to Equipment Delivered
THEN: Attach Smart Form Equipment Confirmation Form
WHEN: Start Date is reached
THEN: Attach Smart Form First Day Checklist
This keeps the Jira issue clean and presents forms only when they become actionable.
5. Stop Asking Users to Re-Type Data (Pre-Filling Follow-Up Forms)
Nothing frustrates employees more than being handed a follow-up form that asks for information they already gave you three weeks ago.
When sending a follow-up form—like an Equipment Confirmation—Jira already knows who the employee is, what hardware was ordered, and when they started.
Using the Attach Smart Form with values action in Jira Automation, you can automatically attach a form and pre-fill its fields with live data from the current Jira work item.
When the employee opens the form, they see:
Employee Name: Anna Schmidt (Pre-filled)
Assigned Device: MacBook Pro 16" (Pre-filled)
Serial Number: C02G1234MD6R (Pre-filled from IT)
Did you receive this device? [ Yes / No ]
Is the device functioning properly? [ Yes / No ]
Any missing accessories? [ Text Box ]
It only takes about 10 seconds for the employee to finish. All the context is there, the data stays accurate, and the process feels well thought out.
6. Auto-Share Form Links to the Right People at the Right Time
Attaching a form to a Jira issue is only half the battle. Anna still needs to know the form exists.
Smart Forms automatically generates a unique, shareable URL for every form attached to an issue. Jira Automation can pull this URL using smart values and deliver it directly via email or Slack.
The Smart Value Syntax
To target a specific form attached to an issue by its name, use this smart value structure in your Jira Automation email or notification action:
{{#issue.properties."saasjet.forms.formsSharedUrls"}}
{{#if(equals(formName, "Equipment Confirmation Form"))}}
{{url}}
{{/}}
{{/}} 
Automated Multi-Role Distribution
Because form links are generated dynamically, Jira Automation can route specific forms to specific people throughout the onboarding journey. HR coordinators don’t have to open Jira, copy links, or send emails manually. The system automatically sends the right form to the right person.
7. Deliver Tailored Onboarding Content Automatically
The structured data captured by your initial Smart Form can also drive automated distribution of role-specific and location-specific onboarding materials.
If the form submission records:
- Location = Germany
- Department = Engineering
Jira Automation reads those exact field values and immediately emails Anna:
- The German Benefits & Local Holiday Guide (based on location).
- The Engineering Setup Guide & Security Policy (based on department).
Pro Tip: Don’t use up AI resources or complicated prompts for simple rules. If you just need to send a German HR Pack when Location = Germany, Jira Automation is the better choice. It’s predictable, easy to check, and doesn’t use any AI processing.
8. Time Your Requests: The Lifecycle Sequence
To avoid overwhelming new hires, map your forms across a realistic timeline:
BEFORE START DATE
└── Employee submits Initial Onboarding Form (External Share / Portal)
└── Smart Form creates the central Jira Onboarding Work Item
└── Standard HR & Manager forms are Auto-Attached by Work Item Type
└── Jira Automation sends country/role-specific welcome packs
DAY 1
└── Jira Automation attaches pre-filled 'First Day Checklist'
└── Auto-share URL emailed to employee
POST-HARDWARE DELIVERY
└── Issue transitions to 'Equipment Delivered'
└── Automation attaches 'Equipment Confirmation Form' with values
└── Auto-share URL emailed to employee
DAY 30
└── Automation attaches '30-Day New Hire Feedback Form'
└── Auto-share URL emailed to employee (No manual HR follow-up required!)
9. Give the Routine Onboarding Execution to a Rovo Agent
Once an onboarding request is clearly set up in Jira, Atlassian Rovo can do more than just summarize text. It can actually handle routine setup tasks.
Instead of expecting HR or IT managers to manually break down every incoming request into the same set of sub-tasks, you can assign the newly created onboarding issue directly to a dedicated HR Onboarding Rovo Agent. Rovo agents can collaborate as assigned team members directly on Jira work items, or be invoked programmatically via Jira Automation when specific workflow events occur.
Because the initial Smart Form already validated and mapped all essential details into Jira fields, Rovo doesn't have to guess what needs to happen. It receives a pristine starting point:
- Role: Product Designer
- Department: Product
- Location: Germany
- Start Date: September 7
- Equipment: MacBook Pro
- Access Needed: Figma, Jira, Confluence, Miro
Prompting Rovo for Contextual Execution
With structured data in place, you can give your Rovo agent clear operational instructions:
"Review each new onboarding request assigned to you. Based on the employee’s department, role, location, equipment, and access requirements, create the standard onboarding tasks required for HR, IT, and the hiring manager. Reference our internal HR knowledge base to attach relevant guidance and flag any non-standard requests for manual human review."
For our new hire, Anna, Rovo instantly breaks down the primary ticket into actionable work across teams:
- IT Tasks:
-
- [ ] Provision MacBook Pro 16"
- [ ] Grant Figma seat license
- [ ] Provision Jira & Confluence access
- [ ] Provision Miro account
- HR Tasks:
-
- [ ] Initiate German payroll setup
- [ ] Send local health benefits documentation
- Hiring Manager Tasks:
-
- [ ] Complete First-Week Orientation Checklist
Rovo can also tap into your connected internal knowledge bases (like Confluence policy pages) to pull exact instructions directly into these tasks, strictly respecting the permissions granted to the agent and user.
The End-to-End Workflow
Here is how the entire system seamlessly hands off responsibility across forms, automation, AI, and people:
[ 1. Smart Form Submitted ] │ (Manager submits dynamic New Hire Request)
▼ [ 2. Jira Work Item Created ] │ (Form maps structured responses to Jira fields)
▼ [ 3. Assigned to Rovo Agent ] │ (Agent evaluates structured data)
▼ [ 4. Agent Organizes & Breaks Down Work ] │ (Creates role & location-specific sub-tasks)
▼ [ 5. Smart Forms + Automation Handle Milestones ] │ (IT transitions ticket to 'Equipment Delivered' ➔ Automation │ attaches pre-filled 'Equipment Confirmation Form' ➔ │ Auto-shares URL with new hire)
▼ [ 6. Humans Handle Only Exceptions ] (HR/IT step in solely for non-standard hardware, special approvals, or policy gaps)
▼ [ 2. Jira Work Item Created ] │ (Form maps structured responses to Jira fields)
▼ [ 3. Assigned to Rovo Agent ] │ (Agent evaluates structured data)
▼ [ 4. Agent Organizes & Breaks Down Work ] │ (Creates role & location-specific sub-tasks)
▼ [ 5. Smart Forms + Automation Handle Milestones ] │ (IT transitions ticket to 'Equipment Delivered' ➔ Automation │ attaches pre-filled 'Equipment Confirmation Form' ➔ │ Auto-shares URL with new hire)
▼ [ 6. Humans Handle Only Exceptions ] (HR/IT step in solely for non-standard hardware, special approvals, or policy gaps)
Maintaining a Clear Division of Labor
To keep your workflows predictable and cost-effective, maintain a clear boundary between rules, AI, and human judgment:
- Smart Forms: Collects and structures decisions upfront without field schema sprawl and automate form attachment and delivery workflow.
- Jira Automation: Executes fixed, deterministic rules where the outcome should never change (e.g., If Location = Germany ➔ Attach German HR pack; If Status = Equipment Delivered ➔ Attach Equipment Confirmation Form with values and email auto-share URL).
- Rovo Agent: Performs repeatable, knowledge-based Jira work that requires interpreting combinations of structured data (e.g., building a tailored task list based on role + location + access level).
- People: Focus exclusively on approvals, edge cases, and personal human connections.
Keeping these roles clear stops you from over-complicating automation for tricky cases and saves AI resources on simple rules. Rovo organizes the context, Smart Forms collect the data, and your team gets back hours of admin time each week.
Summary: The Complete Ecosystem in Action
[ JSM Help Center / Rovo Chat ] ──(Identifies need)──> [ Smart Form Intake ]
│
(Creates Work Item)
│
▼
[ Jira Automation Engine ] ◄──(Pulls Form URLs)── [ Structured Jira Ticket ]
│ │ │
(Sends emails / (Attaches next │
routes packs) form with values) ▼
│ │ [ Rovo HR Ops Agent ]
▼ ▼ (Summarizes, flags
[ Employees / Managers / IT ] anomalies, drafts plans)
By shifting your mindset from “answering questions” to “executing end-to-end workflows,” you transform your help center from a passive digital filing cabinet into an active operational engine:
- Rovo guides the employee to the right starting point in the JSM Help Centre or you can skip this part, avoid JSM forms and go with Smart forms, because they can be embeded and shared with anyone without login or creating accounts.
- Smart Forms captures structured, validated data up front—using dynamic logic to show only the relevant fields, without cluttering your Jira field schema.
- Auto-Attach handles standard checklists automatically on issue creation.
- Jira Automation dynamically attaches specialised forms at specific workflow milestones.
- Attach with Values pre-fills follow-up forms so users never re-type existing data.
- Auto-Share Smart Values deliver direct form URLs via email or Slack to the right person at the right time.
- Rovo reviews the structured Jira work item to summarise tasks, draft agendas, and flag edge cases. Employees enjoy a quick, smooth onboarding. HR and IT receive organised, automated Jira tickets. Your Atlassian tools all work together as one smart, unified, intelligent machine.
Was this helpful?
Thanks!

Olha Yevdokymova_SaaSJet
Atlassian Partner
TAGS
Atlassian Community Events
Copyright © 2026 Atlassian
0 comments