There often arises a need to export Jira issues for various purposes like reporting, analysis, or backup. This article explores the different methods to export Jira issues to Excel and CSV formats natively, and using Jira plugins.
Exporting Jira Issues to Excel
Exporting issues to Excel is straightforward in Jira. Here’s how you can do it:
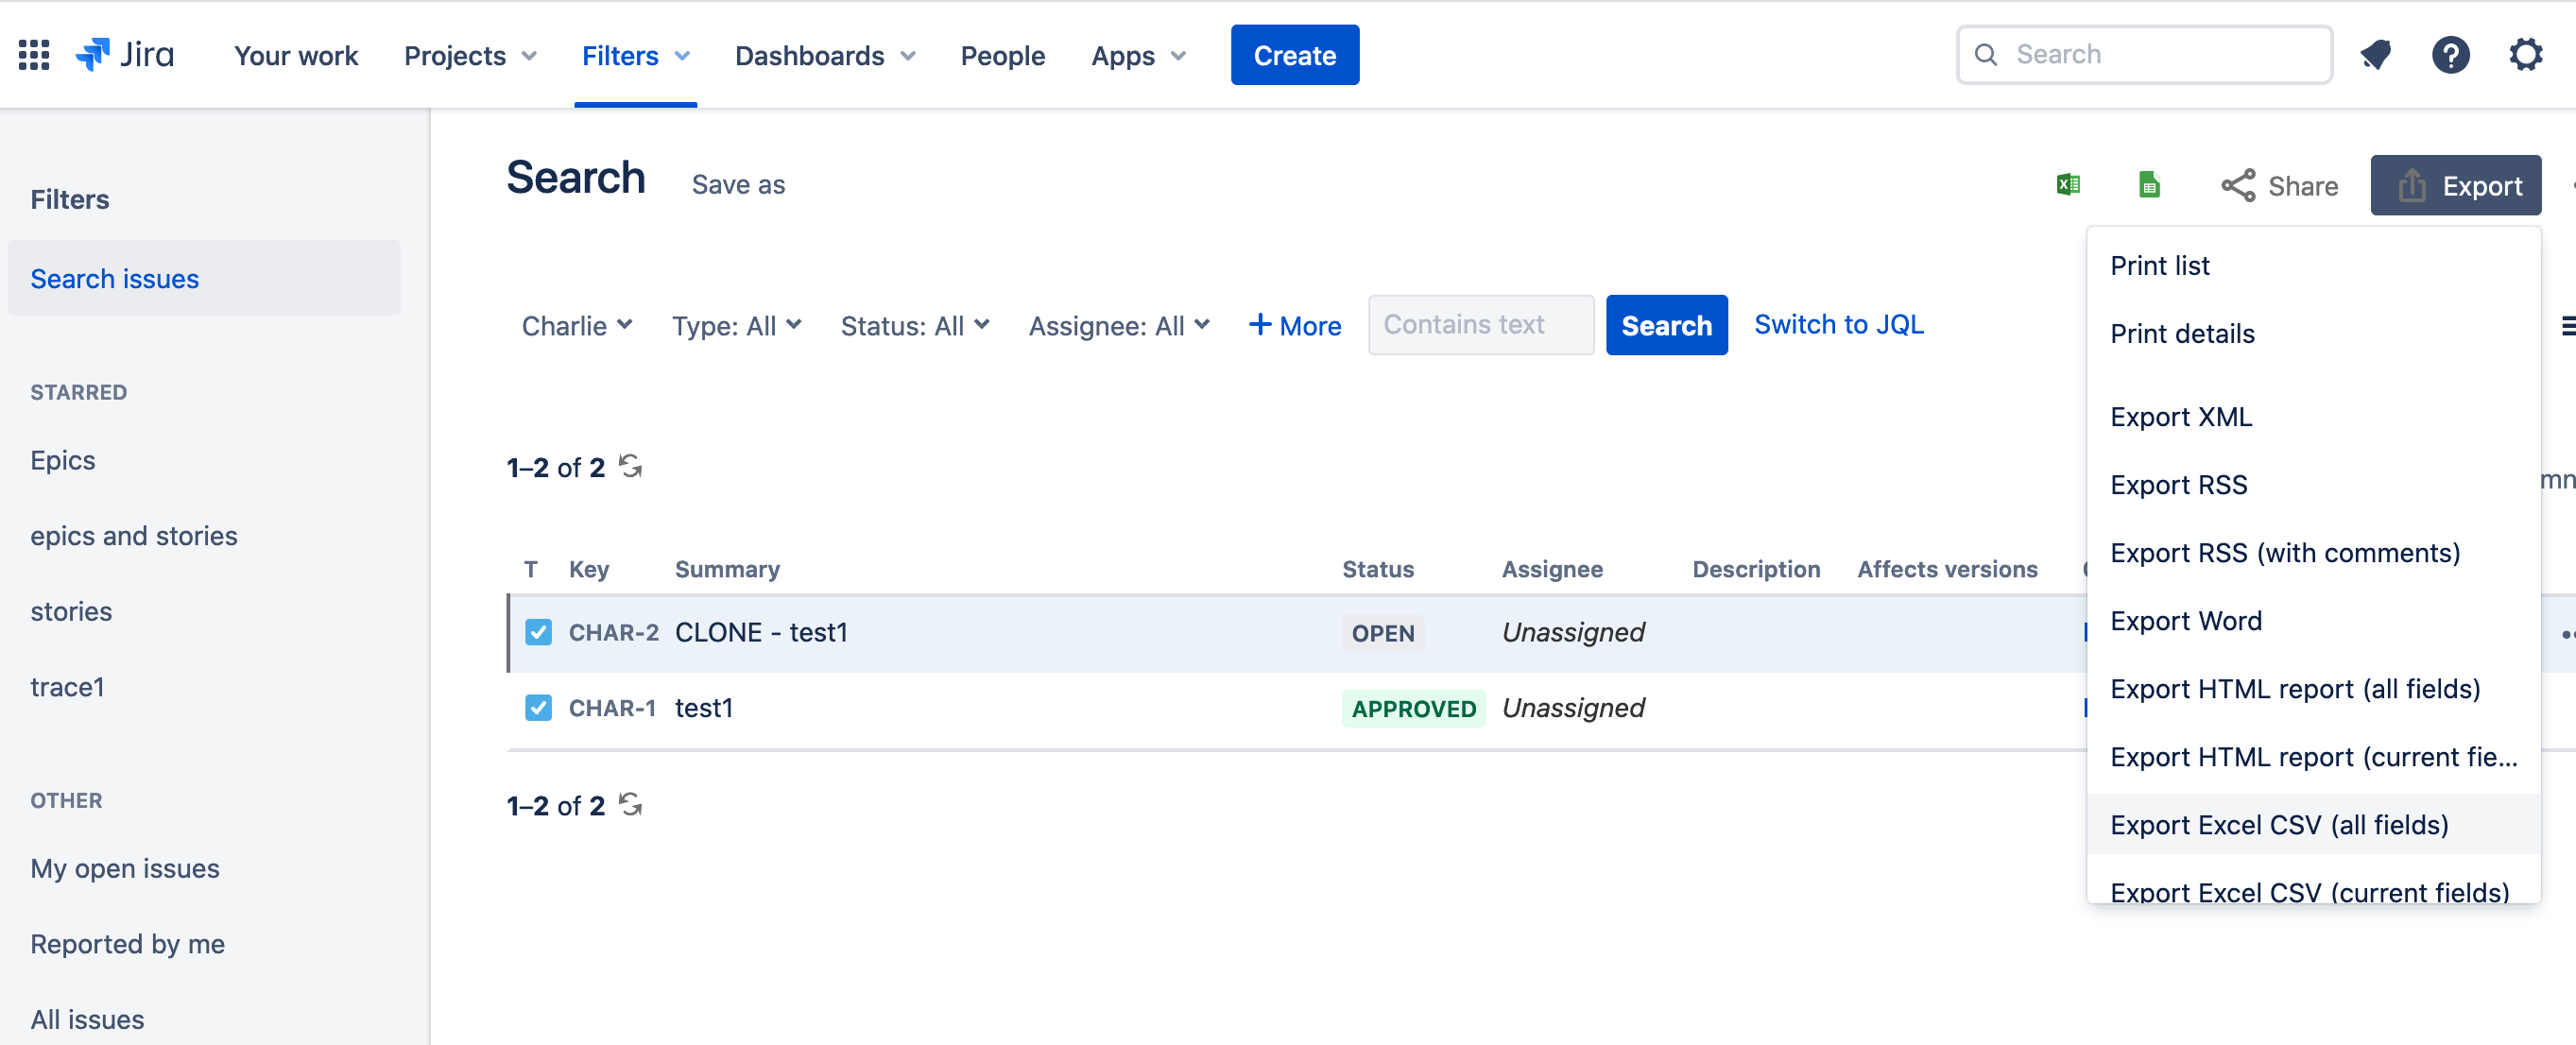
- 1. Navigate to Issue Search: Access the issue search feature in Jira to locate the issues you want to export.
- 2. Apply Filters: Use Jira’s robust filtering options to refine the issues list based on your requirements.
- 3. Export to Excel: Click on the 'Export' button and select the 'Excel' format. Jira will generate an Excel file with the issues data.
- 4. Excel Data Management: Once exported, you can use Excel’s functionalities to format and analyze the data, making it suitable for presentations or further analysis.
Exporting Jira Issues to CSV
For more flexibility, especially when integrating with other software, exporting to CSV is ideal. The initial steps are similar to exporting to Excel. After filtering your issues, select the 'CSV' format in the export options.
Using Planyway for Enhanced Export Capabilities
Planyway is a powerful add-on for Jira that broadens the horizons of project management with advanced roadmaps, workload management, calendar planning and time tracking. So, if you’re looking for a way to enhance project management capabilities, Planyway is perfect for that. And once you decide to export the data both crated in Jira and in Planyway, it can be easily done by clicking Export button on any of the chosen views.