Our Cost Tracker for Jira Cloud add-on works in symbiosis with time-tracking applications.
Simply put, the user registers the time spent on a task, and then it's Cost Tracker's job to manage it. You can generate reports based on workflows, calculate labor costs, and more.
There are many time-tracking applications. The main ones are as follows:
- Built-in functionality from Jira. Easy to use, but not very flexible. All you need to keep track of time is to enter it in the required field.
- Timesheets by Tempo - Jira Time Tracking. Probably the most popular app. Huge functionality and, accordingly, it is not very budget-friendly (compared to other players).
- Clockwork. Interesting functionality with its peculiarities. There are paid and free versions.
We'll talk about the detailed features of these apps later. Let's focus on how Cost Tracker works with Timesheets by Tempo.

Cost Tracker: Getting Tempo worklogs
What are the peculiarities and complexity of Tempo worklogs? Most time-tracking apps store time logs in Jira, and it's not a problem for other add-ons that use them to "get" worklogs and operate on them.
Tempo time logs are stored specifically in their space and are unavailable for apps not part of their conglomerate. That is, if you use Tempo Timesheets, then they expect you to use their cost-tracking tool.
Having understood this situation, our team implemented the ability to read and calculate Tempo work logs in the Cost Tracker for Jira Cloud.
Configure this functionality
Ensure you have Tempo Team Administrator or Manage Team permissions for the respective team (Team Leads have this permission by default for their team).
Step 1: Adding Permission Roles
- Select Settings in the Tempo sidebar.
- Select Permission Roles in the Data Access section.
- Click + Add permission role at the upper-right.
- Enter a name for this permission role, and select the permission View Worklogs.
- Click + Add users in the Role users row, then select the users you permit to create a token with permission to view worklogs.
- Select the value Full in the Role access row.
When you're done, click Save to save the permission role.
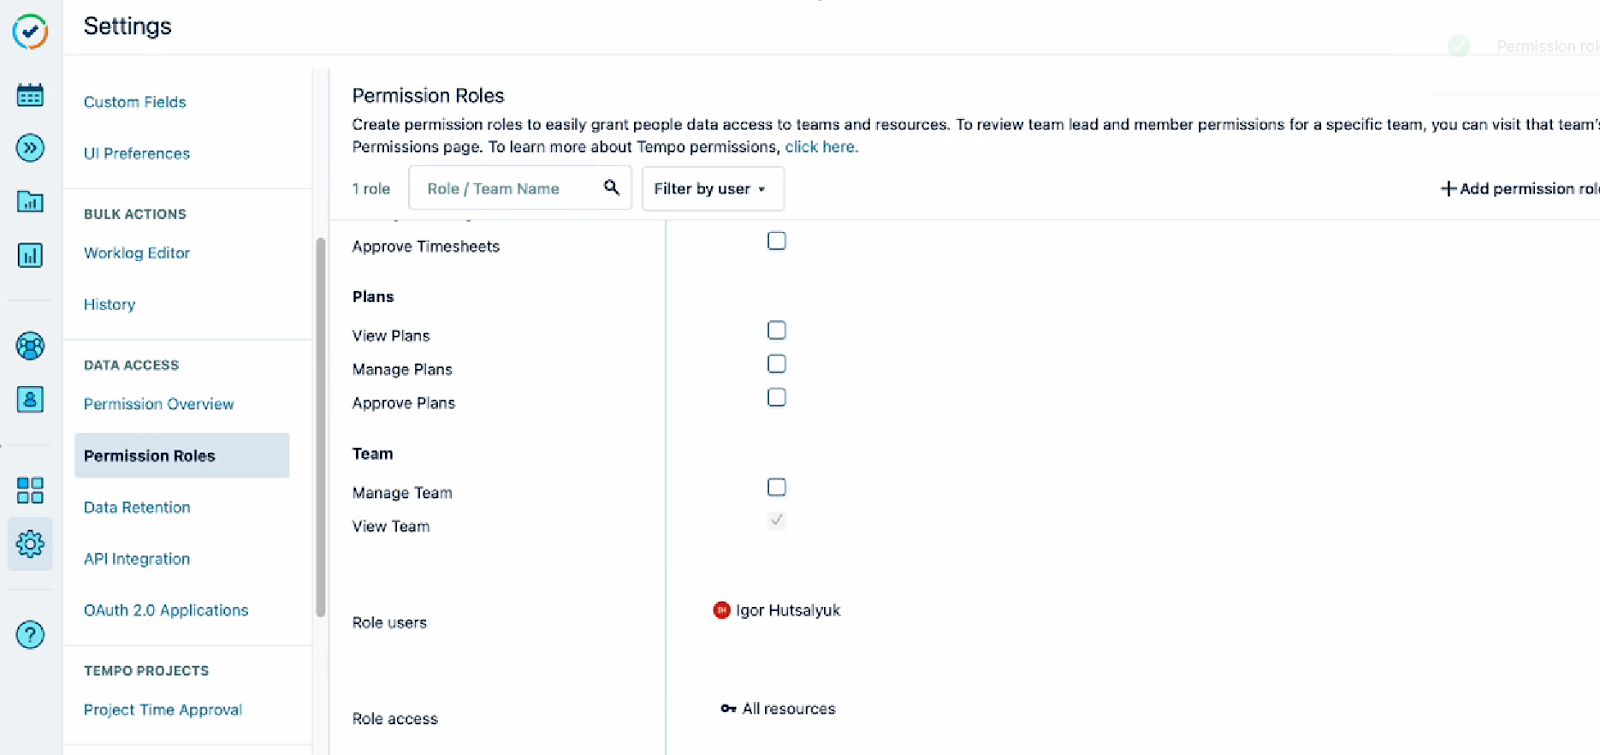
Step 2: Getting Tempo Token (only for users who were added in Step 1)
- Select Settings in the Tempo sidebar.
- Select API Integration in the Data Access section.
- Click + New Token at the upper-right.
- Enter a name for this new token, and select a value in the Expiration (recommended 5000 days).
- Select Custom Access and select View worklogs in the Worklogs scope section.
- Click Confirm, and copy the Token.
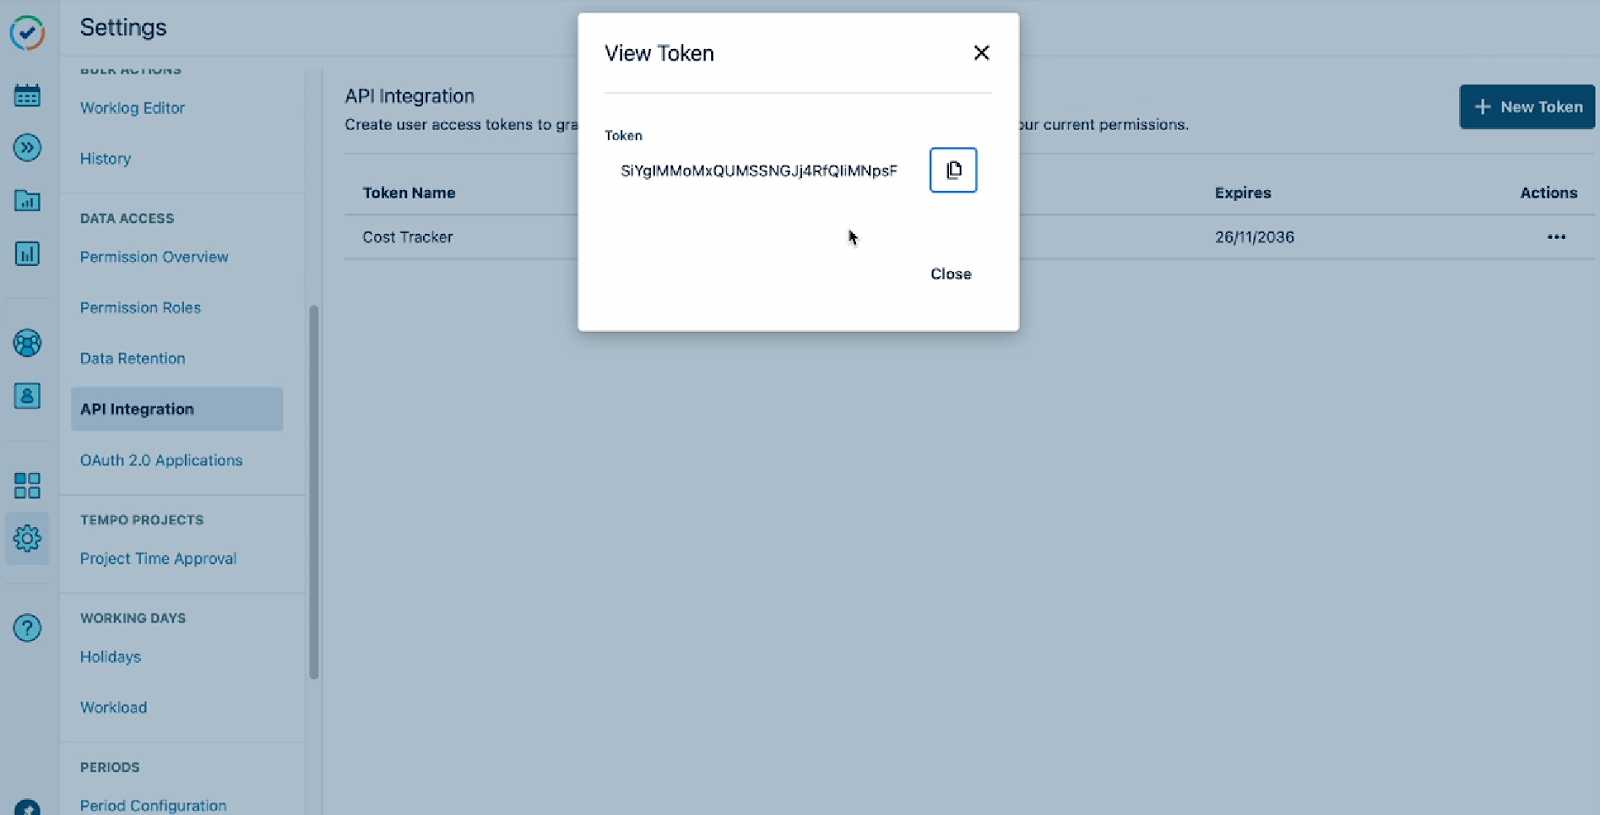
Step 3: Applying Tempo Token in Cost Tracker
- Select Menu add-ons at the upper-right and click Manage Tempo token.
- Paste the token in the field Tempo token.
- Click Confirm to save this token.
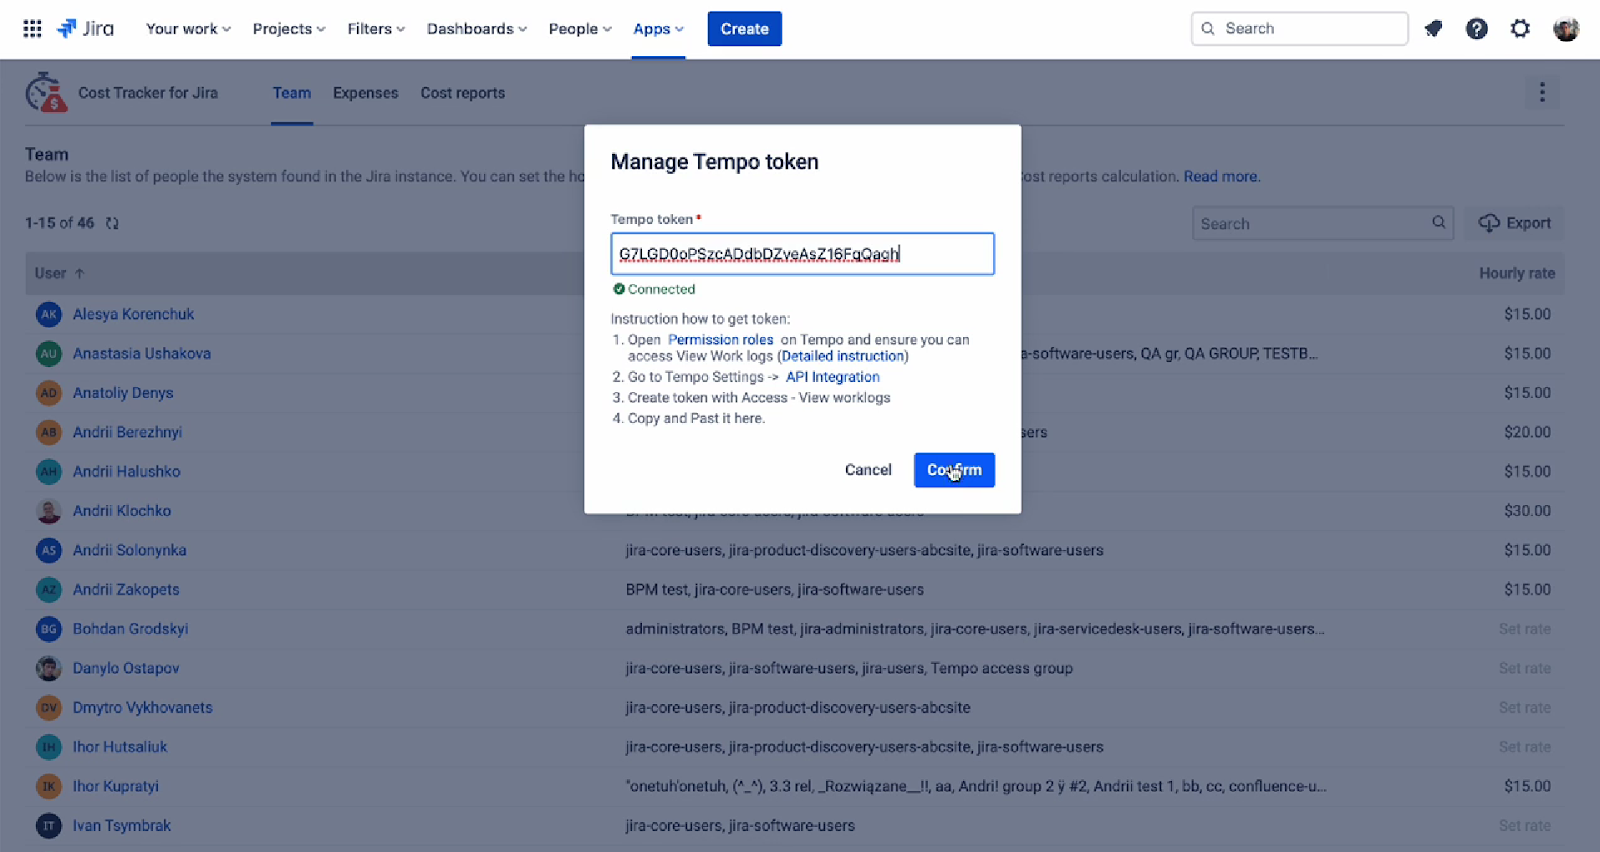
Cost Tracker: Generating reports based on Tempo worklogs
Now, after completing the steps, you only need to select the appropriate settings when creating a cost report:
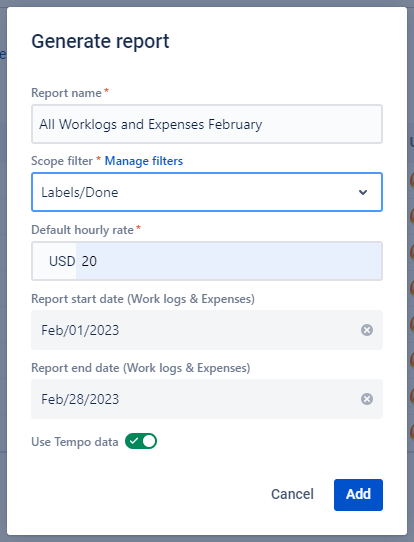
And you get a report based on the users' Tempo worklogs :
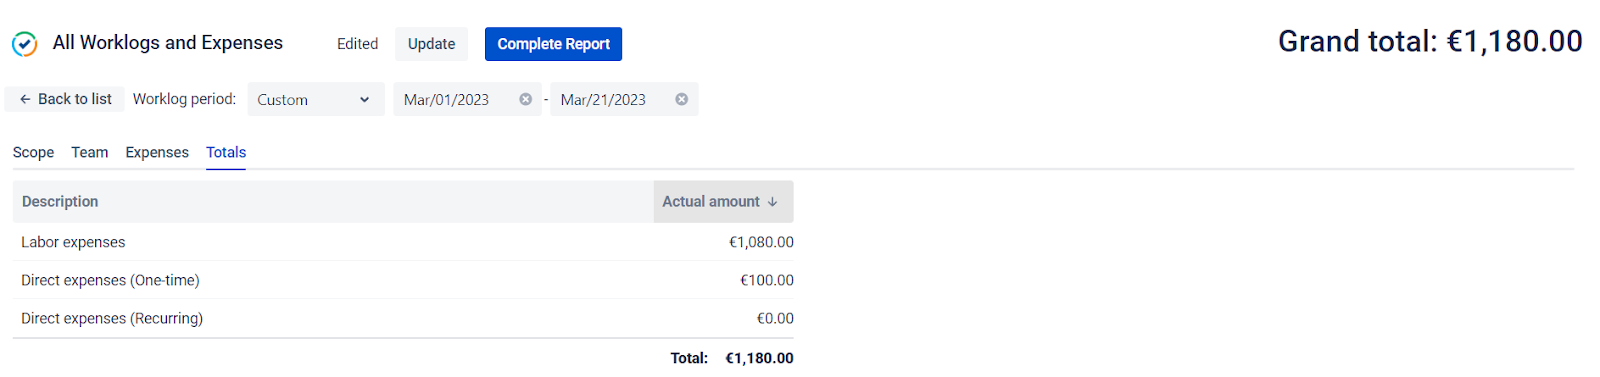
As you can see, everything is quite simple and straightforward.
Takeaway
You are completely free to choose your applications. We are presenting something new in the Cost Tracker app from SaaSJet only. You can enjoy a trial period of 30 days. Test it, organize your costs, and ensure this addon is useful.
We remind you that the application is free for teams of up to 10 users.
