In this article, I'd like to show you how you can change where the data of your Atlassian Cloud instance is hosted.
Please note that this is possible for all new paid Cloud plans today and will be enabled for existing Cloud instances until October 2021 (see @RJ Gazarek's post for more details).
What to do before you move your data?
I'd recommend that you read through Atlassian's docs to understand what data can be pinned to a certain location. I'm intentionally not listing them here (to not have an outdated list in this post).
Please note that moving one of your Jira products will automatically move the other Jira products with the same base url as well since they're technically on the same instance.
For the move, you need to define a 24 hour move window. Atlassian will perform the migration in this timeframe. Please be aware that potentially in the whole move window, your instance won't be accessible.
How do you change it?
Please note that you need to be an organization admin in order to make these changes.
- Go to your Jira or Confluence instance
- Open the top left menu and select Administration
- In the top navigation menu, select Security
- On the left hand menu, select Data Residency
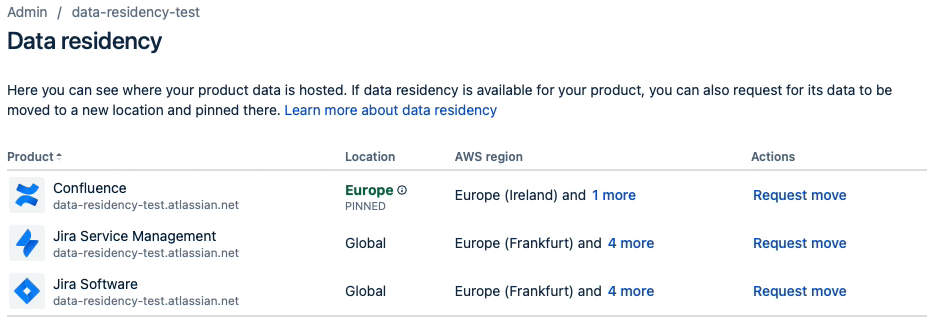
- On this page, you can see the currently configured location for each of your products.
- Click on Request Move for the product you want to change the location for.
- Select the new location for your data and move to the next screen.
- Enter the start time of your move window and move to the next screen.
- In the last step, review your selections and confirm your move request by submitting it.
- You'll get a success message that your move has been scheduled which will also be reflected in the table.
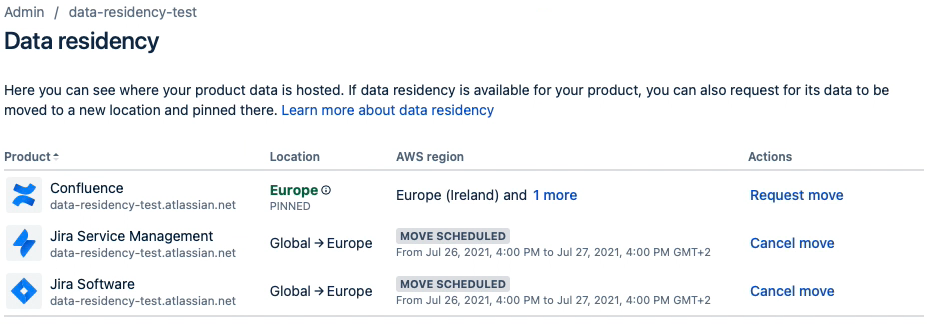
- Now you simply need to wait until your move window has passed.
- After your data has been moved, you'll see that it's pinned to a location (as the Confluence instance in my screenshot.
To see these steps in action, check out this visual guide:
 https://www.youtube.com/watch?v=v448qsAvmtg


