Community resources
Community resources
Community resources
Best Practices for Managing Workflow in Jira
Teams work differently. Some are large, others small. Some work in offices, others remotely. Software development teams follow agile sprints, while operations teams focus on daily task tracking.
No two teams manage work the same way, which is why a one-size-fits-all approach to project management rarely works.
Jira workflows let teams build processes that match their unique work style—whether it’s a simple to-do, in-progress, done setup, or a complex workflow with multiple approvals and handoffs.
This article explains how Jira workflows work, why configuring a custom workflow can improve your team’s efficiency, and how to create workflows that fit your project lifecycle. You’ll also learn how tools like checklists in Jira streamline work and help team members stay on track.
What is a Jira Workflow?
A Jira workflow is a visual representation of how work progresses through different stages in your project.

Each Jira issue, whether it’s a task, bug, or story, moves through statuses like to do, in progress, and done. These statuses reflect the lifecycle of a task from start to completion.
Workflows define the steps issues follow, including transitions between statuses. They help development teams, stakeholders, and assignees understand where tasks stand and what needs attention.
Key Components of a Jira Workflow:
-
Statuses: Represent the state of a Jira issue (e.g., to do, in progress, done).
-
Transitions: Define how an issue moves between statuses.
-
Post Functions: Automate actions like assigning an issue or updating fields after status changes.
-
Validators: Set rules that must be met before a transition can occur.
-
Workflow Properties: Configure additional rules like restricting who can transition issues.
Types of Workflows in Jira:
-
Default Workflows: Simple workflows that work for basic task tracking.
-
Custom Workflows: Configured by a Jira administrator to match your team’s process.
-
Workflow Schemes: Connect workflows to specific issue types or Jira projects.
Team-managed vs. Company-managed Projects:
-
Team-managed Projects: Project admins can create and configure workflows. Each project has its own workflow.
-
Company-managed Projects: Jira administrators control workflows. Workflows can be shared across multiple projects.
Jira Service Management Note:
-
Team-managed projects: Each request type can have its own workflow.
-
Company-managed projects: Workflows apply to all request types within a project.
Templates and Automation:
Atlassian provides project templates for different teams like DevOps, Jira Service Management, and software development. These templates come with predefined workflows.
Automation rules can be added to speed up transitions, assign team members, or prevent issues from moving forward without completing certain subtasks.
Why Do Custom Jira Workflows Matter?
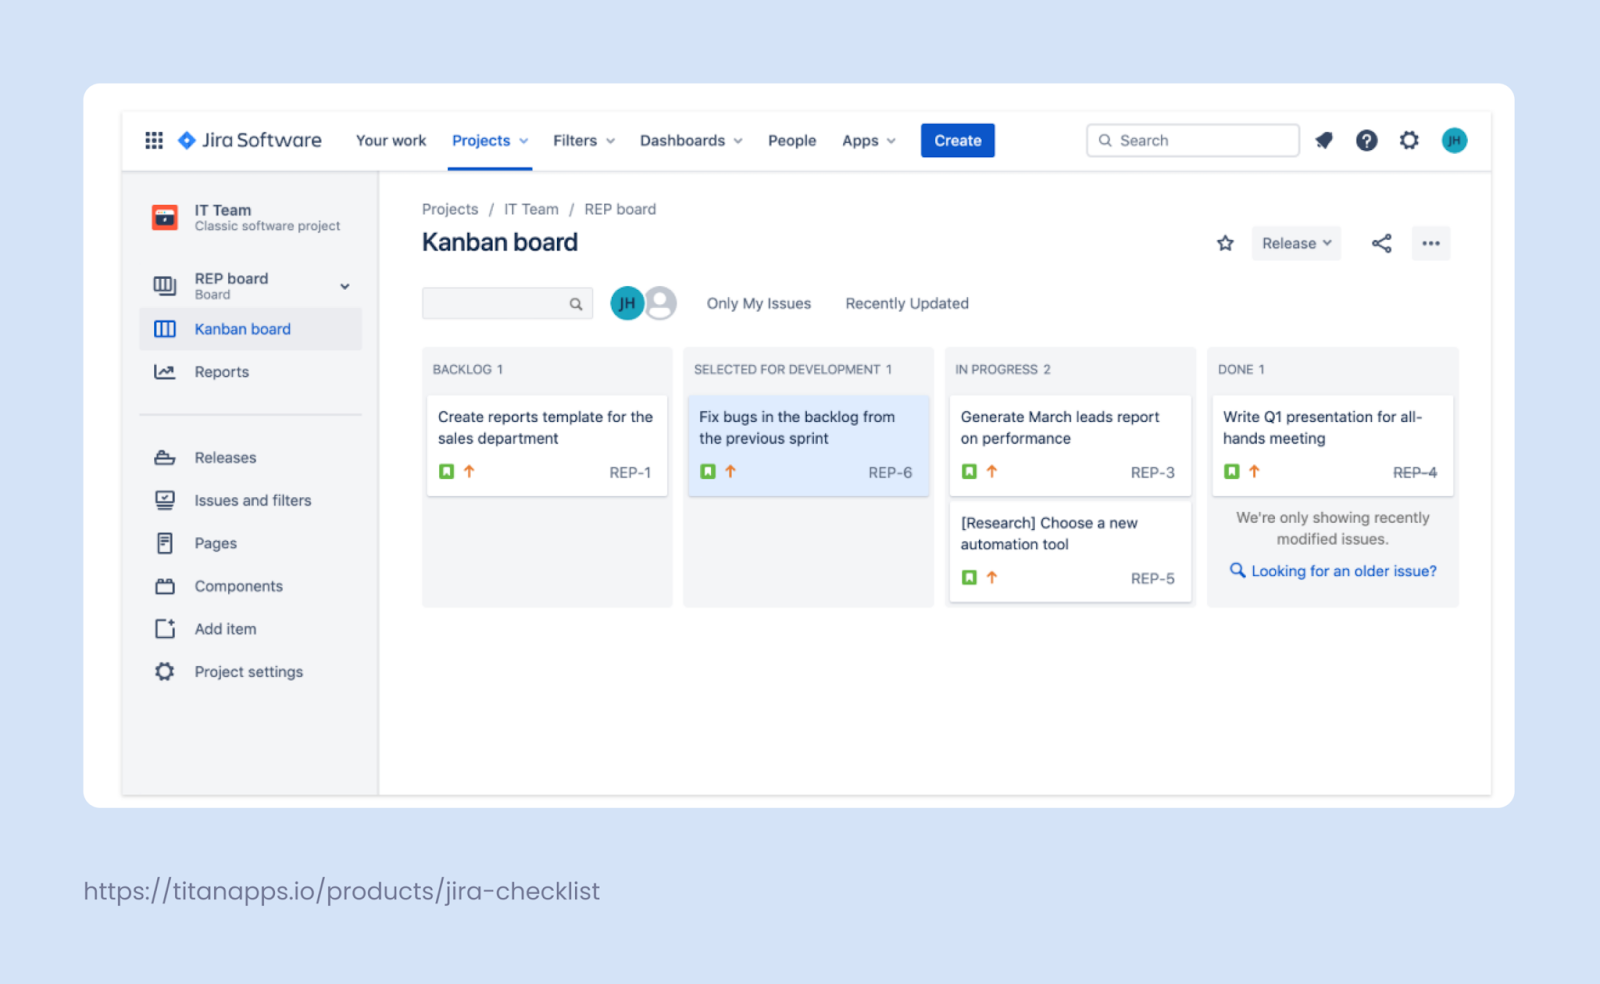
A custom workflow in Jira helps teams map their unique processes onto a Kanban board or Scrum sprint.

Instead of squeezing work into default workflows like to do, in progress, and done, teams can create workflows that match the actual lifecycle of their tasks.
Custom workflows improve sprint planning, task progress tracking, and communication with stakeholders. They also help teams align work across departments, from software development to customer support.
Why Default Workflows Fall Short
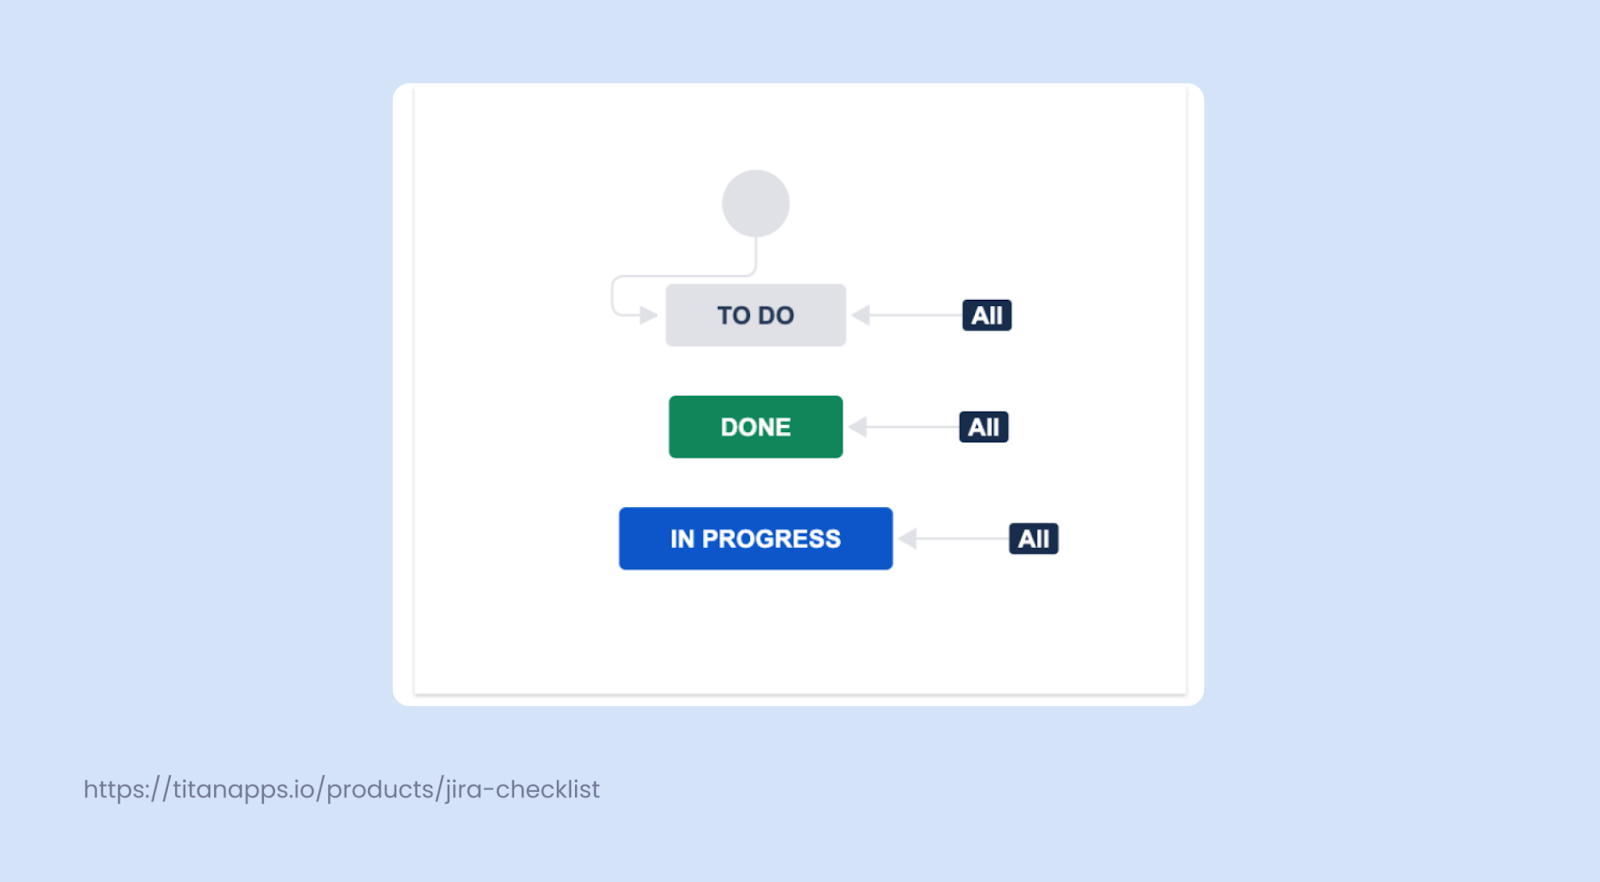
Jira provides default workflows like Jira Core for project management, with simple statuses like:
-
To Do
-
In Progress
-
Done
These work fine for small projects.
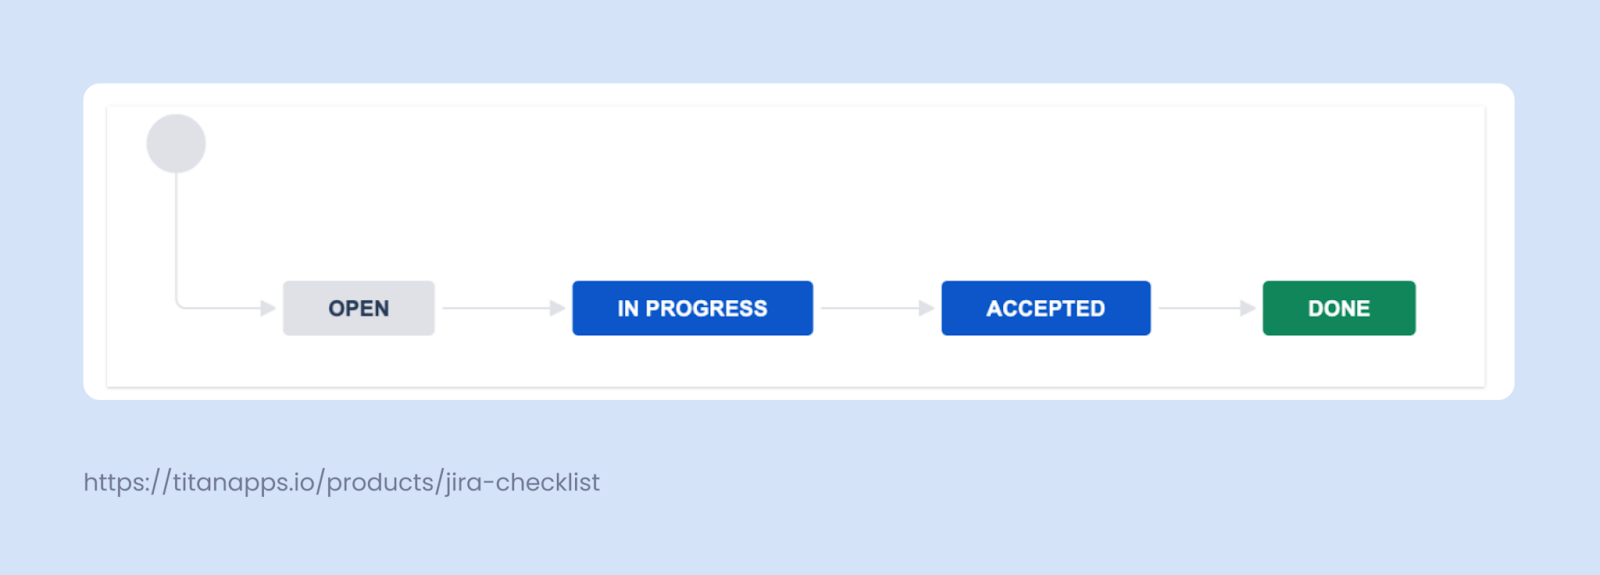
In reality, most teams need more detail:
-
Tasks require review, testing, or approval.
-
Some work needs to be put on hold.
-
Different teams follow different processes.
A software development team may need statuses like "In Review" and "Ready for Testing".
A sales team might need "Approved" and "On hold".
A support team may use "Accepted" and "Resolved".
One workflow will not work for every team. Configuring workflows to match the needs of different issue types across teams is key to keeping projects organized.
What Are the Key Components of a Jira Workflow?
A Jira workflow consists of four core elements:
1. Statuses
Statuses represent where an issue stands:
-
To Do, In Progress, Done
-
Reviewed, Blocked, Accepted

Each issue can only have one status at a time. Statuses should reflect how your team works.
For example, the “In Negotiation” (if we’re talking about leads) status will make perfect sense for a sales team workflow, but it wouldn’t be of much use for the QA team members.
2. Assignees
Assignees are the team members responsible for an issue.
Ownership can change across statuses:
-
A developer may be the assignee during "In Progress".
-
A QA engineer takes over when it is "Ready for Testing".
-
A team lead might handle "Approval".
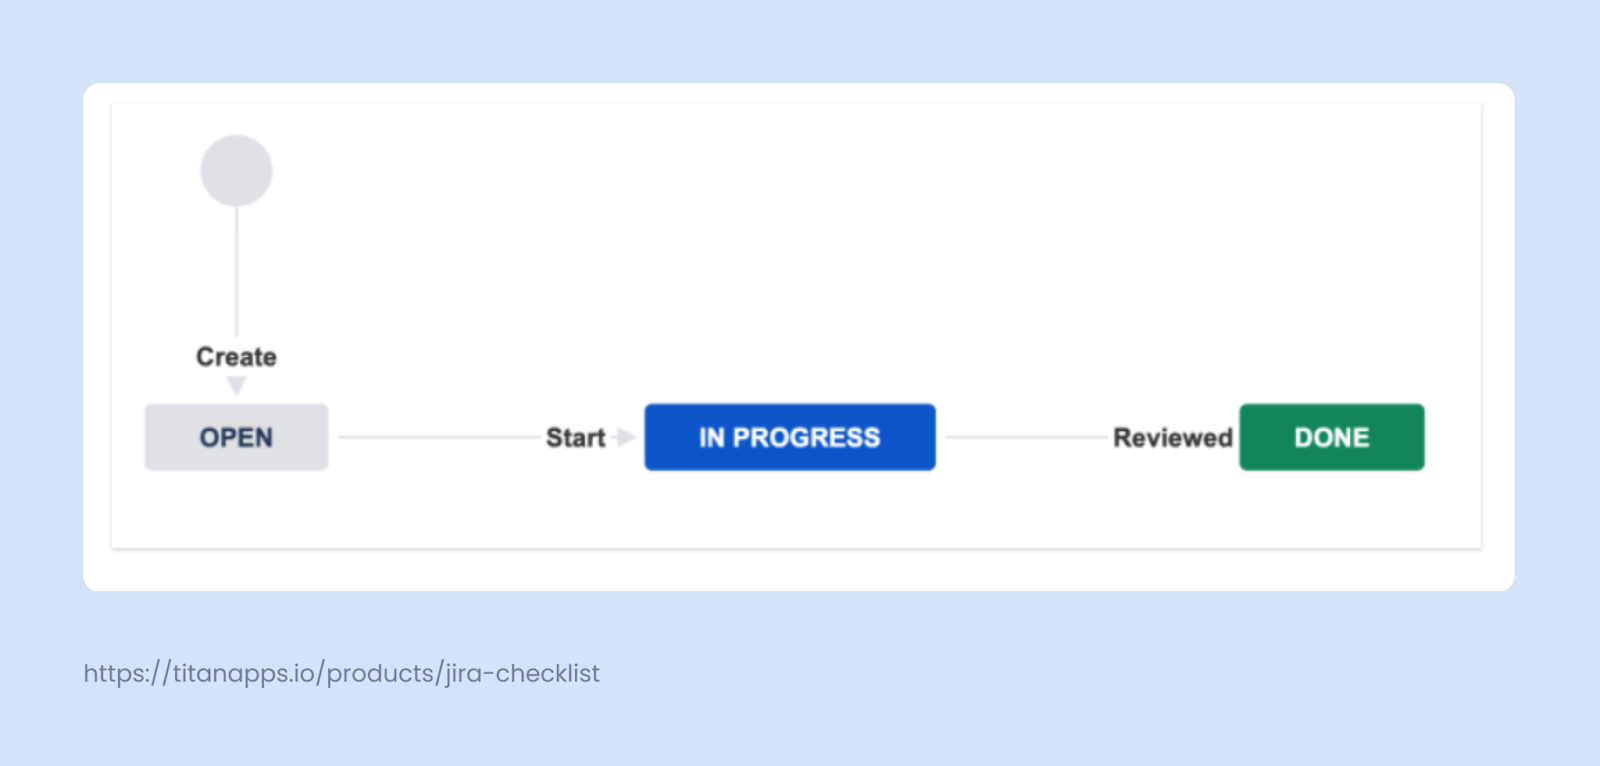
3. Transitions
Transitions are the paths between statuses:
-
Move an issue from In Progress to Code Review.
-
Shift from Waiting for Approval to Approved.
Transitions can be customized:
-
Add validators to ensure certain conditions are met before a status change.
-
Use post functions to automatically assign issues or update fields after transitions.
4. Resolutions
Resolutions explain why an issue is closed:
-
Done, Fixed, Won’t Fix, Duplicate
Setting a resolution marks an issue as complete.
Avoid creating an Unresolved resolution. Jira treats empty resolution fields as Unresolved by default. Creating this status can mislead team members into thinking issues are closed. As a Jira Admin, you can prevent users from transitioning issues, either all of them or chosen ones.
How to Create a Jira Workflow
Setting up a custom Jira workflow helps teams build a process that matches their work style. Here’s a step-by-step guide to creating workflows in Jira.
1. Add Statuses
Create workflow statuses representing each stage of your task lifecycle. Examples: "To Do," "In Progress," "Code Review," "Done."
2. Define Transitions
Set up transitions to connect statuses. Each transition moves an issue from one status to another. For example, from "In Progress" to "Code Review."
3. Set Workflow Conditions
Control who can move tasks between statuses. Conditions limit transitions based on user roles, issue types, or custom criteria.
4. Add Validators
Ensure tasks meet requirements before changing status. Validators check fields like Assignee, Attachments, or Estimates before an issue progresses.
5. Configure Post Functions
Automate actions during transitions. Examples:
-
Assign the issue to a team member.
-
Update fields like Resolution.
-
Notify stakeholders.
6. Use Triggers for Automation
Automate status updates based on external events. For instance:
-
Move an issue to "Done" when a pull request is merged in GitHub.
7. Apply Workflow Properties
Fine-tune workflow behavior with properties. You can:
-
Restrict who can edit an issue in a specific status.
-
Hide certain transitions from users.
8. Create a Workflow Scheme
Assign your new workflow to a project. Map the workflow to relevant issue types like Tasks, Bugs, or Epics.
9. Publish Your Workflow
Activate your workflow for your Jira project. Test the workflow in a small project before rolling it out company-wide.
Enrich Your Workflow with Smart Checklists
Workflows in Jira often involve tasks that require multiple steps.
Tracking each of these steps within a single issue can get messy.
Smart Checklist for Jira helps teams break work into smaller actions and check them off as they go.
This keeps tasks clear and prevents anything from slipping through.
How to Use Smart Checklist in Jira
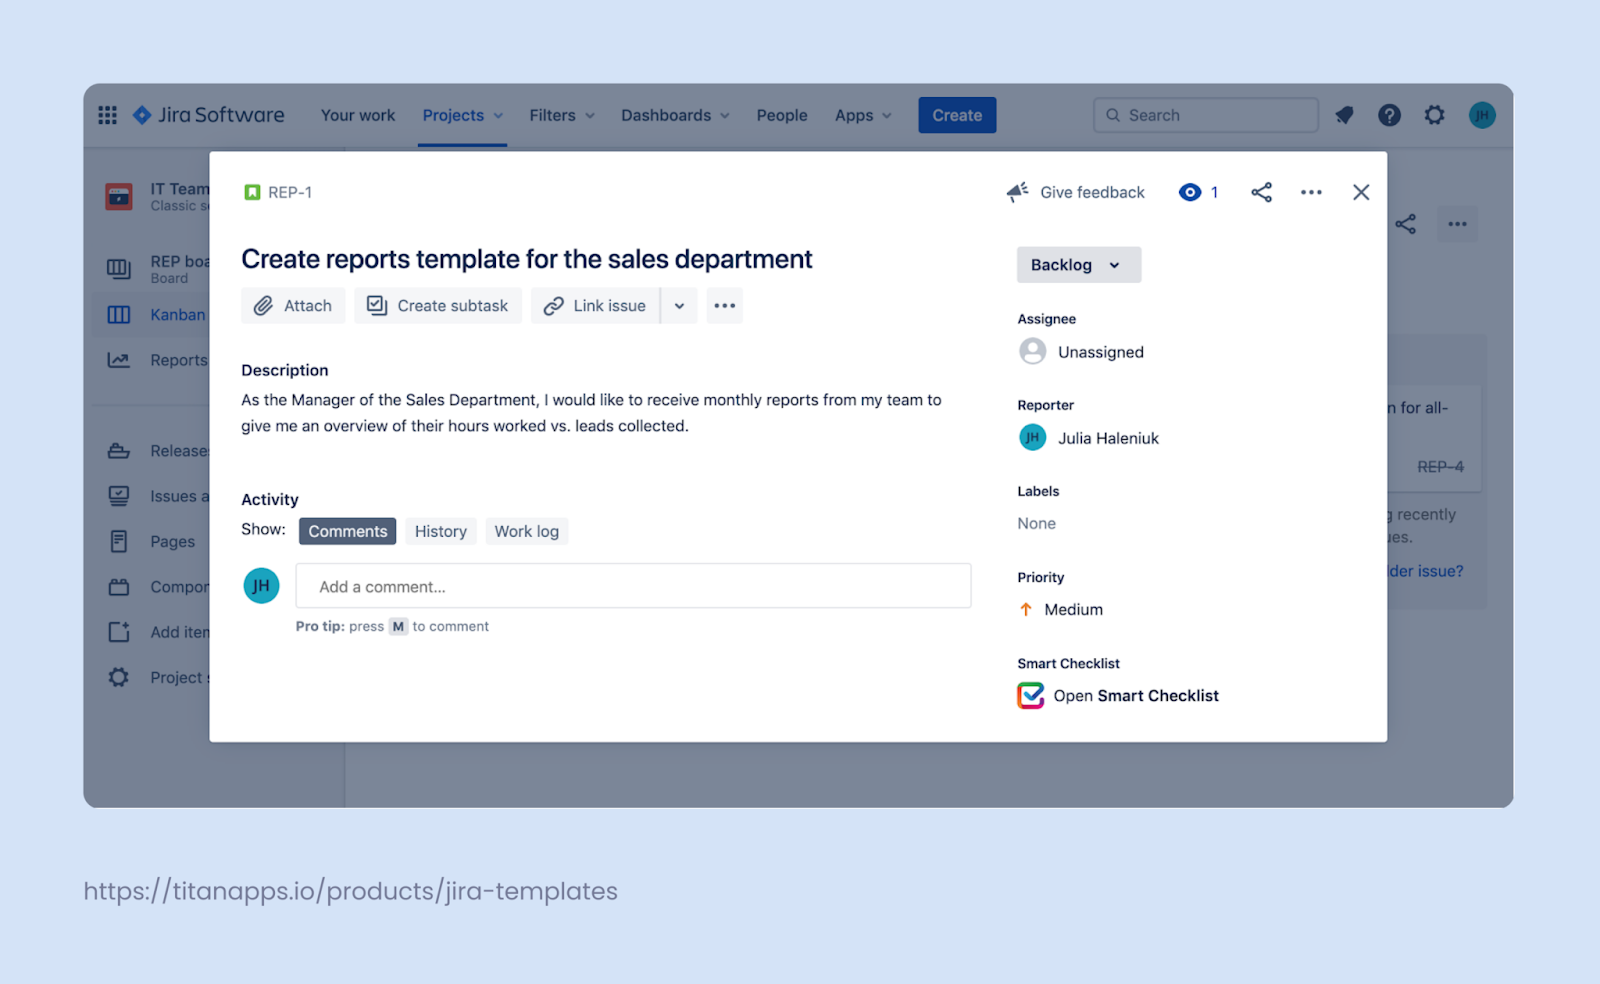
Once the app is installed, Smart Checklist is added to every Jira issue.
You will find it at the bottom of the right-hand panel inside the issue view.
If you prefer, you can move it to the center panel for easier access.
Click Open Smart Checklist to get started.
Add Checklist Items
There are two ways to fill out your checklist:
-
Add items one by one using the input field.
-
Click the pen icon to open the Fullscreen Editor and enter all steps at once.
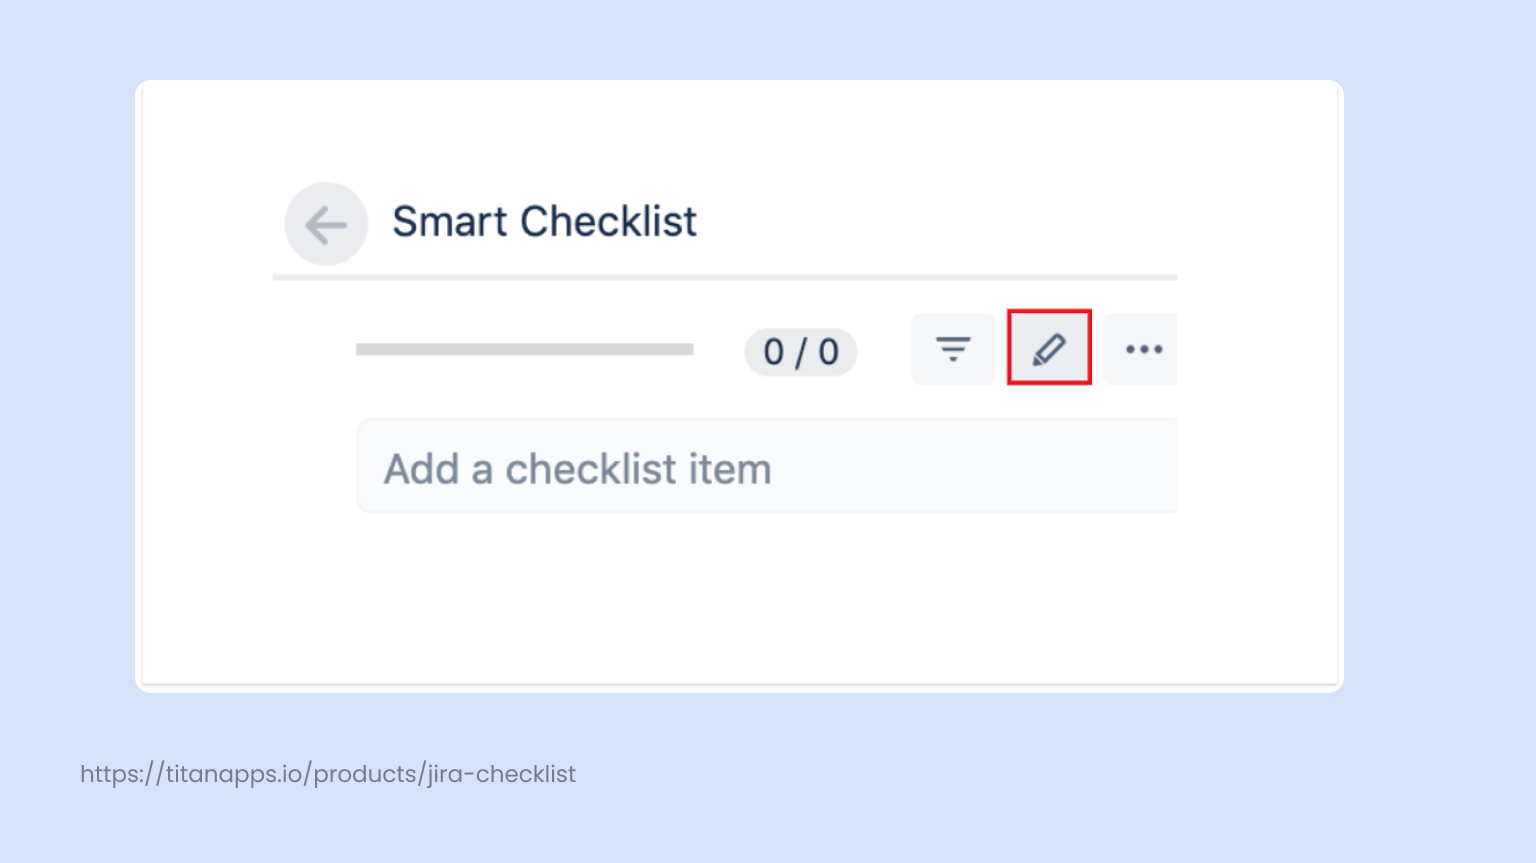
The Fullscreen Editor is especially helpful when you need to list many steps or format your checklist.
Customize Checklist with Statuses and Formatting
Smart Checklist lets you mark each item with a status.
This helps teams track which steps are pending, in progress, or done.
You can format checklist items using Markdown:
-
- for To Do (default status).
-
+ for Done.
-
~ for In Progress.
-
x for Canceled.
Example:
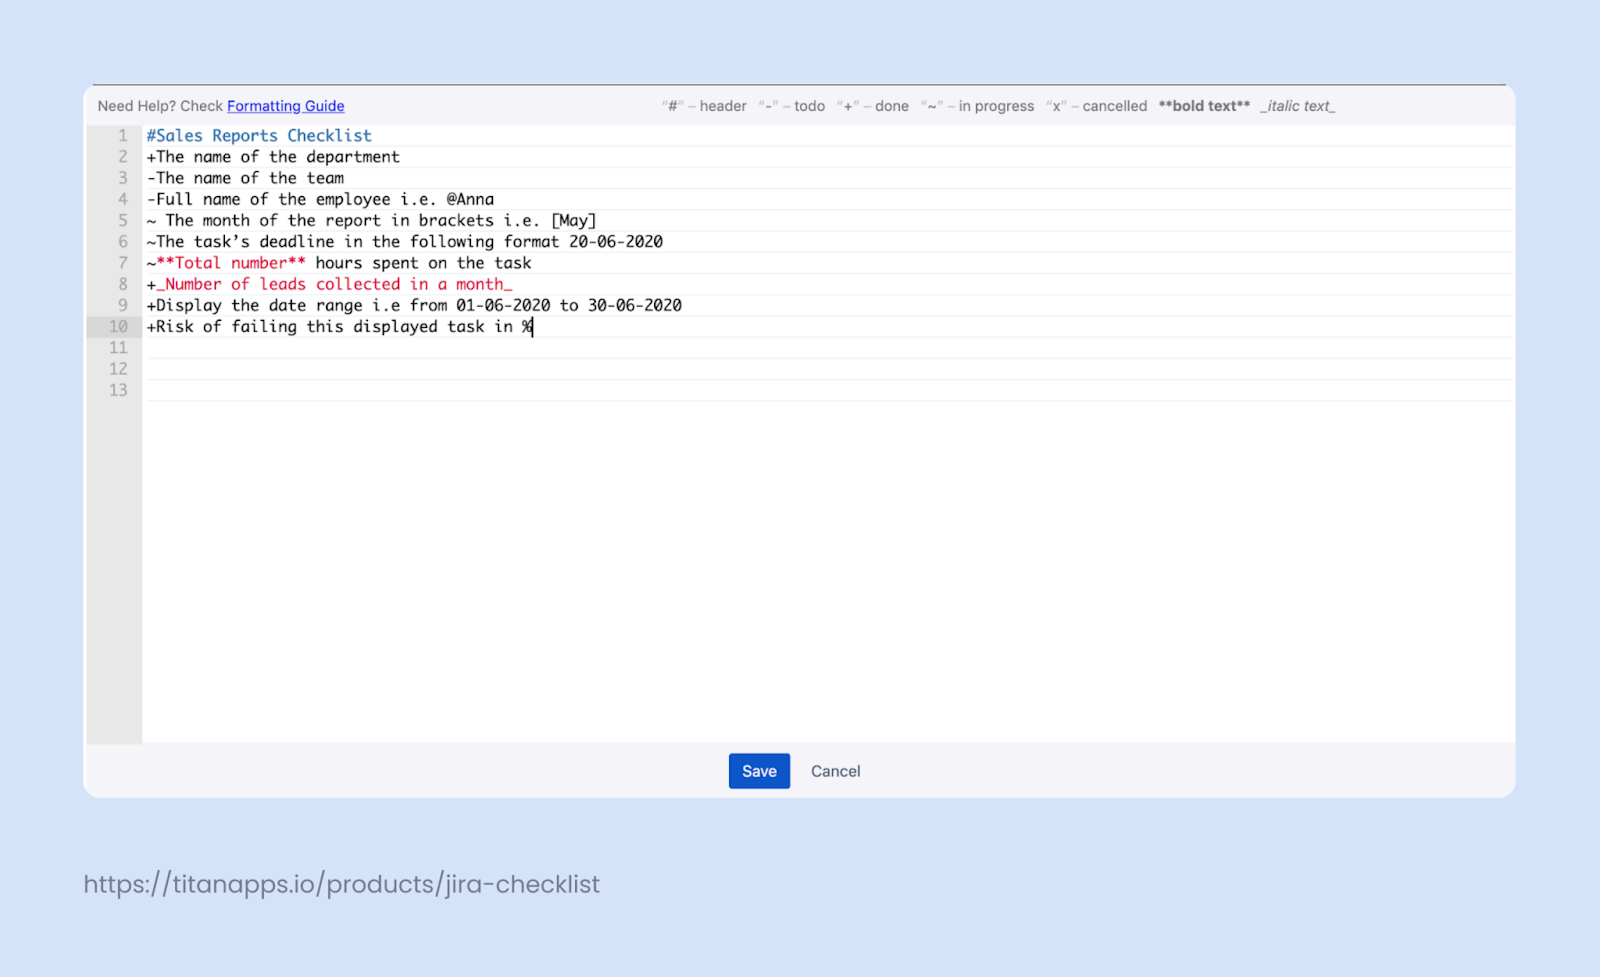
Tip: Make sure there is no space between the symbol and the text.
For example, - Task description works, but - Task description will not.
Mention Team Members and Add Dates
Checklists are often shared among team members.
You can mention colleagues in checklist items using @username.
This adds clarity, showing exactly who is responsible for a step.
Note that this does not trigger a notification—it is for reference only.
Dates can also be highlighted within the checklist.
Smart Checklist and Workflow Transitions
For Jira Data Center users, Smart Checklist integrates directly with workflows.
Checklist items can be updated automatically during status transitions.
Example:
-
Mark checklist items as done when moving the issue to Done.
-
Reset a checklist when the issue is reopened.
This automation reduces manual work and keeps checklists aligned with the issue status.
Save and Track Progress
Once your checklist is ready, click Save.
You will see the checklist embedded in the Jira issue.
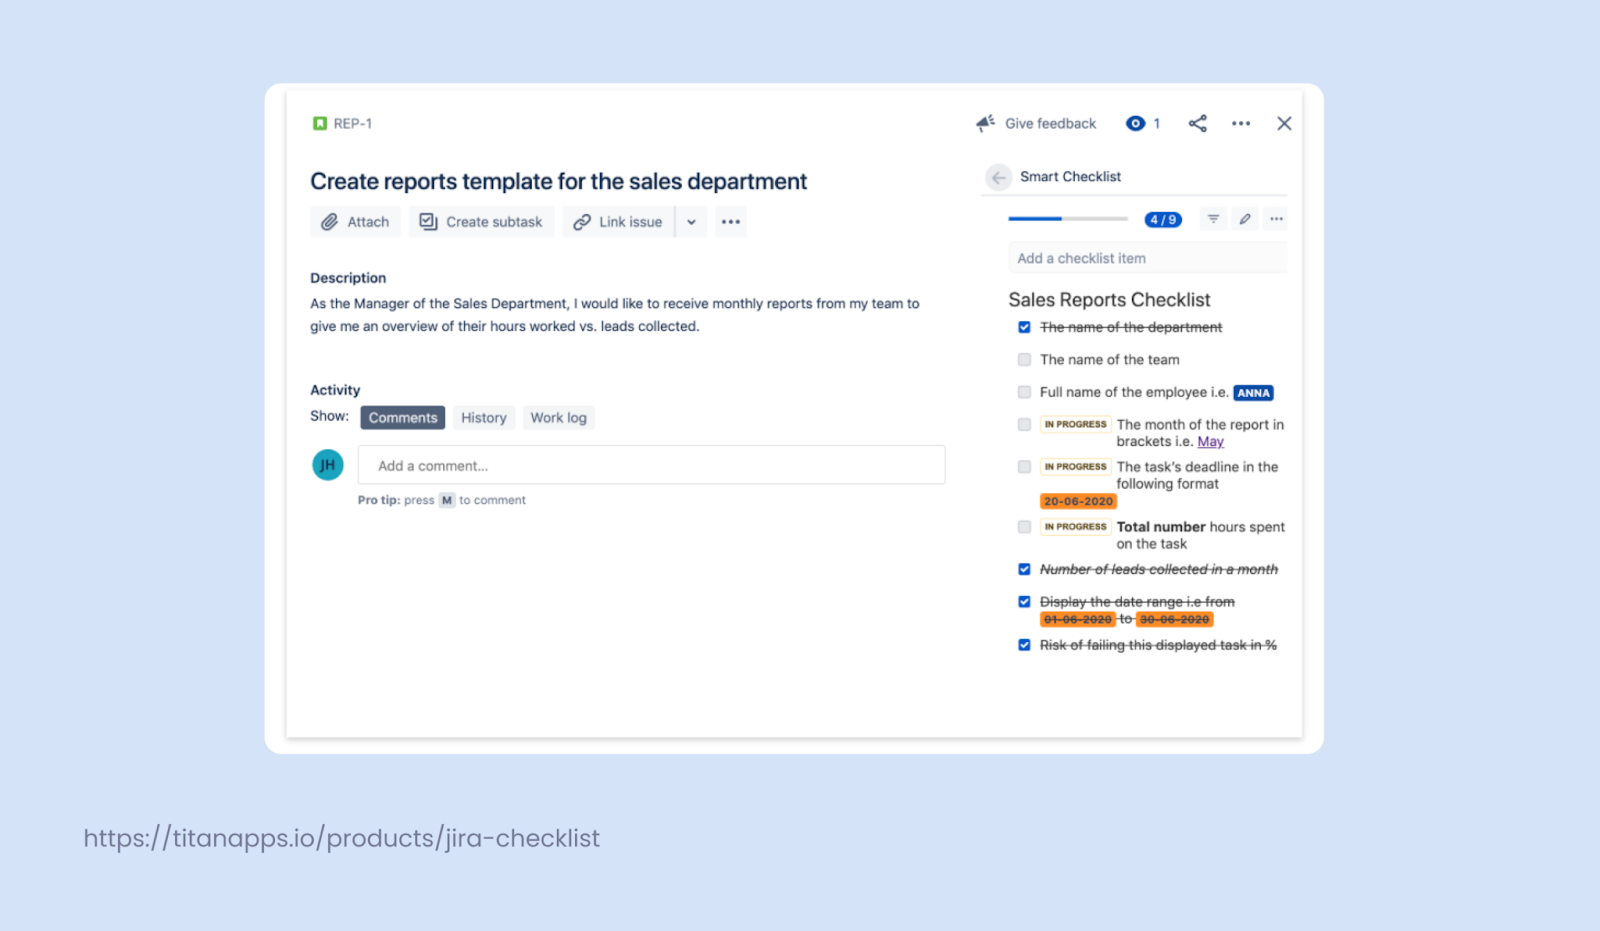
As you work through the task, check off items directly from the issue view.
The progress bar will show how many steps are complete, helping teams stay on track.
Smart Checklist turns any Jira issue into an actionable task.
Teams can track work without creating unnecessary subtasks or jumping between tools.
For more advanced features like global templates, automation rules, or blocking transitions until checklist completion, visit the Smart Checklist documentation.
Summary
Creating workflows in Jira helps teams map their unique processes from backlog to completion.
Combining custom workflows with Smart Checklists turns Jira issues into clear action plans.
Teams can reduce manual work, track progress easily, and deliver work faster.
For more details check out Smart Checklist for Jira.
Was this helpful?
Thanks!
Viktoriia Golovtseva _TitanApps_
0 comments