Rovo agents can handle common support requests, answer questions from your knowledge base, and raise tickets on behalf of users. Whether you're an IT team drowning in password reset tickets or a HR team fielding the same onboarding questions, a Rovo agent can help your team scale self-service and free up your teammates for higher-value work.
This guide walks you through setting up your first Rovo agent for self-service in your Jira Service Management (JSM) Portal in two ways:
Before you begin
Create from a template in your JSM project
Use our template to create an agent that is pre-configured with optimized instructions, your project's JSM knowledge base, and the JSM "Raise request" skill. This is the fastest way to build an agent for self-service.
What the template sets up for you
-
Agent name & instructions - Pre-filled with your project's name and key, so the agent knows which project to raise tickets in.
-
Knowledge base - Your JSM project's linked knowledge base is automatically connected.
-
Raise request skill - The agent can escalate unresolved issues by creating JSM tickets, routed to the correct request type with required fields collected.
Important: The template instructions (from below) include your project name and project key - these are required for the "Raise request" skill to work correctly. If you rename your project later, remember to update the agent instructions to match.
Steps:
-
In your JSM project, go to Project settings > Channels & Self-service > Portal.
-
Select Create from template. Rovo will generate an agent with your project's name, instructions, knowledge base, and skills already configured.
-
Select Test to preview how your agent responds. Try a few common questions your users typically ask.
-
When you're satisfied with the responses, select the toggle to make the agent live in your JSM Portal.
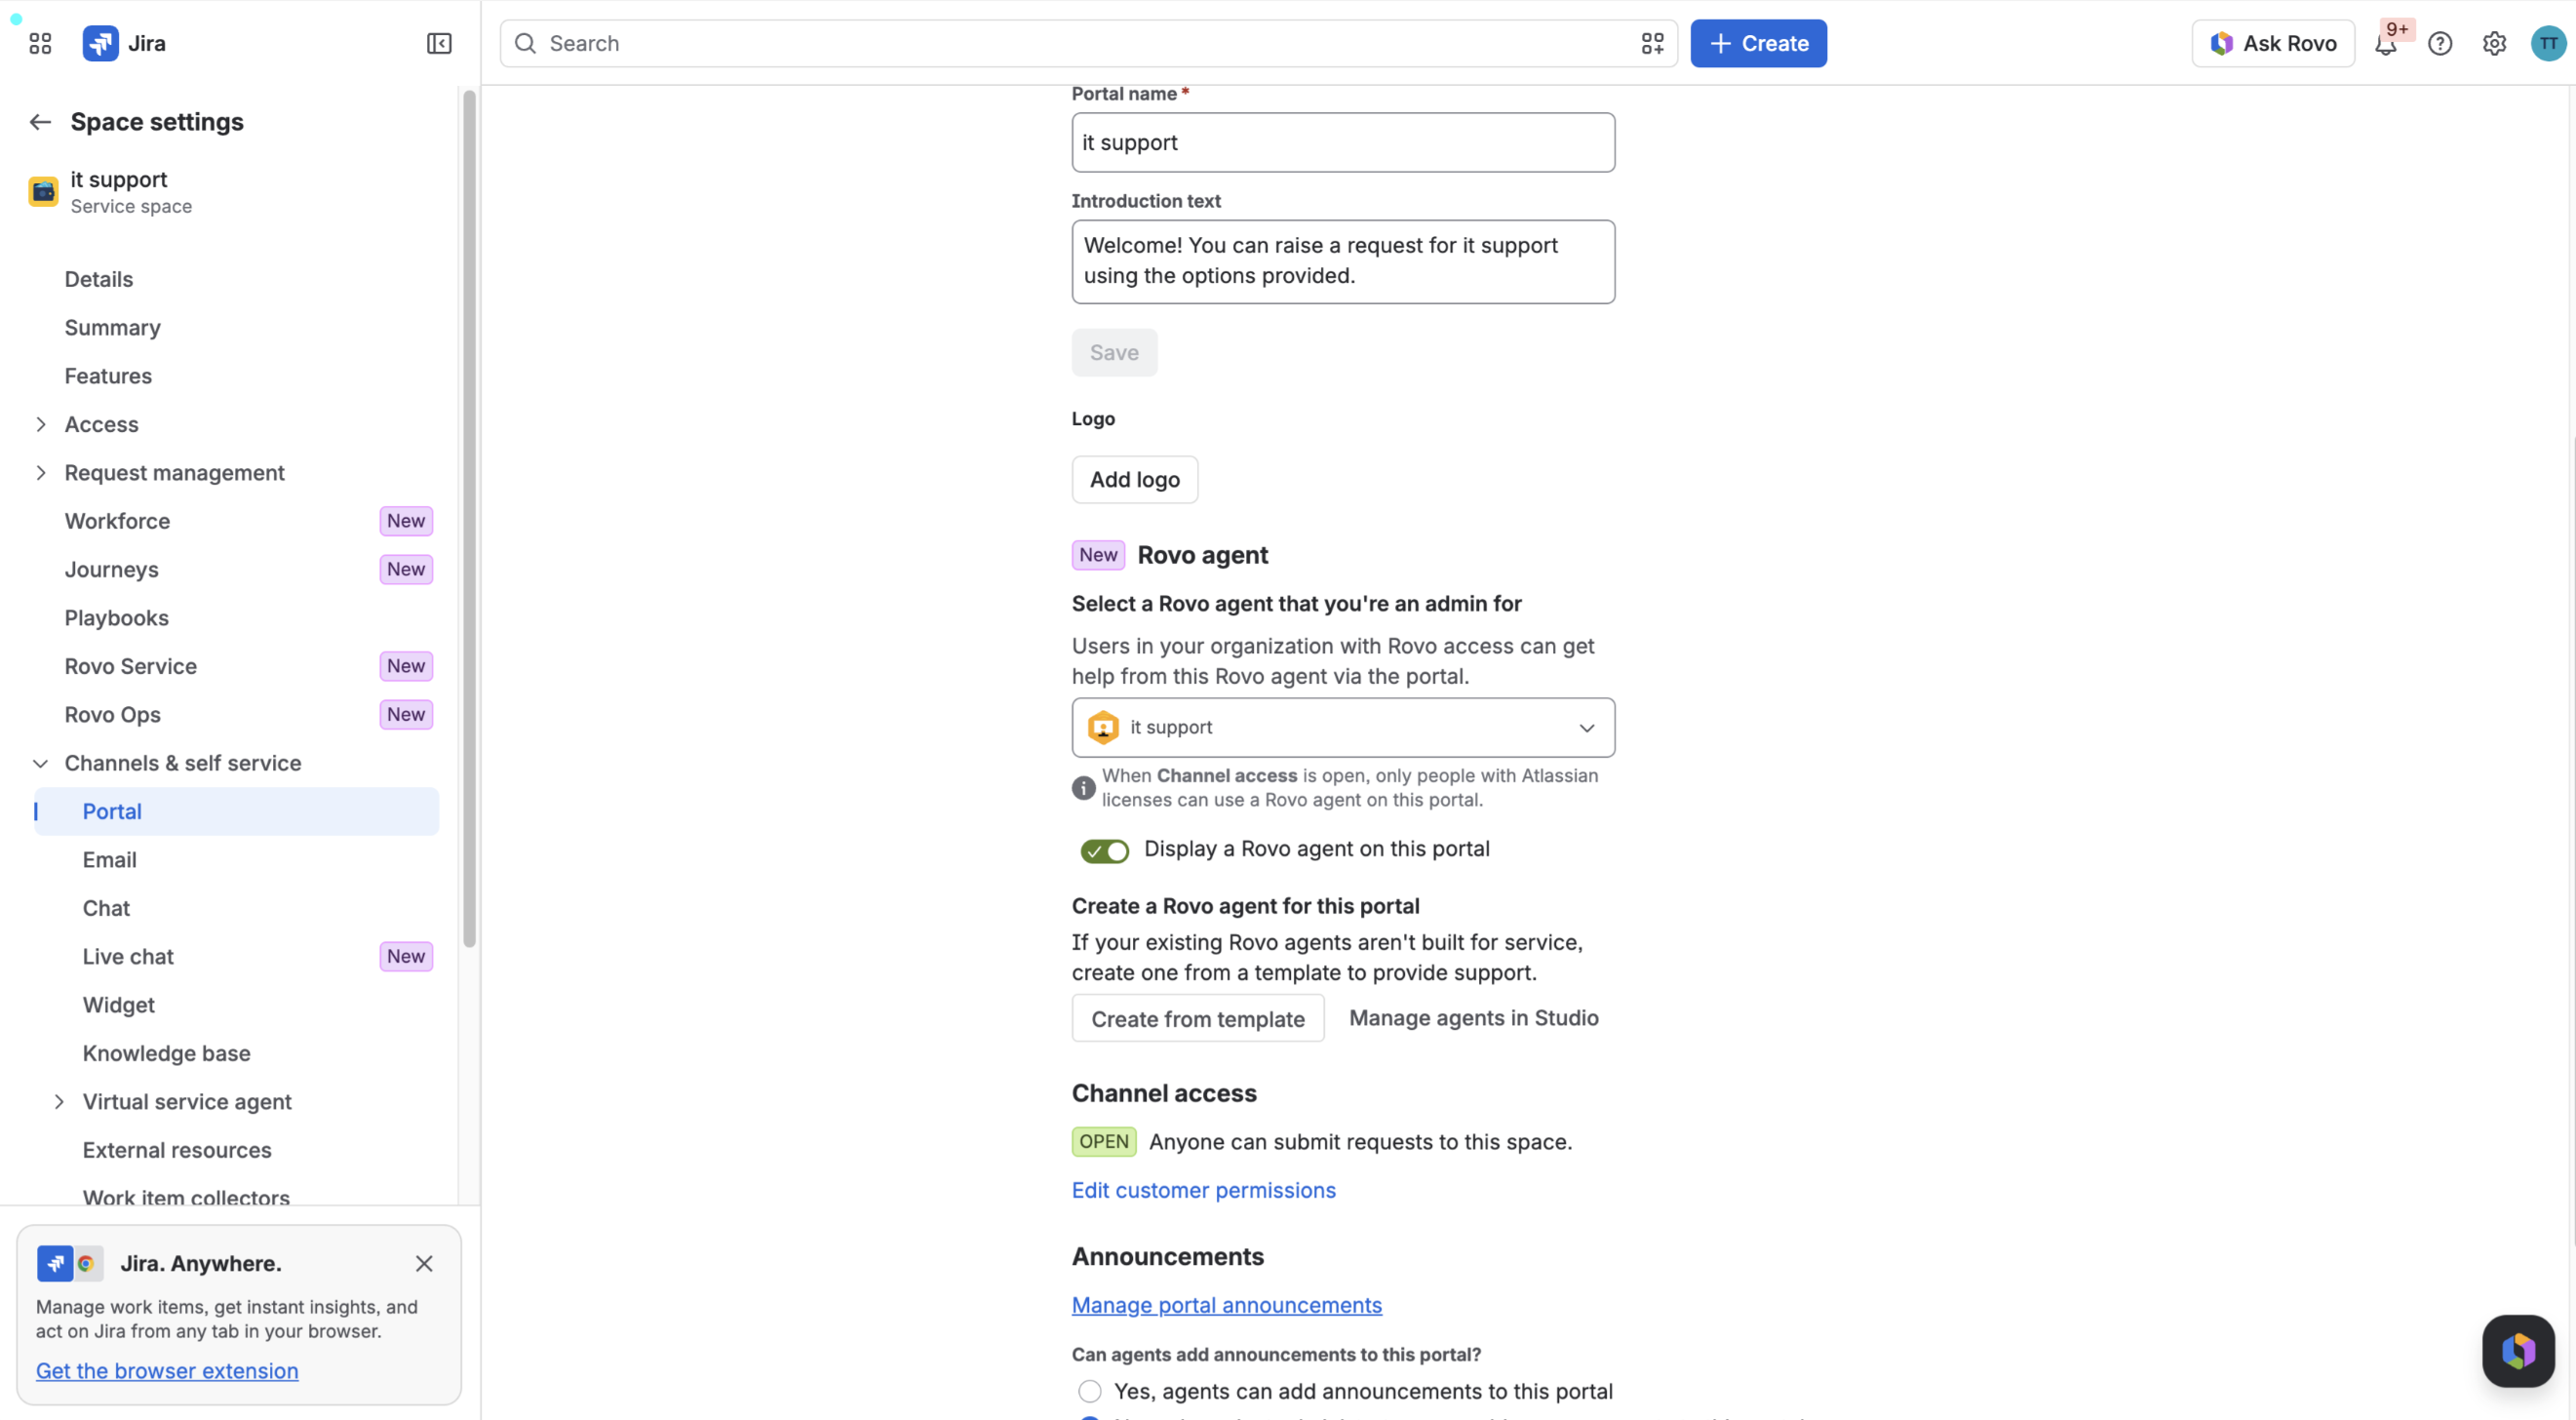
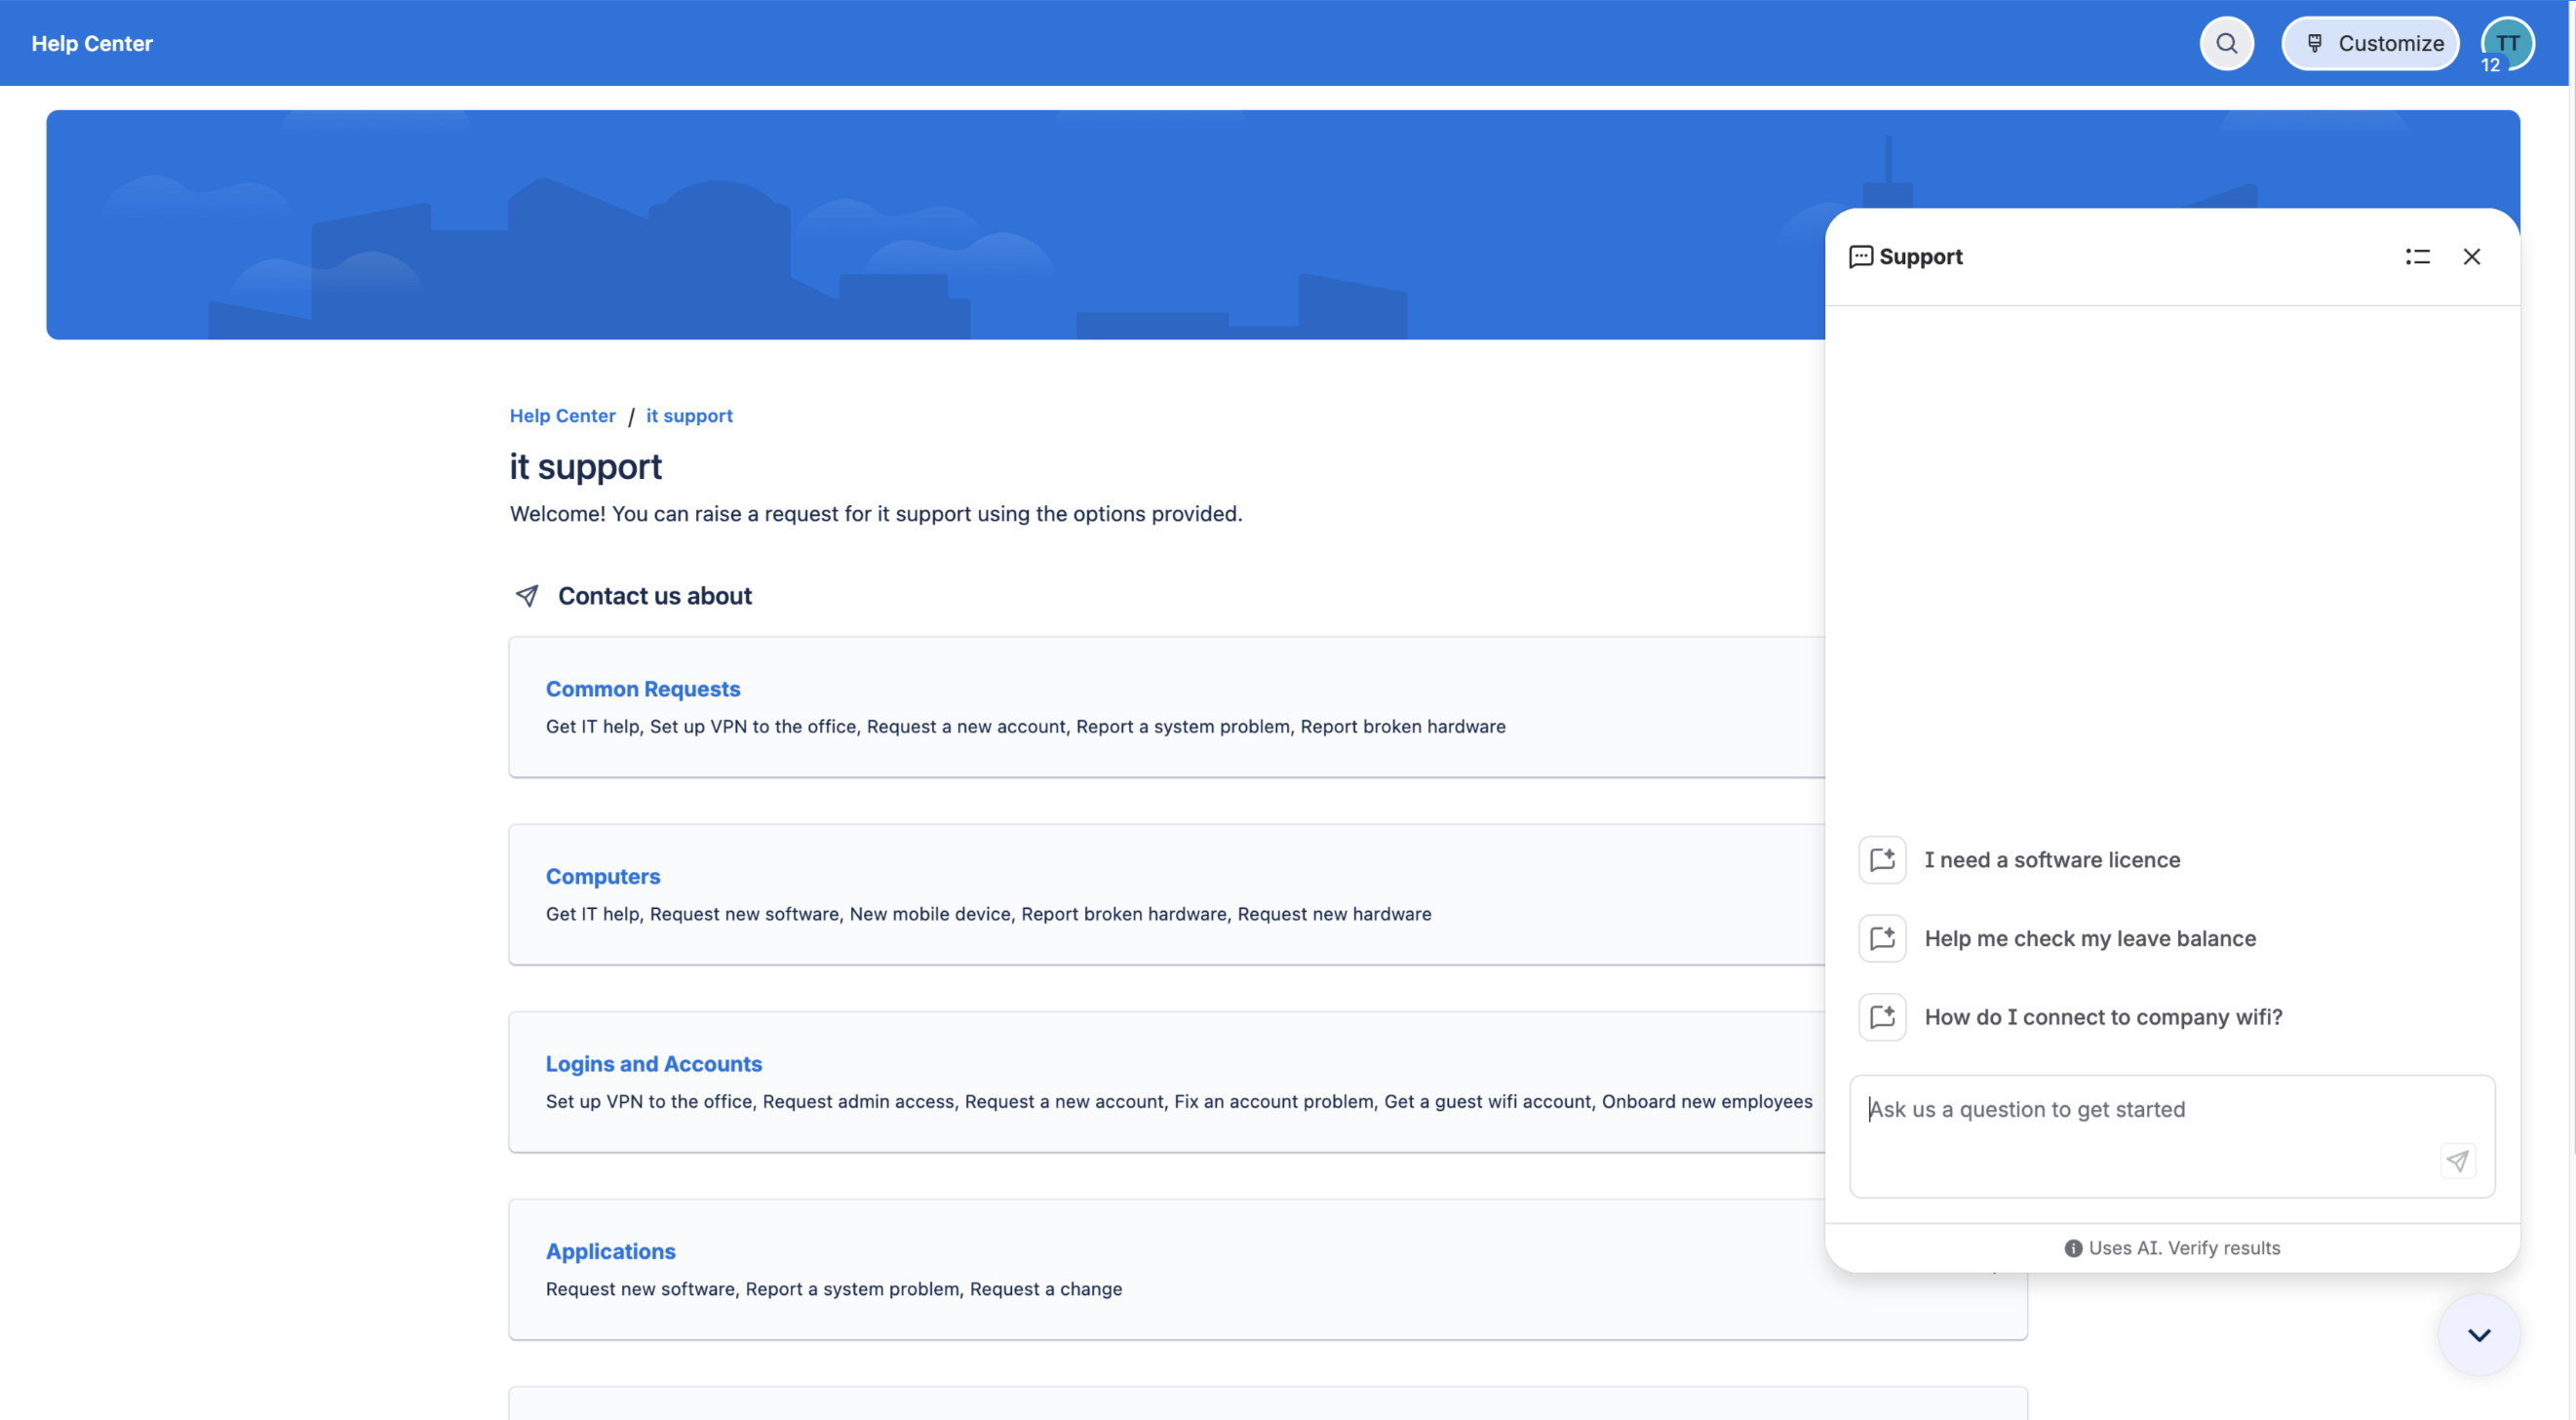
Your portal help-seekers will now be greeted with a widget powered by your Rovo agent 
Create from scratch in Studio
Use this as a starting point if you're building your agent from scratch. Replace the placeholders with your own project details.
| Setting |
Field |
| Instructions |
You are the service agent for [YOUR PROJECT NAME] (Project key: [PROJECT KEY]), here to help users resolve issues using only your attached knowledge sources.
-
Understand the problem: Before answering, ensure you fully understand the user's issue. Ask clarifying questions if details are missing.
-
Use knowledge sources: Search your attached knowledge to find resolution or troubleshooting steps.
-
Answer only from knowledge: Only provide answers based on your knowledge sources. If you cannot find an answer, clearly state that you don't have the information.
-
Escalate when needed: Create a JSM request in [YOUR PROJECT NAME] (Project key: [PROJECT KEY]) only if the user explicitly requests it, or if you have exhausted all self-service options and the user remains unsatisfied.
|
| Knowledge |
(Under custom knowledge)
[YOUR PROJECT NAME]
|
| Skills |
Raise a request |
Add your agent to more surfaces
You can make your agent available in more surfaces to reach users wherever they already work. If you previously had a virtual service agent (VSA) in a surface, deactivate it first to avoid confusing help seekers.
JSM Portal
Add the agent to your JSM Portal so it greets users with a chat widget before they submit a ticket.
-
In your JSM project, go to Project settings > Channels & Self-service > Portal.
-
Under Rovo agent, select your agent from the dropdown.
-
Select Activate.
Things to know:
-
You can only add one agent per JSM Portal, but the same agent can serve multiple Portals.
-
If you created your agent using the template, it's already pre-selected and ready to activate
JSM Help Center
For coverage beyond a single portal, add the agent to your JSM Help Center so it greets users with a chat widget before they submit a ticket.
-
In your JSM Help Center, go to Settings > Rovo agent.
-
Under Select agent, select your agent from the dropdown.
-
Select Activate.
Slack
To add your agent to a Slack channel you’ll need the Rovo Slack app installed in your Slack workspace
Bring the agent into the Slack channels where your users already ask for help.
-
Go to your Slack channel and add Rovo to it by mentioning @rovo.
-
Select Set up Rovo.
-
Under A Rovo agent search for your agent.
-
Choose any of the triggers to decide when your Rovo agent will respond in the channel
-
Select Submit.
Tips for getting the most out of your agent
Start simple, then iterate. Launch with our template. Monitor how users interact with the agent, then add subagents for the most common topics over time.
-
Always include the project name and key in your agent instructions if you want the agent to raise JSM tickets. Without this, the agent can't determine where to create requests.
-
Keep instructions concise and specific. Avoid vague or overlapping guidance - the clearer the instructions, the more consistent the agent's behavior.
-
Curate your knowledge. If your knowledge base is large or contains outdated content, link specific pages directly to individual sub-agents rather than connecting the entire knowledge base. This prevents the agent from surfacing incorrect information.
-
Use subagents for high-volume topics. Create subagents for common queries where there's a known, fixed process that differs from your agent’s default behaviour. This helps you tackle the highest-impact queries first. More on subagents.
-
Test before you go live. Use the Test button in Studio to preview the agent's responses before activating. Try a range of questions, including edge cases.
Capability limitations
Visit our official support documentation for the most current capability of Rovo for service agents https://support.atlassian.com/jira-service-management-cloud/docs/create-service-requests-with-rovo-agents


