👋 Hi Community,
We've been listening — and we know that not every status update is meant for the world. Sometimes you need to keep your customers, employees, or partners in the loop without publishing to a public page.
Today, we're excited to announce Private Status Pages in Jira Service Management Enterprise are GA. 🎉
What are Private Status Pages?
Private Status Pages let you share real-time incident updates and service health information with only the people you choose - your internal teams, customers under NDA, or a specific group of partners.
Why we built this ?
Public status pages are great for transparency. But many of you have told us that:
-
👥 You have internal services (HR tools, finance systems, internal dev platforms) where status should only be visible to employees.
-
🤝 You serve enterprise customers who require a dedicated, authenticated status page
-
🛡️ You operate in regulated industries where incident details cannot be shared publicly for compliance reasons.
-
🔄 You're paying for a standalone statuspage tool just to get this capability — and would prefer it native to JSM.
Private Status Pages include:
-
✅ Create one or more private status pages, scoped to authenticated audiences
-
✅ Add components, post incidents and link directly from Jira service management incidents
-
✅ Control access via your existing atlassian permissions and groups
-
✅ Branded pages with your logo, colors and components
⚙️ How to set up your Private Status Page ?
Private status pages are available on the Service Collection Enterprise plan.
Step 1: Enable Private Status Pages in your site
-
Open Jira Service Management → Operations → Status pages
-
You'll see a Private Status pages unlocked when you click on “Create” button
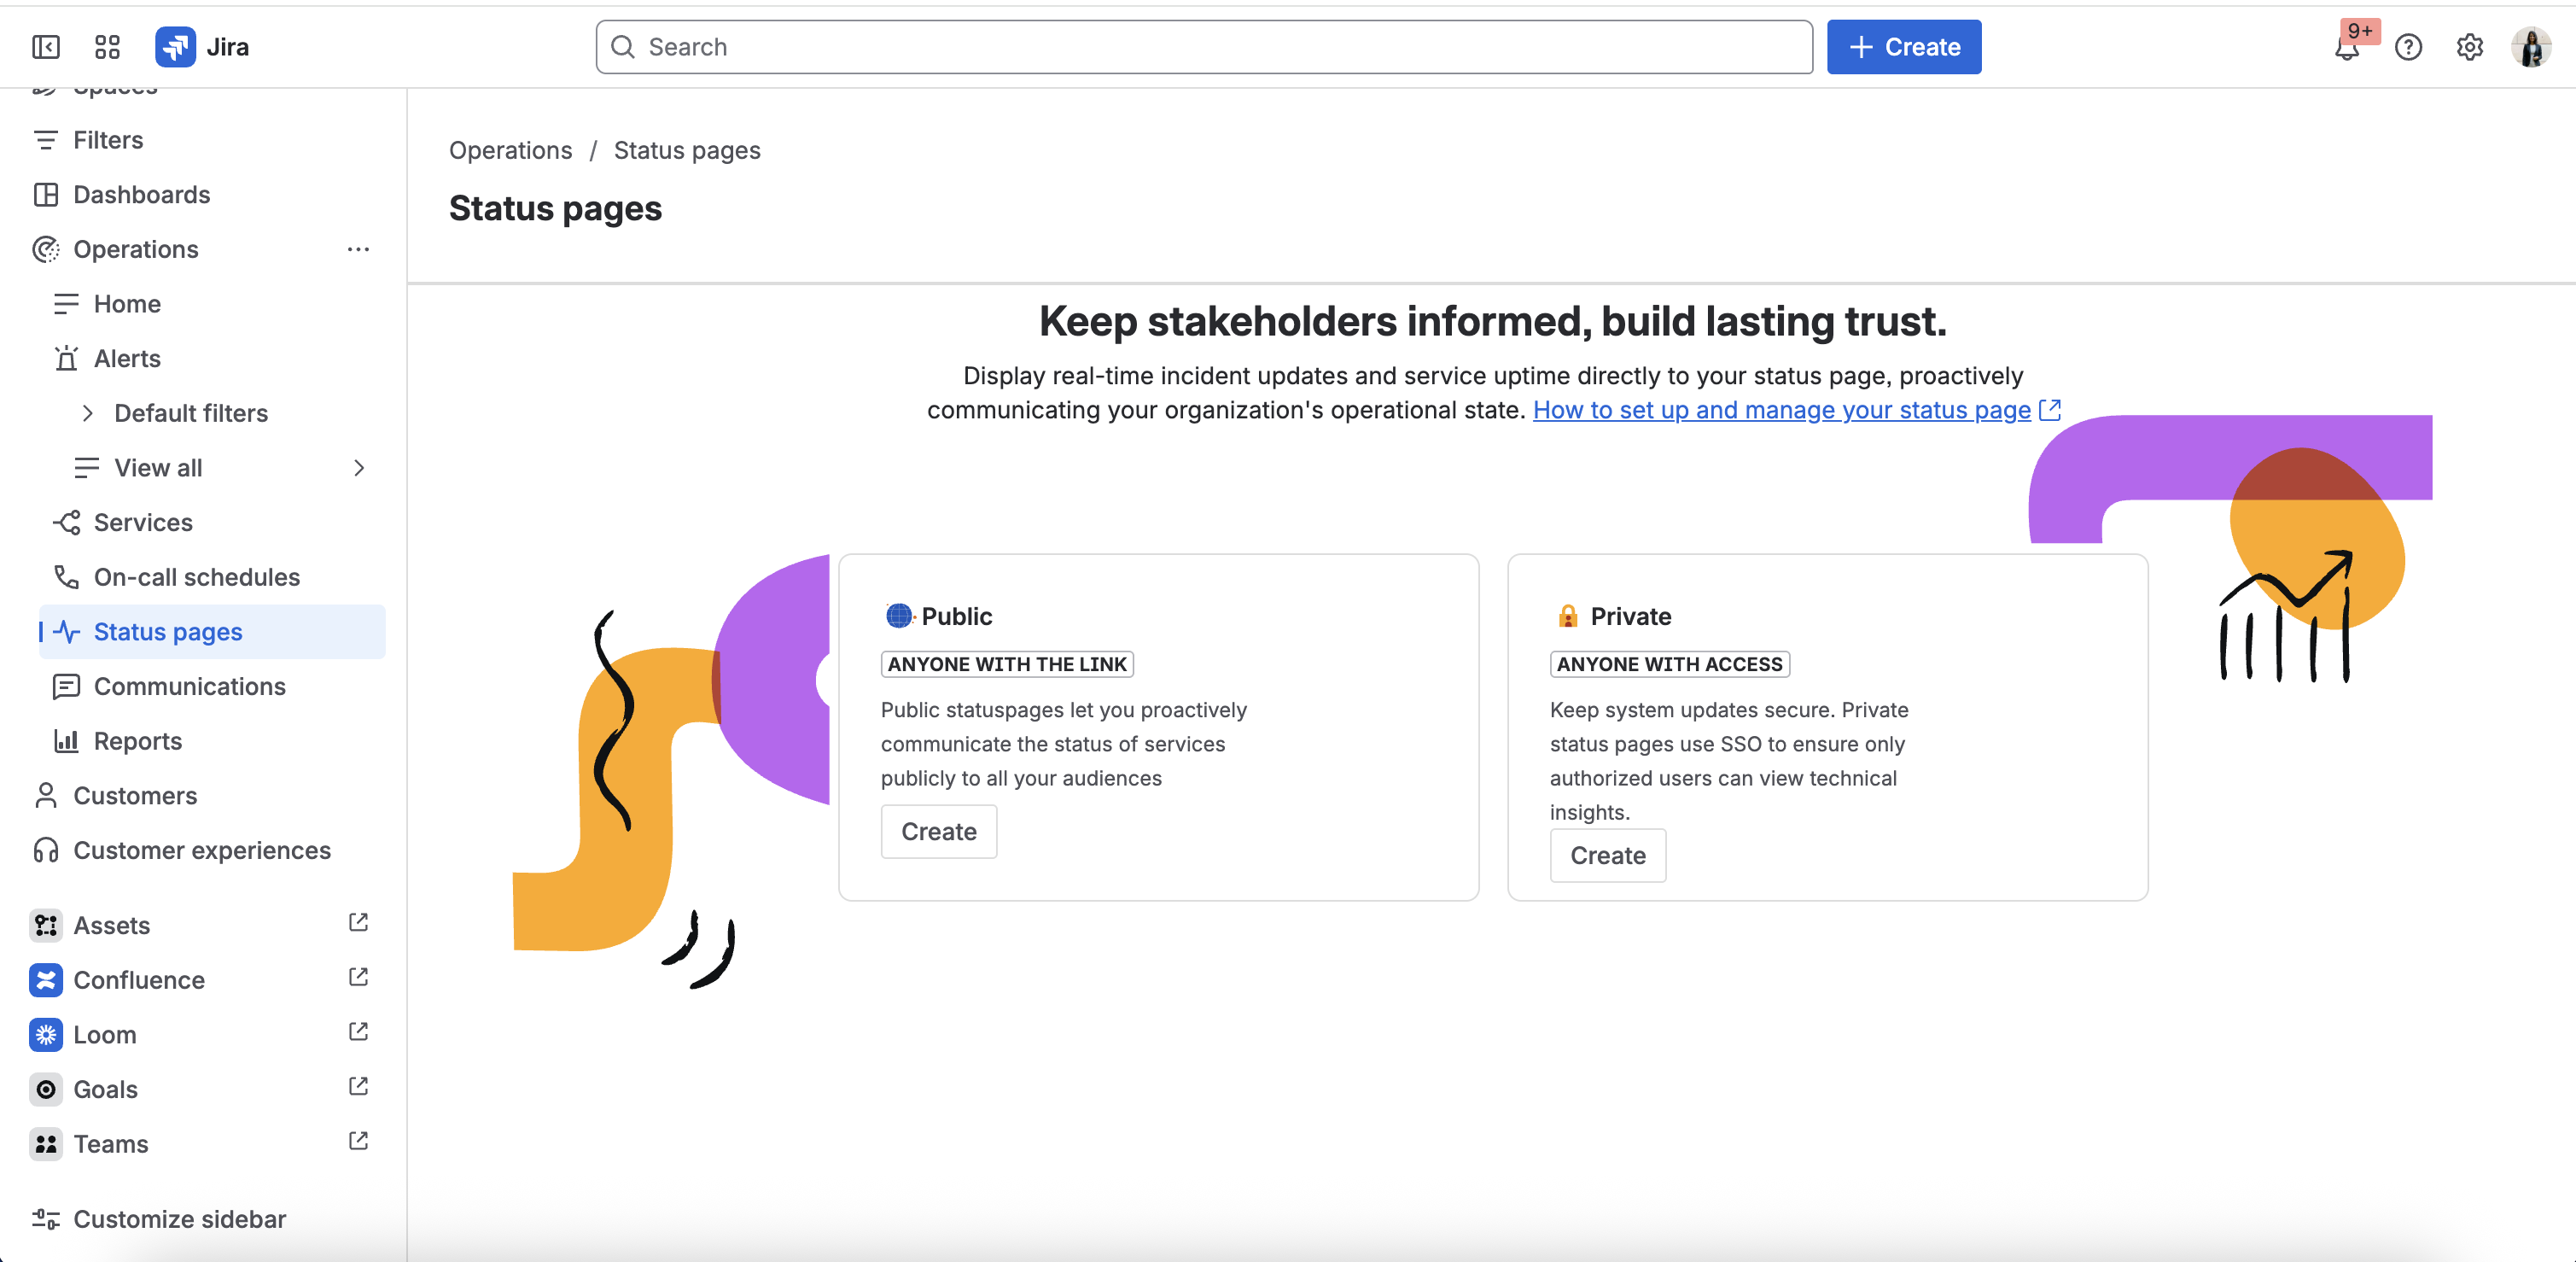
Step 2: Create your first private page
-
Click Create
-
Give your page a name (e.g., "Internal Tools Status" or "Enterprise Customer Status — Acme Corp")
-
Choose a URL (e.g., internal-tools)
-
Confirm with the Create button
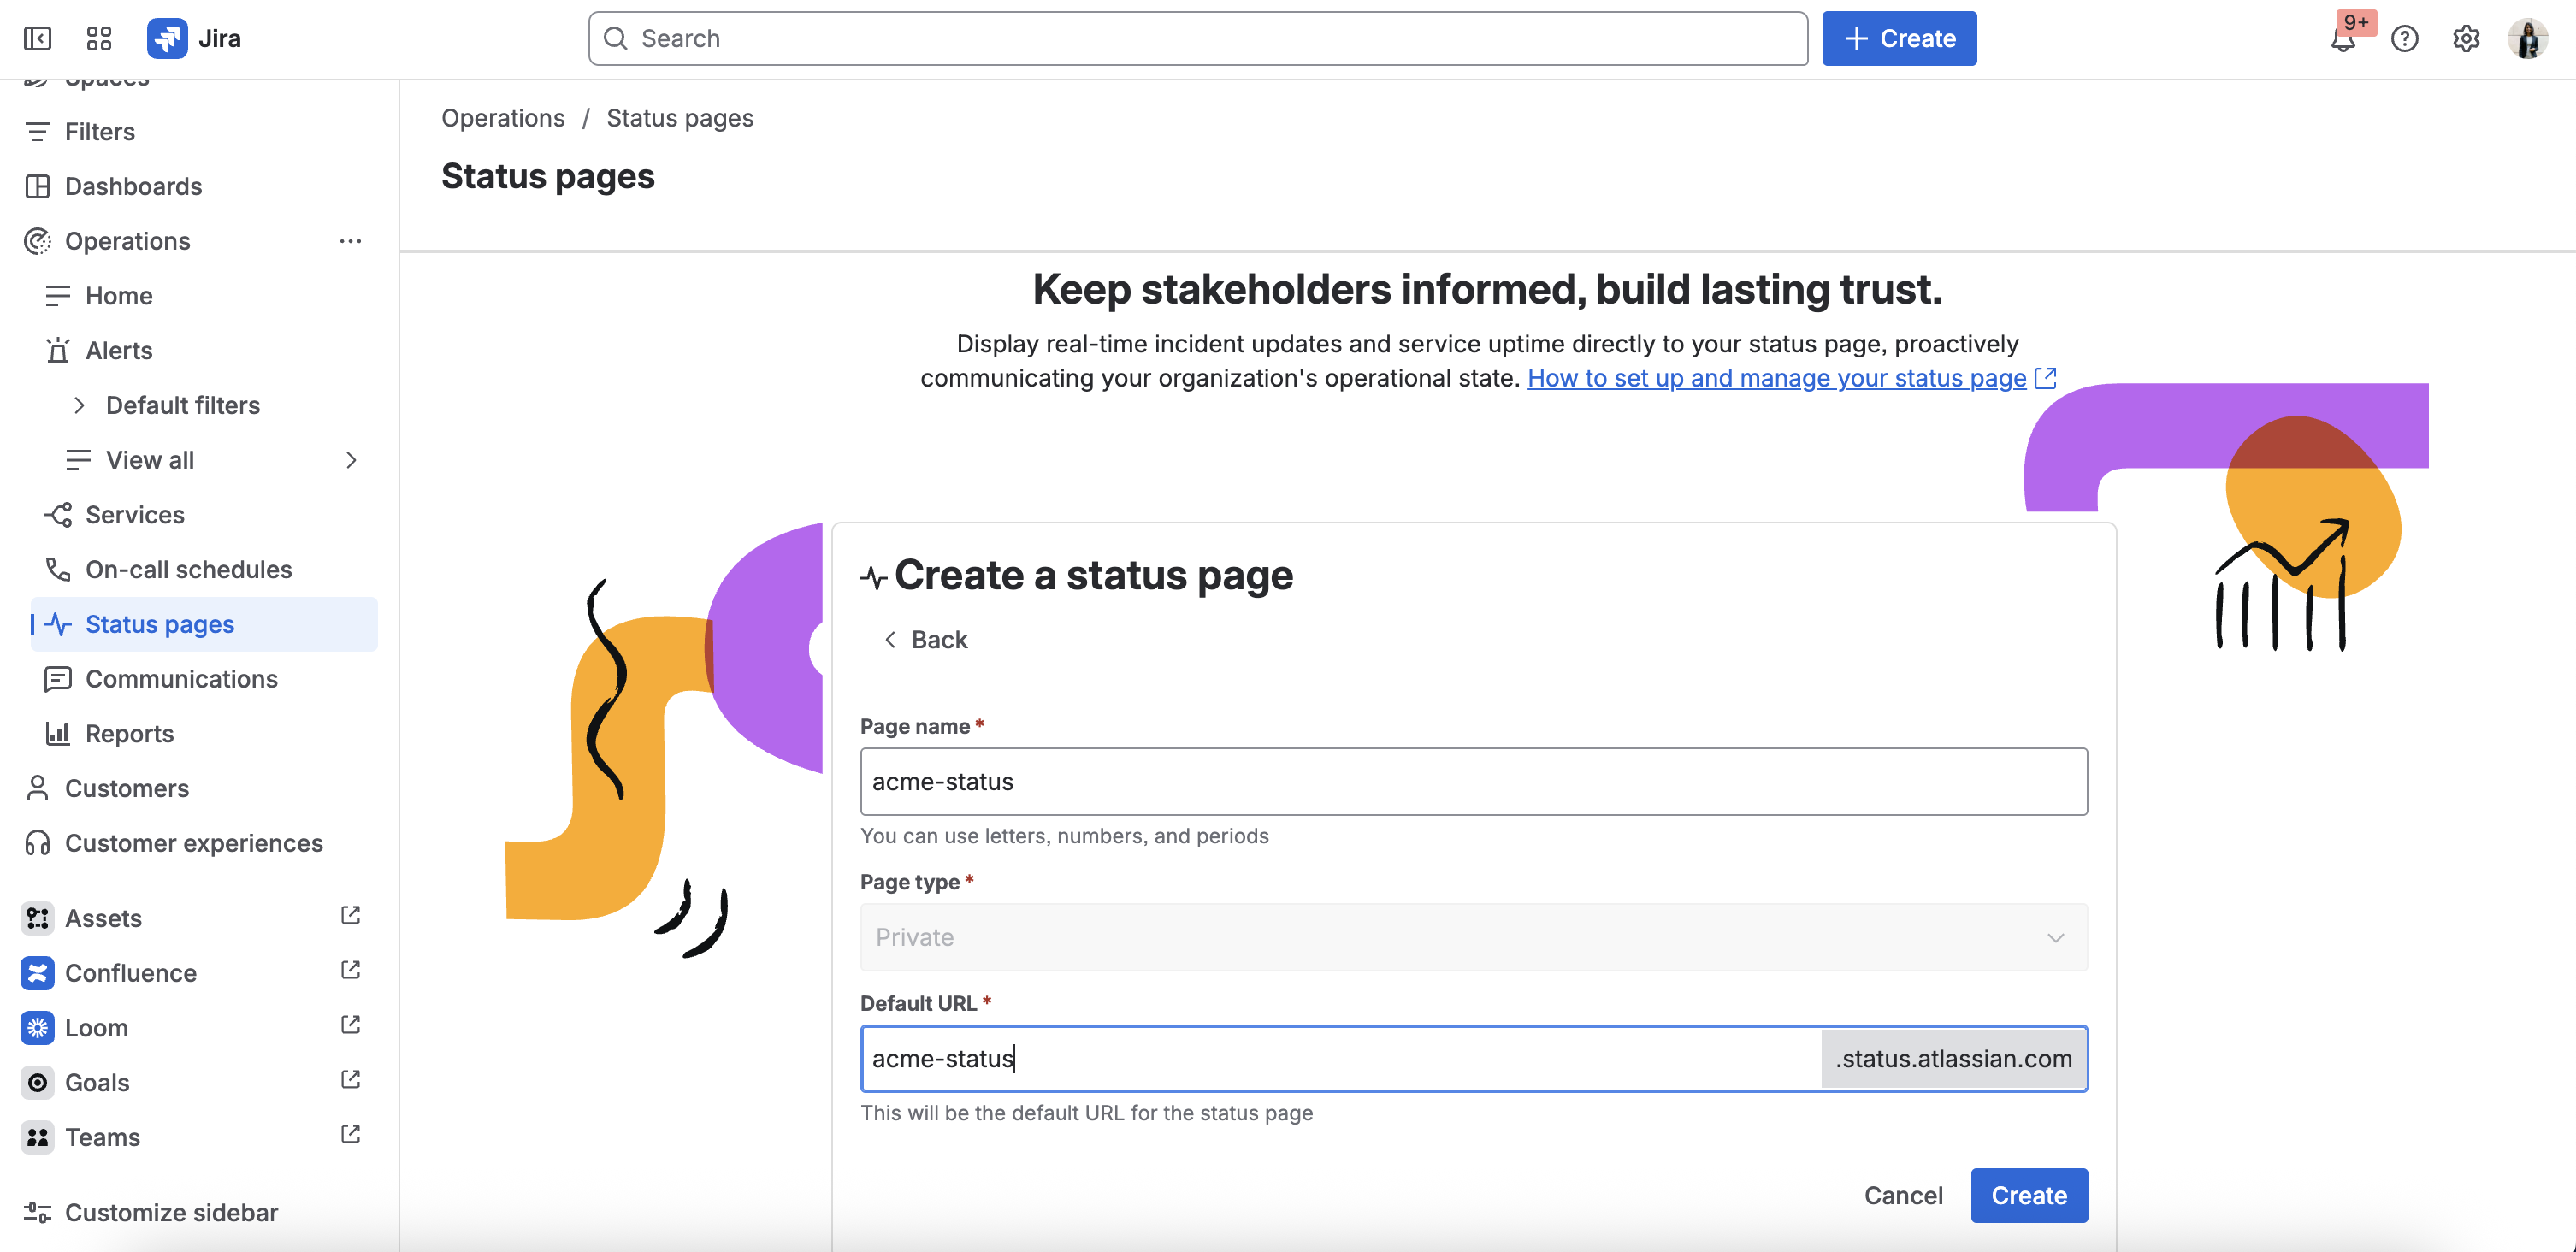
Step 3: Add your components
-
Go to Components on your new page
-
Add the services you want to track (e.g., "Internal Wiki", "VPN", "Build System")
-
Group related components together for clarity
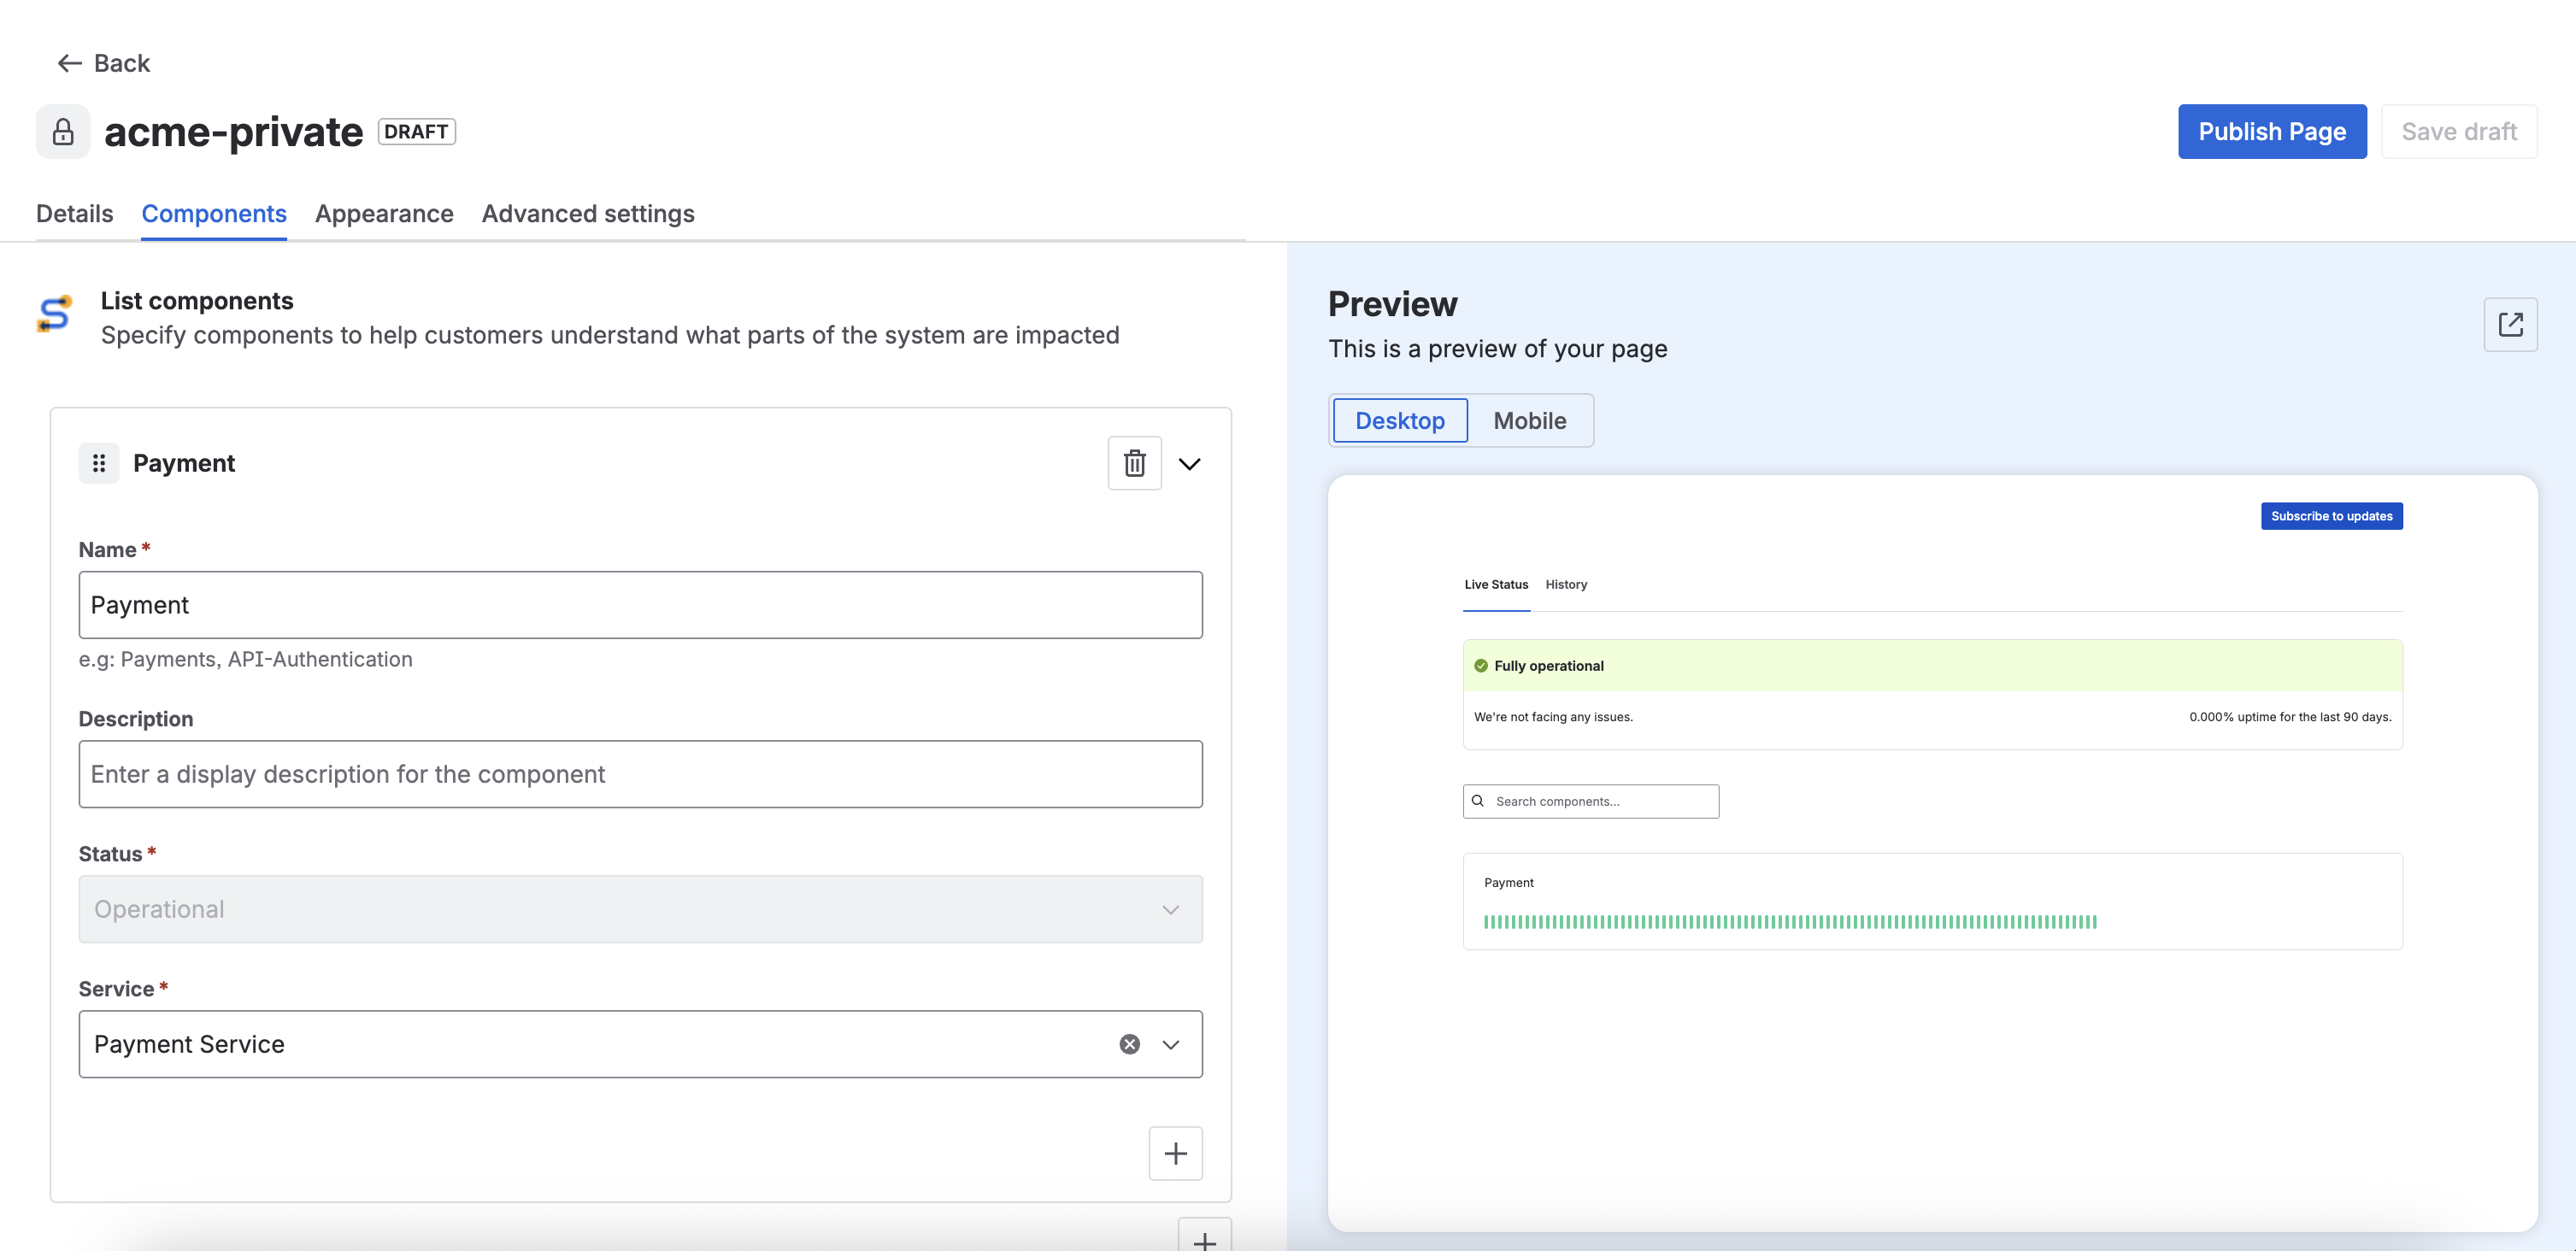
Step 4: Brand it and share the link
-
Under Appearance, upload your logo and choose your brand colours
-
You can even customise branding using HTML/CSS
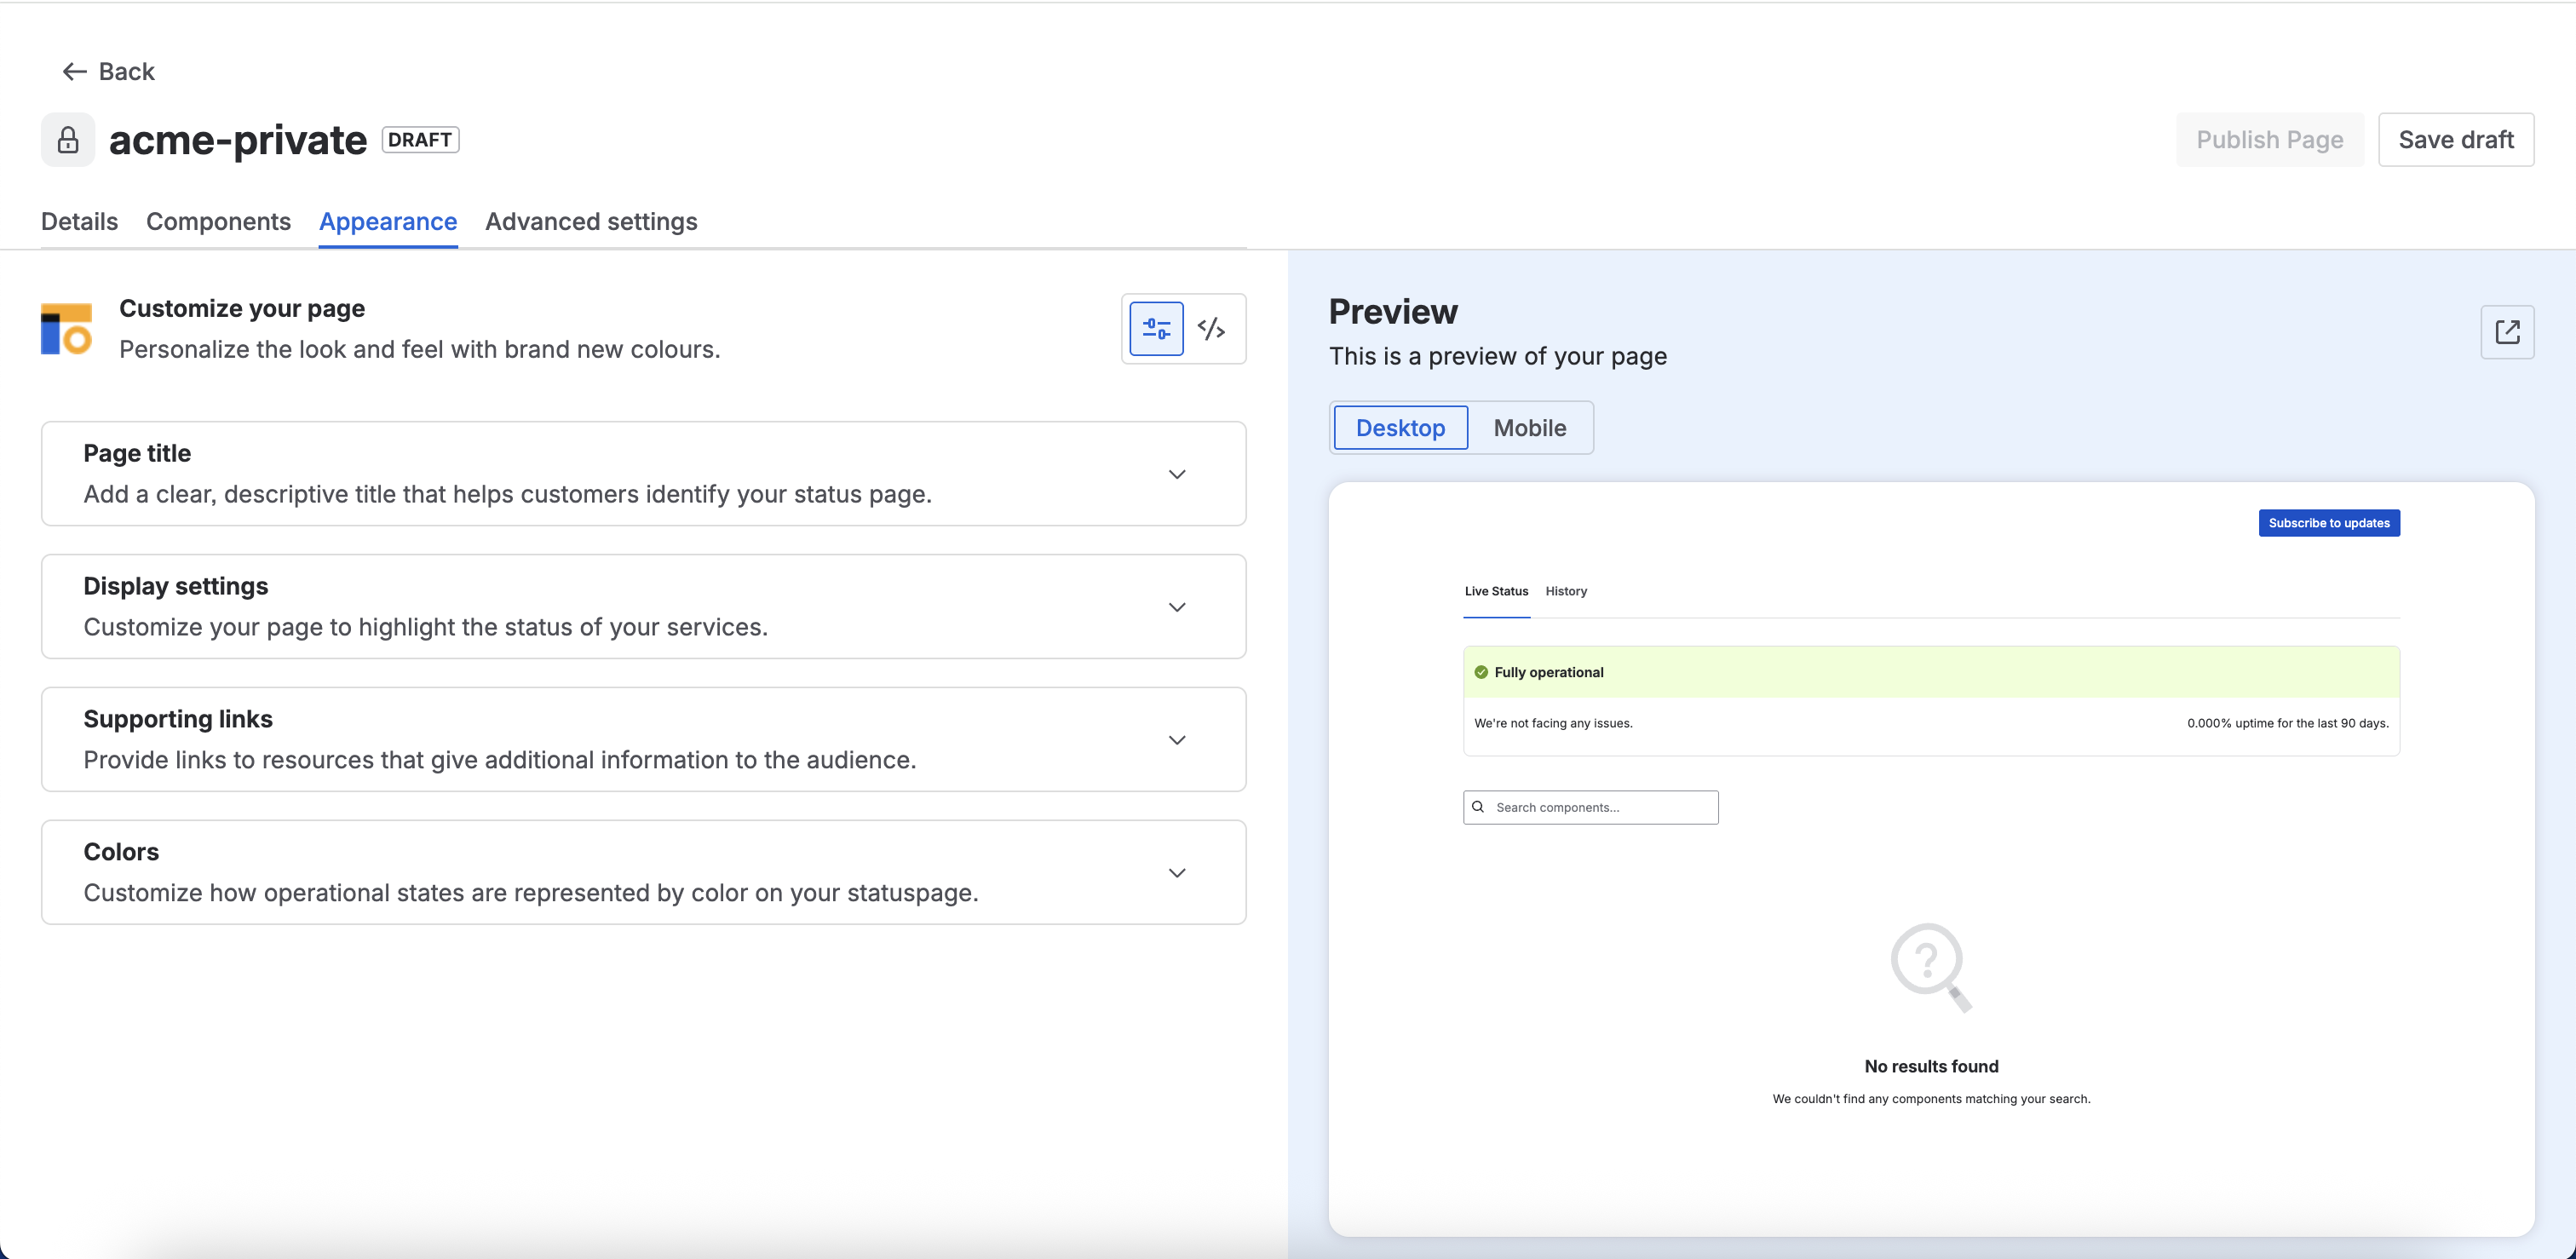
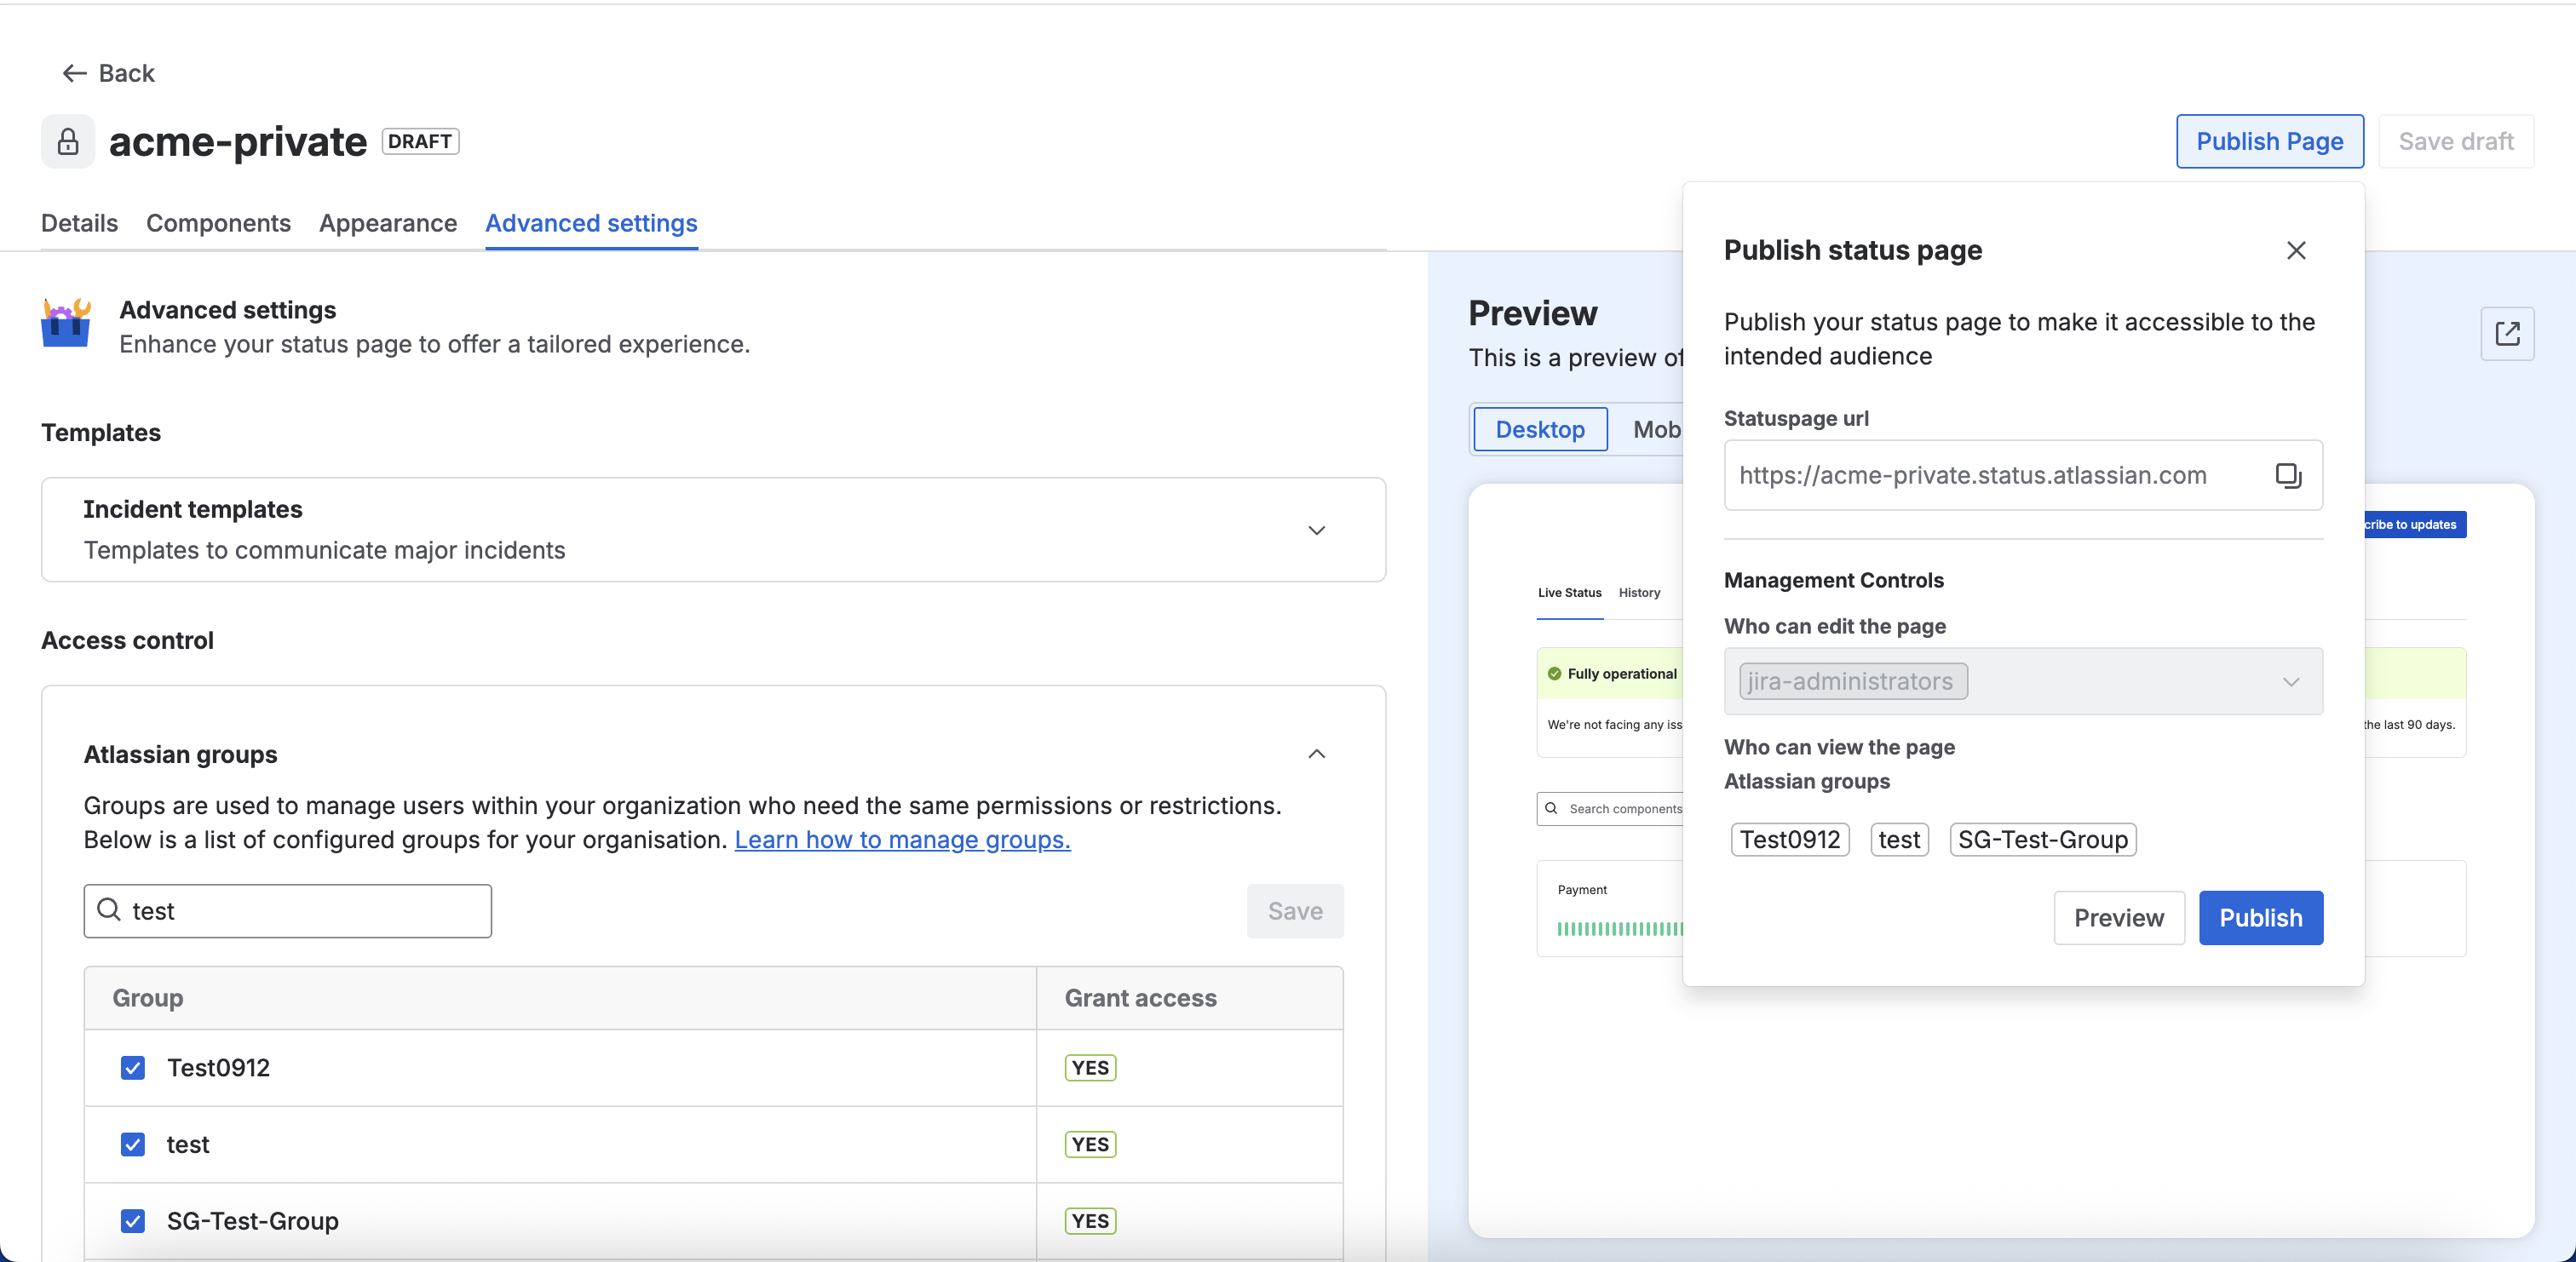
Step 5: Set who can access it
-
In your new page settings, go to “Advanced Setting”
-
Go to Access control
-
Select the Atlassian groups who should be able to view the page
-
Click on Save to confirm the Atlassian groups mapped to the page
Step 6: Publish your private status page
-
Click Publish on the top right
-
Review the details and confirm with "Publish" button to make the page live.
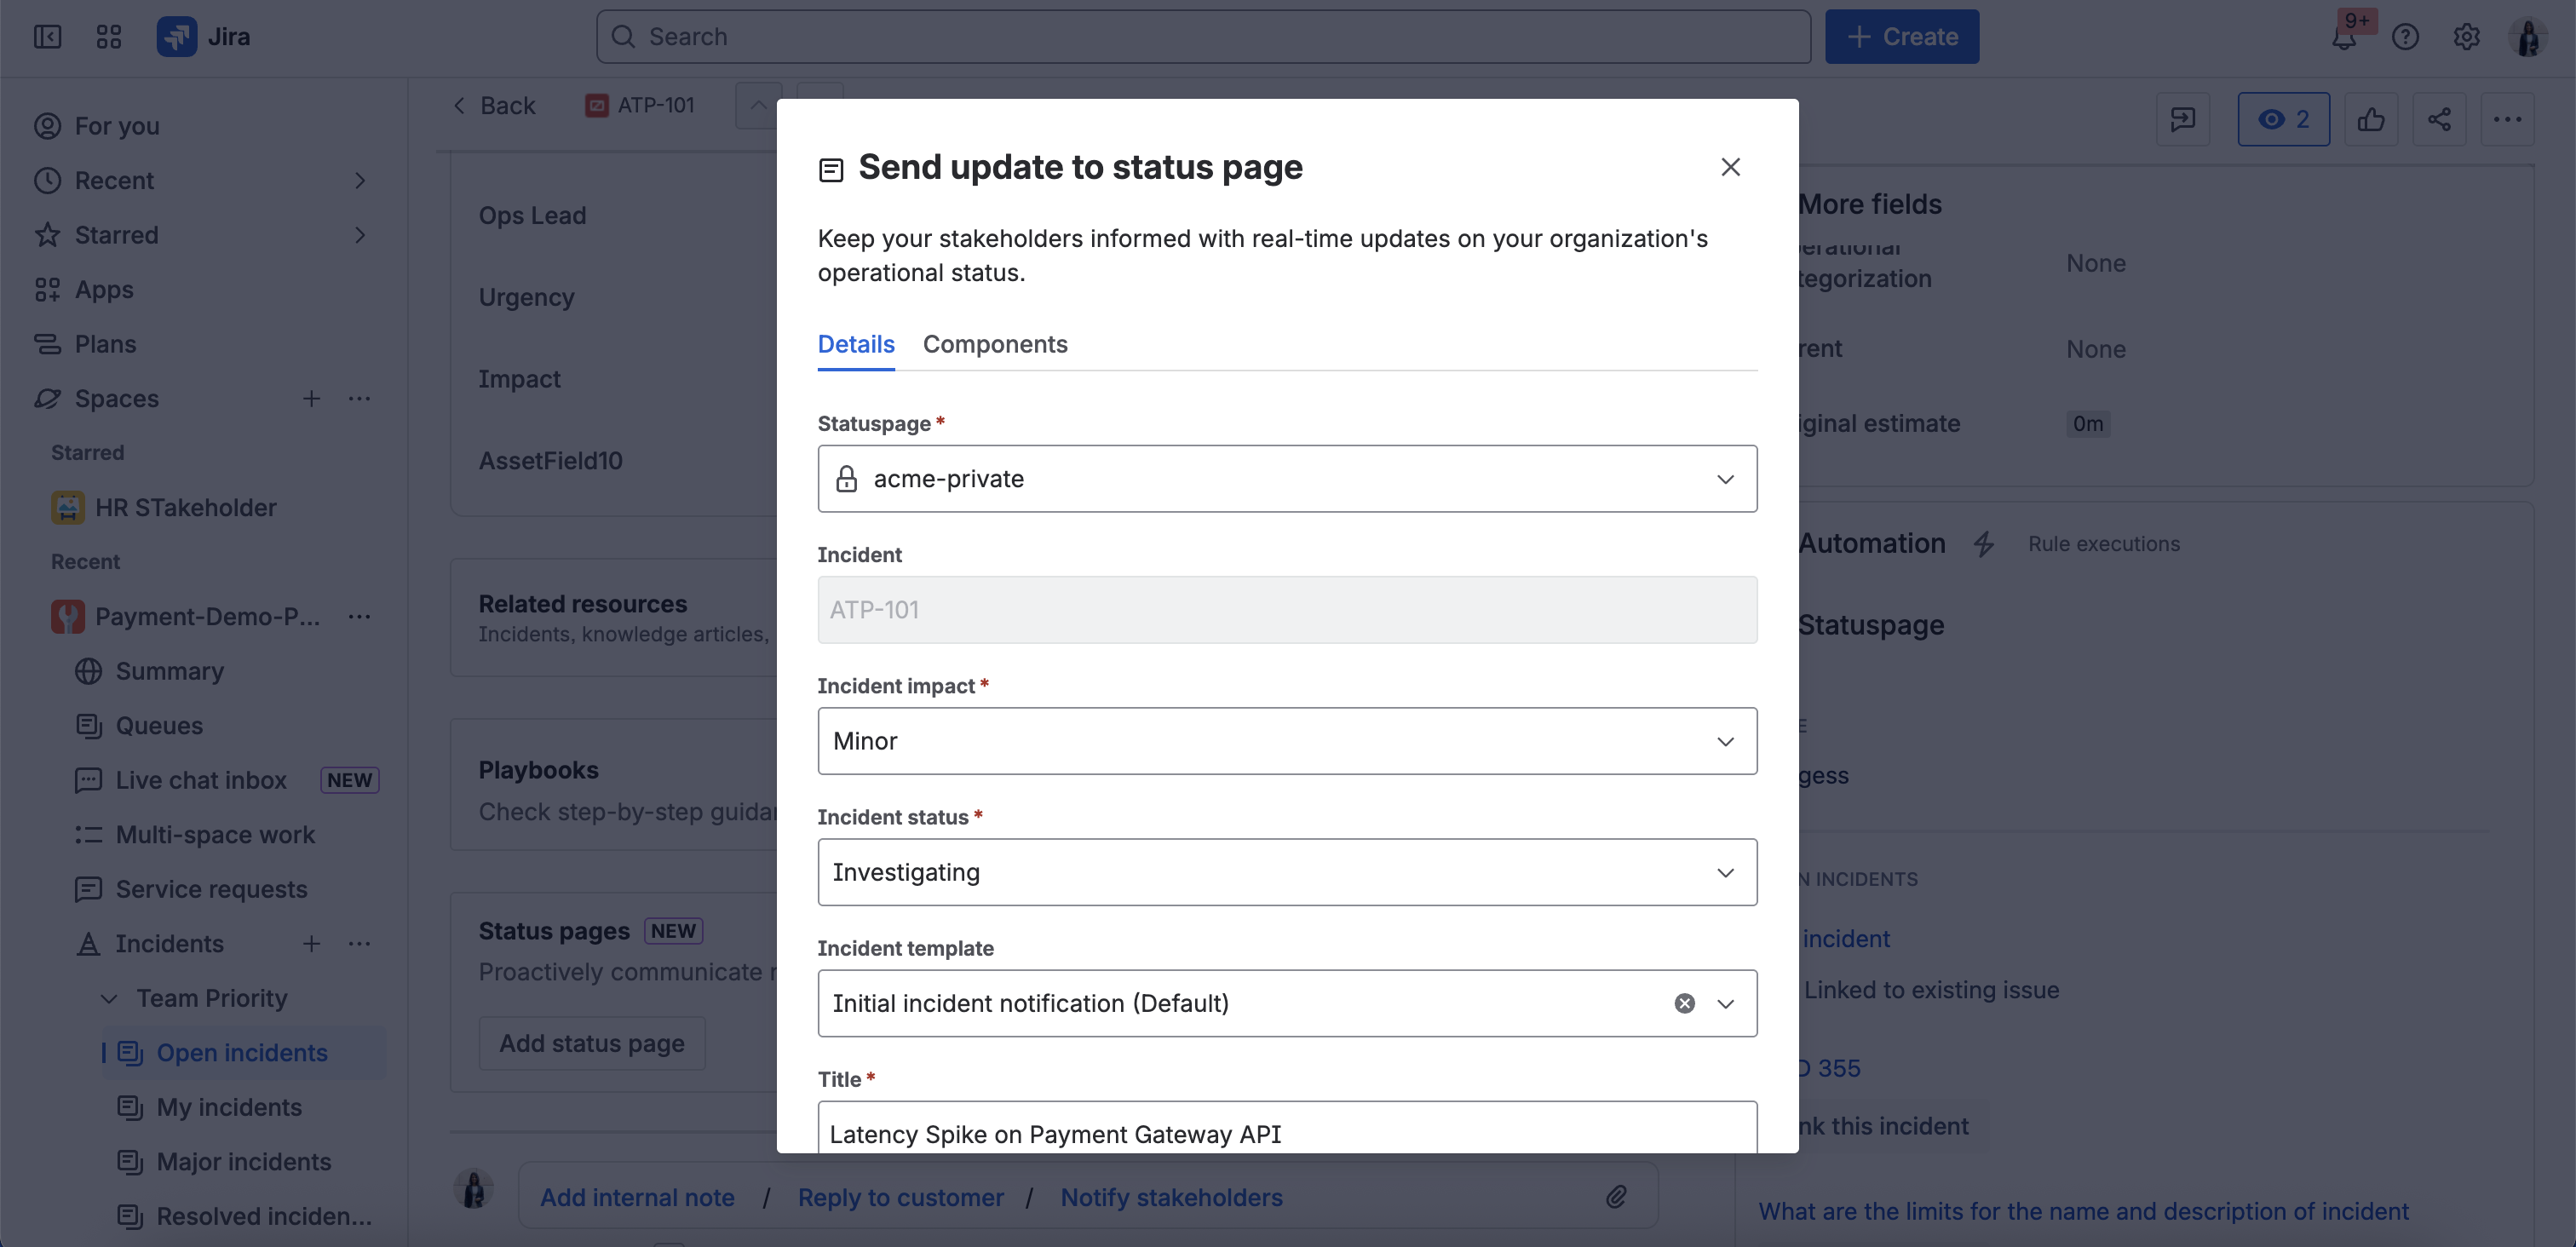
Step 7: Send incident updates to the private status page
-
Go to your project, select any Open incident
-
Navigate to Status pages and click on “Add Status page”
-
Select the Private Status Page you published
-
Fill all the necessary fields, update the component status and click on “Send Update”
With all the details above, you’re now ready to set up and start using Private Status Pages in Jira Service Management Enterprise!
👉 Want to explore other stakeholder communication capabilities launched in the past, view them here!


