Jira Service Management can be used to help many different types of customers in many different ways. For a customer service management project where your customers are external to your business, brand identity is an important aspect. For this, Jira cloud allows custom email addresses to be used for notifications. For example, you can use your own email domain for sending emails to your external customers. Today we are excited to announce that emails sent via custom email addresses can be formally signed to pass DMARC security checks, and ultimately ensuring your messages are delivered to their recipient.
What is DMARC/DKIM?
Domain-based Message Authentication, Reporting & Conformance (DMARC) is a protocol used to verify that emails are actually being sent by the person who owns the email domain. This protocol uses Domain Keys Identified Mail (DKIM) to prevent hackers from impersonating email domains.
Why is this important?
Although DMARC has been around for many years, it is only recently that mail servers have started to strictly enforce it. As a result, it is becoming more common that unsigned emails are flagged, moved to spam, or worse blocked completely.
How do I enable a custom email address for my JSM project?
Add your custom domain
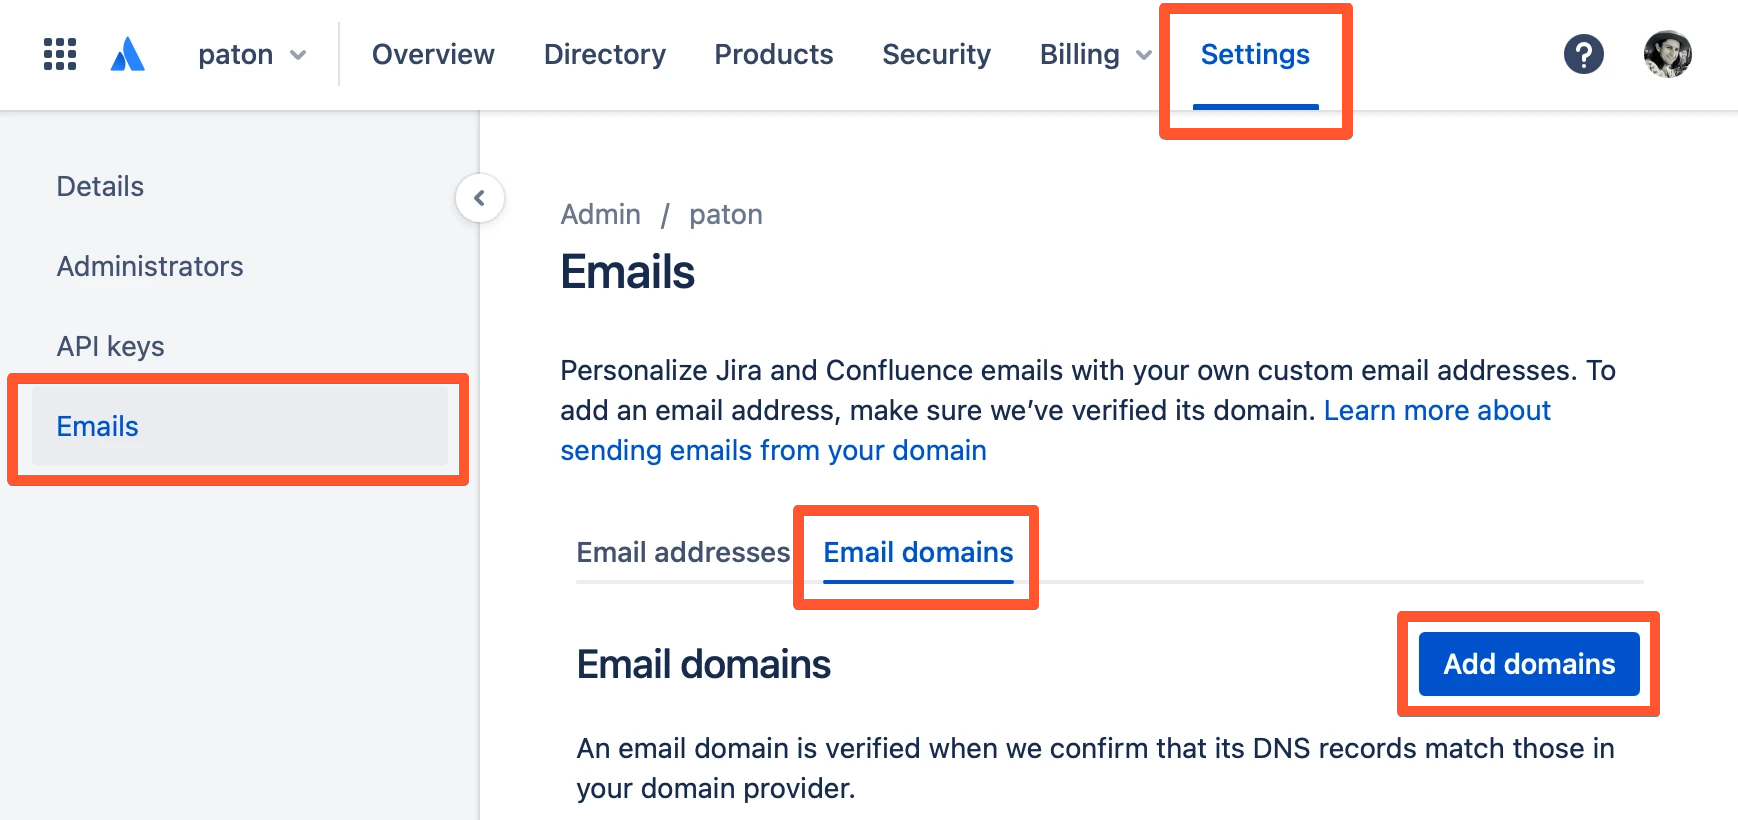
- Navigate to Atlassian Admin, by going to the top-right Settings (cog) and selecting User management.
- From the top horizontal navigation choose Settings.
- Choose Emails from the left-side panel.
- Make sure you’re on the Email domains tab, choose Add domains.
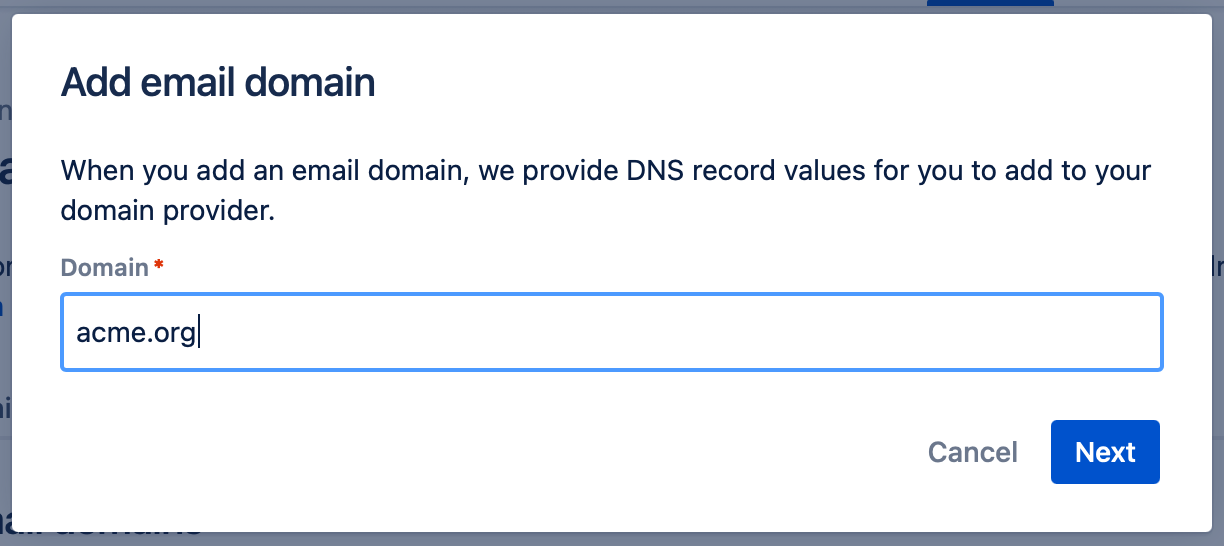
- On the Add email domain window, enter your domain and select Next.
Managing your DNS
For this step, you will need a Network Administrator who can apply DNS changes to your domain.
You will need to add each of these records to your domain's DNS. This will be slightly different based on your domain registrar
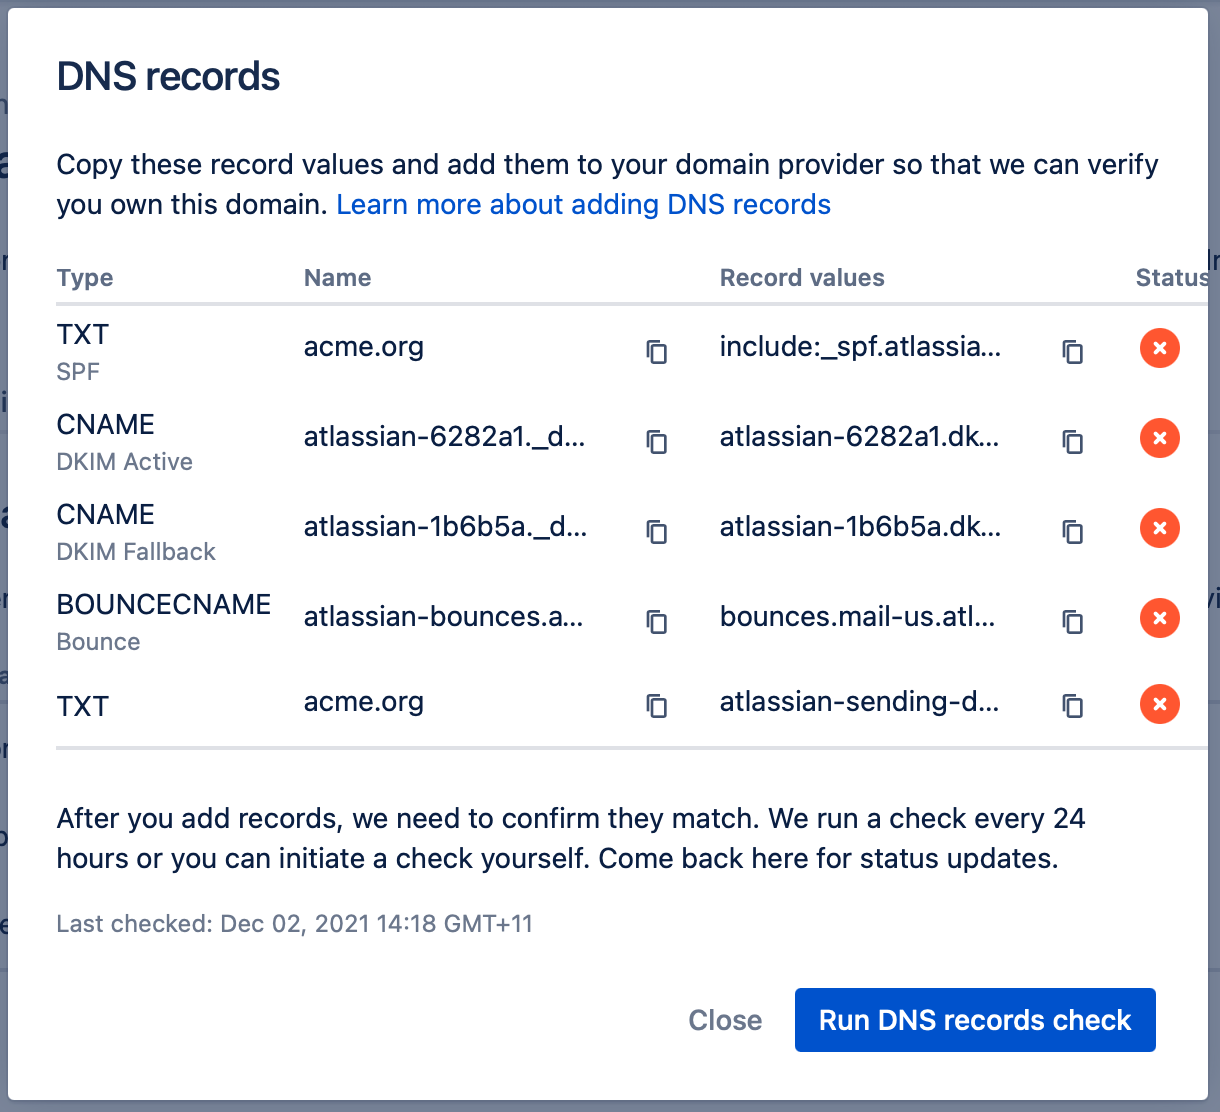
- SPF - TXT - You might already have an SPF record for your domain. In that case, you must include this record with a space after v=spf1
- DKIM Active, DKIM Fallback, Bounce - CNAME - Depending on your domain registrar you might need to drop your domain from the name/host value e.g. atlassian-bounces.acme.org becomes atlassian-bounces.
- Verify - TXT - This lets us verify and associate your domain with your Atlassian Organisation.
Once all the changes have been made, your DNS will be verified and the domain status will change to Active.
Add your email addresses
Once you have a domain added, you can add email addresses that are allowed to be used for sending notifications.
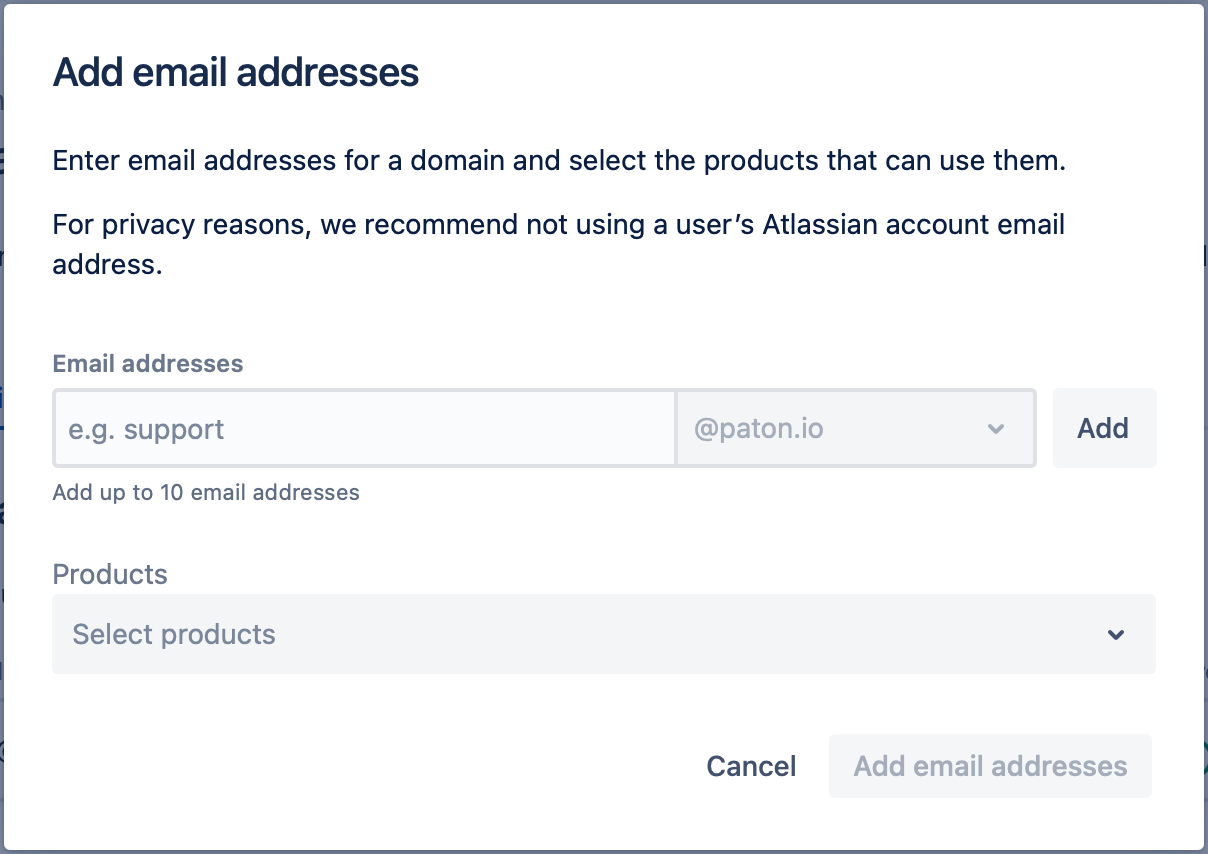
- Go back to the Email addresses tab on the Settings > Emails page.
- Click Add email address.
- Select a domain and enter the prefix of the email address then select Add. You can add up to 10 email addresses at a time.
- Select the products for which the email addresses can be used for sending notifications.
- Click Add email addresses.
Apply an email address to a project
Now that you have a list of allowed email addresses with your domain, you can apply an email address to a project for it to start sending email notifications using that email address.
- Go back to Jira Service Management (or any Jira cloud product) and select the project for which you want to change the email address for notifications.
- From the left-hand project sidebar, go to Project settings and select Notifications.
- Under the Notification email heading click Edit.
- You will see the projects email address for notifications, click Edit.
- In the drop-down select the custom email address you created for your custom domain.
- Click Save.
Your project will now send notifications from your custom email address.
Bonus Step
Have you considered adding a custom email address for inbound to match your custom email address for notifications? Learn more.
What if I am already using a custom email address / domain
Not a problem. Existing custom email addresses/domains will continue to function as they did previously. But it is recommended that you upgrade to the new method to take advantage of the correct DMARC/DKIM signing.


