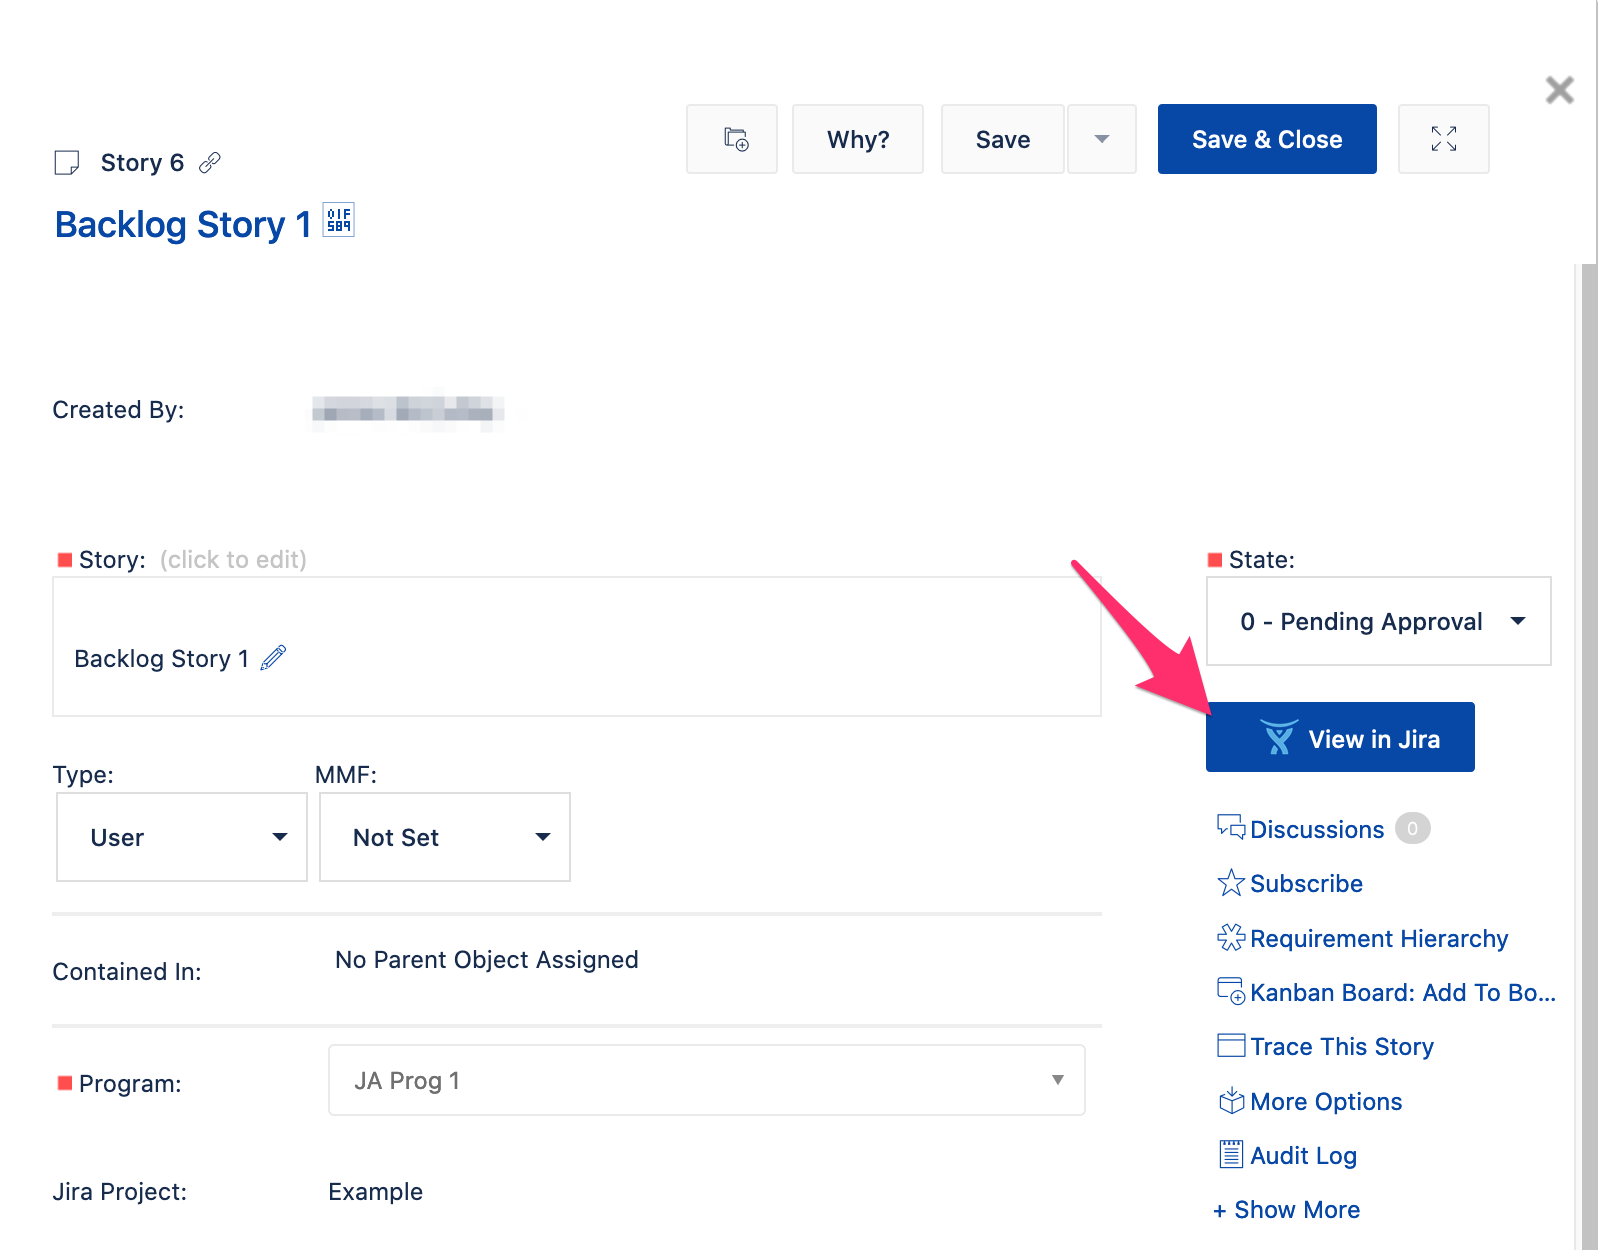
The Jira Align Connector test was successful and authentication is setup (Basic Auth or OAuth 1.0a). Now it's time to sync a project!
Just a word of caution -- if you are a brand new Jira Align customer, it's strongly advised to sync a project with a minimal amount of issues in it. We're just verifying that we can sync a few issues. Your Solution Architect will be able to walk you through a full import at a later time.
Project Key
1) Login to Jira Cloud or Jira Data Center.
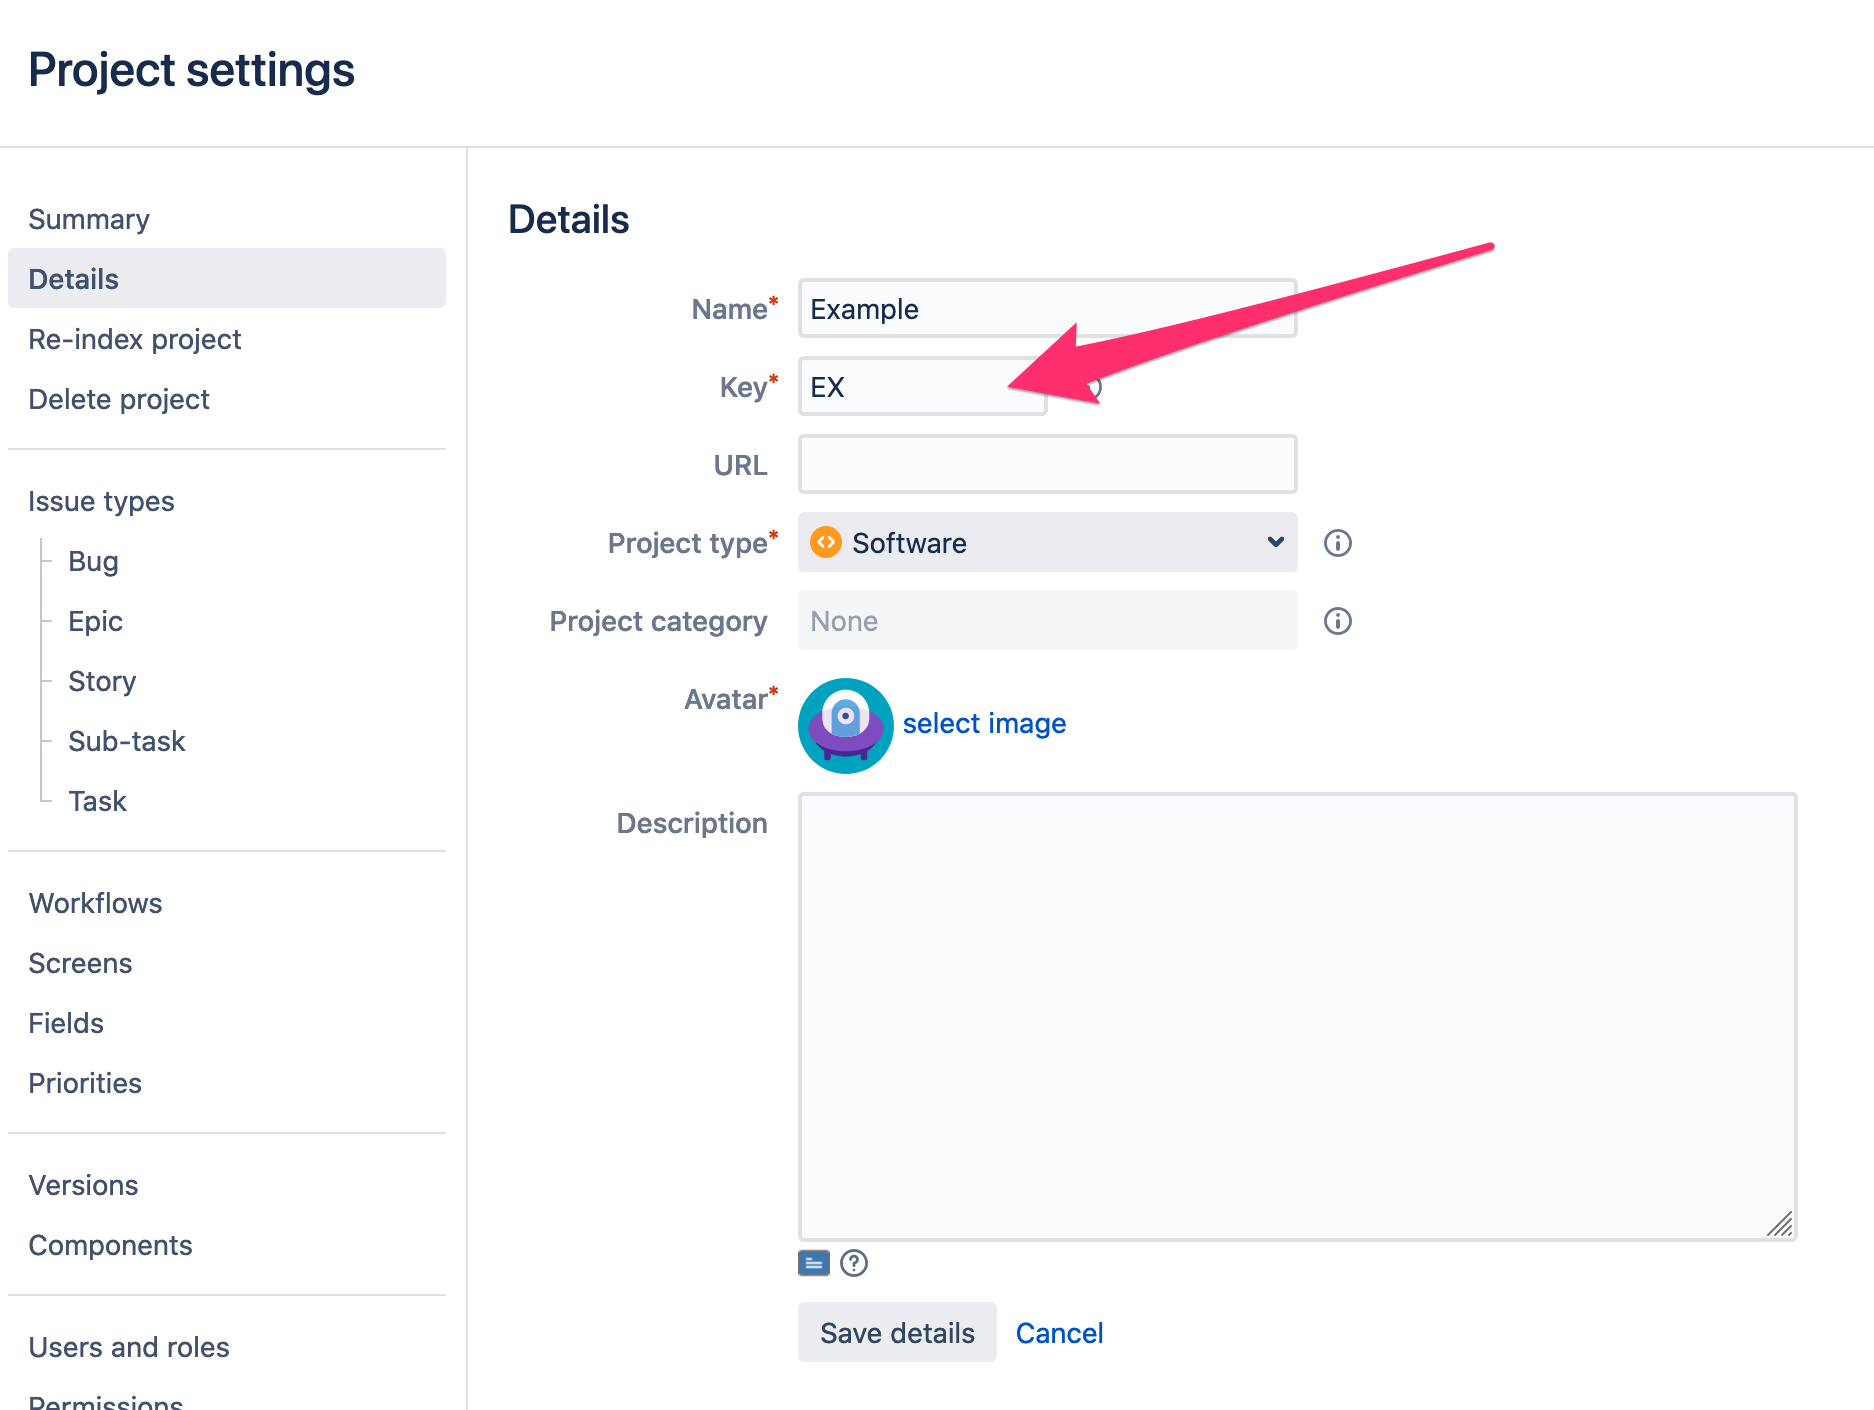
2) In Jira Software, grab the Project Key and Project Name.
- Note: You can see this key under Project Settings within the Project. The key will also show up in your browser address bar when you click on a project in Jira.
Issue Types
Jira Cloud
Skip to 6, if you are using Jira Server or Data Center.
Now, we'll need to grab some IDs.
3) Go to Project Settings (Project > Project Settings).
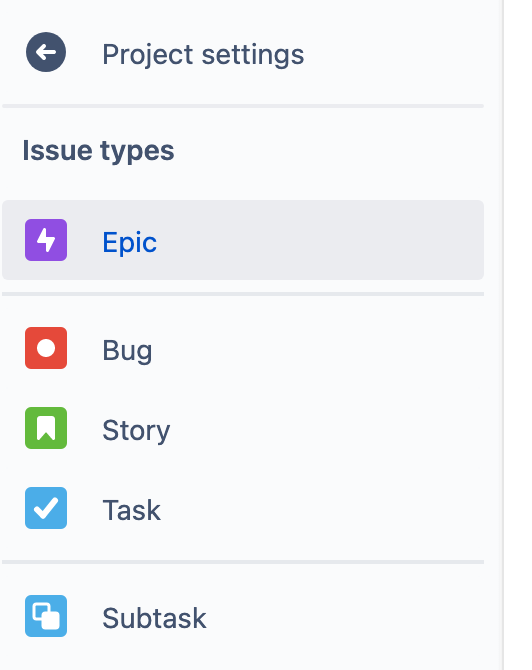
4) Go to Issue Types.
5) Click on Story, Bug, Epic, Sub-Task and copy down the numbers you see in the URL in your browser's address bar.
- Note: By default, the Jira Align Connector will search the default issue types (Epic, Story, Sub-Task, Bug). If your organization is using a different name or custom issue type, that would need to be configured in the Connector before Jira Align would be able to search for it. Please reach out to your Technical Account Manager or Solution Architect on this note if there's any questions.
Note: If you are using
Jira Data Center
Skip to 9, if you are using Jira Cloud.
6) Go to Project Settings (Administration > Projects > Select a Project)
7) Click on Summary under Project Settings.
8) Under the Issue Types Section, hover over Story, Bug, Epic, Sub-Task and copy down the numbers.
Custom Fields
Jira Cloud
Skip to 16, if you are using Jira Server or Data Center.
9) Click search box top right
10) Click advanced issue search
Note: Switch to JQL if not already there
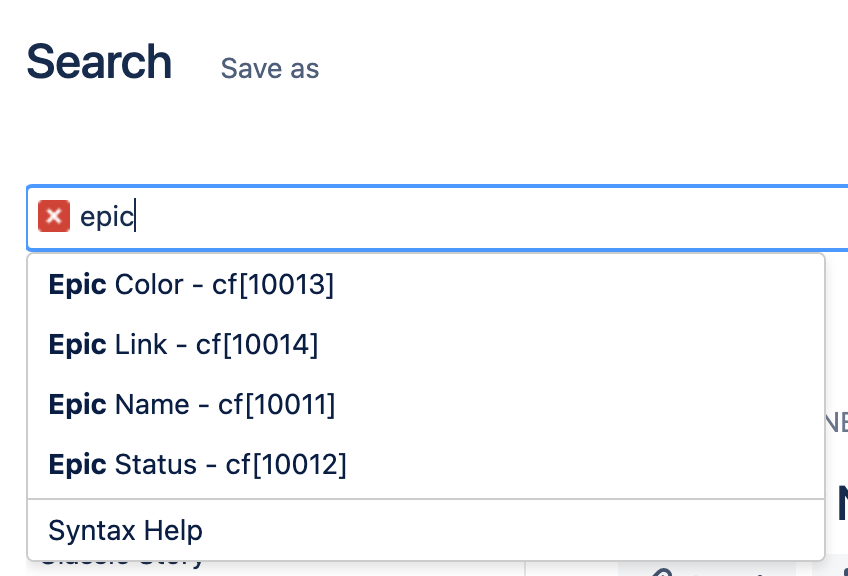
11) Erase what's in the search box
12) Type in "epic" and don't press enter. Copy down Epic Name and Epic Link numbers.
13) Type in "sprin" and don't press enter. Copy down Sprint number.
- Alternatively, you can find these IDs by going to Settings > Issues > Custom Fields > 3 Dots on Far Right > View Field Information and copy the ID in the URL in your browser.
14) If you are using Next-Gen Projects (Team-Managed), you can type in "story" and copy down the Story Point Estimate number.
15) If you are using Classic Projects (Company-Managed), you'll need to go to Settings (top right) > Issues > Custom Fields > Story Points > 3 Dots on Far Right > Contexts and Default Value and copy the ID in the URL in your browser.
Jira Data Center
Skip to 19, if you are using Jira Cloud.
16) Go to Project Settings (Administration > Projects > Select a Project)
17) Click on Fields in the 2nd menu column.
18) For each of these names, hover over the link under the Screens column and copy down the numbers: Epic Name, Epic Link, Story Point, Sprint
Add Timers
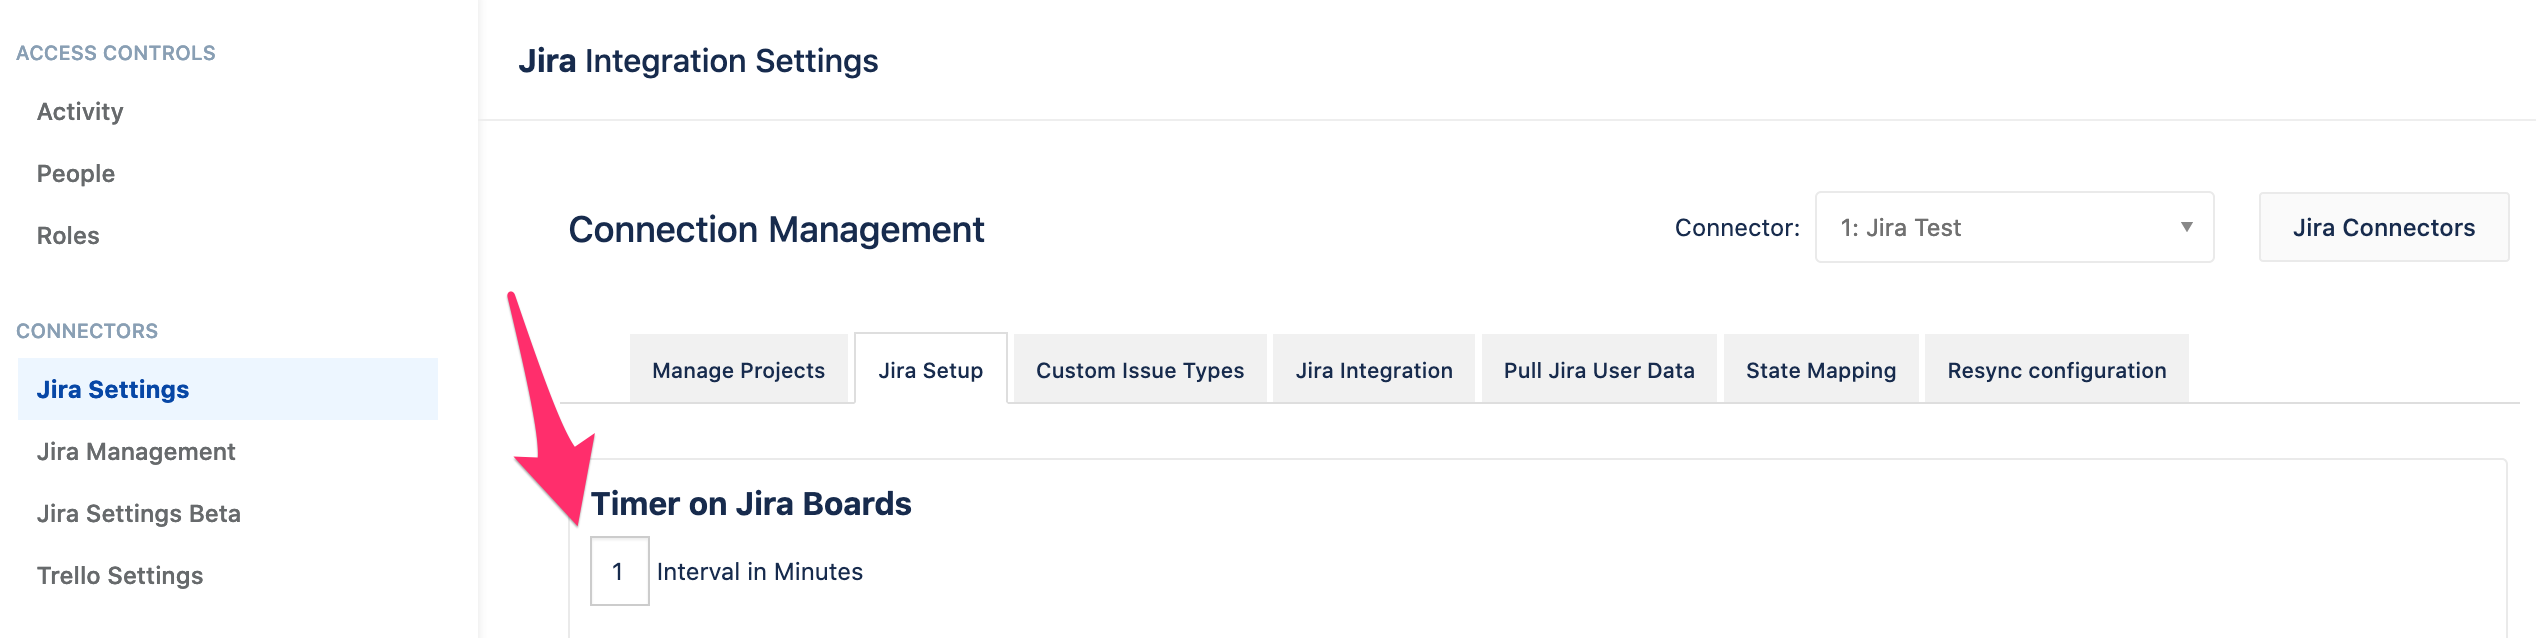
19) In Jira Align, go to Admin > Connectors > Jira Settings > Jira Setup.
20) Set Timer on Jira Boards > Interval in Minutes to 1.
21) Set Timer on Jira Issues > Interval in Minutes to 1.
22) Click Save at the bottom.
Add Project
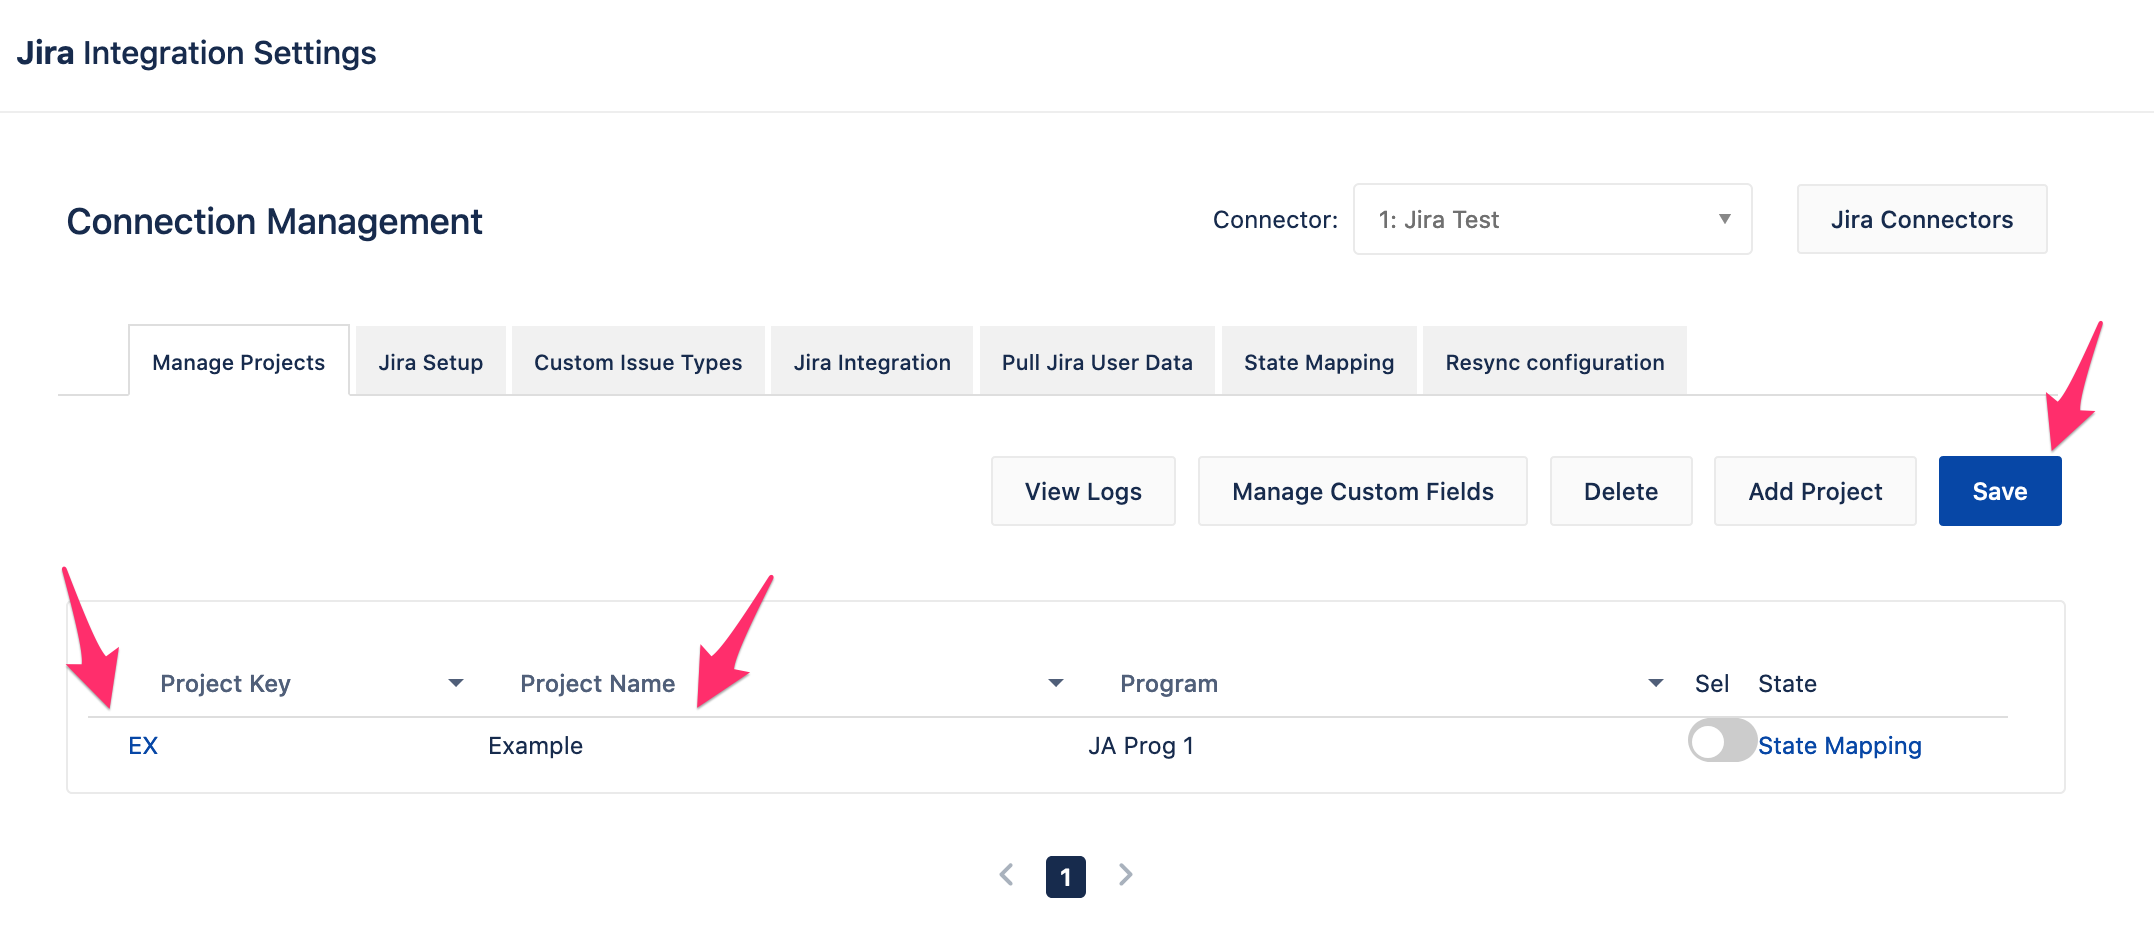
23) In Jira Align, Go to Admin > Connectors > Jira Settings > Manage Projects.
24) Click Add Project.
25) Type in the Project Key and Project Name. Click Save.
Add Issue Types and Custom Fields
Company-Managed Projects:
- In Jira Align, go to Admin > Connectors > Jira Settings > Jira Setup.
- Set Issue Type IDs based on steps 3 - 8.
- Set Custom Field IDs based on steps 9 - 15.
- Note: For Custom Field in Jira Align it will be "customfield_<ID>"
Team-Managed (Next-Gen) Projects:
- In Jira Align, go to Admin > Connectors> Jira Settings > Manage Projects.
- Click the Project Key of the Team-Managed Project.
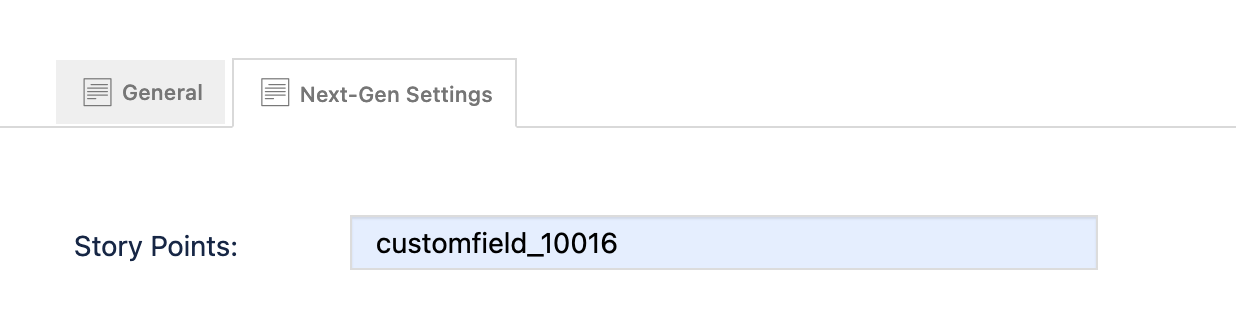
- Click the Next-Gen Settings tab.
- Fill in the Story Points field (from step 14) as follows: customfield_#####.
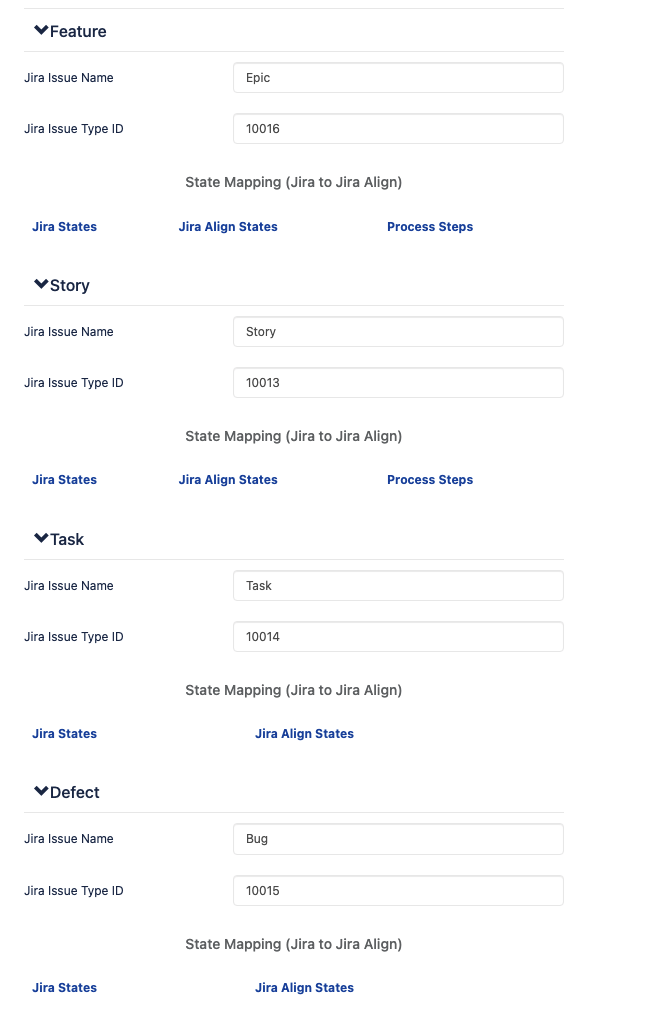
- For Feature (Epic), Story, Task, Defect (Bug), you'll need to use the project specific IDs. They will likely be different than the Company-Managed Project IDs.
Examples (be sure to use your own IDs):
See also: 10X Jira Integration Setup - Set up Team-Managed Projects
Confirm Sync
- In Jira, go to an issue in the project and change the description or add a comment.
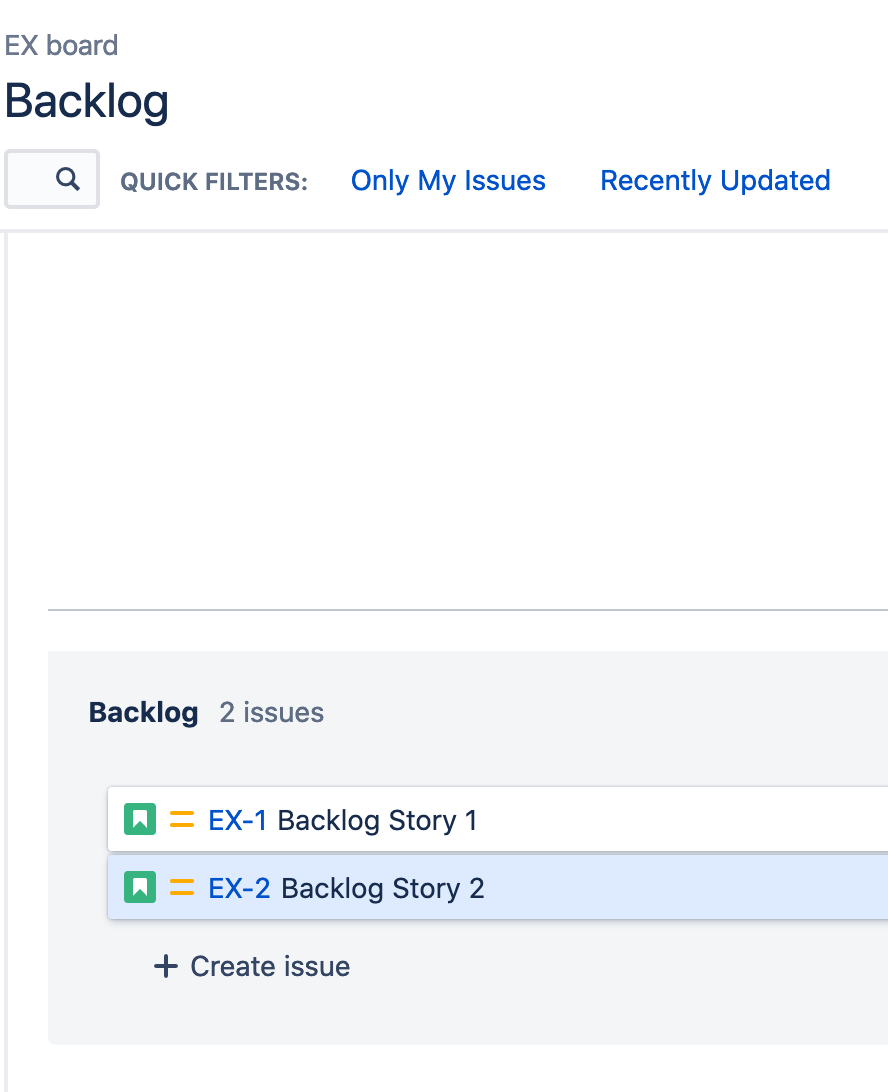
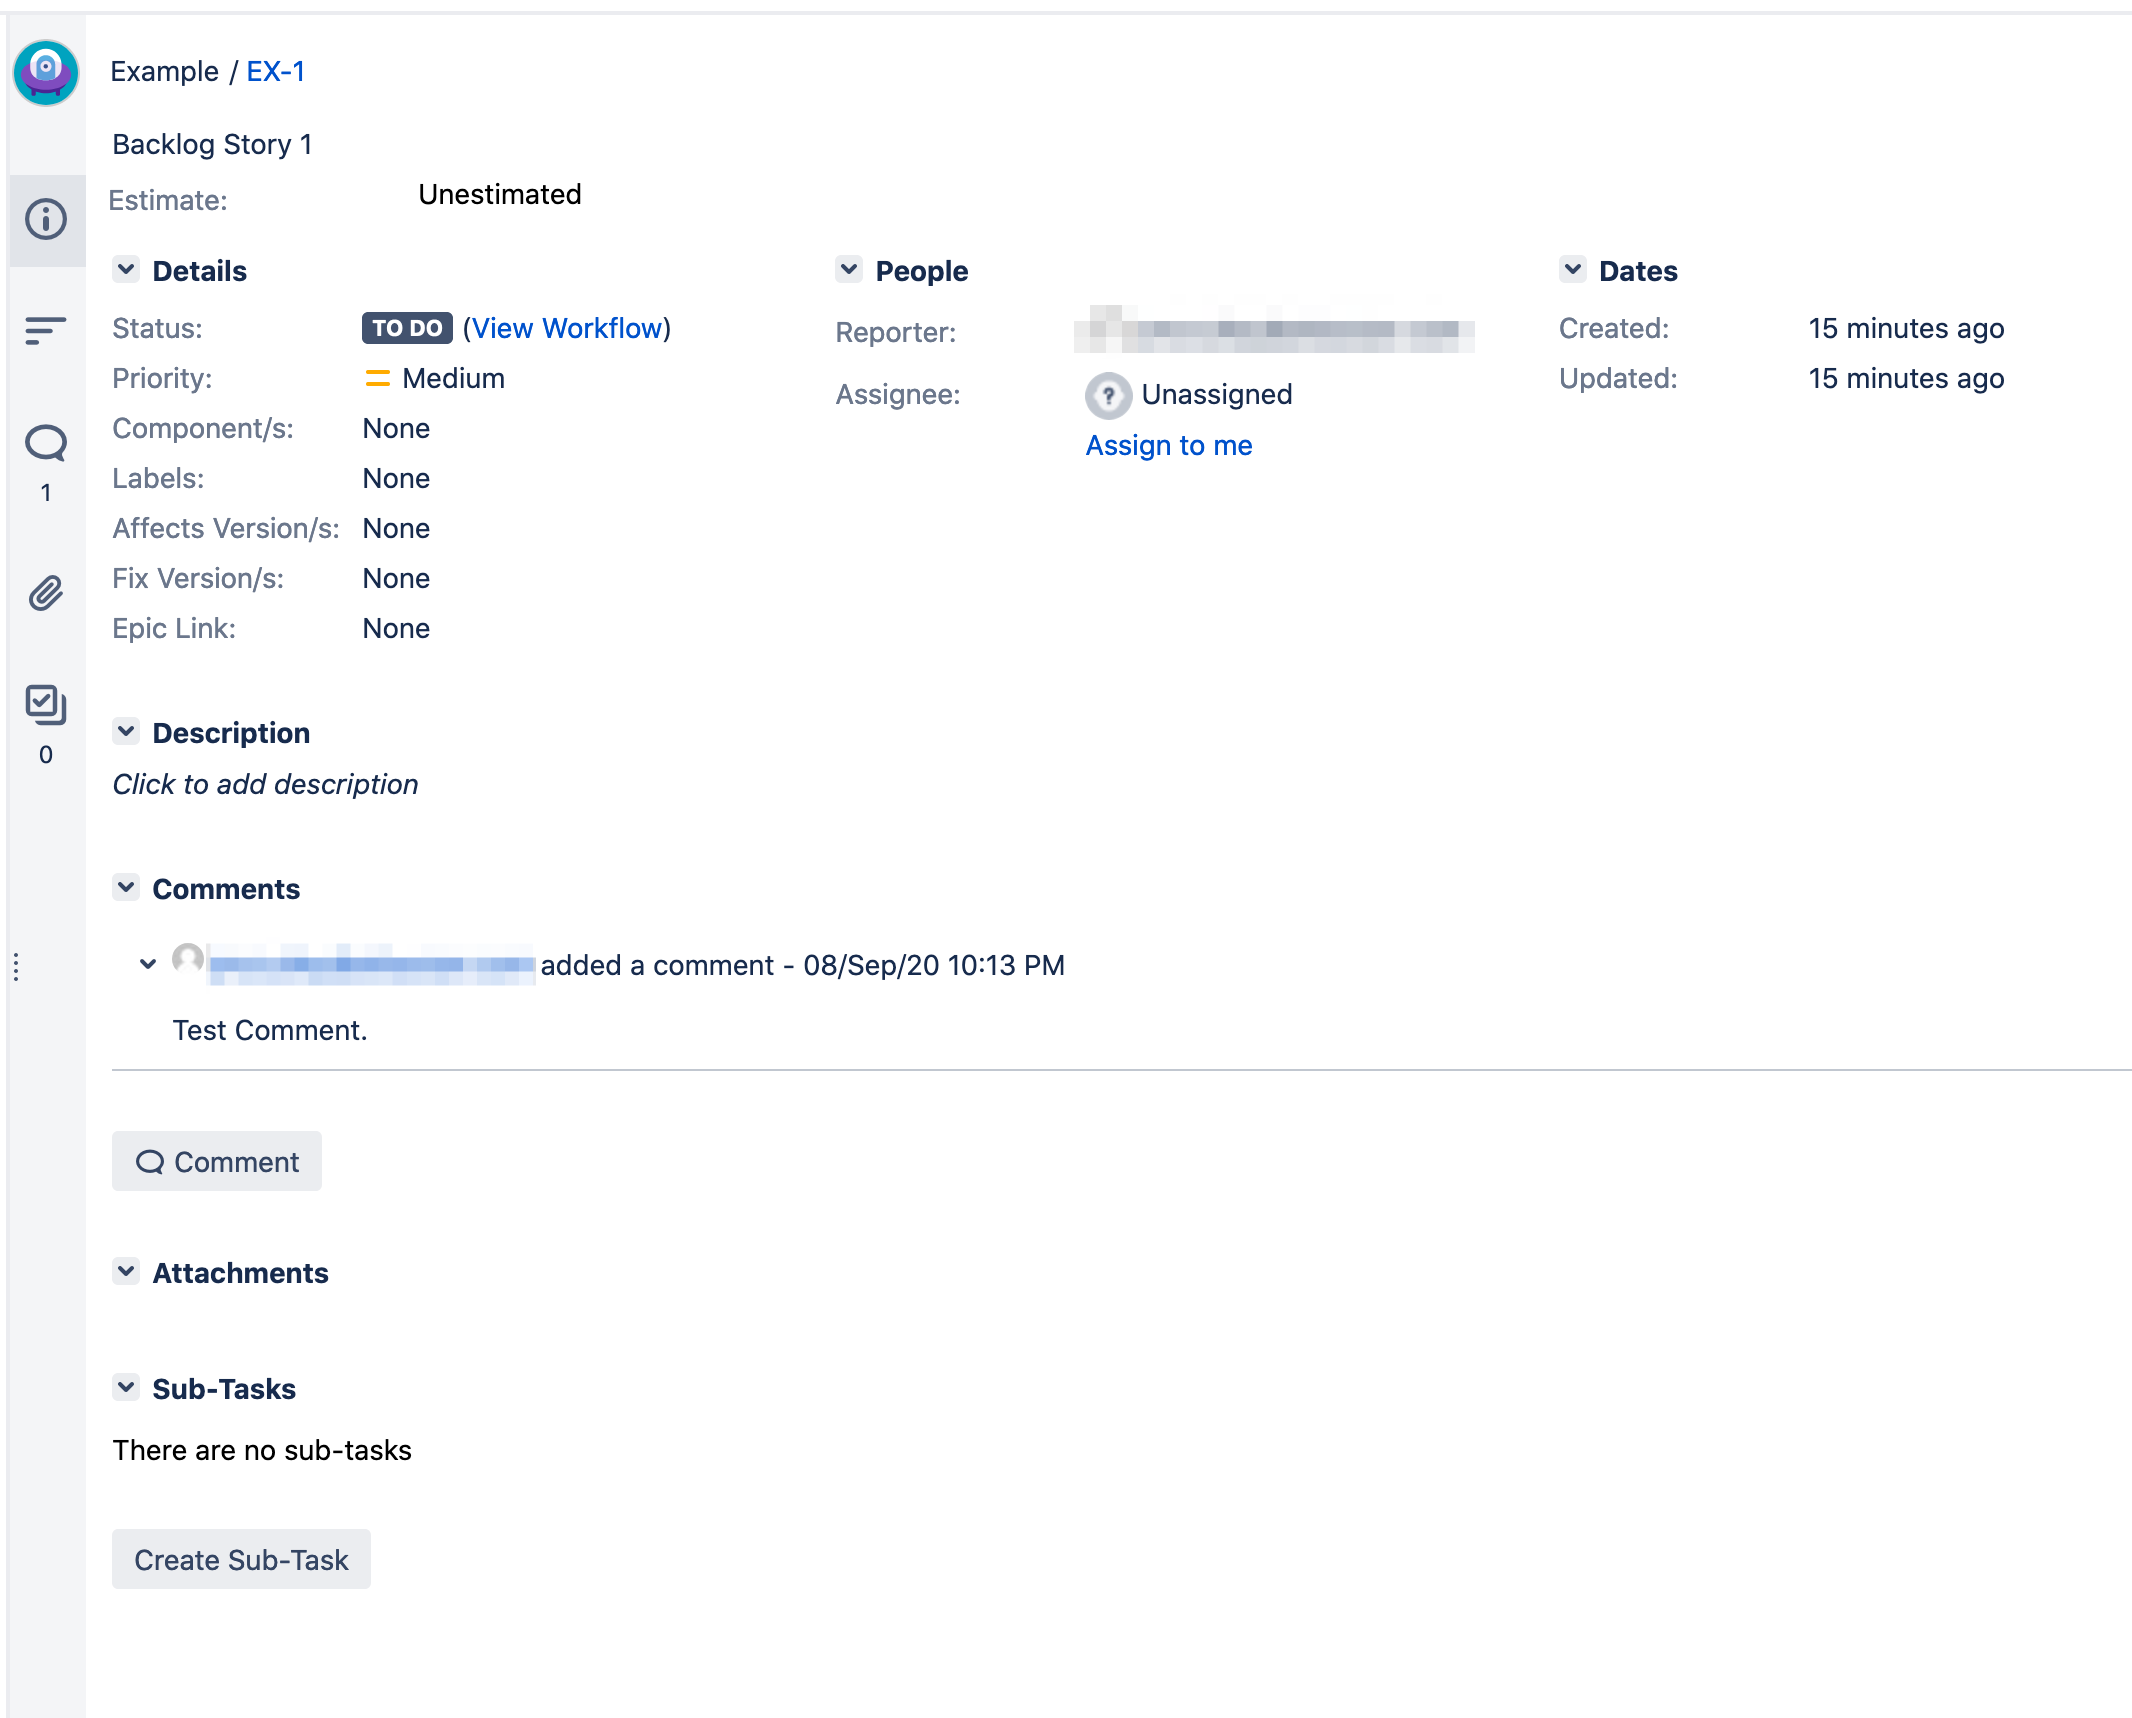
- Wait a minute or so and search in Jira Align (top right corner) for your Project Key from earlier.

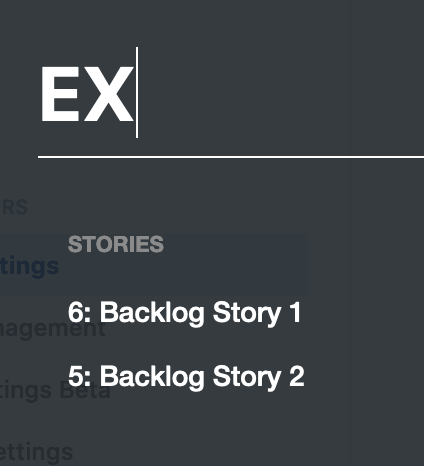
- Click on the issue and click on View in Jira in the right pane to take you back to Jira.