TL;DR
Project admins can now set up and control access to individual issues or set a default restriction to issues of an issue type for a next-gen project.
What has shipped?
Until now, the ability to restrict access to an issue was available only on classic Jira projects. Using the issue security feature, admins or users with appropriate permissions can ensure selective viewing rights to issues that should be visible to certain users only and not to every user in a project. Learn more about issue restrictions on classic projects
We are excited to announce that admins or users with appropriate permissions of next-gen projects can now restrict an issue or issues of an issue type to a role or a set of roles for a next-gen project.
Please note, to set issue restrictions for issues in a next-gen project:
How do I use it?
Customers can choose to restrict issues for the next-gen projects in several ways:
A. Restrict issues individually
For new issues - To restrict access to a system-defined role or a custom role while creating an issue:
-
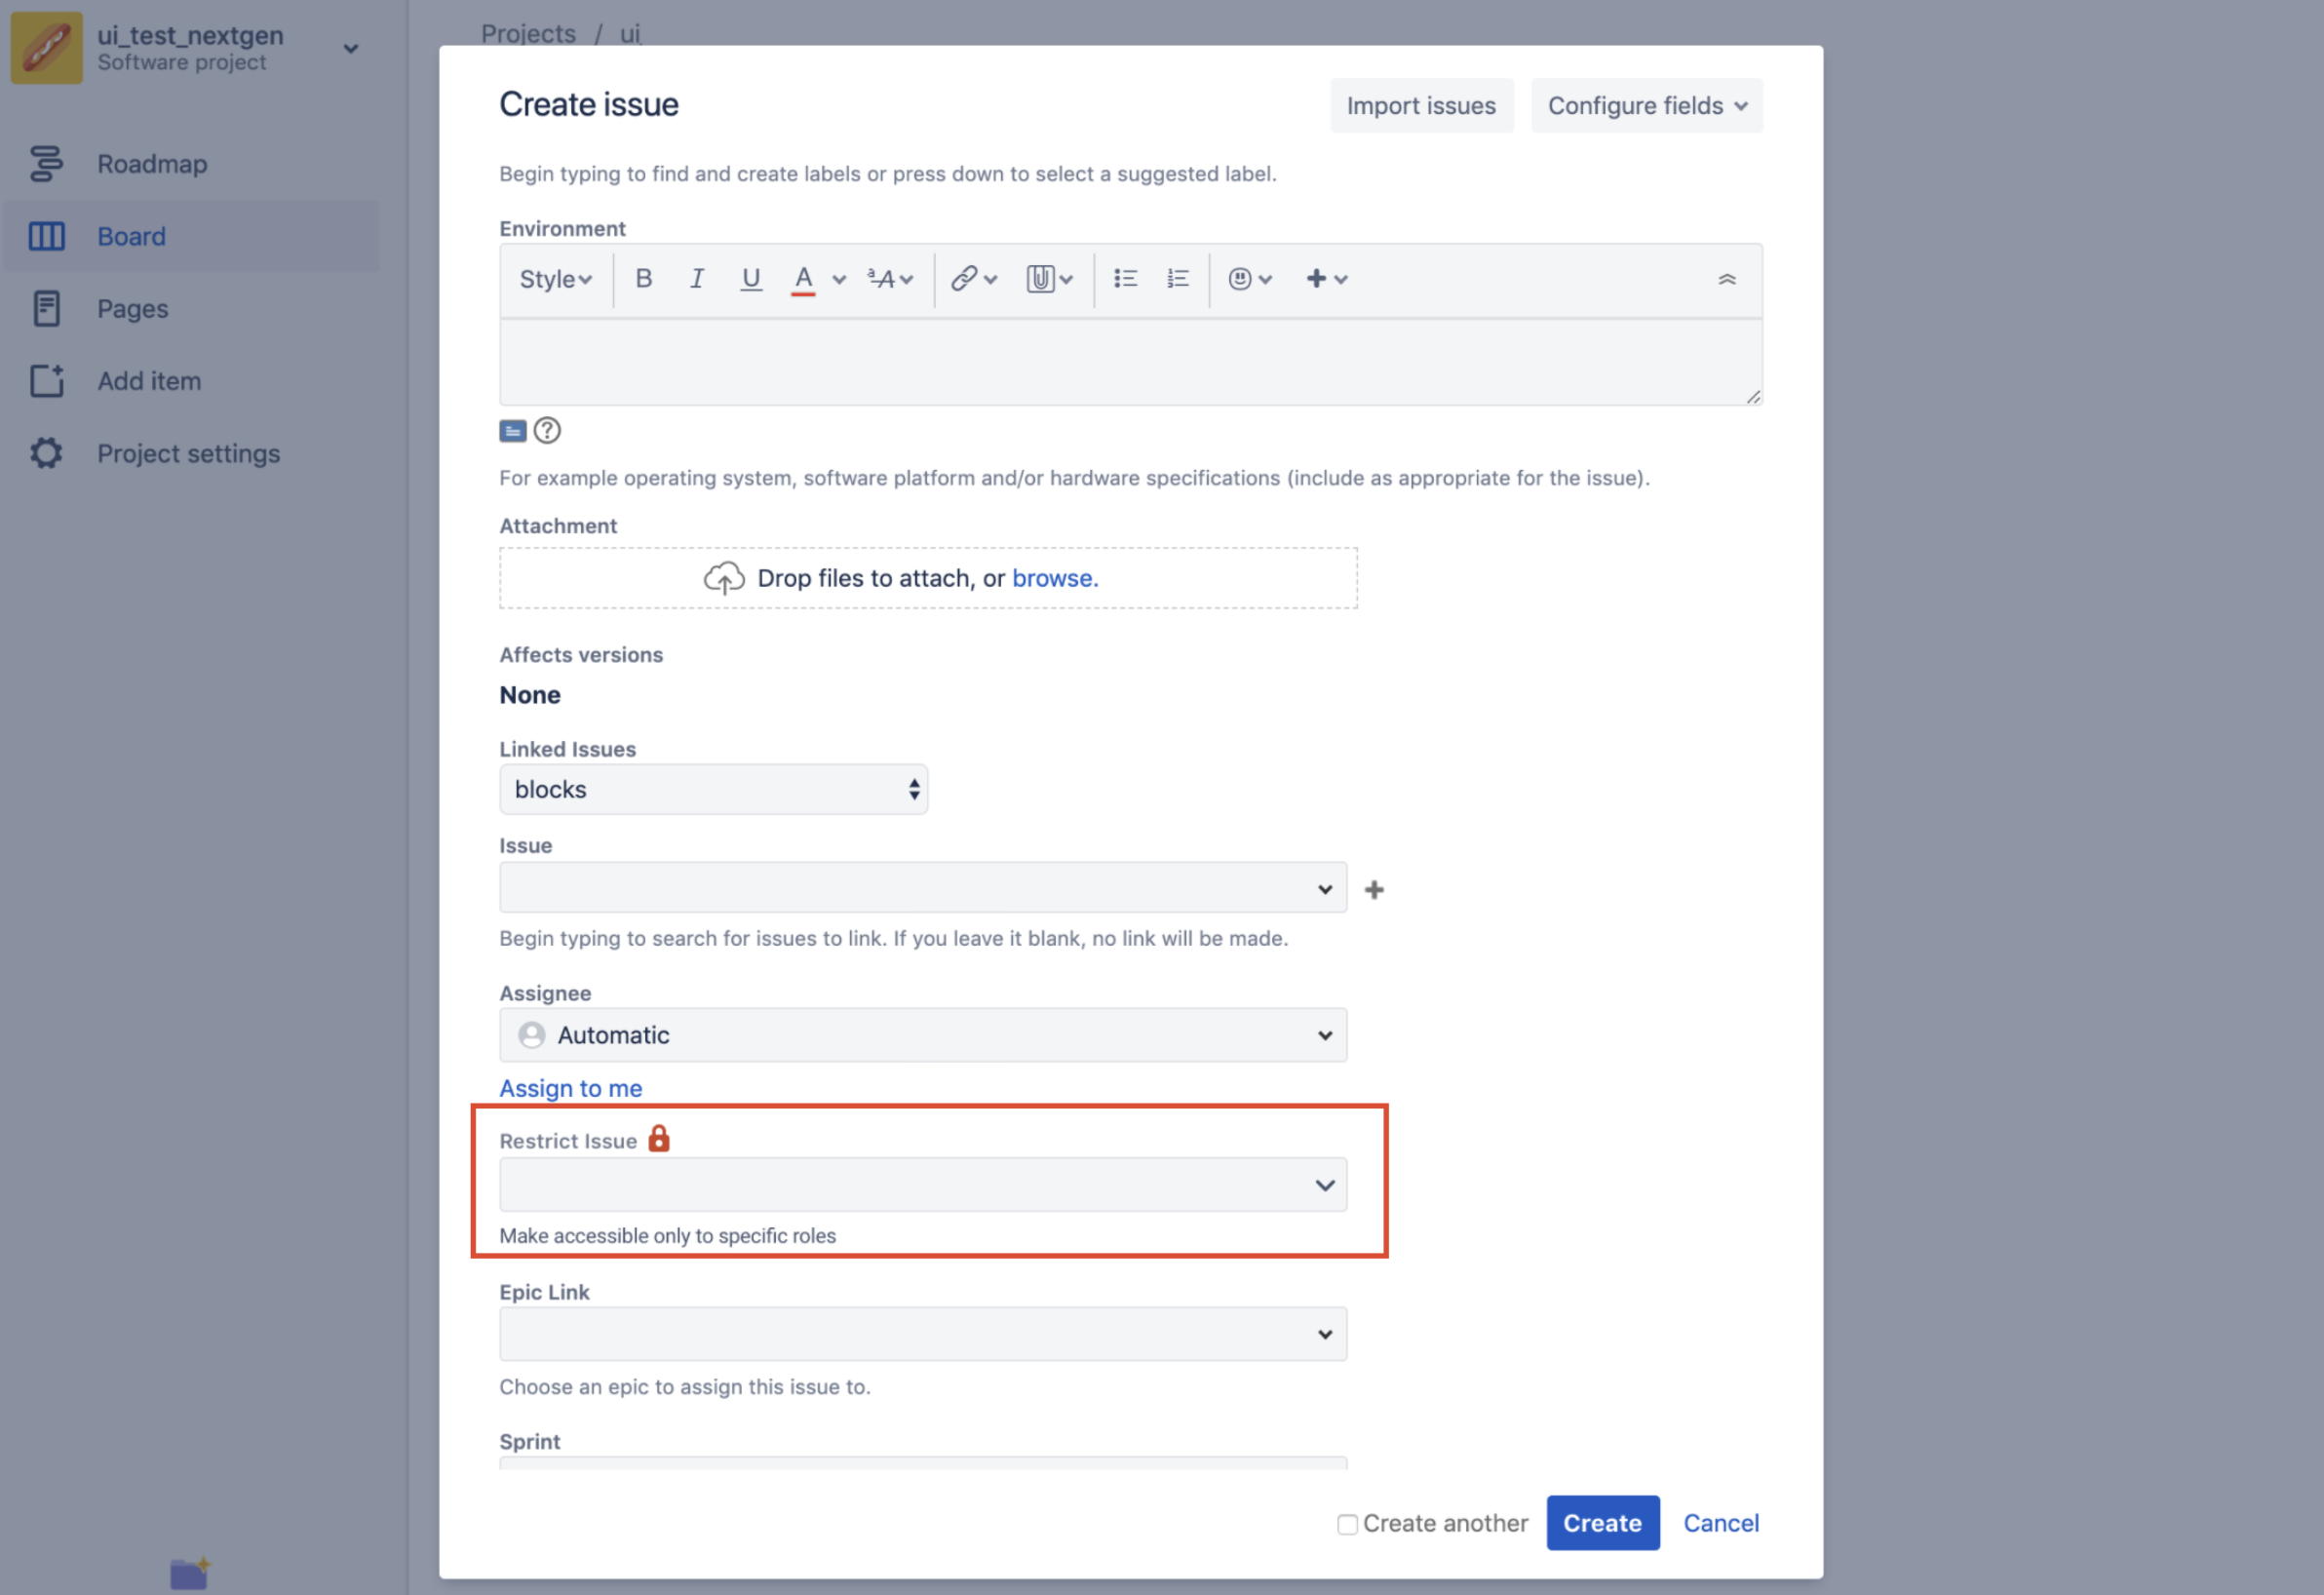
Click on the ‘Restrict Issue’ dropdown in the Create issue modal. If the ‘Restrict Issue’ field is not visible to you, please ensure that the conditions specified above are met and that the restrict user field is configured for this screen.
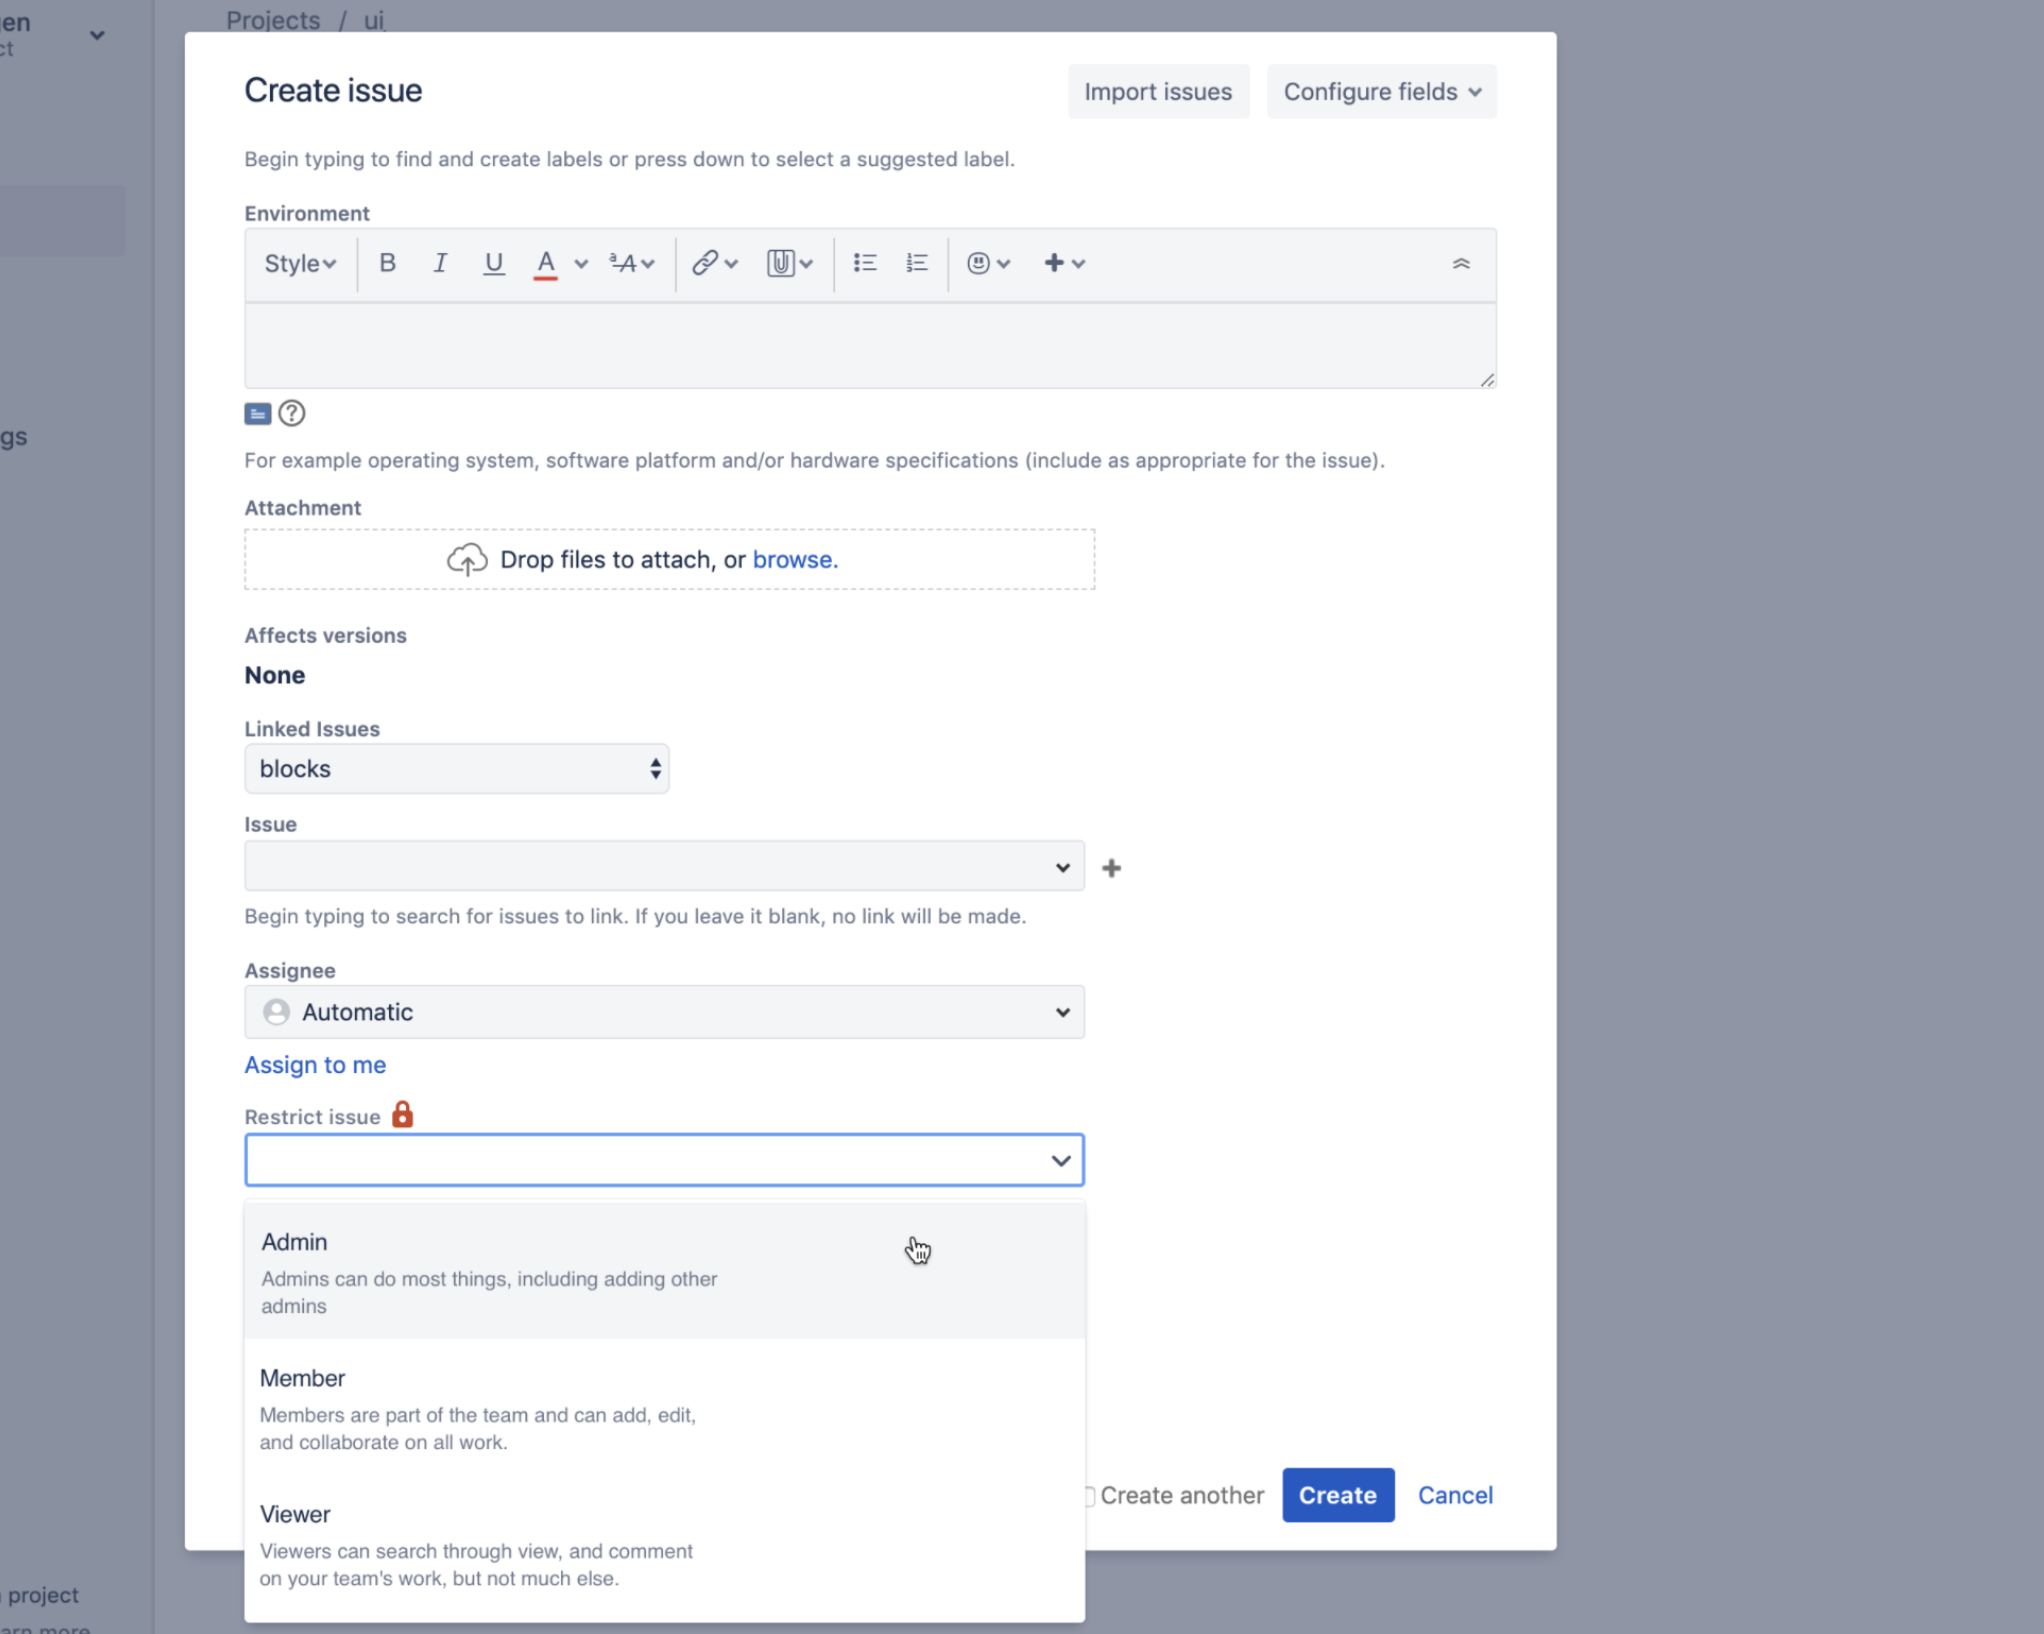
- Choose the project role you would like to restrict the issue from the list of the project roles available for the project.
- You can also restrict the issue to multiple project roles.
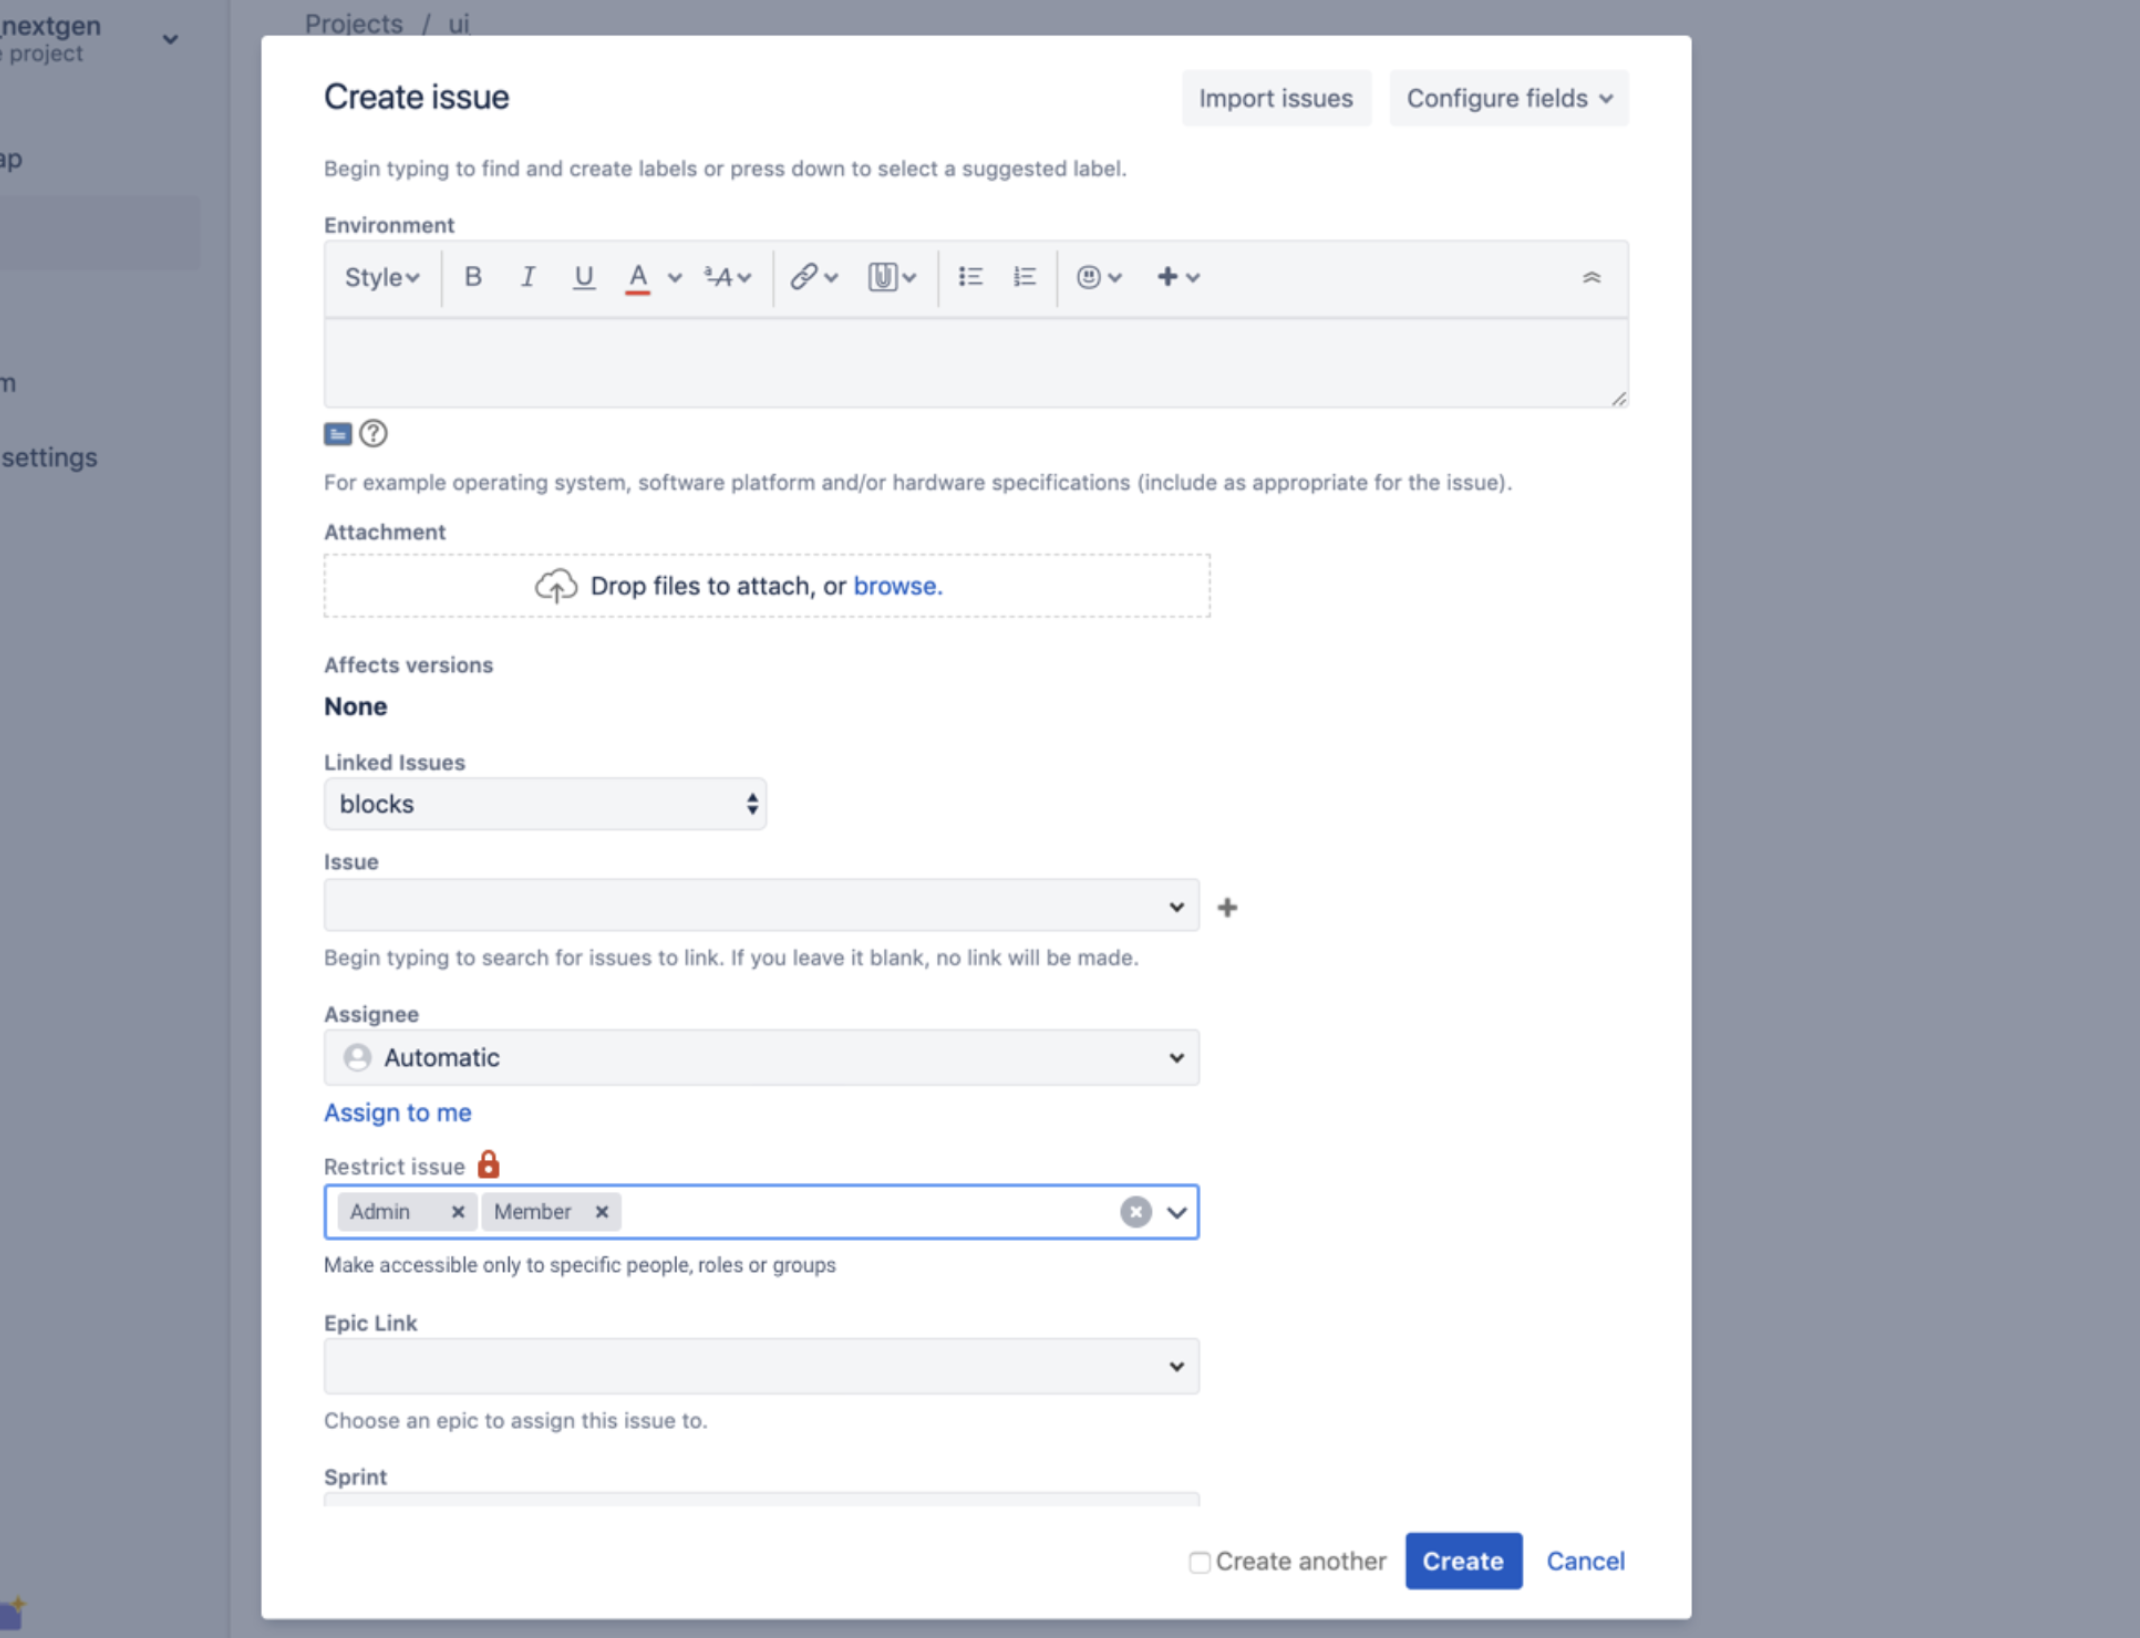
- Click Create, and your issue with the configured restrictions will appear in your project.
For existing issues - To restrict or modify the access to an issue in your project that already exists:
-
Open the issue in the issue viewer and click on the lock icon on the top right corner. If the lock icon is not visible to you, please check if the conditions specified above are met.
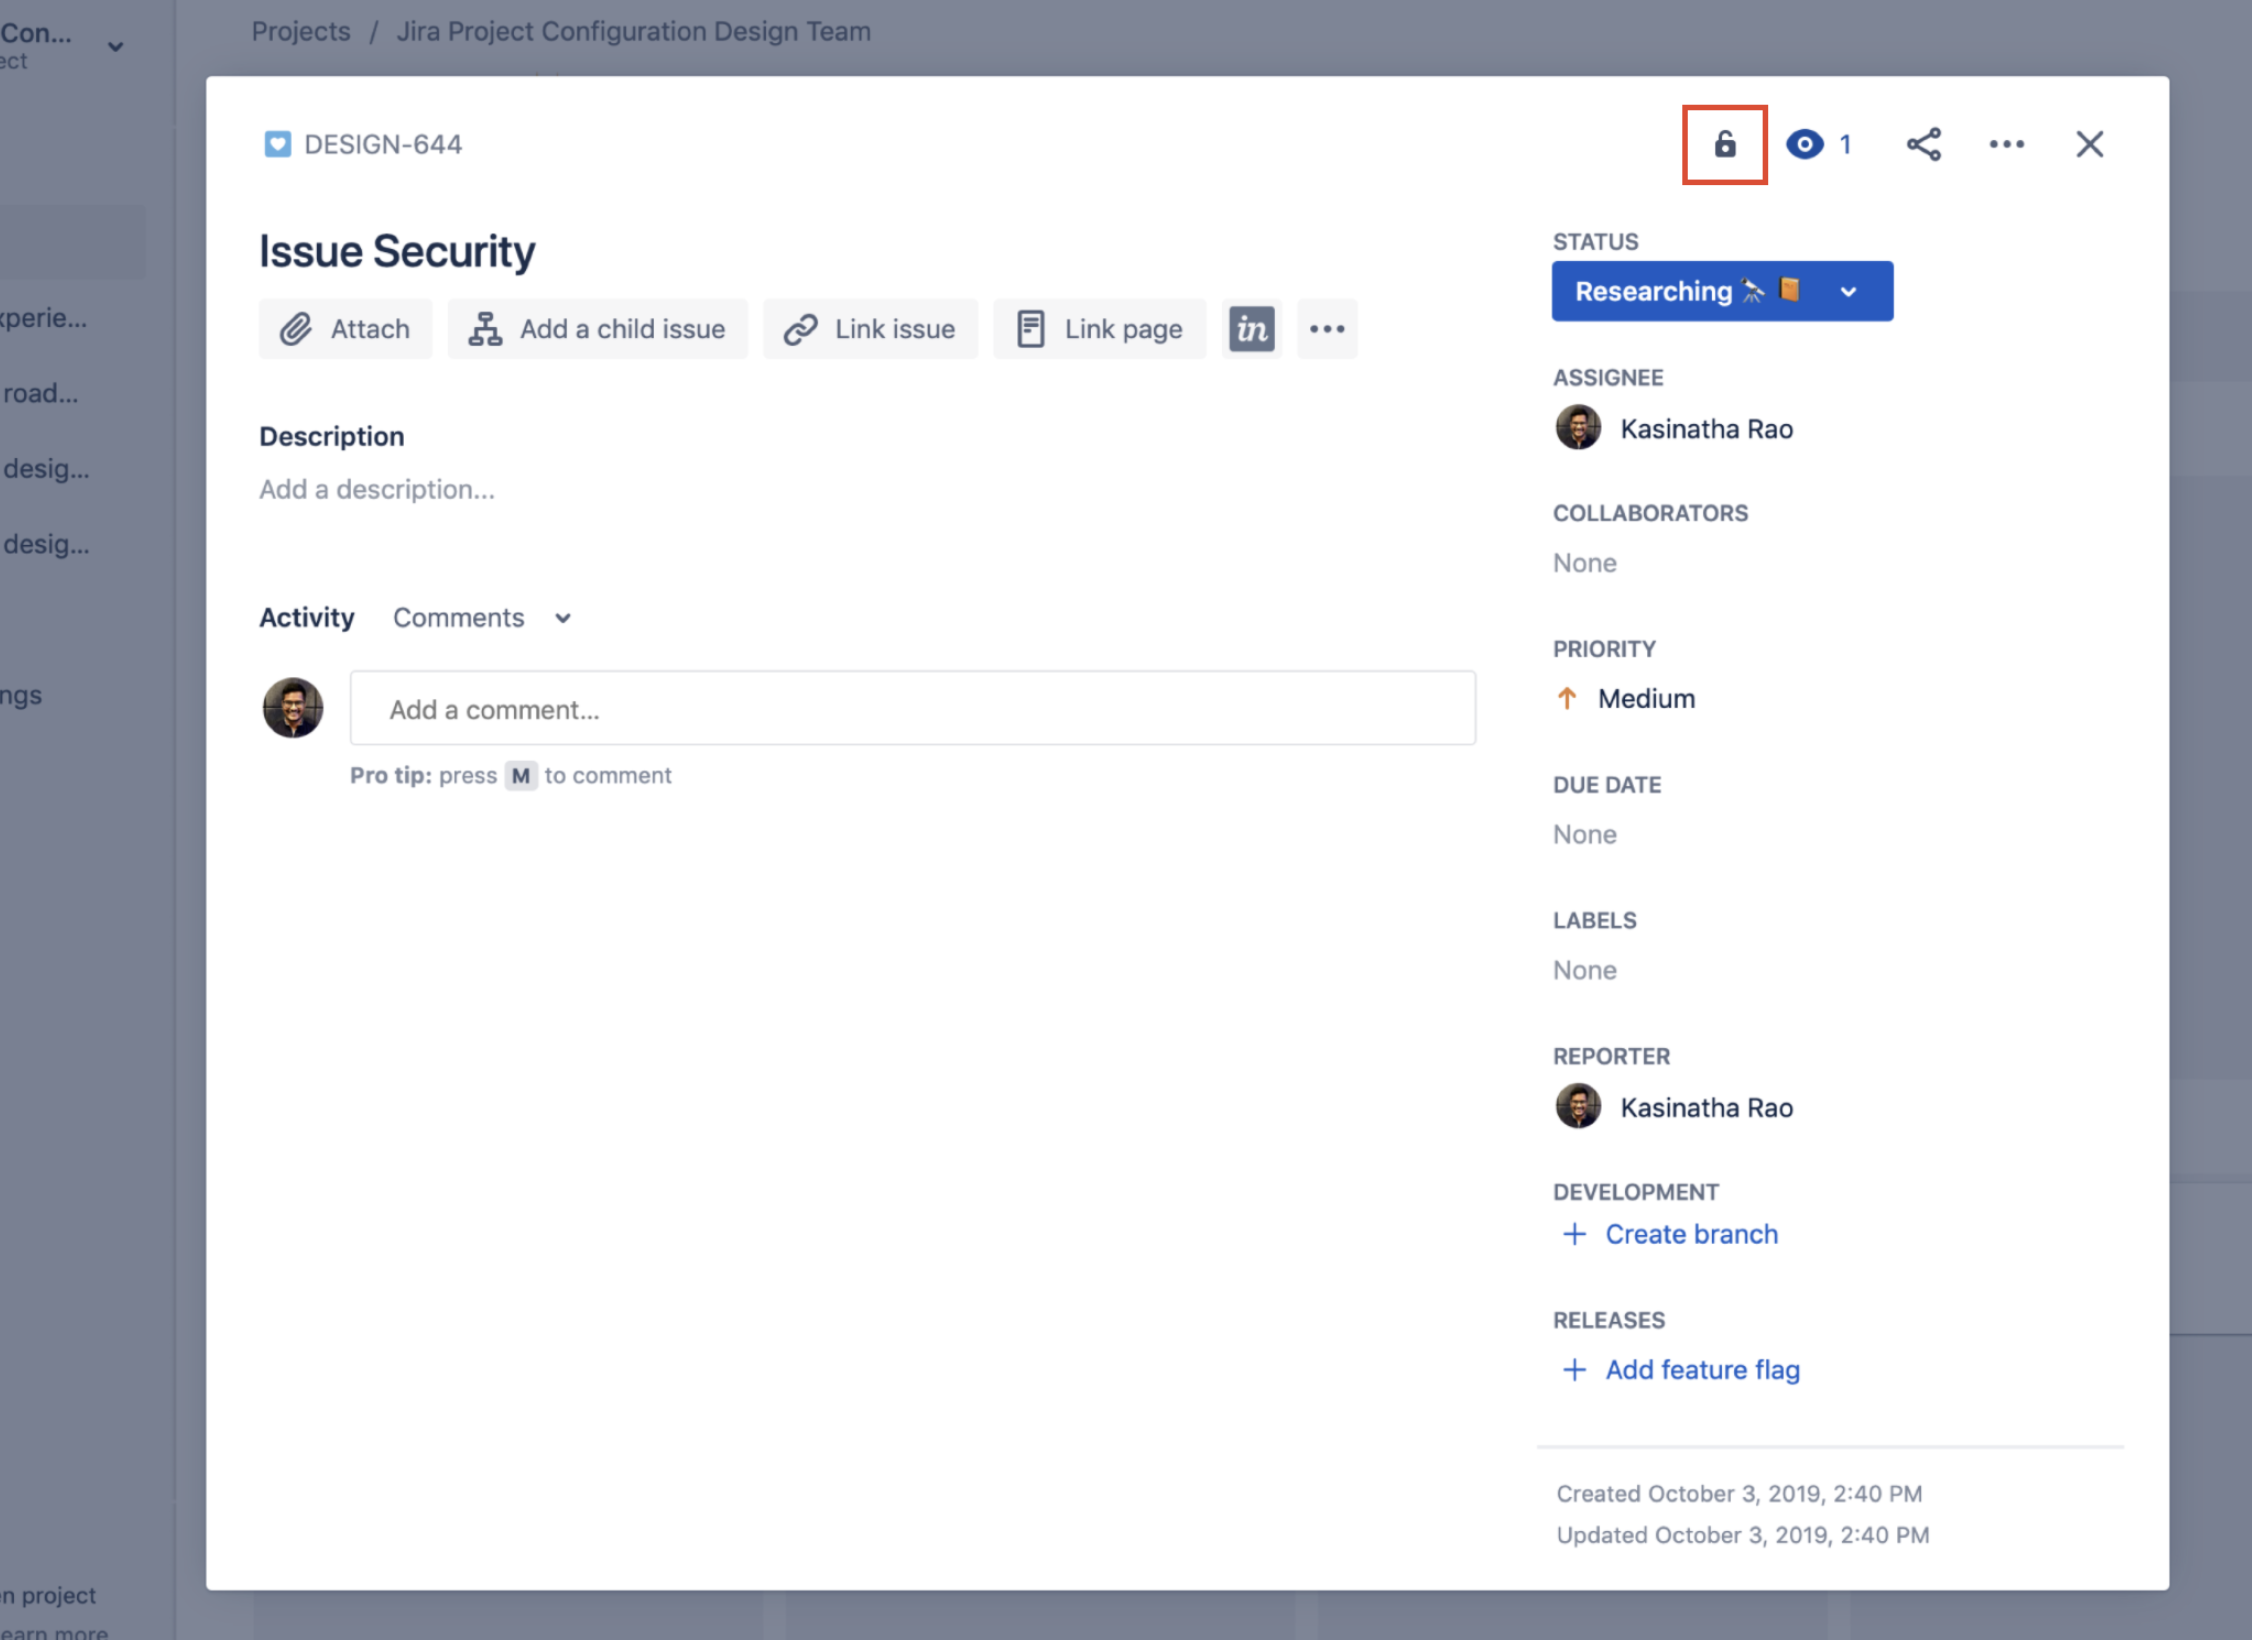
- Choose the roles you would like this issue to be restricted to
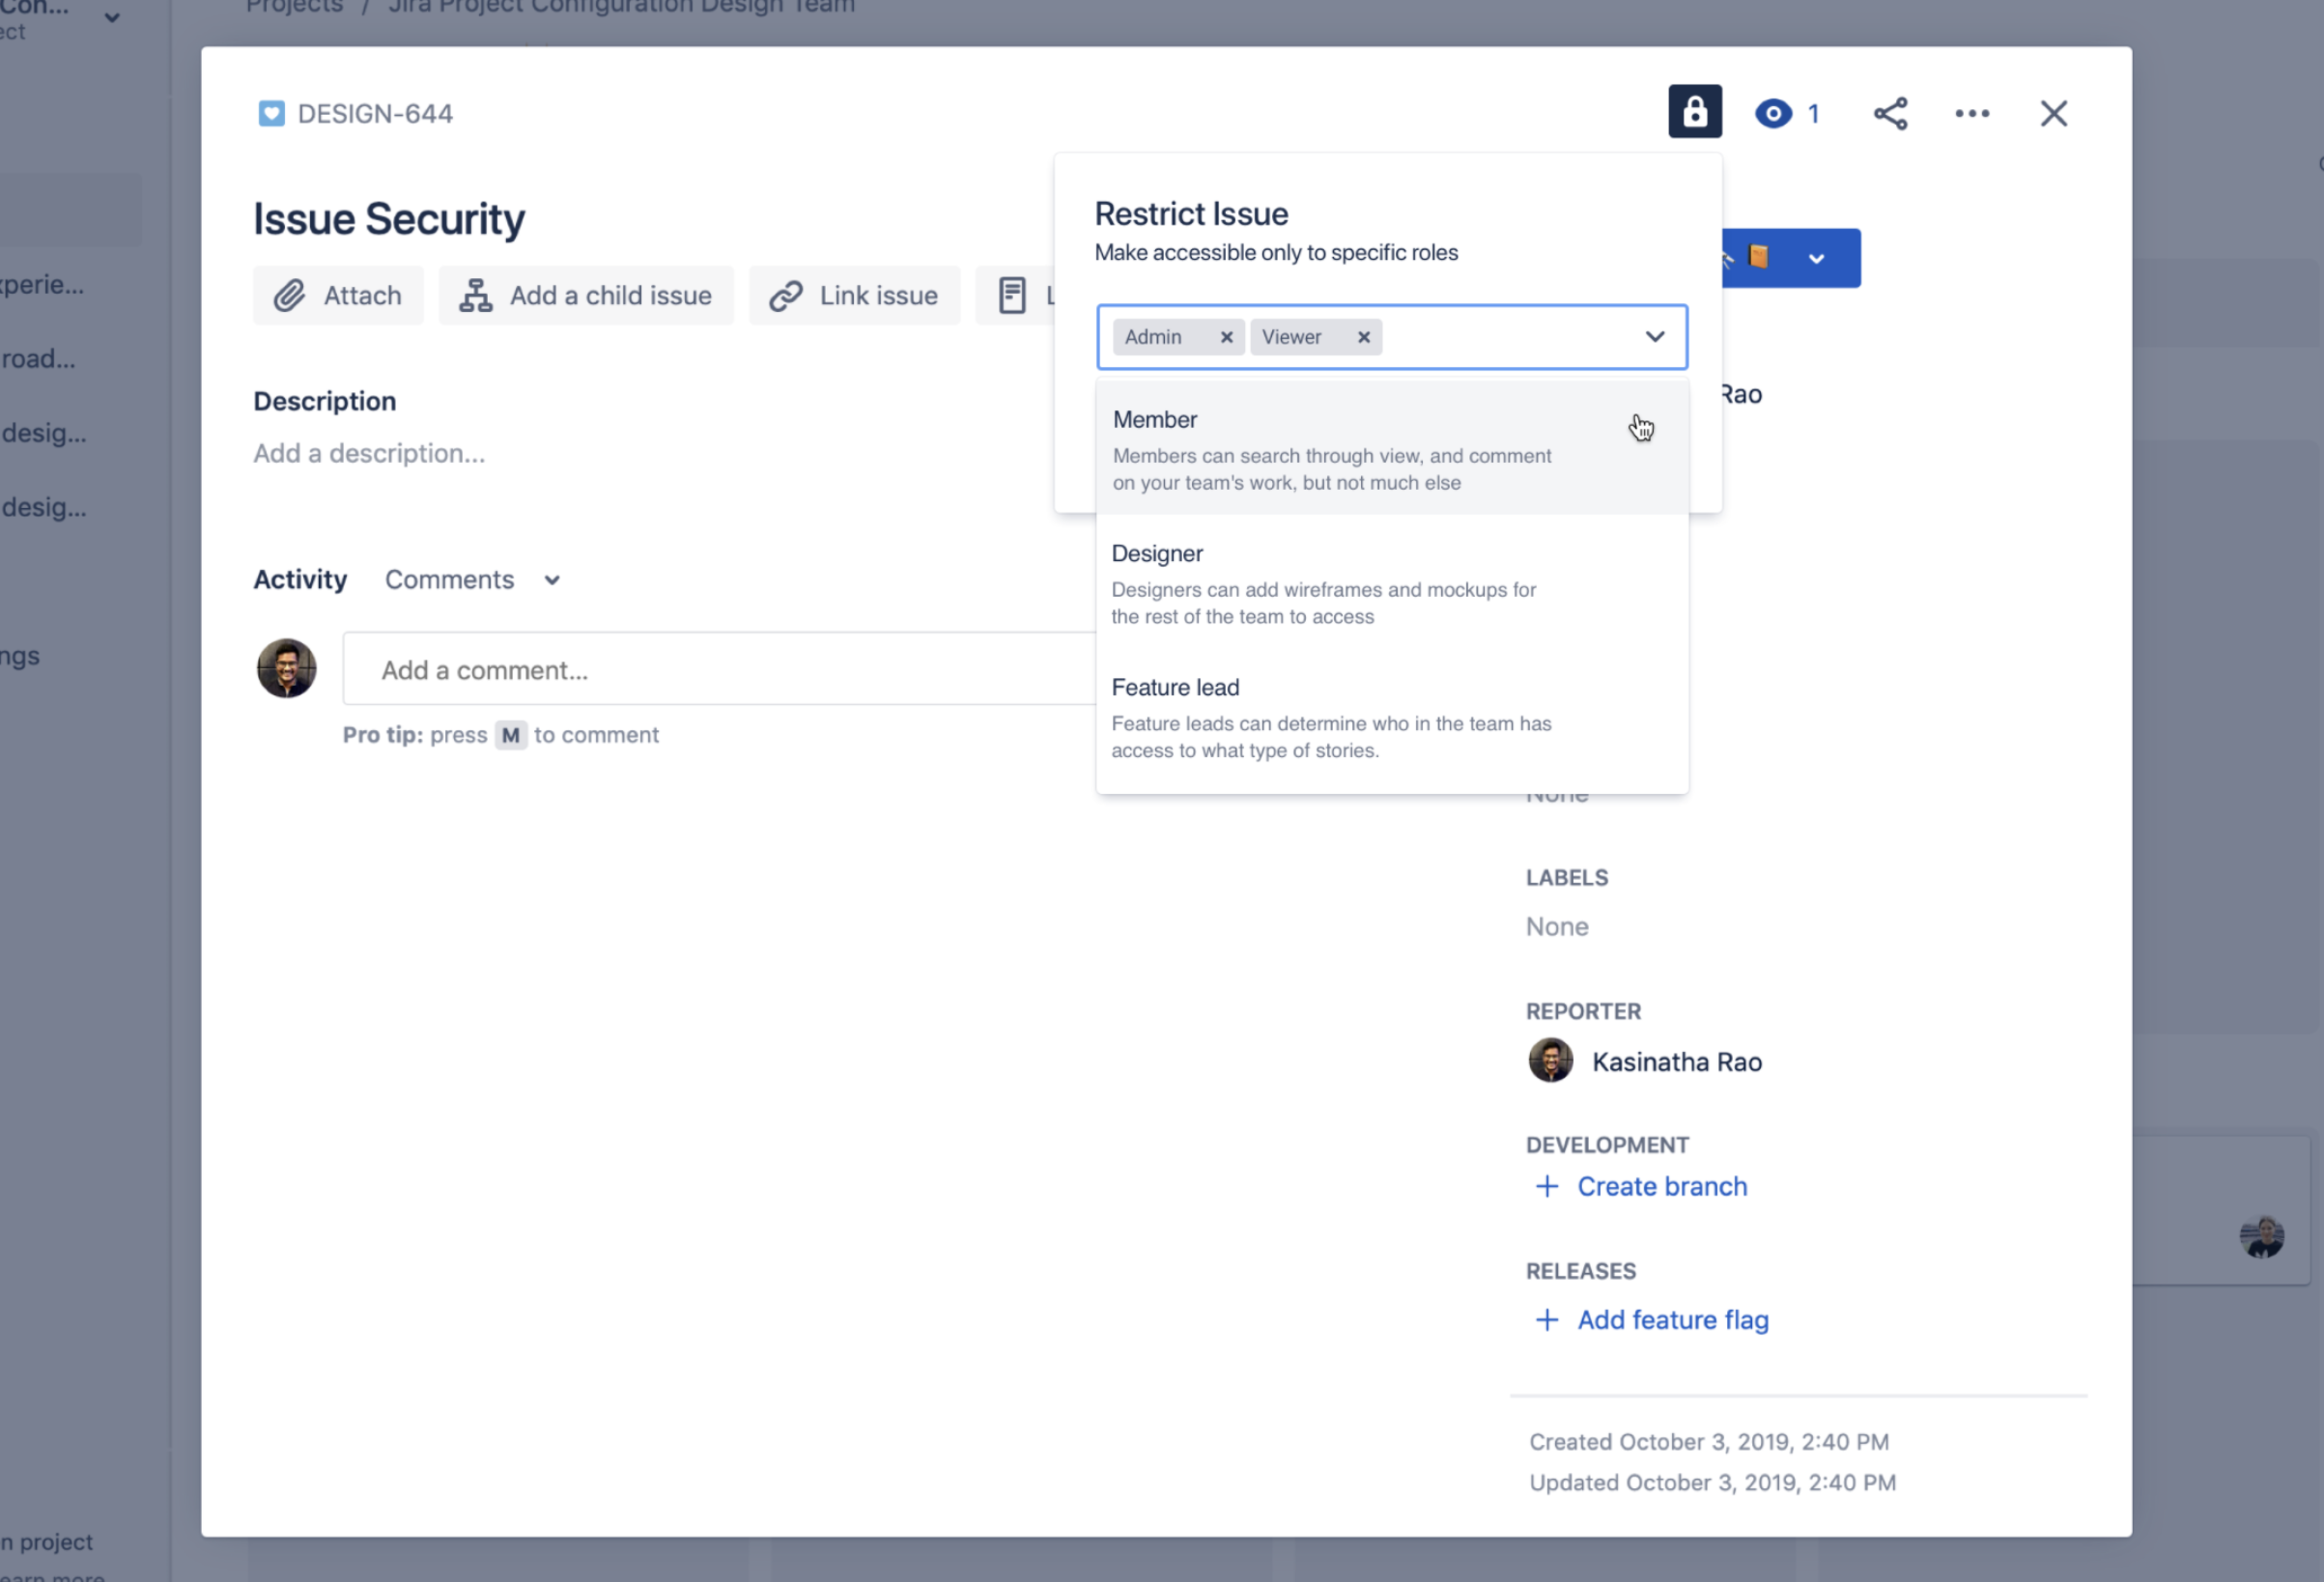
You can also add or change the restrictions of existing issues from the issue viewer available from the sprint view as well by clicking on the lock icon in the top right corner of the issue
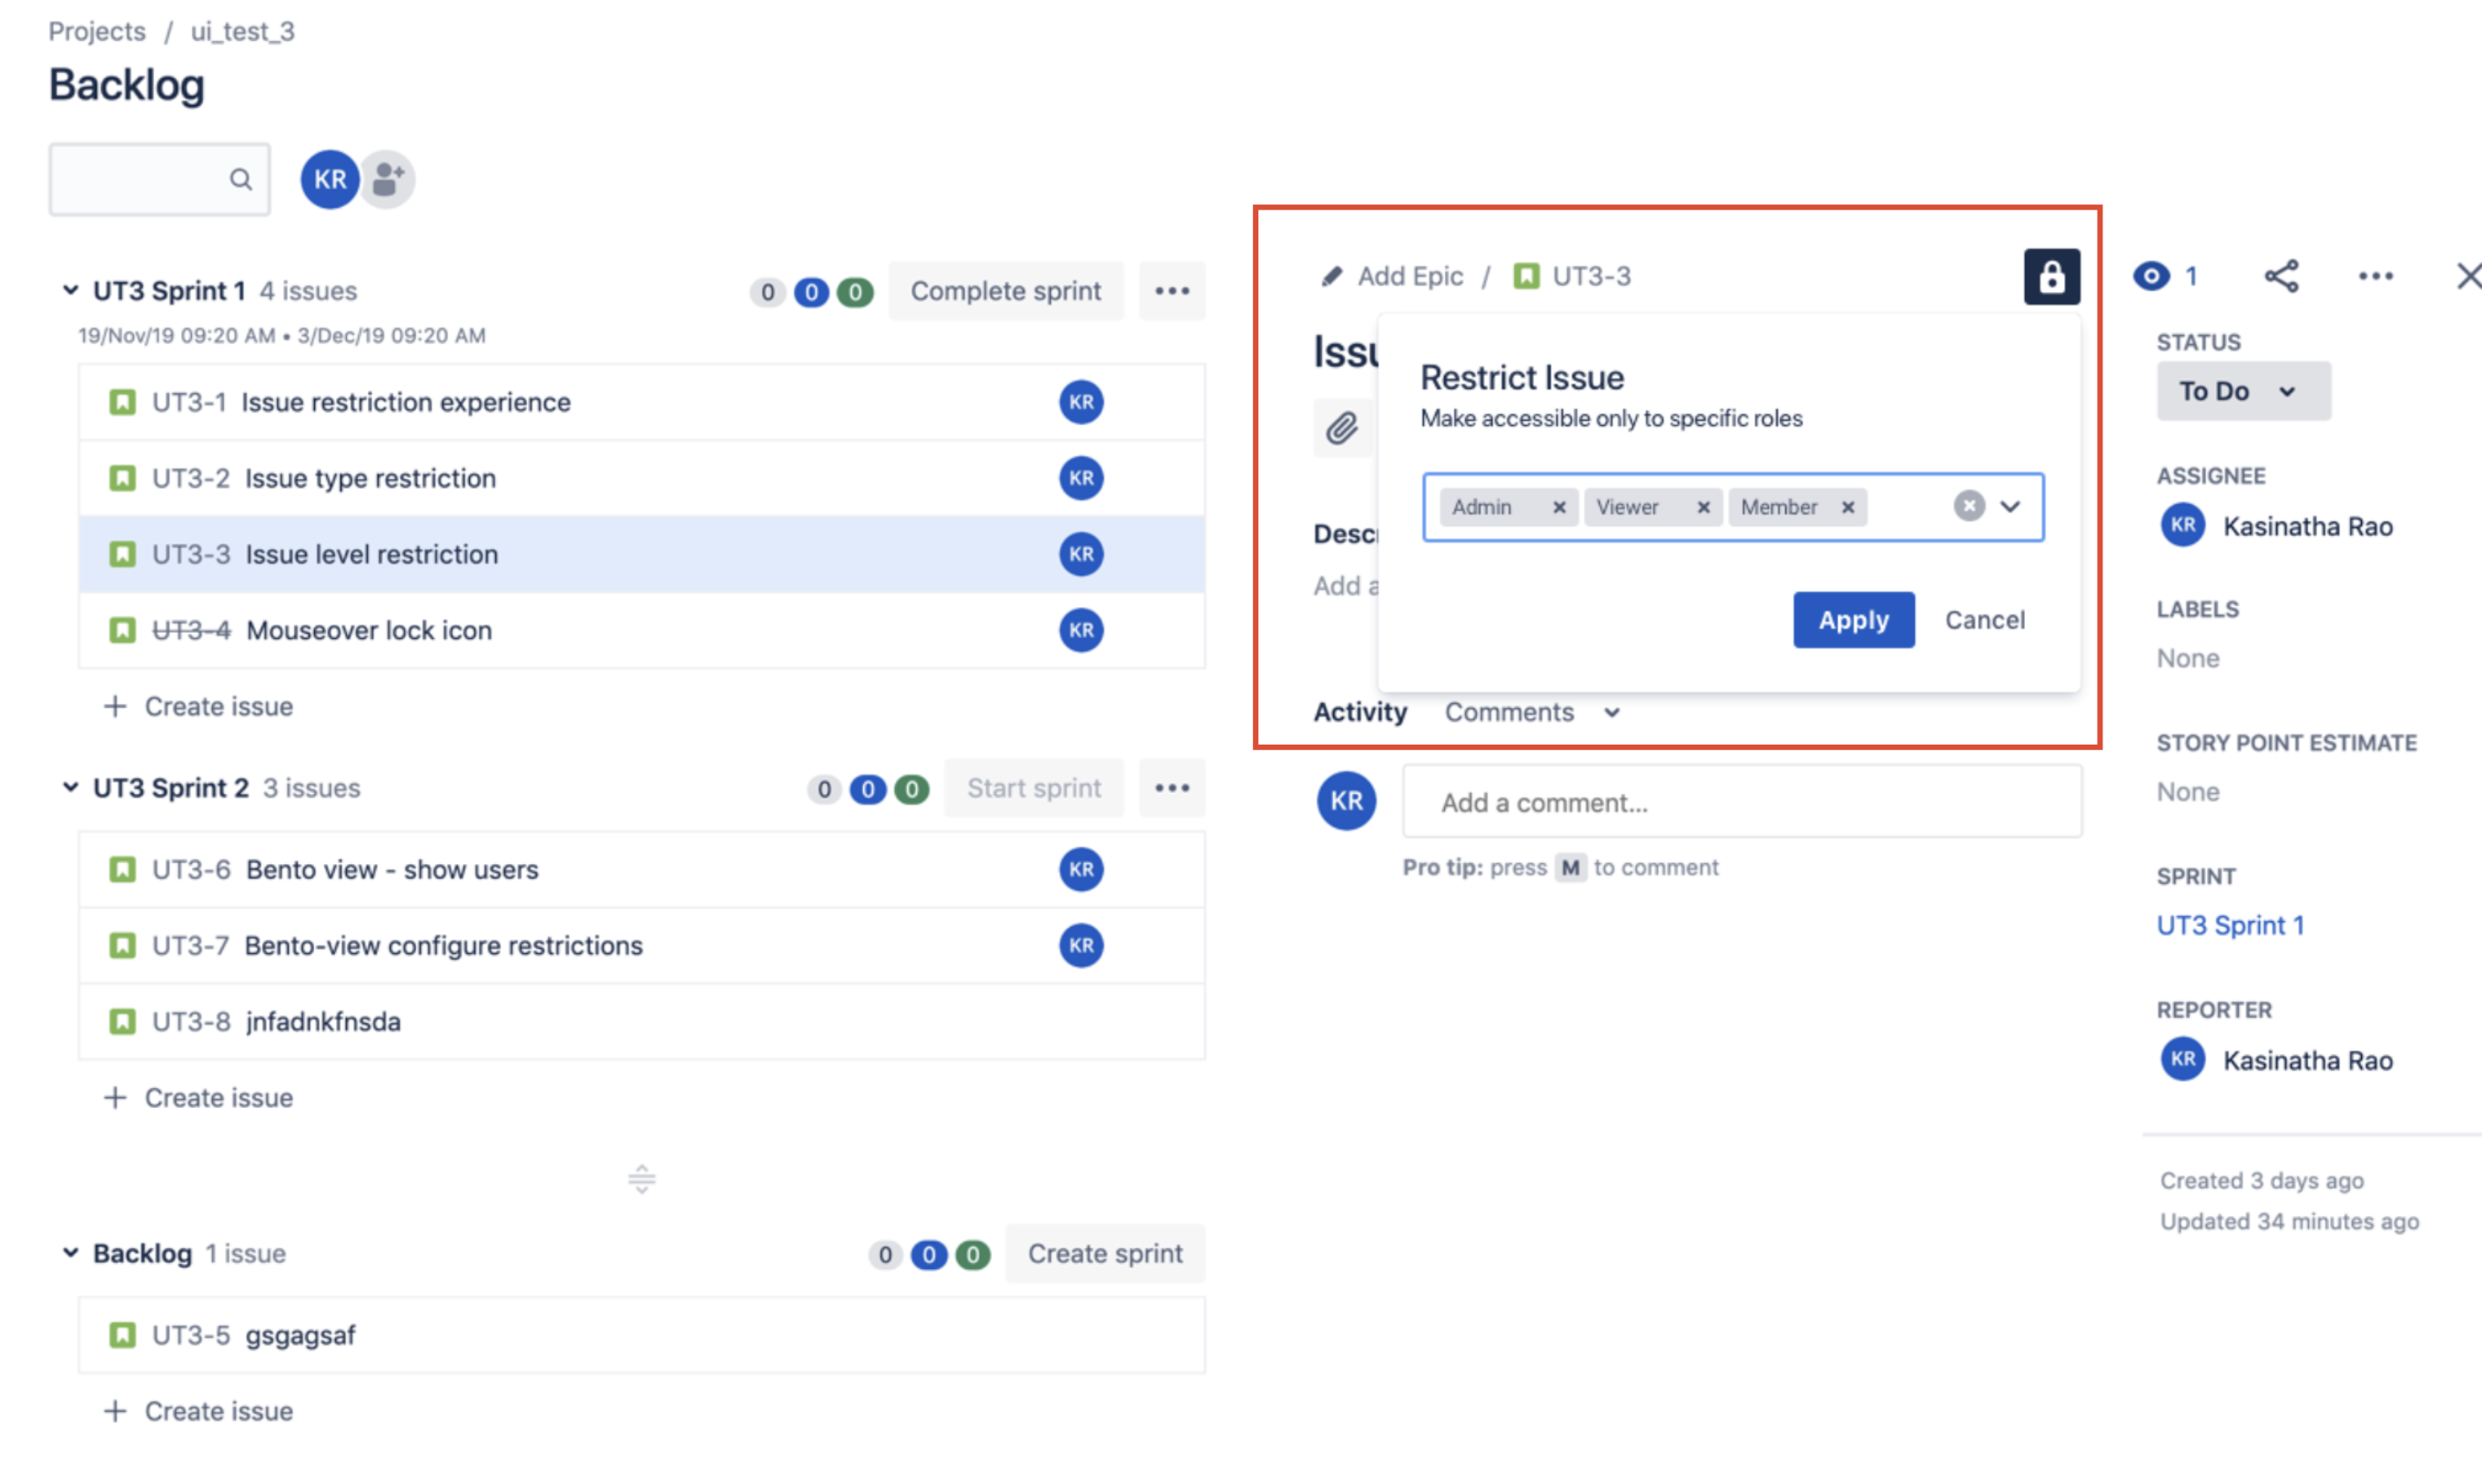
B. Set default restriction for issues of an issue type
If you would like to set up a default restriction for all issues of a certain issue type in a project, you should:
-
Open ‘Issue Types’ in the project settings of the next-gen project and select the Issue Type for which you would like to configure restrictions for
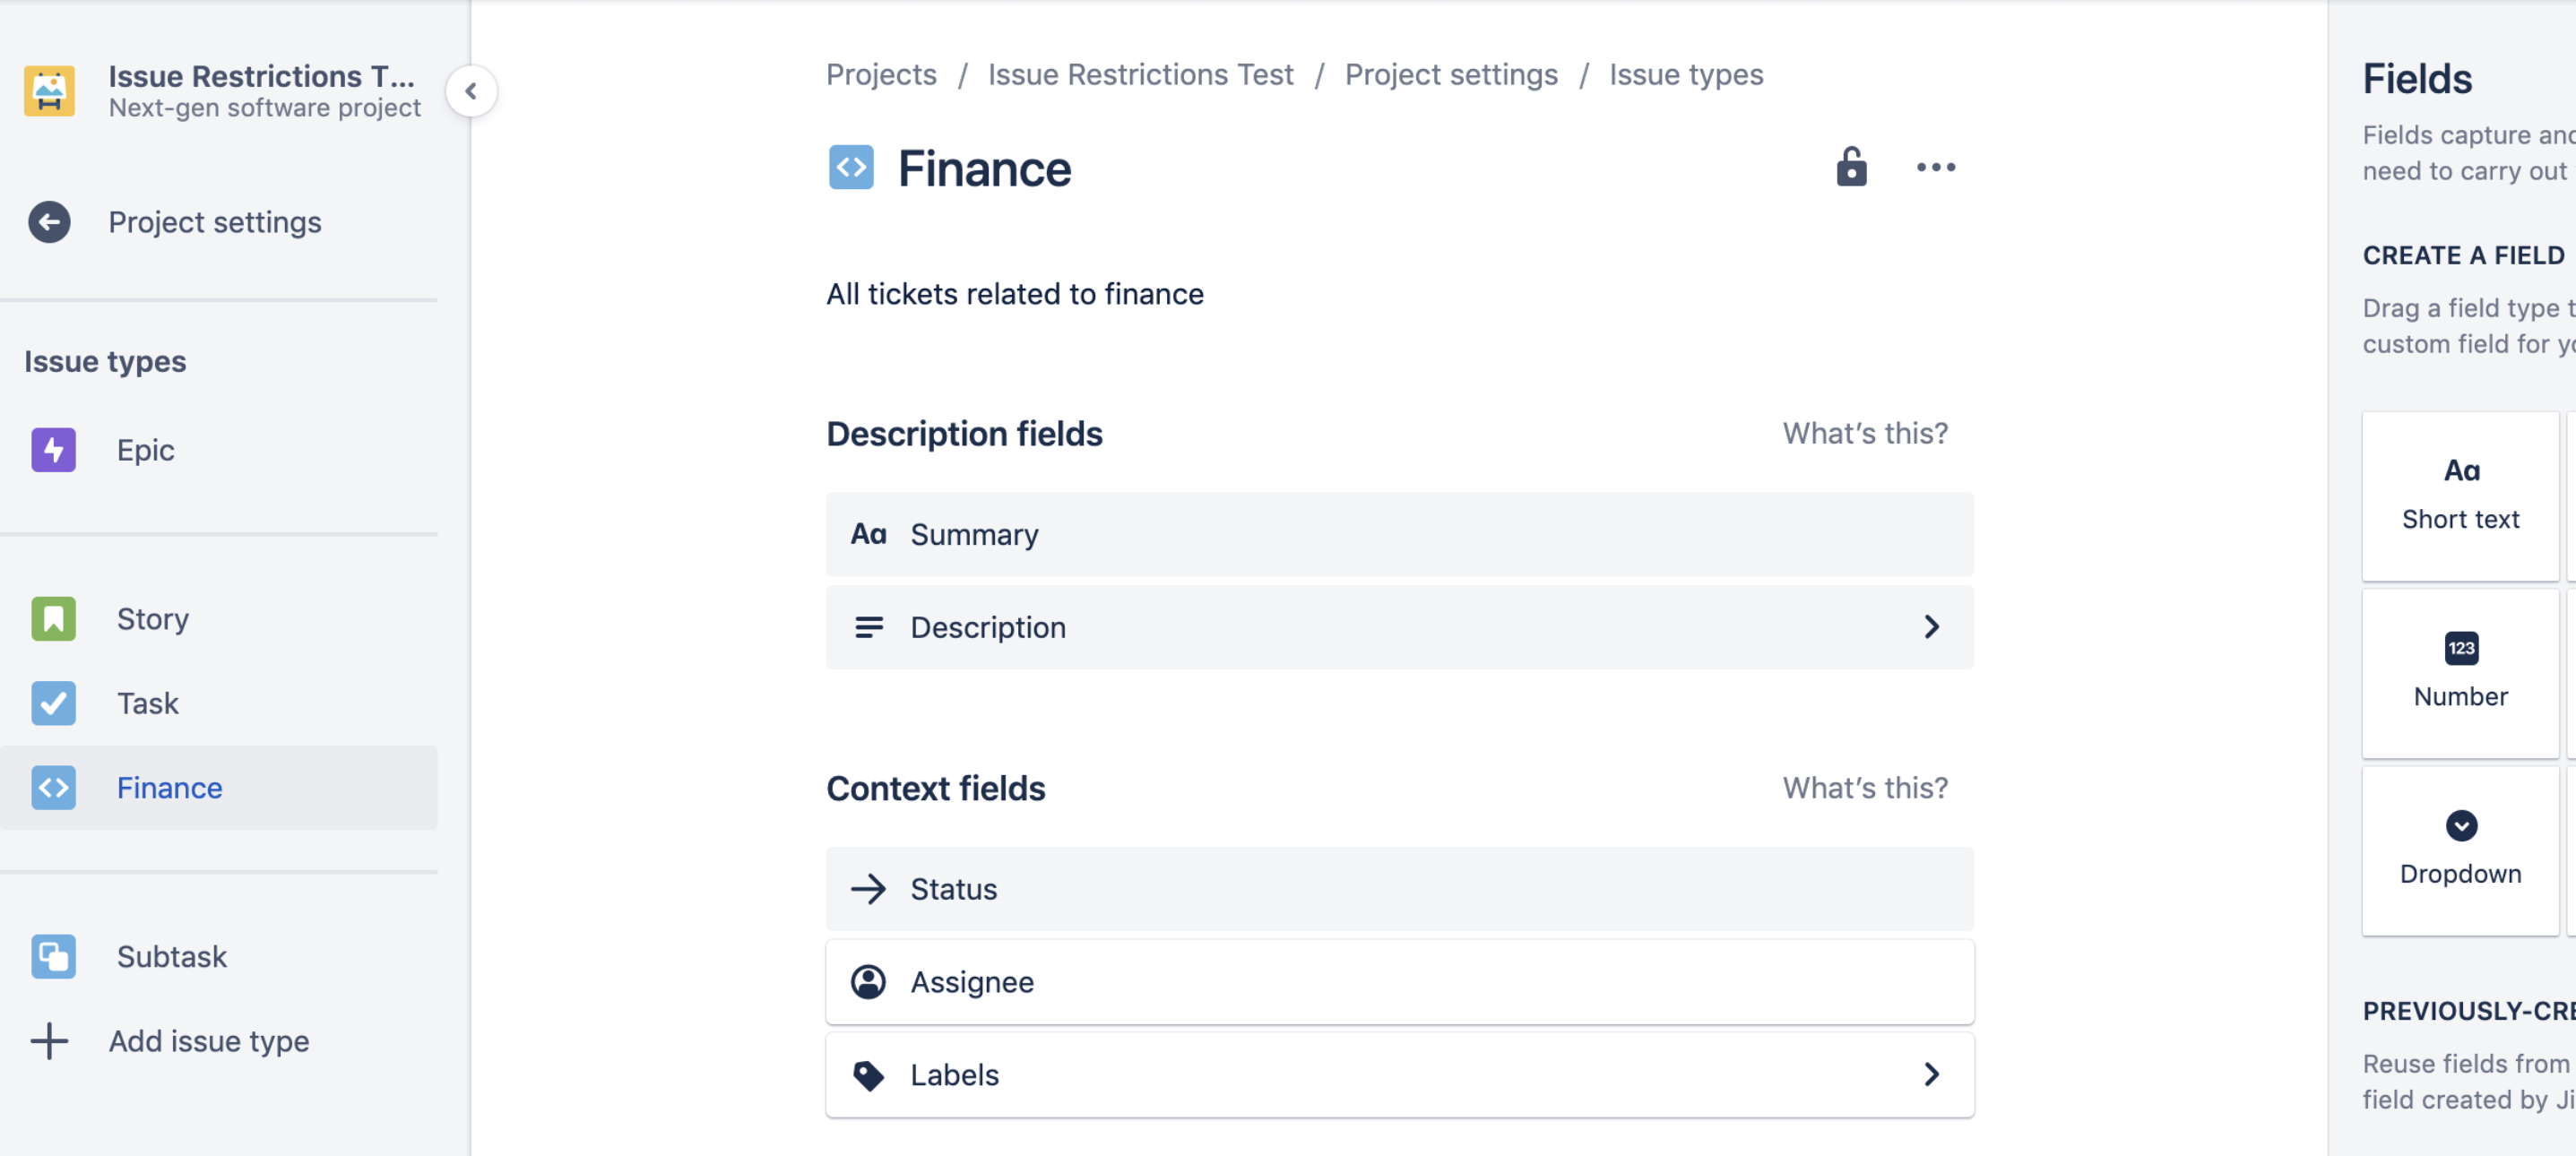
- Click on the lock icon on the top right of the Issue Type screen
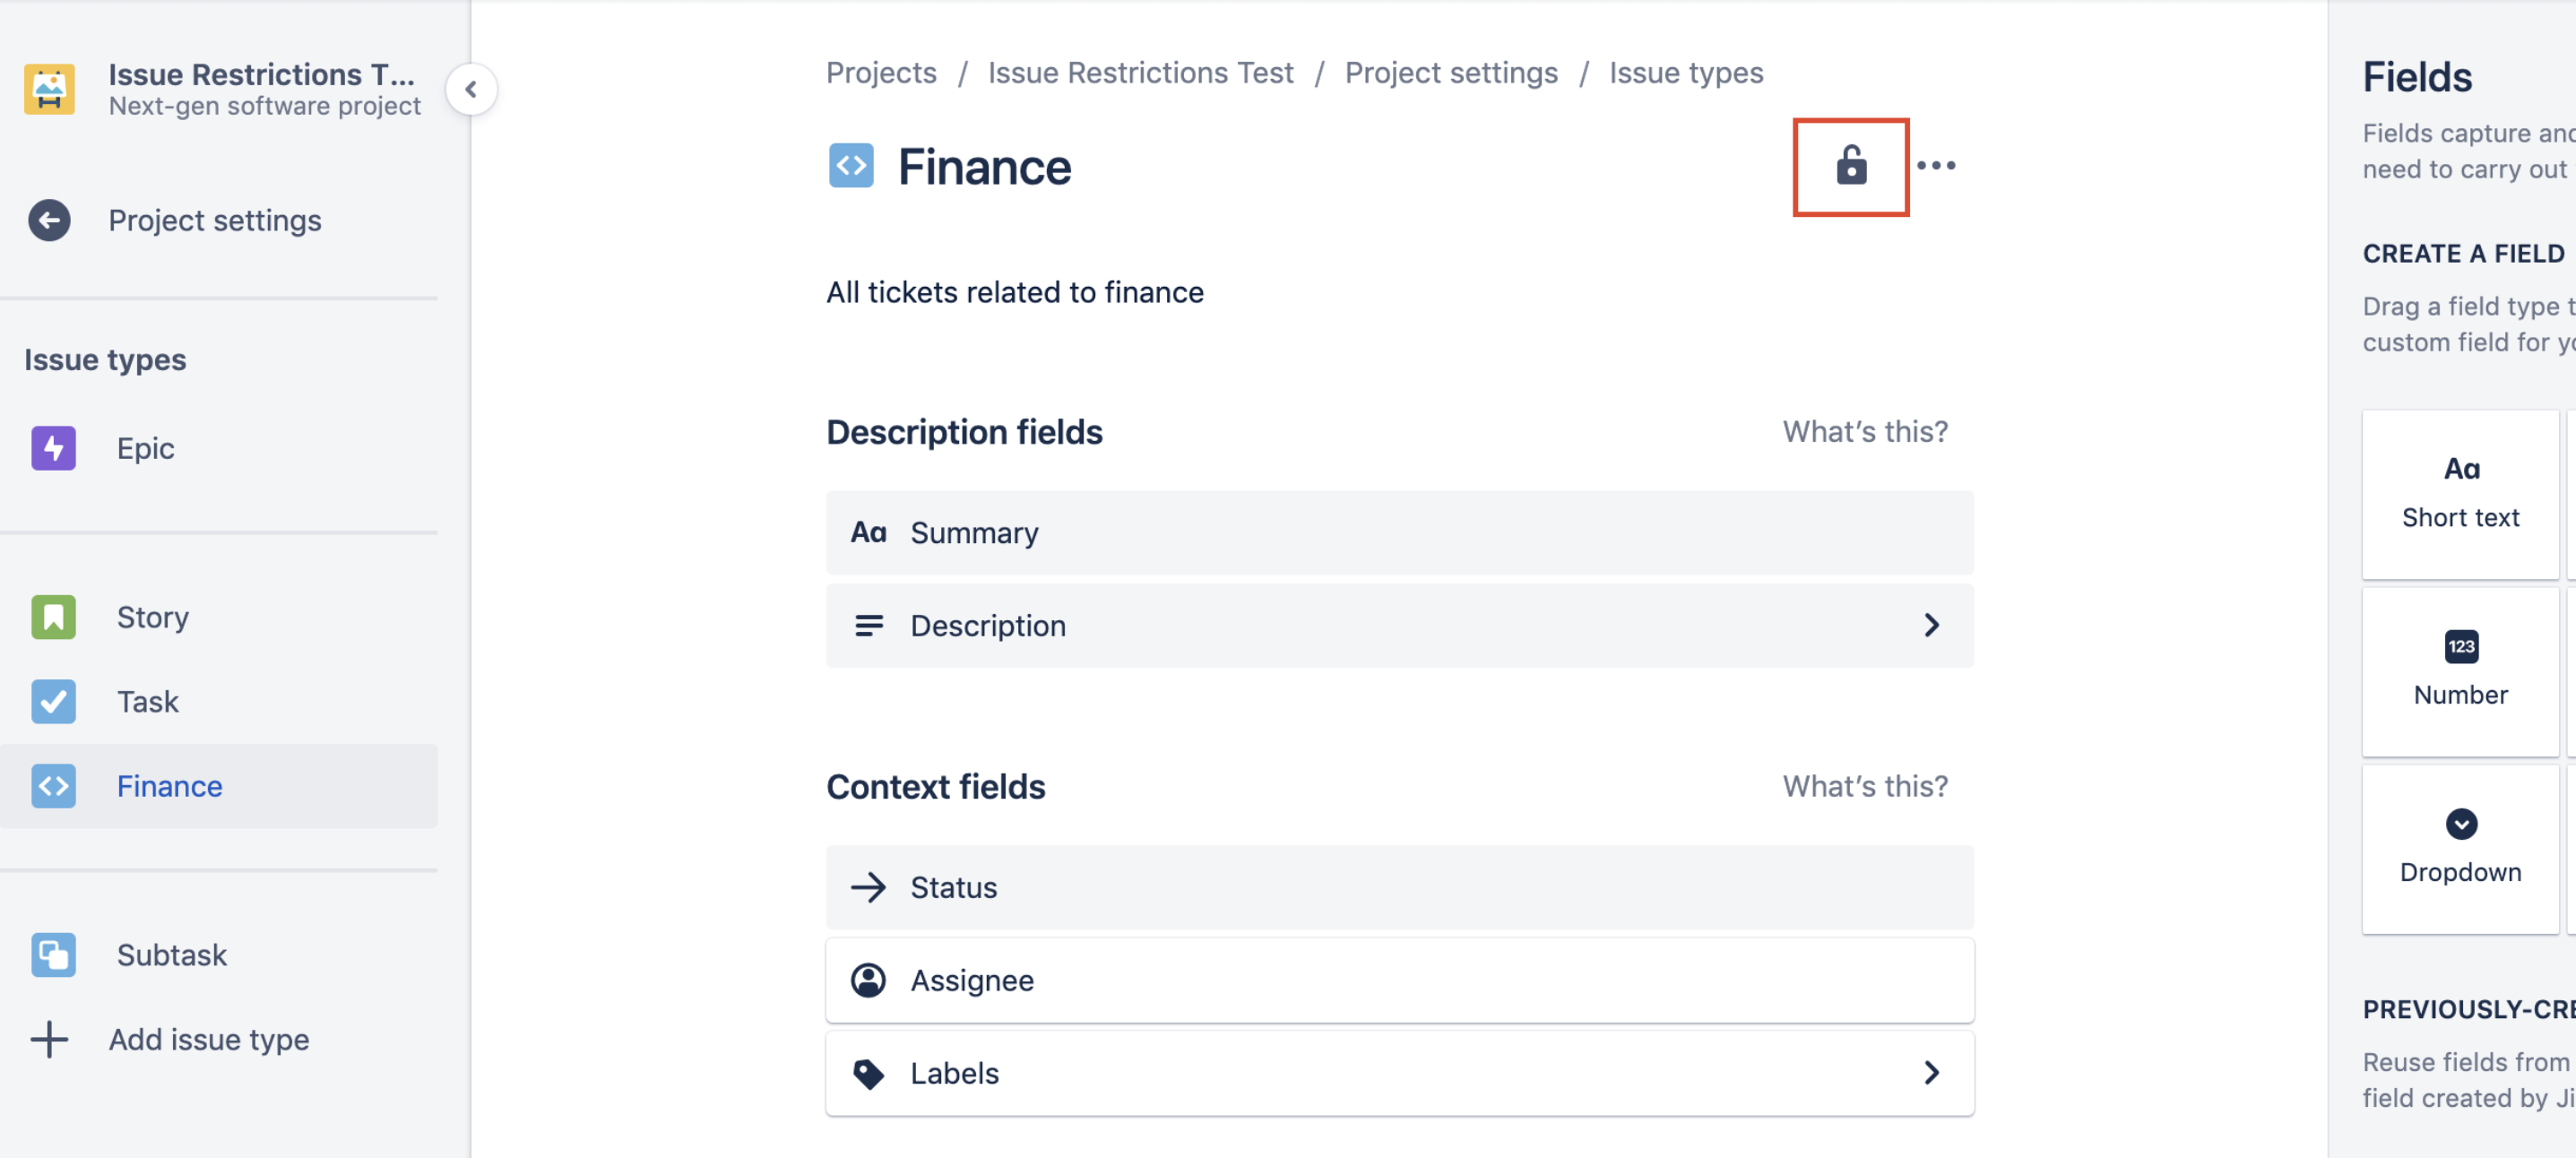
- Select the project roles for which you would like to grant access permission to the Issue Type and click Apply.
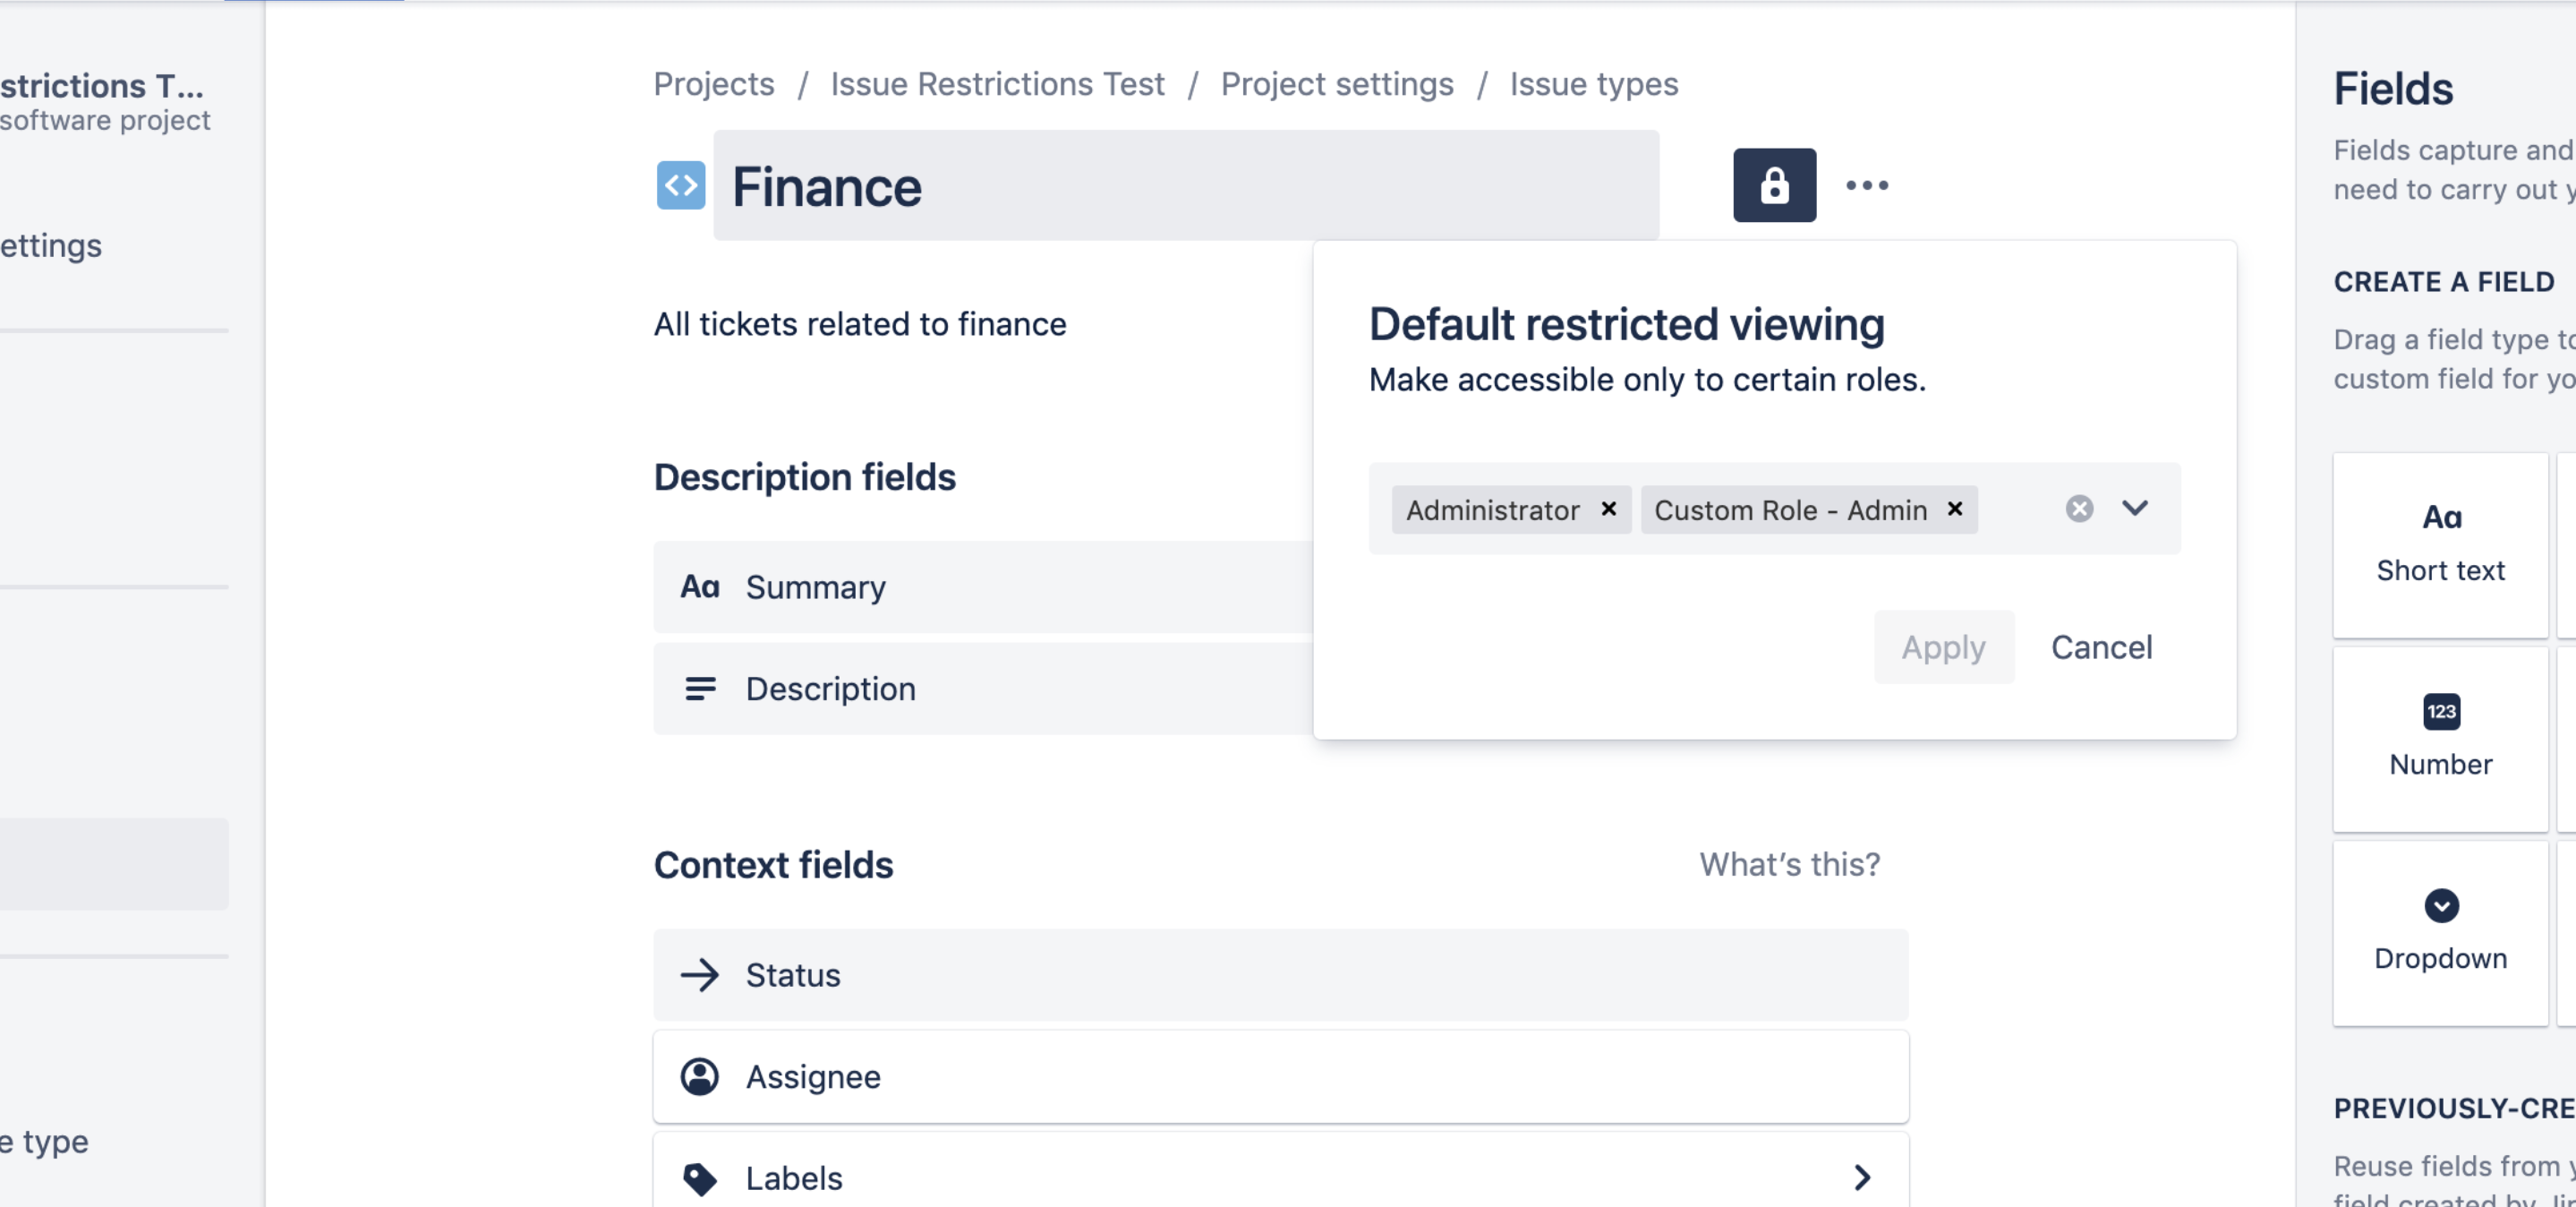
Please note that changes to the default restrictions of an Issue Type will only apply to new issues that are created. For already existing issues of that Issue Type, you will have to individually change the issue restrictions accordingly.
We hope this feature will give admins of next-gen projects more flexibility and control of their projects. Please do leave your feedback and thoughts in the comment section below. We’d love to hear from you.
Thank you!


