Create custom Rovo Agents
By the end of this lesson, you’ll be able to:
- Identify the types of tasks Rovo Agents are best for
- Duplicate and modify an existing Agent
- Determine the type of custom Agent you need
- Create a custom Agent with effective instructions, conversation starters, and knowledge
- Edit an Agent
Do you need a custom Agent?
Identify tasks that can benefit from a Rovo Agent
Choose an approach to creating an Agent
Consider duplicating an existing Agent
- You want to create a similar Agent to an existing one, but with slight modifications.
- You want to maintain consistency across different teams or spaces, but require some customization to fit your team’s unique workflows or context.
- You want to experiment with different configurations or improvements while keeping the original Agent intact.
- You are interested in creating an Agent, but just aren’t sure where to begin!
- Open Rovo chat by selecting Ask Rovo at the top-right of your Atlassian app window.
- Click the Rovo chat menu then select View all agents.
- Locate the Rovo Agent you wish to duplicate. Hover over the Agent and click More actions (represented by ···), then select Duplicate Agent.
- Rename your duplicate, create a new description for it, modify the scenarios, instructions, and add or remove knowledge sources and skills.

Determine whether your task requires a no-code or code Rovo Agent
You can find information on how to create a Rovo Agent using Forge and example apps in Forge documentation.
Create a no-code Rovo Agent
Studio admins can control who can create Agents. Agent creation can be available to all users, limited to selected groups, or limited to org admins only. If you can't create an Agent, contact your Studio admin.
- Open Rovo Chat by clicking on the Ask Rovo button at the top-right of your Atlassian app window.
- Select the Rovo Chat menu, then click View all agents.
- Click the + icon to create an agent. You’ll be taken to Studio app.
- Answer the questions to help Rovo understand what you want your Agent to do.
- Click the Test button to test your new agent.
- Review, finalize, or manually edit elements of your Agent (like its name and descriptions).
- Once you’ve settled on a Name and conversation starters, click Publish to publish your Agent and start using it.

You can hide or show Agents even after you create them by editing the Agent. You can also restrict who can see and use a specific Agent by adding people individually. Restricting access by group isn't supported yet. Restricted Agents are hidden from Agent directories and automation options for anyone who doesn't have access. Agents always act on behalf of the person using them and don't grant additional access or permissions to any data or information, so people can only see content they have access to.
Write instructions for your Agent
- What the role and persona is, what will be its job
- How the agent should interact with people or what tone should it use
- Guardrails and limitations to define, what it should not do
- Format of the output
- Name and trigger (a routing description) which defines when the parent Agent delegates to this subagent
- Instructions which tell the subagent what it should do
- Tools, skills and knowledge sources
- Deep research and web search settings
Create conversation starters for your Agent

- Click on a conversation starter to send that message to the Agent and begin their chat.
- Write their own question, instruction, or prompt.
Provide knowledge to your Agent

Regularly update the knowledge sources linked to your Agent to keep it current and accurate.
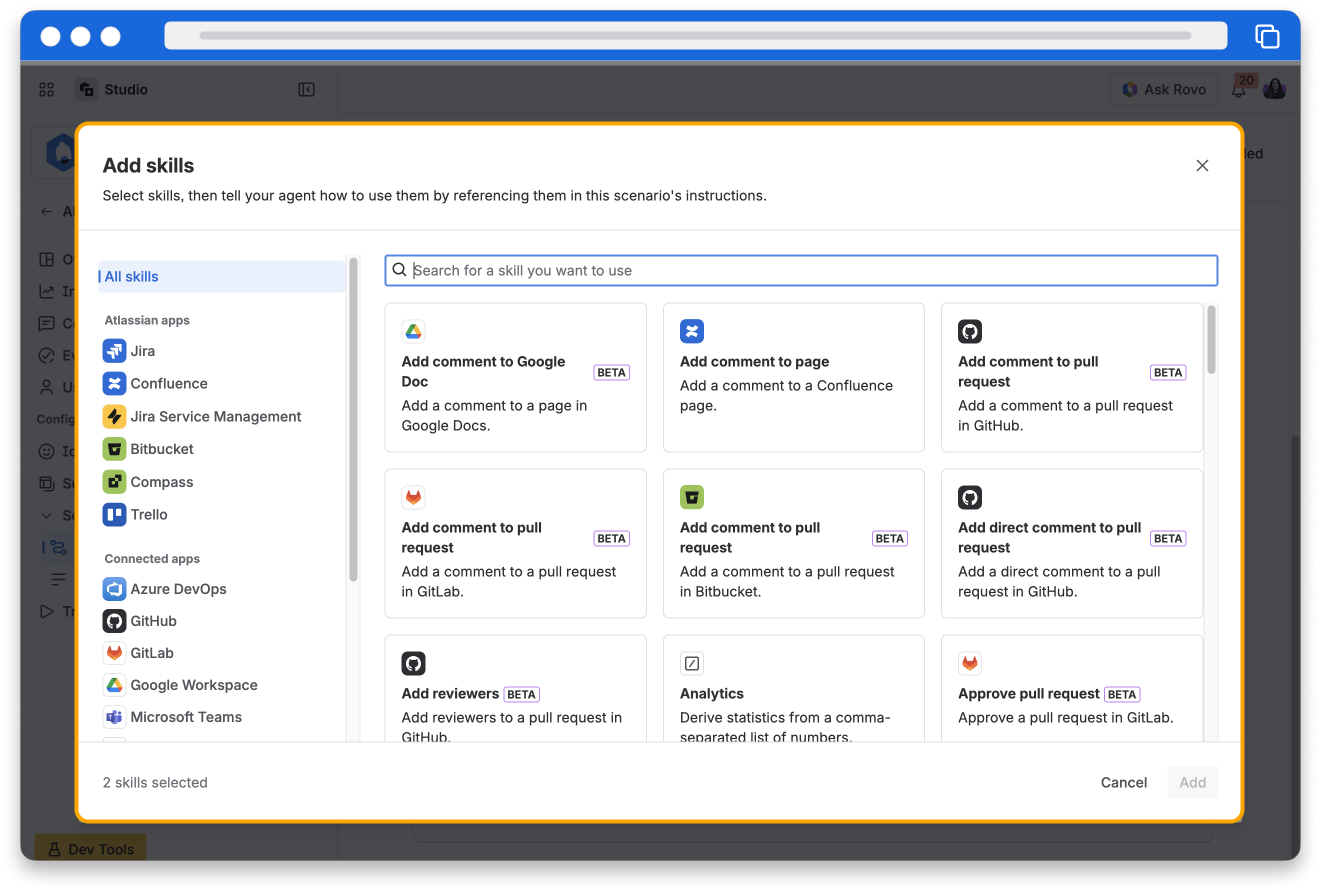
Adding skills to your Agent
Configure the surfaces your agent appears on
Test and edit your Rovo Agent
Evaluate your Agent with a dataset
- Open your Agent in Studio.
- From the sidebar, select Evaluations, then select Create Dataset.
- Upload a CSV file containing up to 50 test prompts, then select Create.
Edit your agent
- Open Rovo chat by clicking on the Ask Rovo button at the top-right of your Atlassian app window.
- Click the menu icon then select View all agents.
- Click on the My agents tab, which shows Agents you created. Alternatively, you can search for the Agent by name.
- Hover over the Agent and click More actions (represented by ···), then select Edit Agent.
- Edit the Agent fields, then click Save for each field you amend.

Only an Agent’s creator can edit the Agent.
Rovo agent triggers
How was this lesson?
next lesson
What is Rovo?
- Rovo helps you and your team work smarter
- How your team can use Rovo
- How Rovo works