Update work items in Jira
10 min
Beginner
By the end of this lesson, you'll be able to:
- Add attachments to a work item
- View a work item’s history
- Link work items to other work and additional content
- Move a work item
- Delete a work item
Add attachments to work items
You can provide more context on your work by attaching files. Jira enables you to attach many file types to work items, including PNG, JPG, ZIP, XML, and more.
👉 For example: You can take a screenshot of a bug in your product and paste it in the description of the related bug. That way, teammates looking at the work item can easily understand what the bug is.
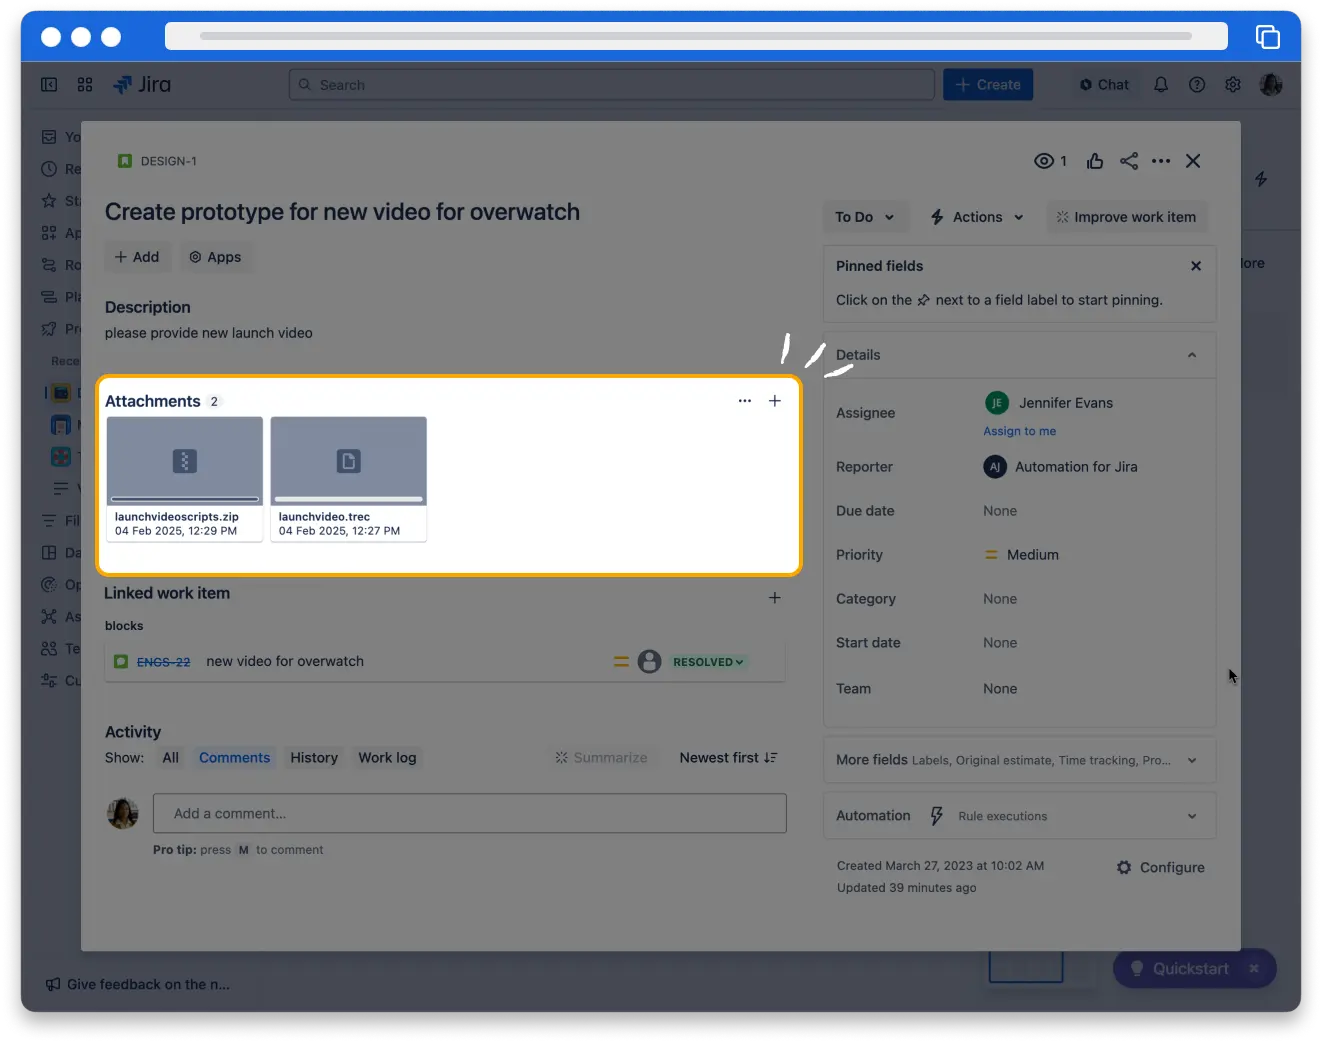
👇 You can attach a file using the Attach button or by pasting it into the Description field.

👇 All attachments on a work item will appear in the Attachments section.
👇 Watch the video below to learn more about adding information to existing work items.
View work item history
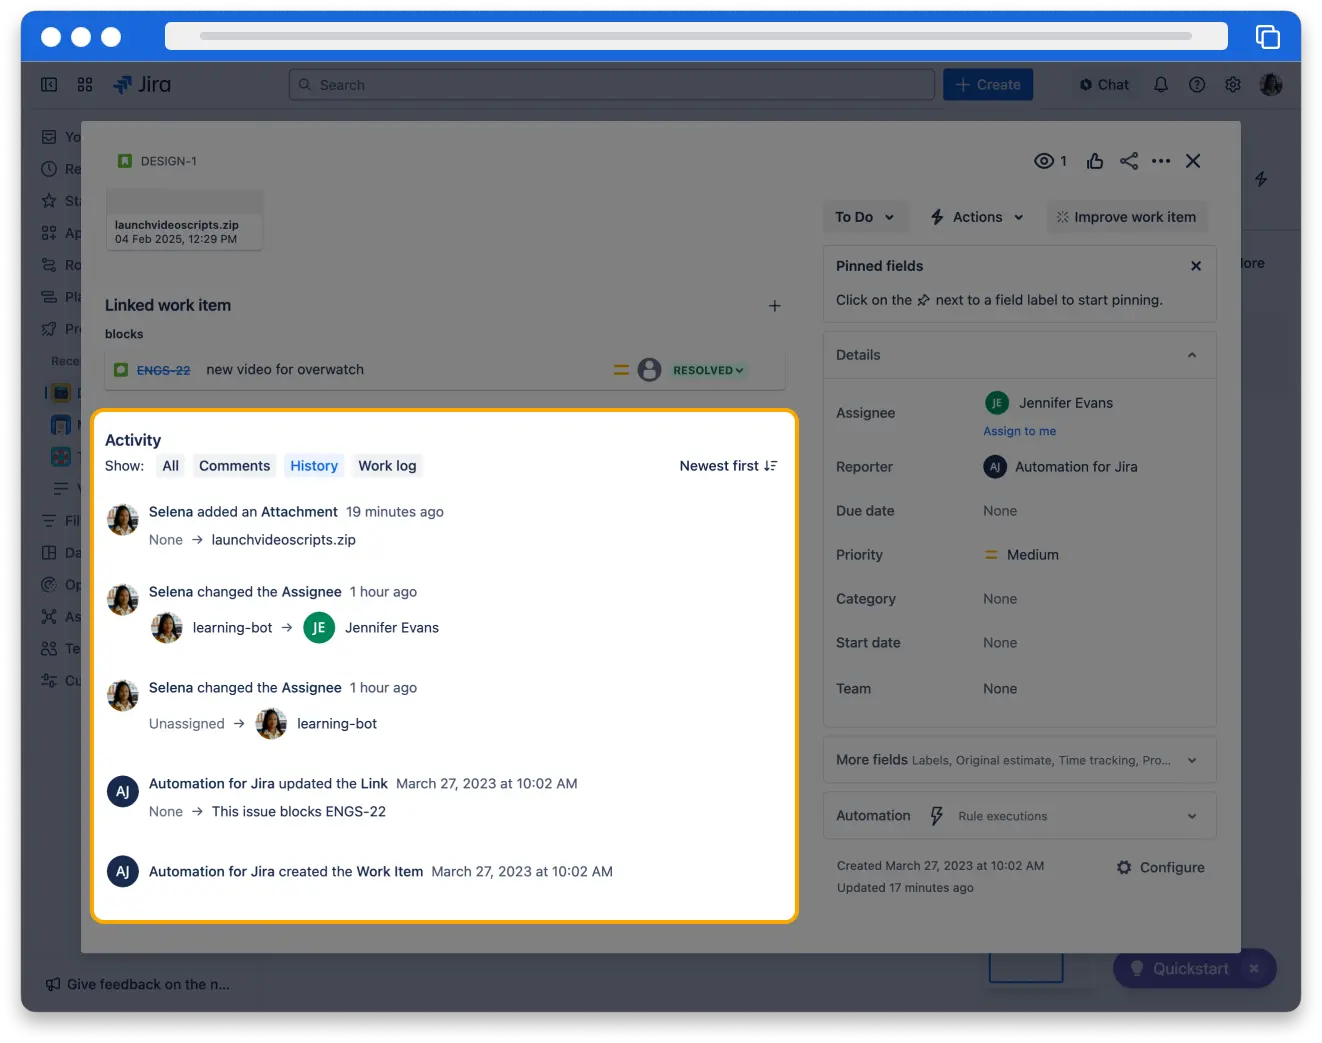
If you want to know how a work item has changed over time, you can go to the History tab. The History tab shows all of the changes on a work item and which user made them.
👉 For example: If you think a work item has a different due date than it used to, you can check in the History tab. It'll show you if the Due Date field changed, when it did, and who changed it. Then, you can ask that coworker any follow-up questions!
👇 The History tab is one of the sections at the bottom of a work item.
Link work items
In Jira, you can link work items that relate to one another and define that relationship. Linking enables you to:
- Show relationships between work items and navigate to them
- Navigate to related Confluence pages from the work items
- Navigate to other related web resources from the work items
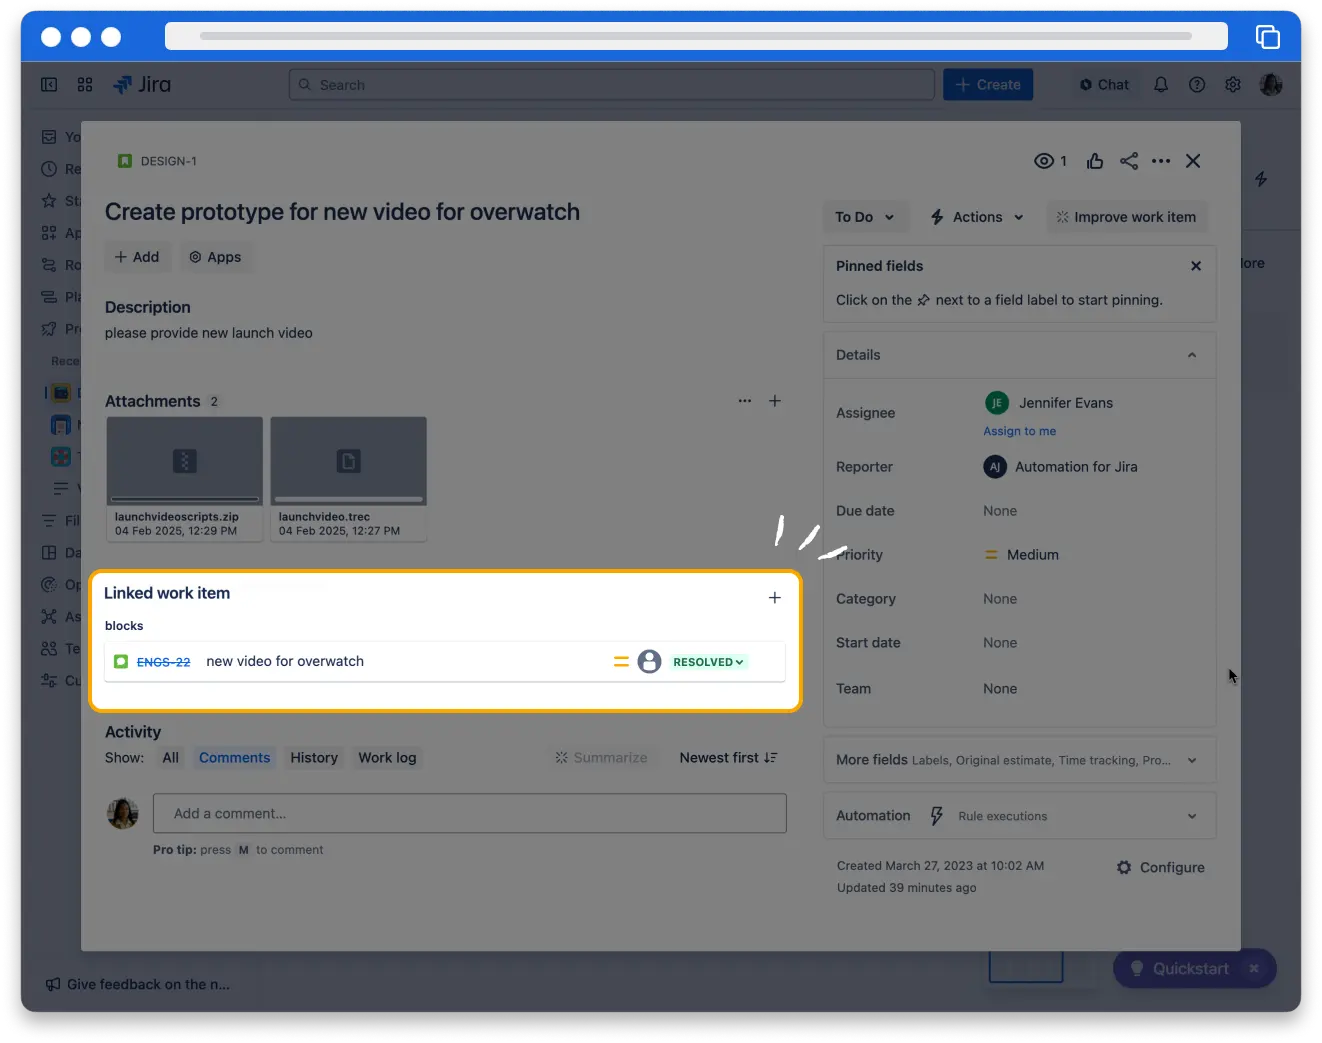
👇 You can link work items when viewing them.

What relationship can work items have?
When linking two work items, there are many different relationships you can choose from. Some common link types are:
- Relates to
- Depends on / is depended on by
- Blocks / is blocked by
- Clones / is cloned by (this link is automatically created for cloned work items)
👇Your linked work items will appear in a section below the description, showing the relationship, work item key, summary, assignee, and more.
Move work items
You can move work items to change their location and relationship to other work. There are three ways you can move a work item in Jira.
👇 Click below to learn more about each of them.
You can change the work type of a work item.
👉 For example: You may decide you want to reorganize your work items by changing a story to an epic.
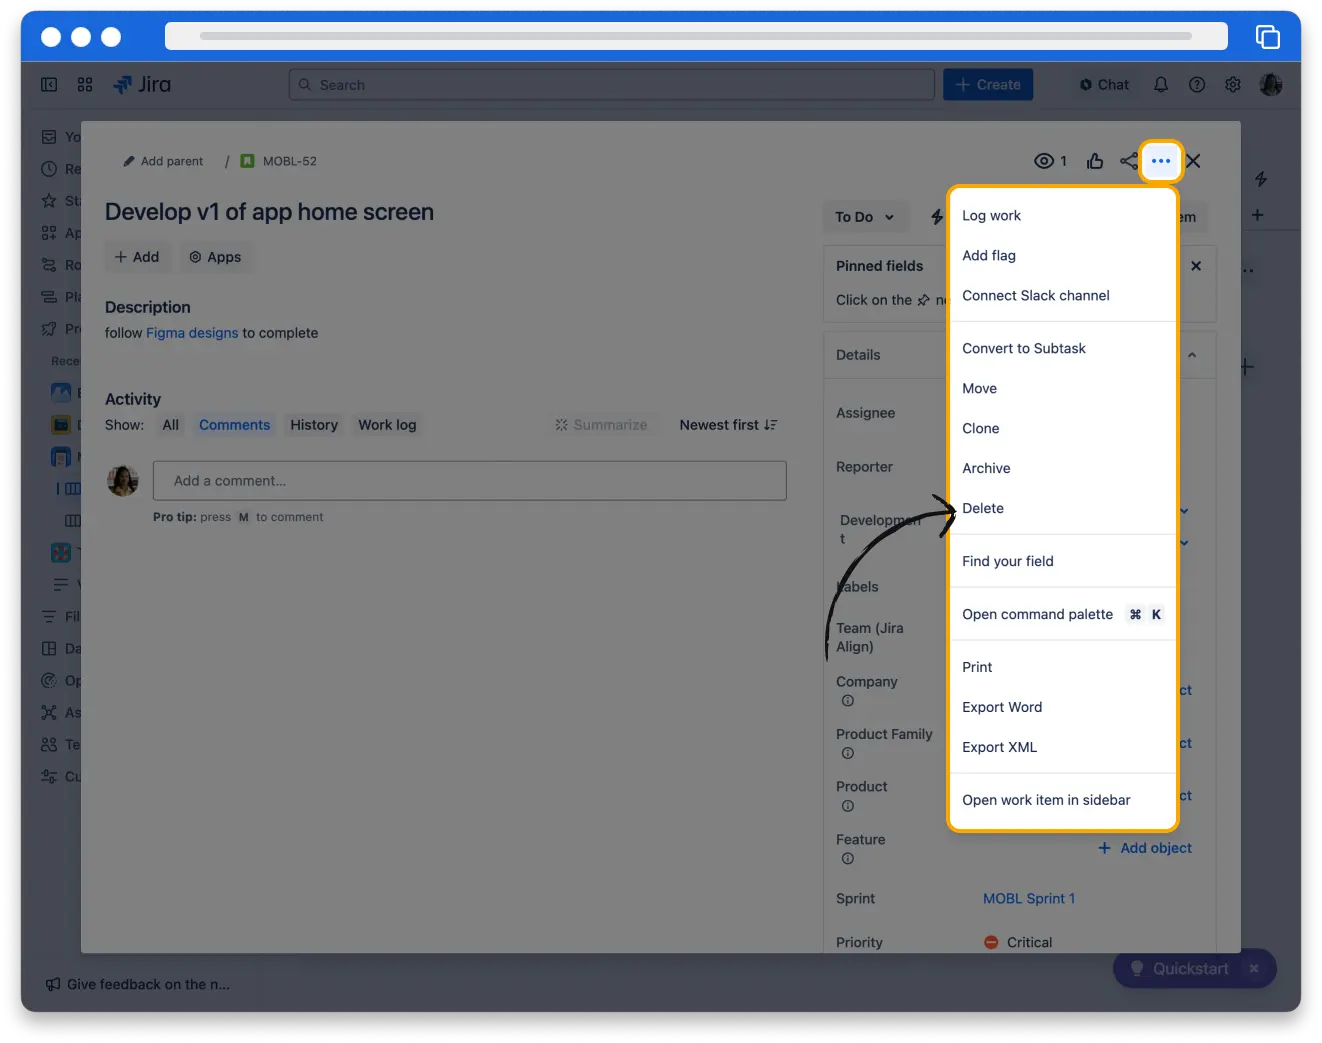
To move a work item in any of these ways:
- Click to open the work item.
- Click More actions (represented by •••).
- Click Move.
- Select what kind of move you'd like to make: to a new project, to a new work type, or to a new parent work item.
- Click Next, fill out any information requested, then click Confirm to move the work item.
👇 Here's how to move work.
Depending on what kind of move you're doing, you may be asked to fill out required fields, or certain fields might not move with a work item.
👉 For example: if you change a work item's type from bug to story, the story type might not have all the same fields as the bug type.

Delete work
If you find you don't need a work item anymore, you can delete it. But, if you delete a work item, you can't undo or recover it.
When you delete a work item, you delete all attachments, comments, history, links, and subtasks for that work item. Also, Jira won’t reuse that work item's key.
To delete a work item:
- Click to open the work item.
- Click More actions (represented by •••).
- Click Delete.
👇 Open a work item to delete it.
You need permission to complete most actions in Jira, including editing, attaching files to, linking, moving, and deleting work. If you want to take one of these actions but can't, check with your project admin.