
The assignment:
Confluence page statuses are visual indicators that show a page's current position in its lifecycle. The default options look like this:
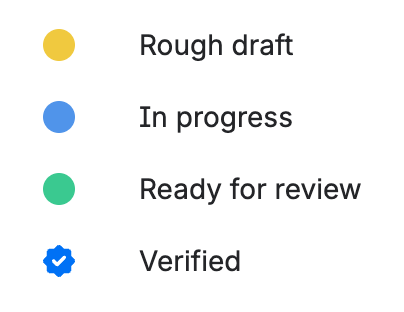
The assignment is to limit which Confluence users can approve a page, or in other words, set the page status to Verified. If any user tries to approve a page and they do not have permission to do so, Confluence will revert the page back to Ready for review or whatever status you may be using.
Part of our CliffsNotes series. Would you rather watch the movie, skim the CliffNotes, or read the book? Below are all 3 options!
🎥 Watch the movie:

🗒️ Read the CliffNotes:
If you want to set this up in your own environment, here’s all you need to do:
- Create the Confluence Approvers group (requires admin permissions)
- admin.atlassian.com → Directory -> Groups -> Create group button
- Add all users who should be able to approve pages
- Create the automation
- Confluence Space Settings → Automations
- Trigger: Page Status Changed to Verified
- IF Condition: User who triggered the event is NOT in group, above
- Action: Change Page Status to “Ready for review”
- Test it out
- As an authorized approver: Verify that the page stays in Verified status when updated, published, and the page is refreshed.
- As an UNauthorized approver: Verify that the page reverts back to “Ready for Review” when updated, published, and the page is refreshed.
📚 Read the book:
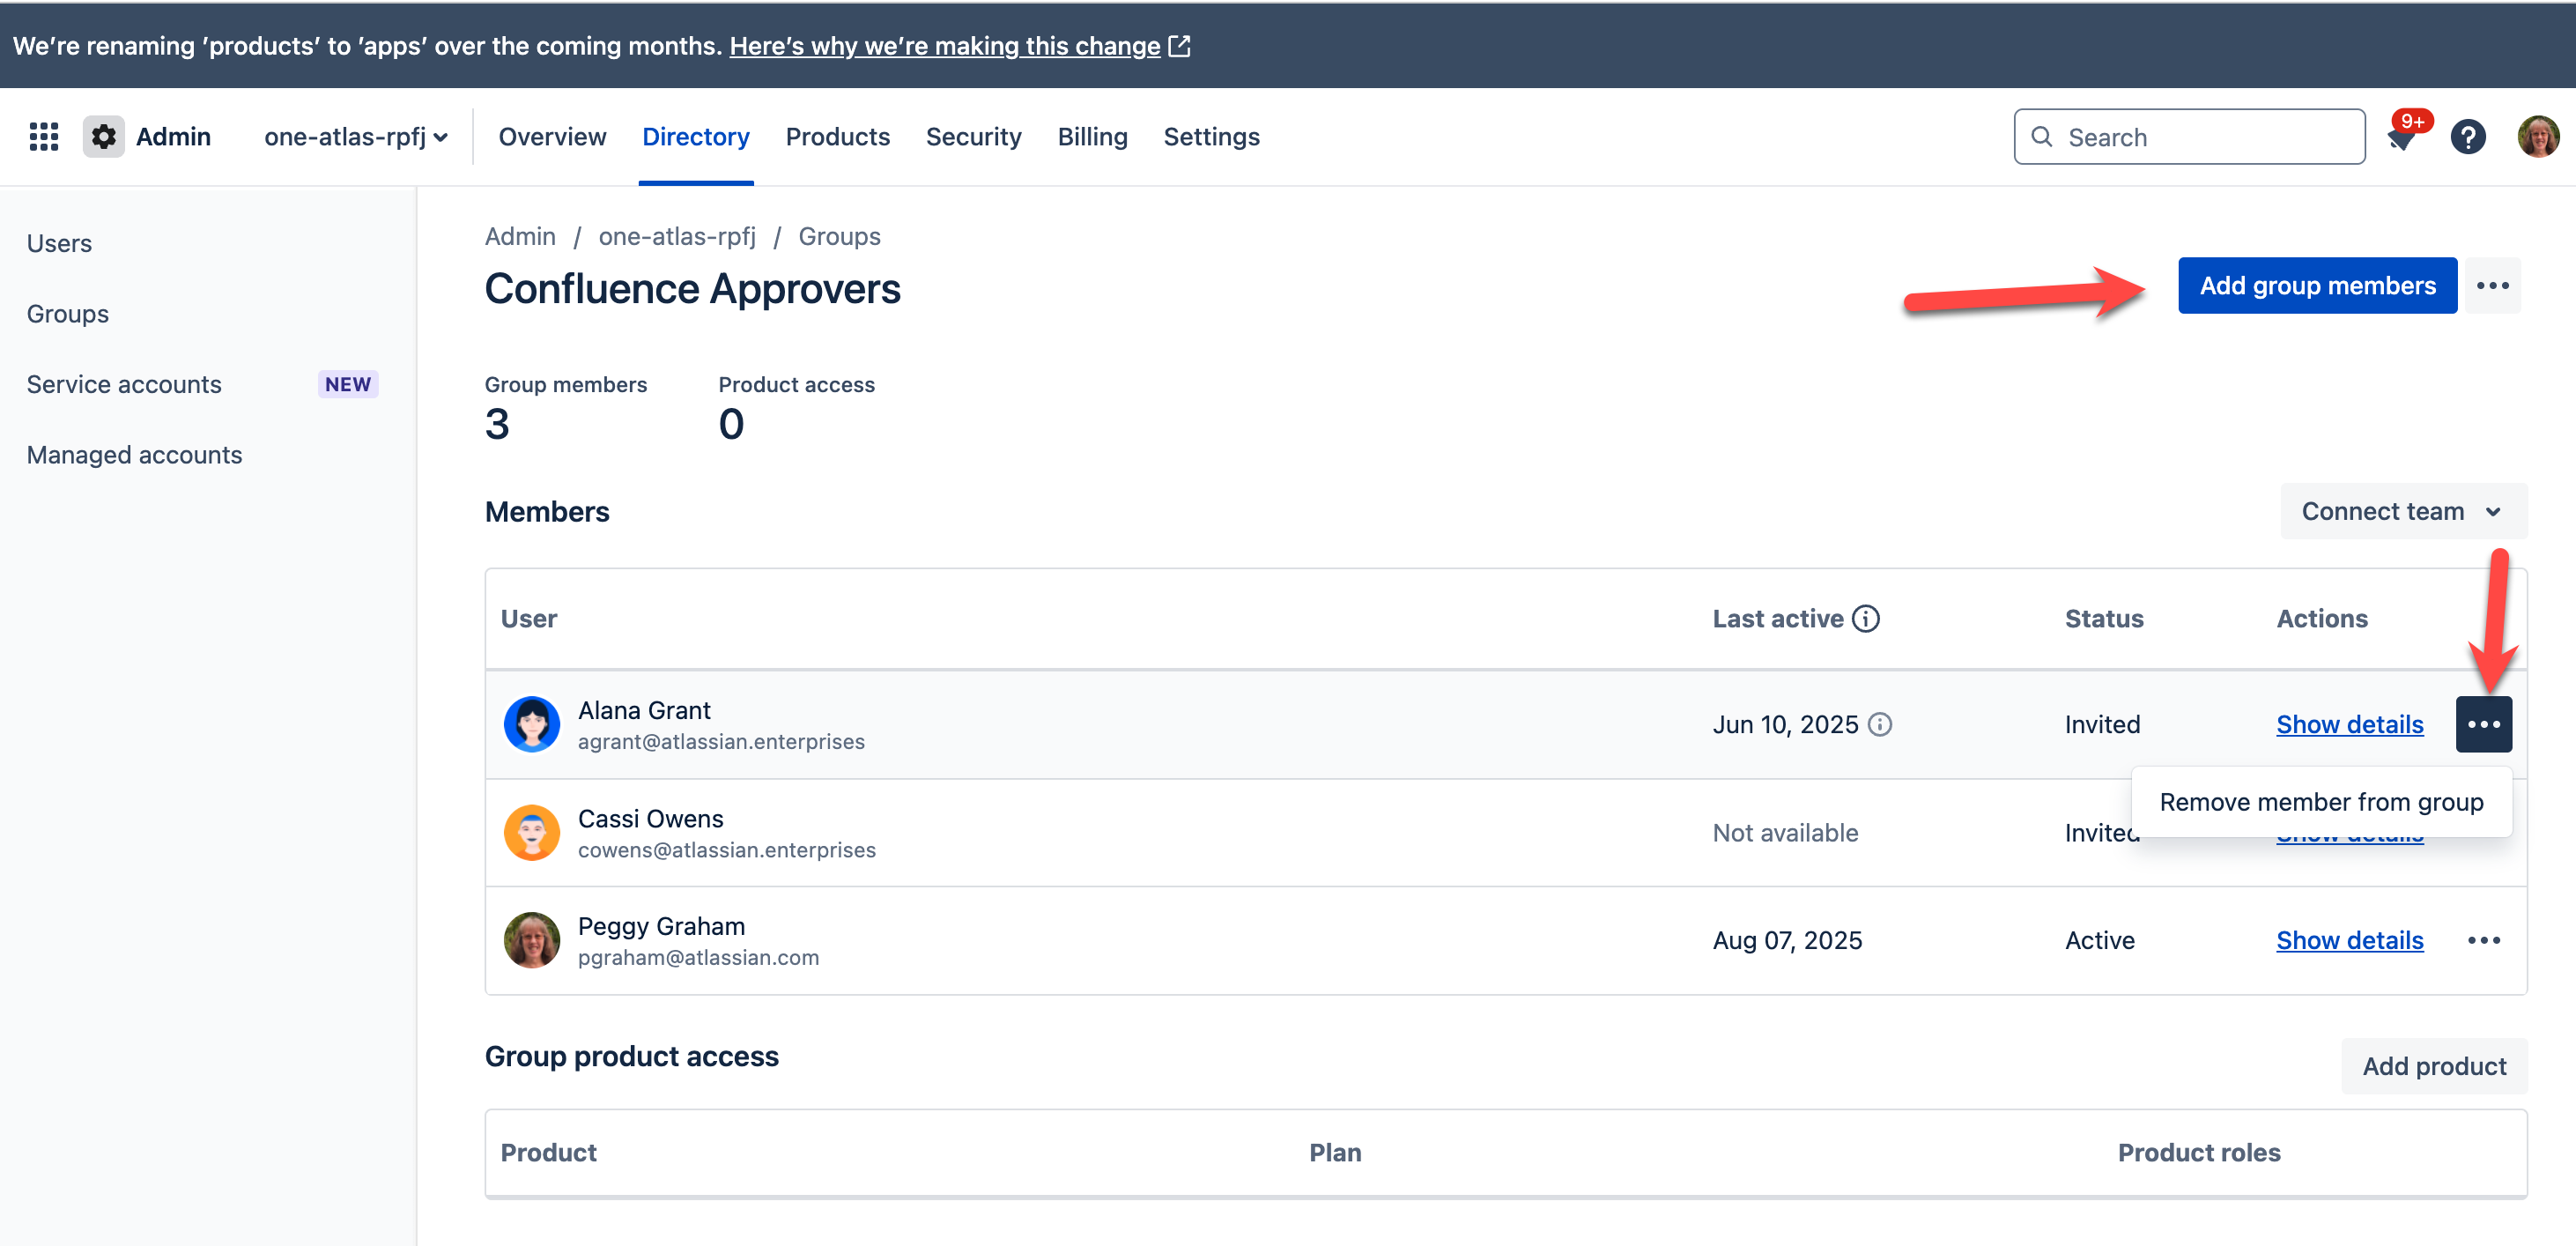
1 - Create the Confluence Approvers group:
- Click the ⚙️ in the upper right corner (requires admin permissions)
- Then click on Groups on the left side menu.
- Click on Create group button. Add all users who should be able to approve pages:

- NOTE: Whenever you need to add or remove approvers in the future, you just need to edit the user group in admin.atlassian.com:
2 - Create the automation:
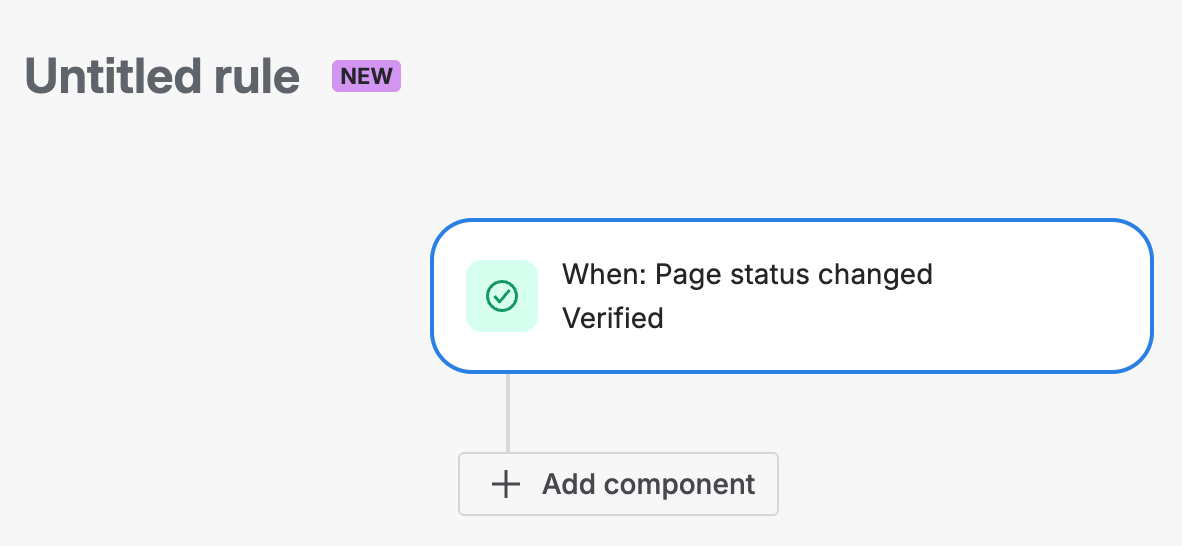
- Automation Trigger step:
- In your Confluence space, go into Space Settings, then Automations.
- Click the Create rule option, then click “Create from scratch”.
- Trigger should be: Page status changed.
- Select the Verified (or whatever you consider your Approved status) and then click Next.
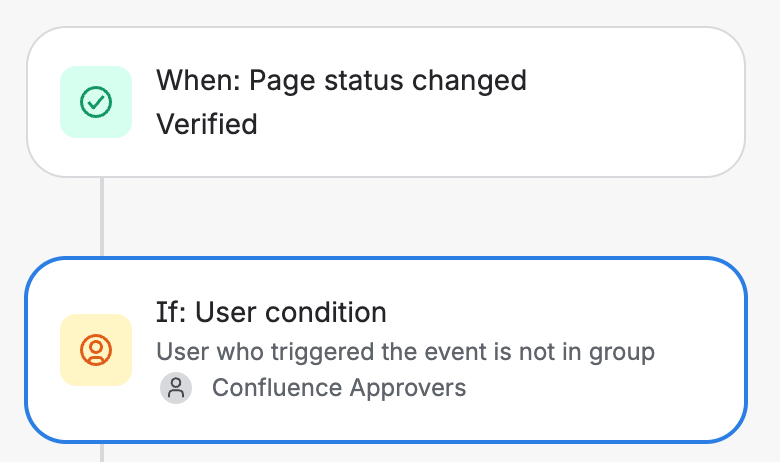
- Automation IF condition step:
- Click on the yellow IF: Add a condition
- Click on User condition
- Click on User who triggered the event is NOT in group
- The NOT is the important part. We want to revert the page if they are not in that group, which is why we check for the NOT condition.
- In the group box, find the approver group we created earlier
- Automation Action step:
- Click on the blue “THEN: Add an action” option
- Add “Change page status” option:
- Change the page status back to “Ready for review”. (Or whatever status you use to indicate a review is needed.)
- Your automation rule should now look like the image to the right.

- Turn on the rule:
- Click Turn on rule and give the new role a name.
- As a best practice, I like to set the automation rules so that they can be edited by all admins. That way, if there are any issues in the future and I’m not around, another admin can edit the automation.
3 - Test the automation:
- For a user who is NOT in your approval group, test the following:
- Change the status of any page in this space to Verified.
- Publish and then refresh the page.
- Check that the page reverts back to “Ready for review”.

- For a user who IS in your approval group, test the following:
- Change the status of any page in this space to Verified.
- Publish and then refresh the page.
- Check that the page stays in the “Verified” status.

🍎 Extra Credit:
For those who want extra credit, here’s where you can take this even further, full credit to Jonathan Smith and Darryl Lee who shared the following approaches to automate even more of the process:
In addition, did you know that Confluence has an out-of-the-box automation template to help ensure your content is regularly reviewed and verified to be current? This automation will look for inactive pages in the verified status (pages with no views or edits in the last 3 months - you can change this duration). The automation will then automatically un-verify the page. The page owner will be notified, asking them to review it. Here’s where you can read more about this: 📣 Verified Pages - Now Available in Confluence! ✅. Important to note, if you want to take advantage of this automation template, you will need to keep the Verified default page status.
🎓 Final Grade:
So, how’d do you? Let us know in the comments if you got a passing grade!


