Managing client projects in Jira sounds straightforward at first.
You create a project, organize the work into issues, assign people, and start delivering.
But for consulting companies, software agencies, MSPs, and other professional services teams, managing the Jira issues is only one part of the job.
Project managers also need to answer questions like:
- Who is available to work on the project?
- How much work have we already scheduled?
- How many billable hours have we delivered?
- Are we still within the agreed budget?
- How much should we invoice the client?
- Is the project profitable?
This is where managing client projects in Jira can become complicated.
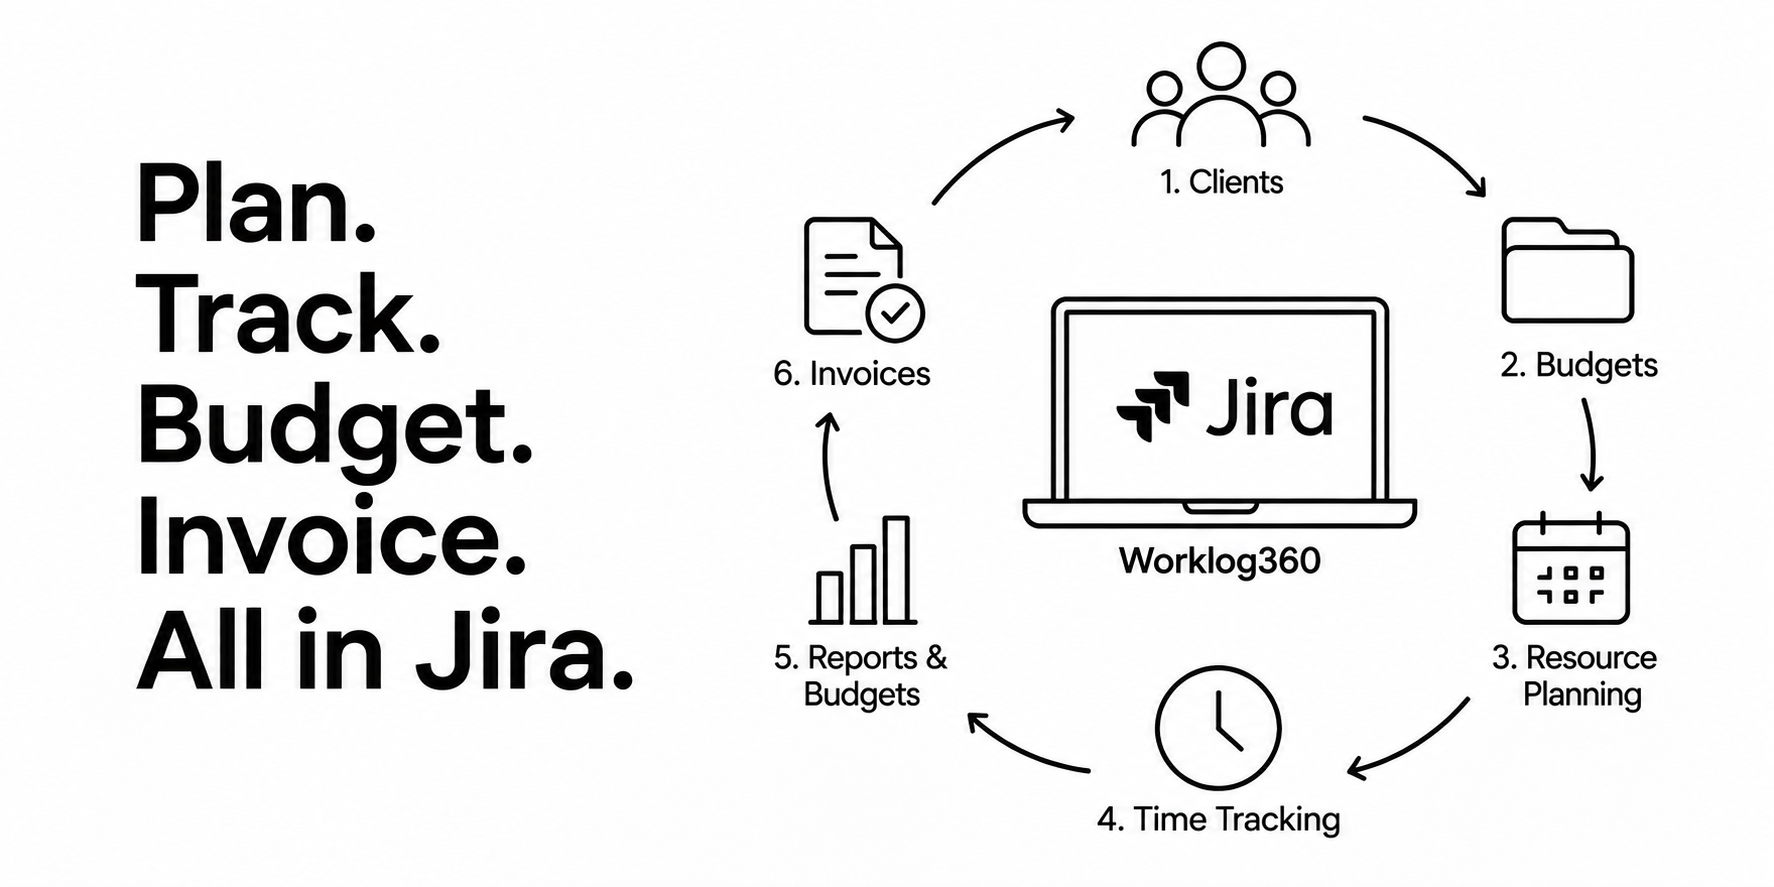
In this article, we'll look at how you can connect resource planning, time tracking, project budgets, and invoicing to manage the complete client project lifecycle in Jira using Worklog360.
The Challenge of Managing Client Projects in Jira
Consulting and software teams often work on multiple client projects at the same time.
A developer might spend:
- 20 hours per week on Client A
- 12 hours on Client B
- 4 hours on internal work
- The remaining capacity supporting other projects
At the same time, each client project may have different:
- Budgets
- Billing rates
- Billing models
- Deadlines
- Project managers
- Team members
Jira does an excellent job of managing the work itself.
The challenge starts when you need to connect that work with people, capacity, budgets, and client billing.
This often leads to a setup where Jira manages issues, spreadsheets manage resource planning and budgets, and another system handles invoicing.
The result is fragmented project information and a lot of manual reporting.
What Does the Complete Client Project Lifecycle Look Like?
For many consulting and software teams, the workflow looks something like this:
Client → Project → Resource Planning → Time Tracking → Budget Control → Approvals → Invoicing → Profitability
The important part is that these aren't separate processes.
They depend on each other.
- The people you schedule eventually log time.
- Those hours consume the project budget.
- Billable hours become revenue.
- Approved work becomes an invoice.
- The difference between revenue and cost determines whether the project is profitable.
Let's walk through how this workflow can be managed inside Jira using Worklog360.
Step 1 – Create Your Clients
Everything starts with the client.
Although Jira organizes work around projects, consulting companies usually need another business layer that represents the companies they work with.
In Worklog360, you can maintain a centralized list of clients. These clients can then be linked to projects, budgets, reports, and invoices, making it easy to understand who every hour of work is being delivered for.
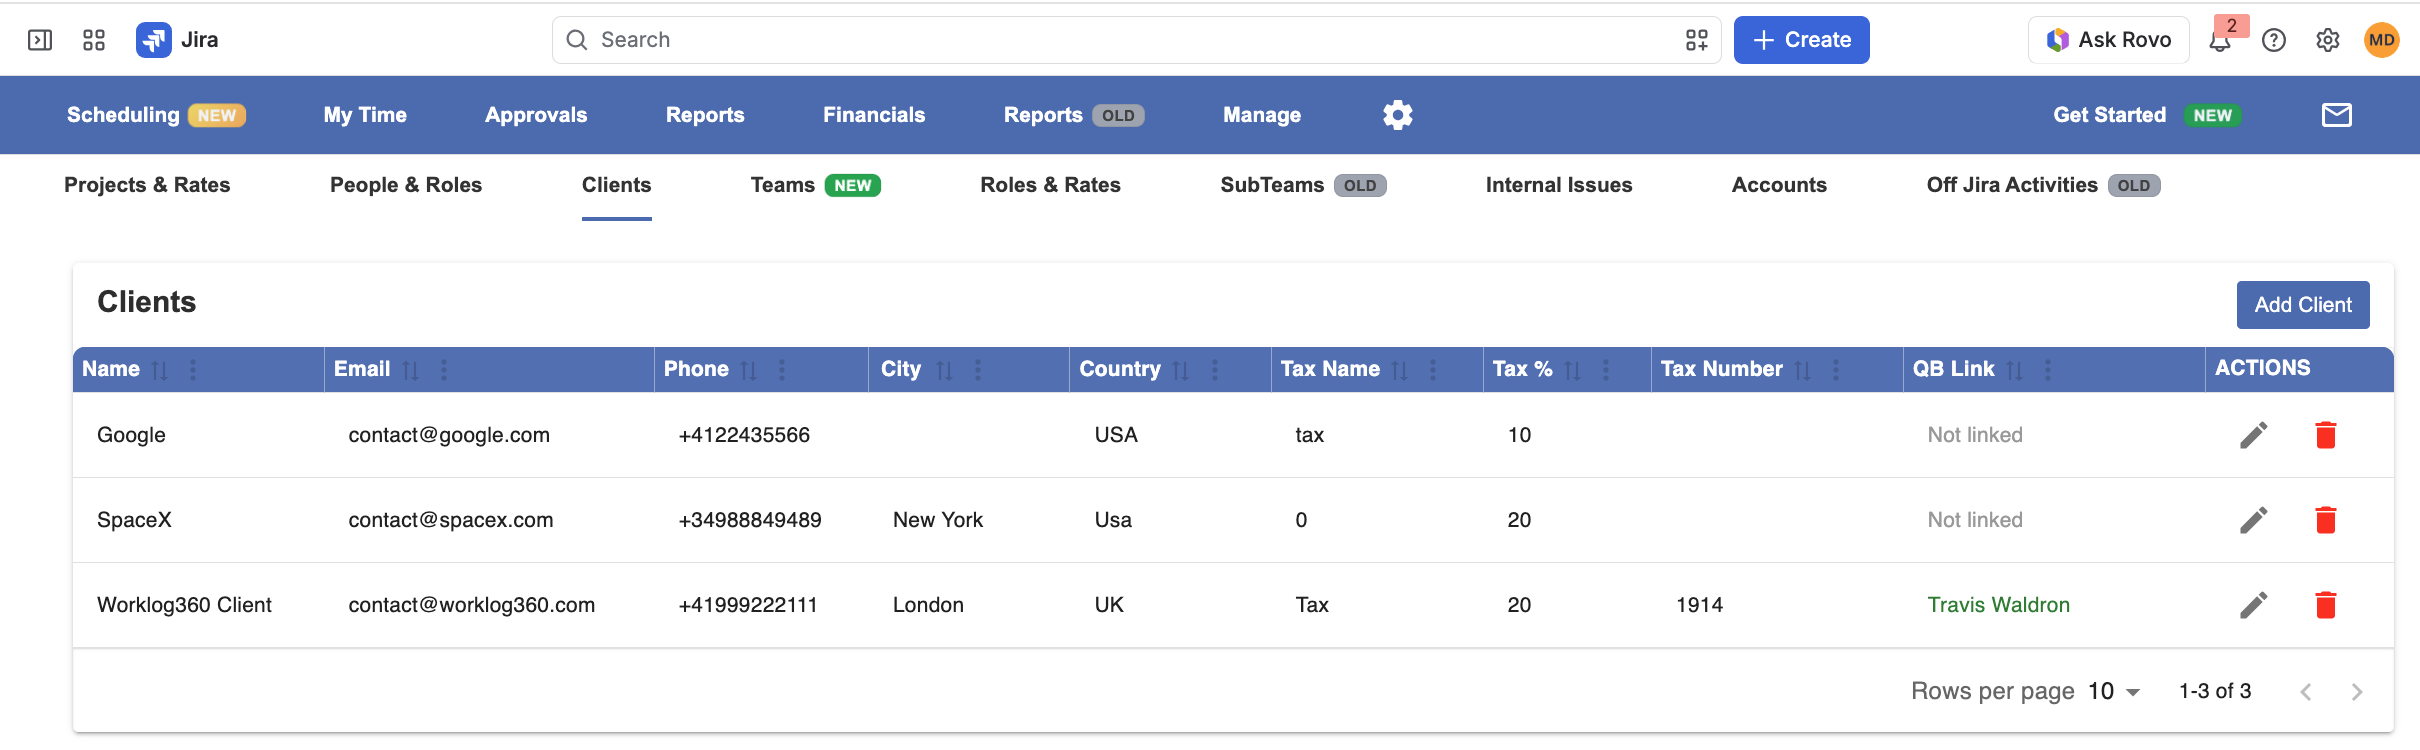
Once a client is created, it becomes available throughout the application, creating a consistent connection between operational work and client reporting.
Step 2 – Create Project Budgets
After creating the client, the next step is defining the project's budget.
A budget represents the commercial agreement with your customer and becomes the financial foundation for tracking project performance.
Each budget can be linked to:
- A Client
- One or more Jira Projects
Depending on the engagement, budgets can be created as:
- Time & Materials
- Fixed Price
- Retainers
They can also be managed using either:
- Budget Hours
- Budget Revenue
or both.
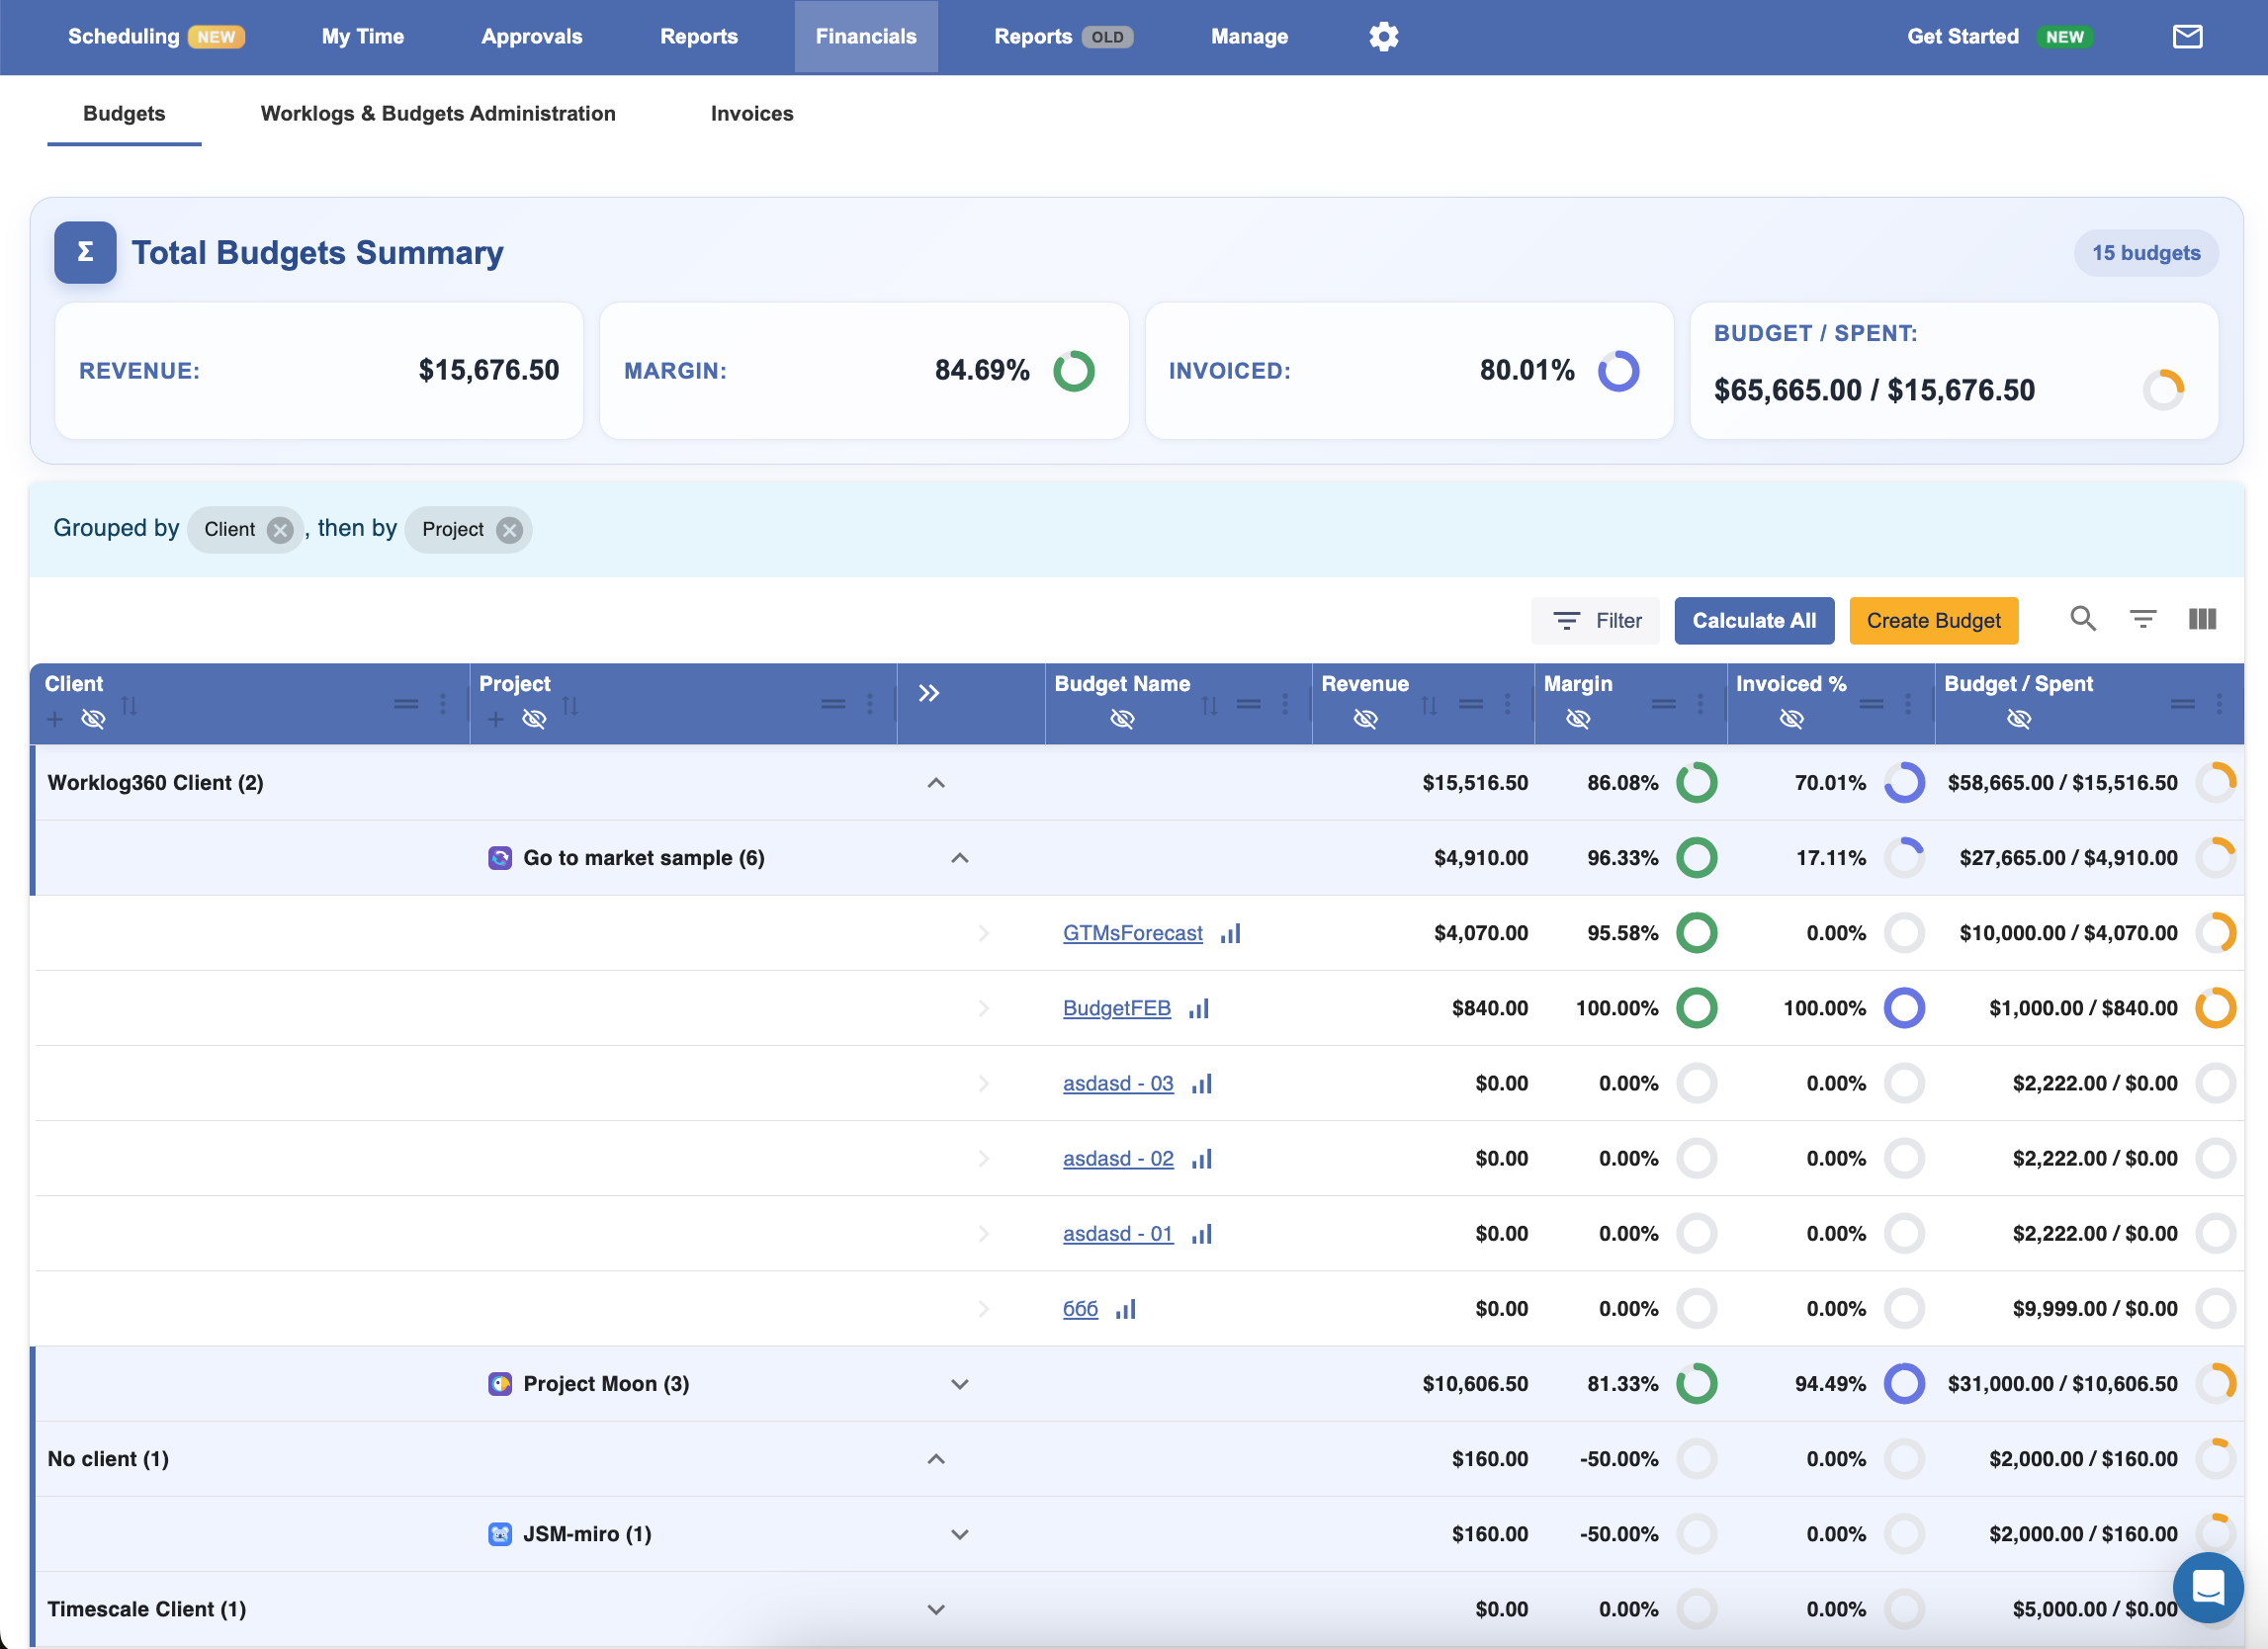
Because every worklog will later be associated with one of these budgets, managers can monitor project performance in real time.
Step 3 – Plan Your Resources
Before work begins, project managers need to answer one simple question:
Do we have enough capacity?
Using the Scheduler, managers can allocate work across people, Jira issues, or entire projects while immediately seeing available capacity and existing commitments.
Instead of maintaining planning spreadsheets, resource planning becomes part of the same workflow used for delivery.
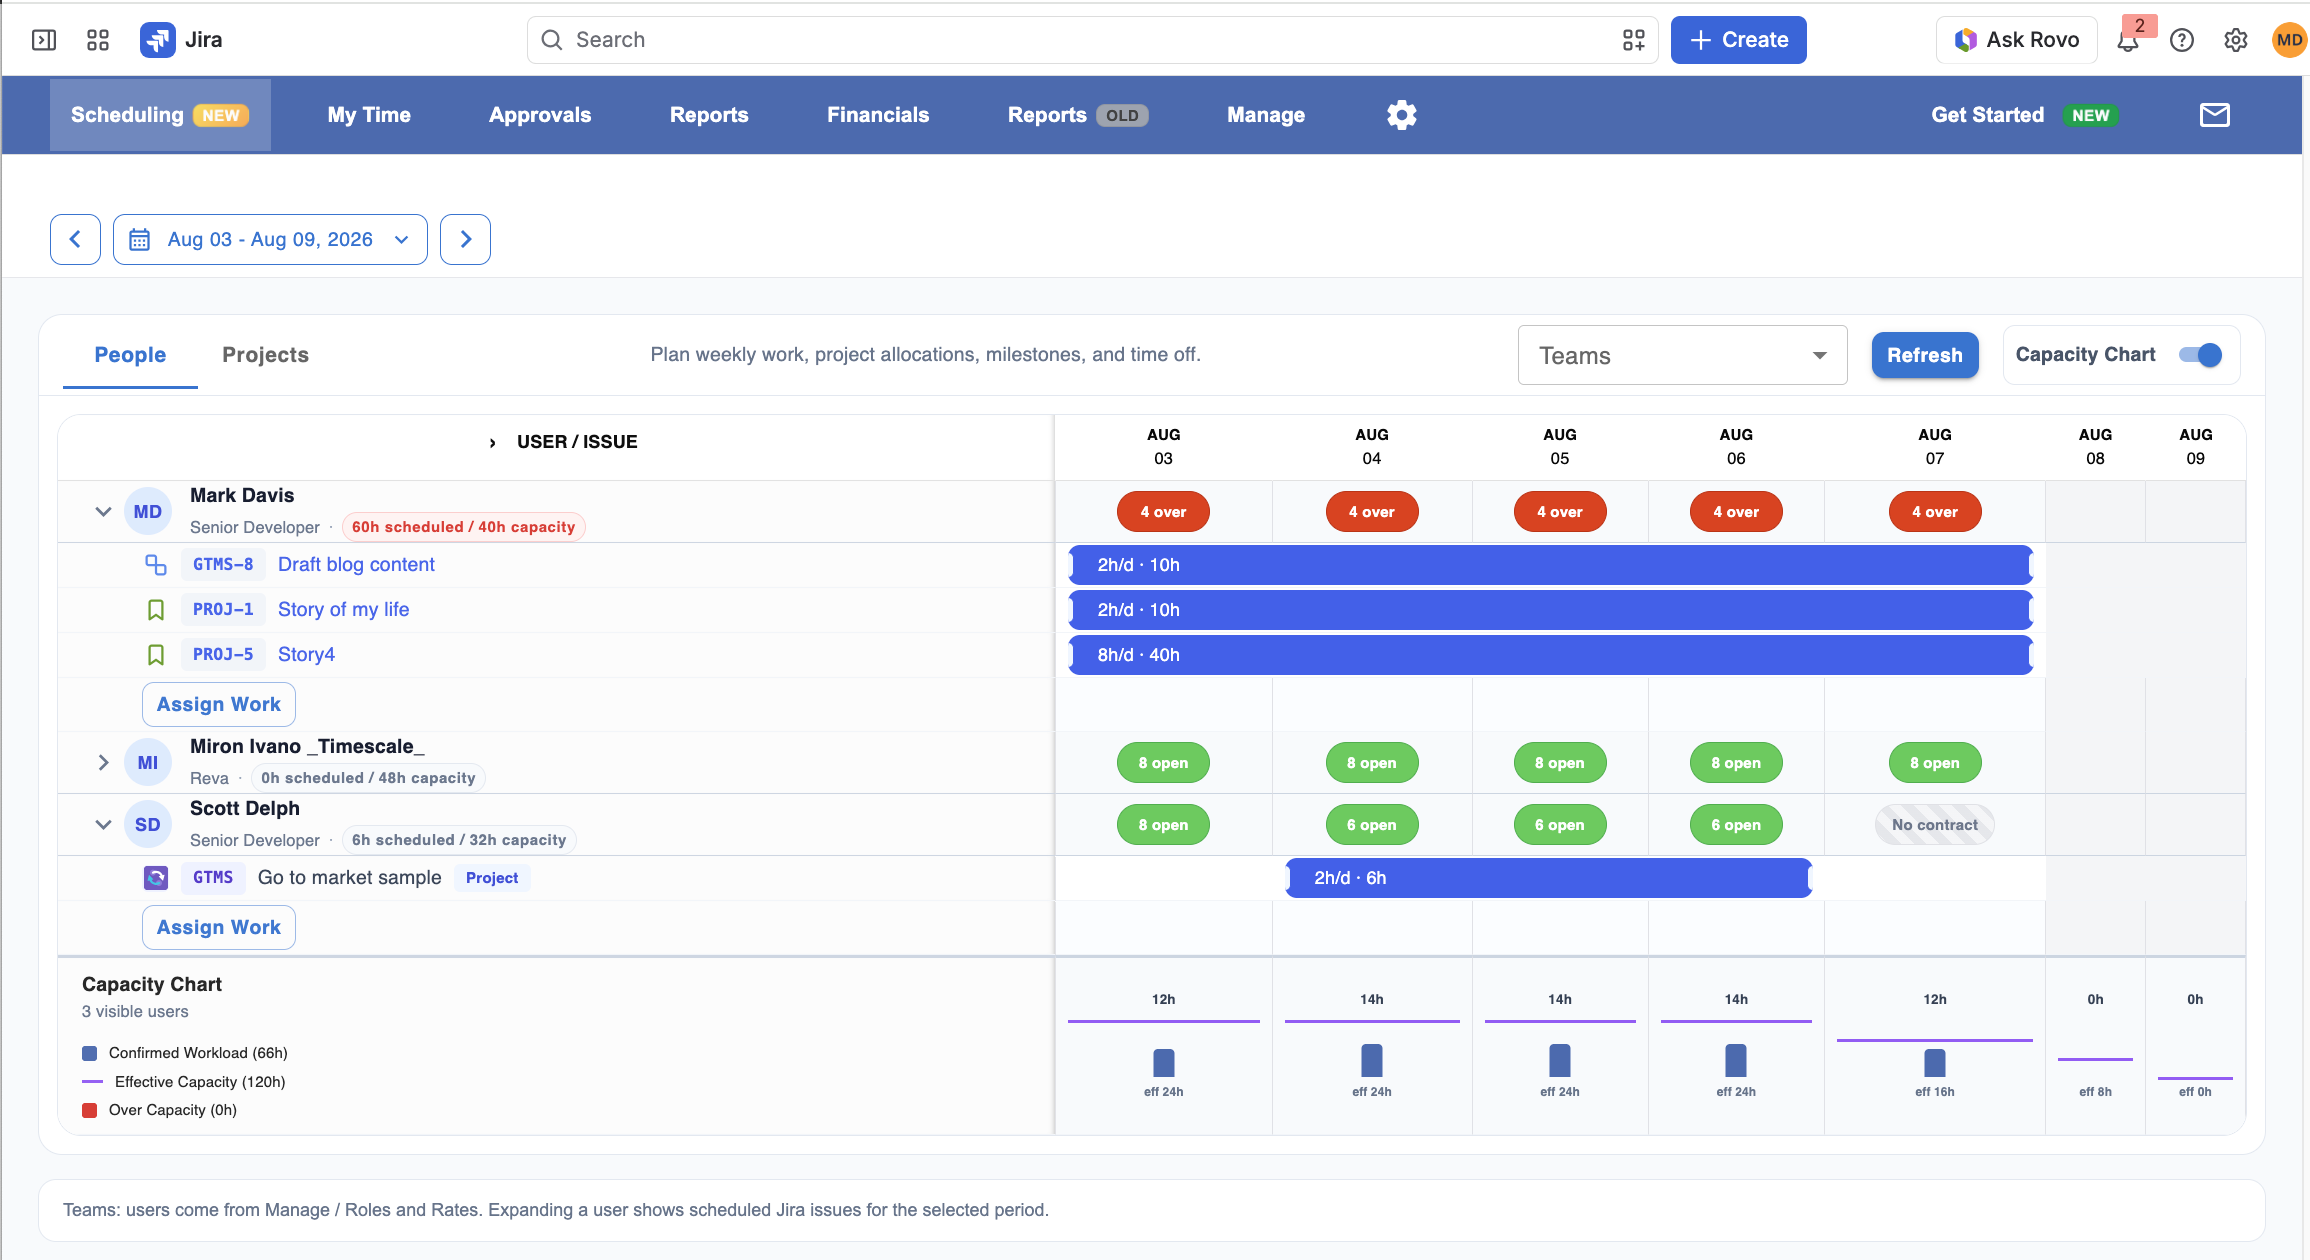
For higher-level planning, work can also be scheduled directly against a project without selecting individual Jira issues.
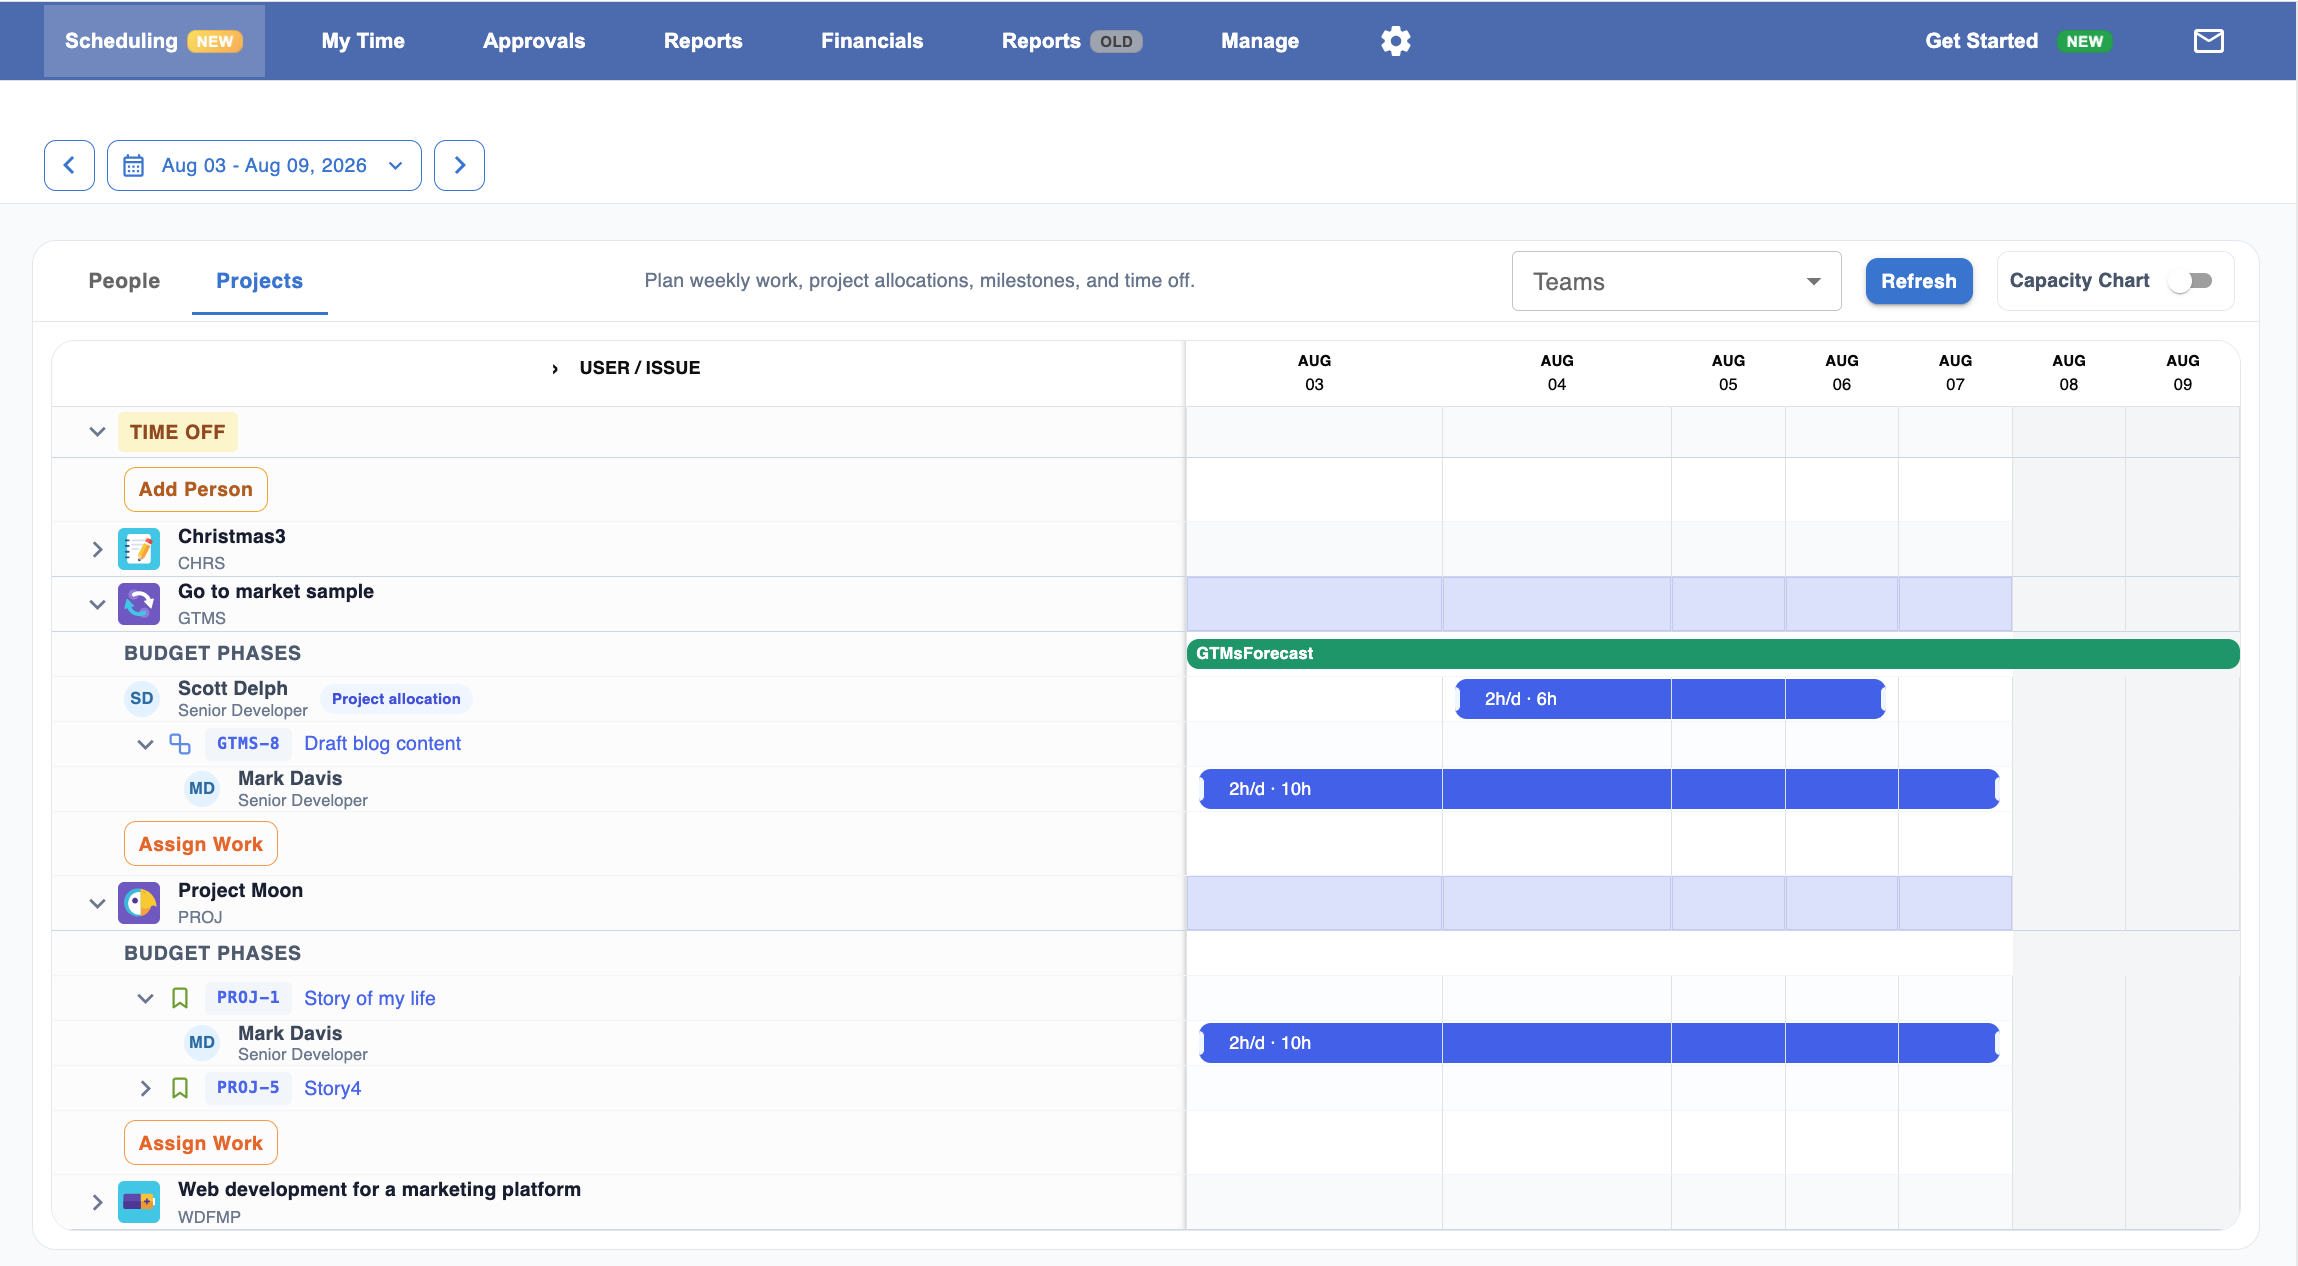
By planning work before it starts, teams gain visibility into both future workload and expected budget consumption.
Step 4 – Track Time
Once work begins, scheduled hours become actual worklogs.
Different people prefer different ways of logging time, so Worklog360 supports several approaches:
- Logging directly from Jira issues
- Calendar-based time tracking
- Editable Timesheets
- Timers
All methods create the same centralized worklog data.
- calendar time tracking
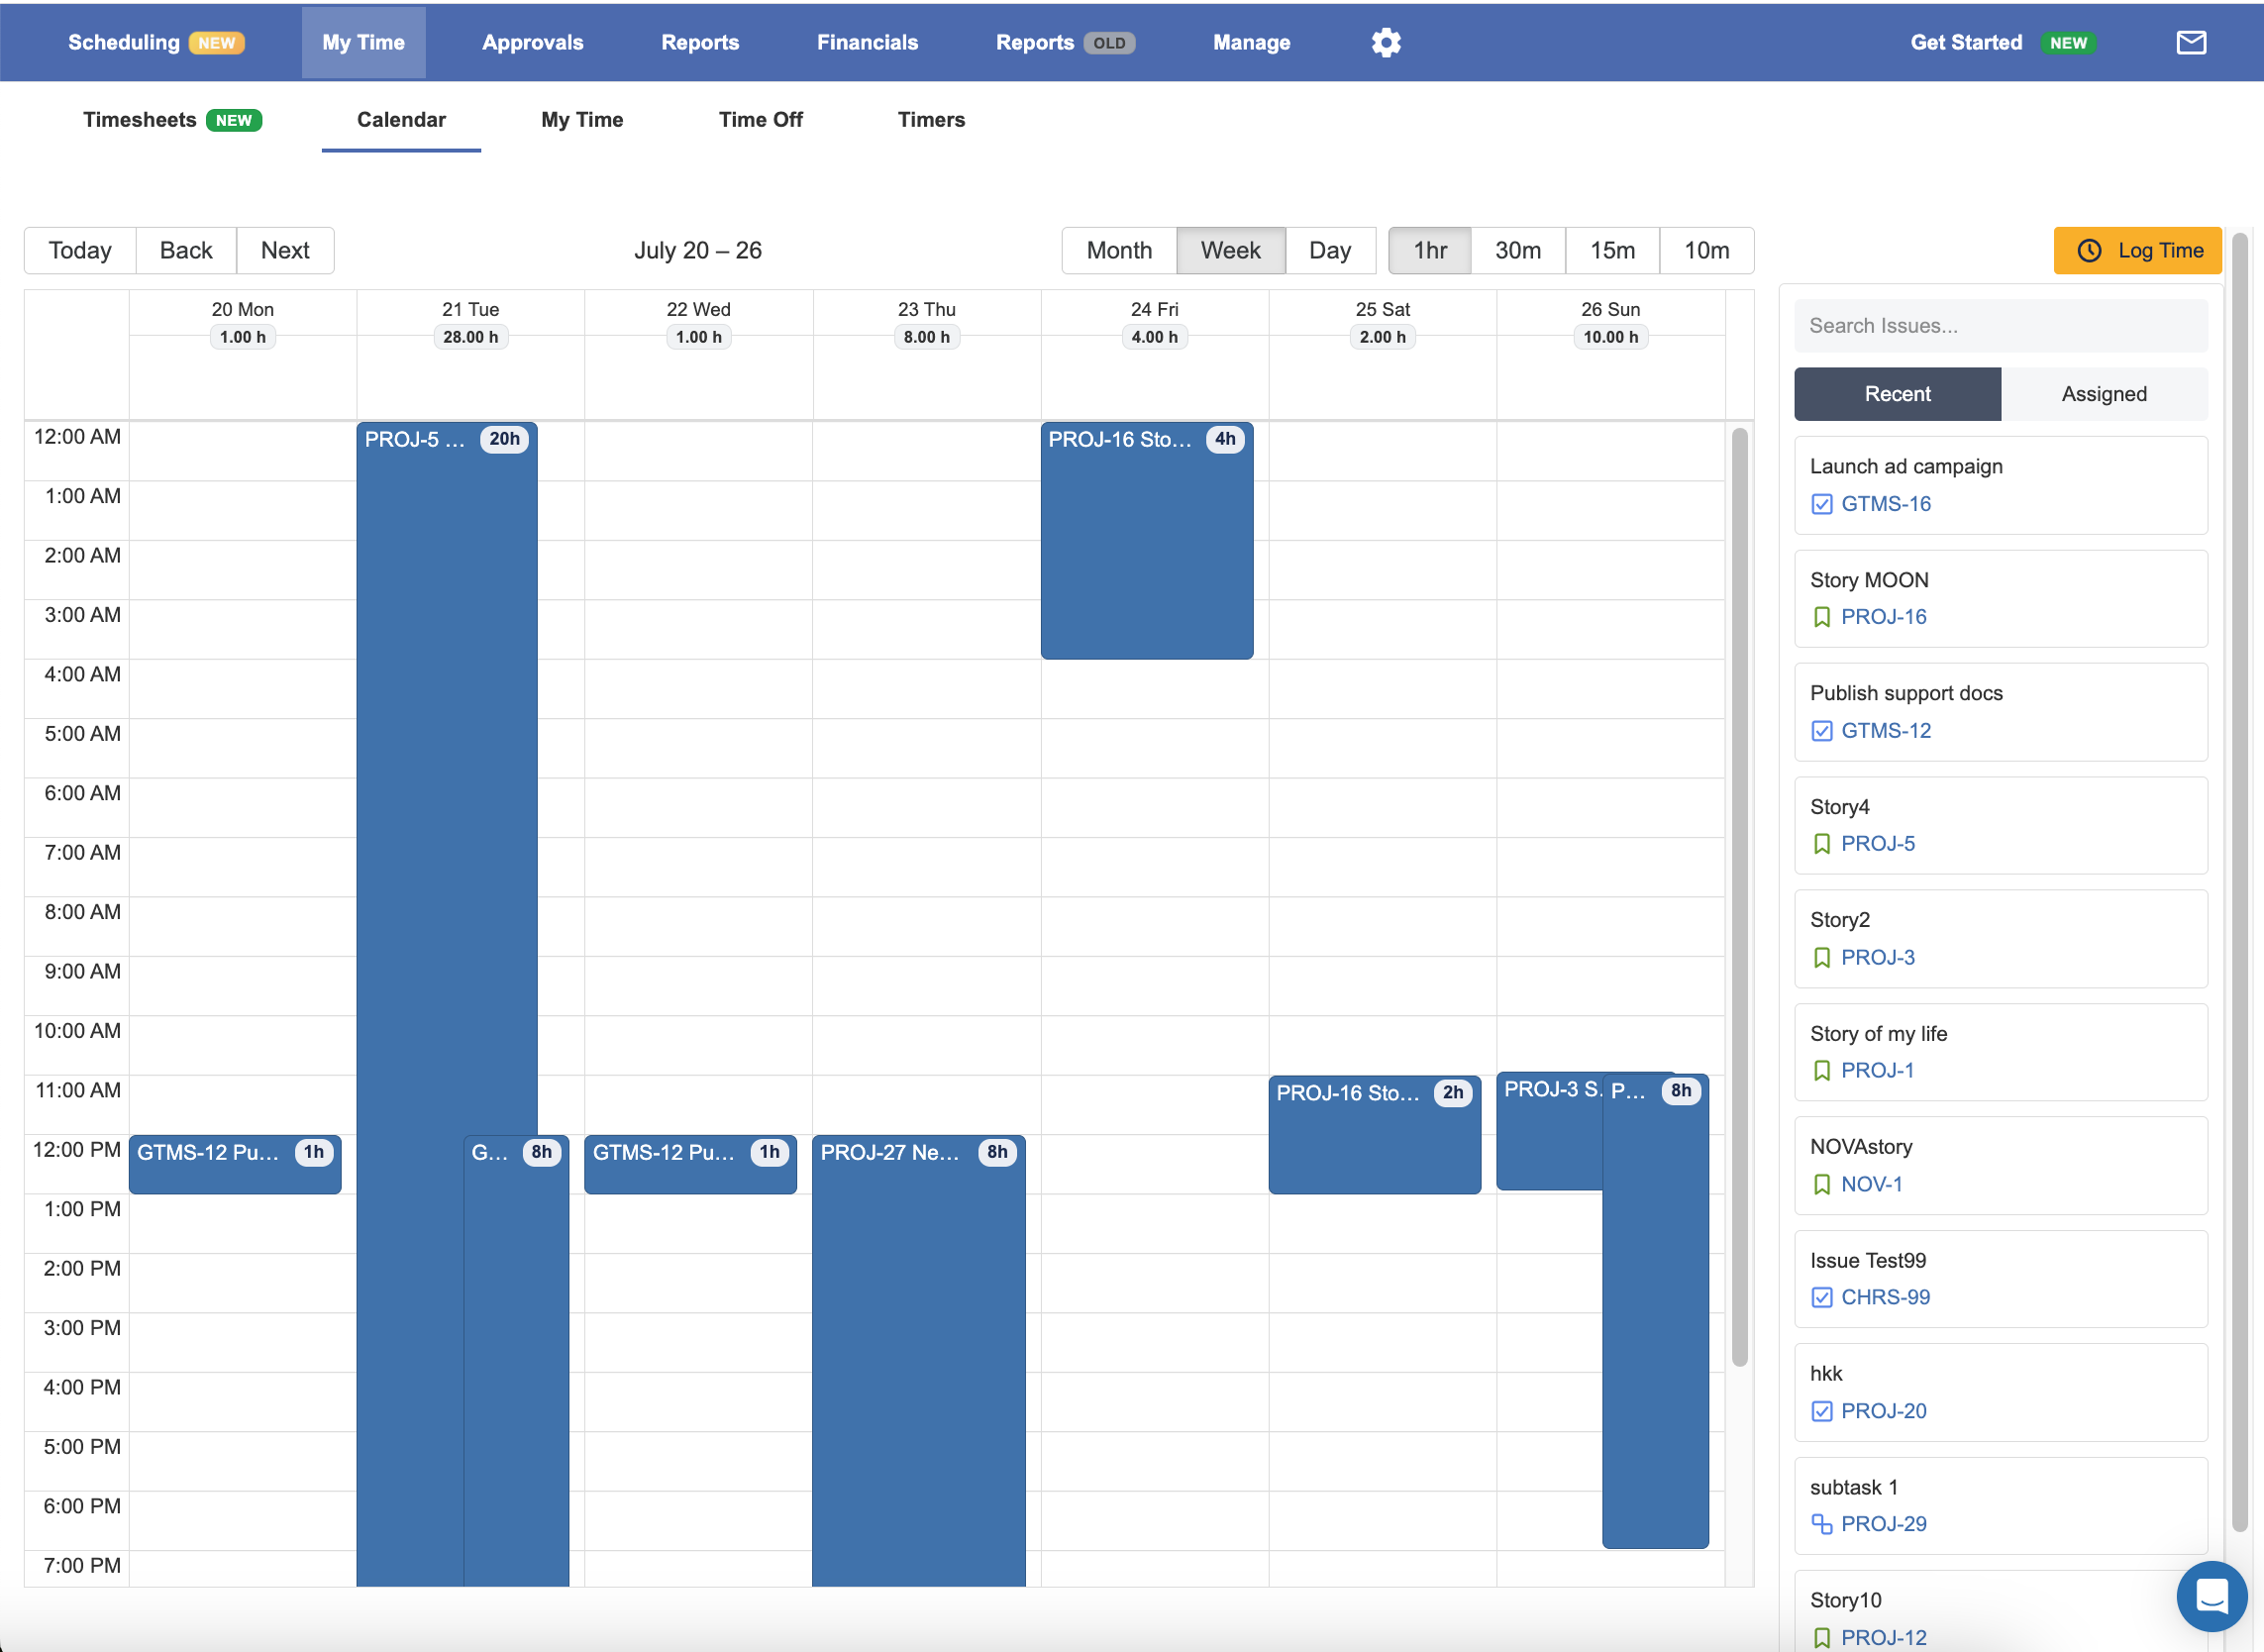
- time tracking directly from the jira issue
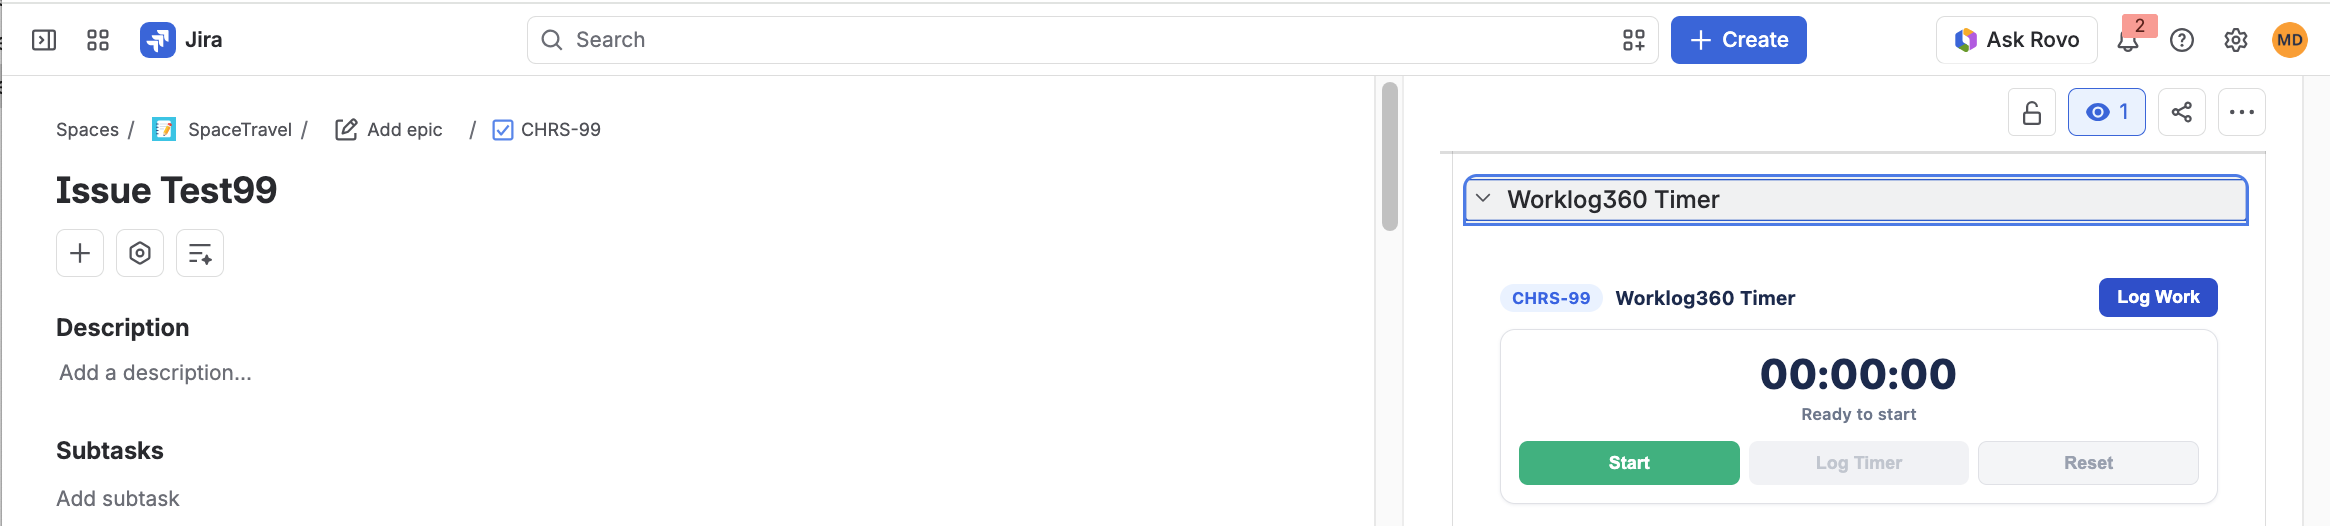
- editable timesheet time tracking, looking at the scheduled hours at the same time
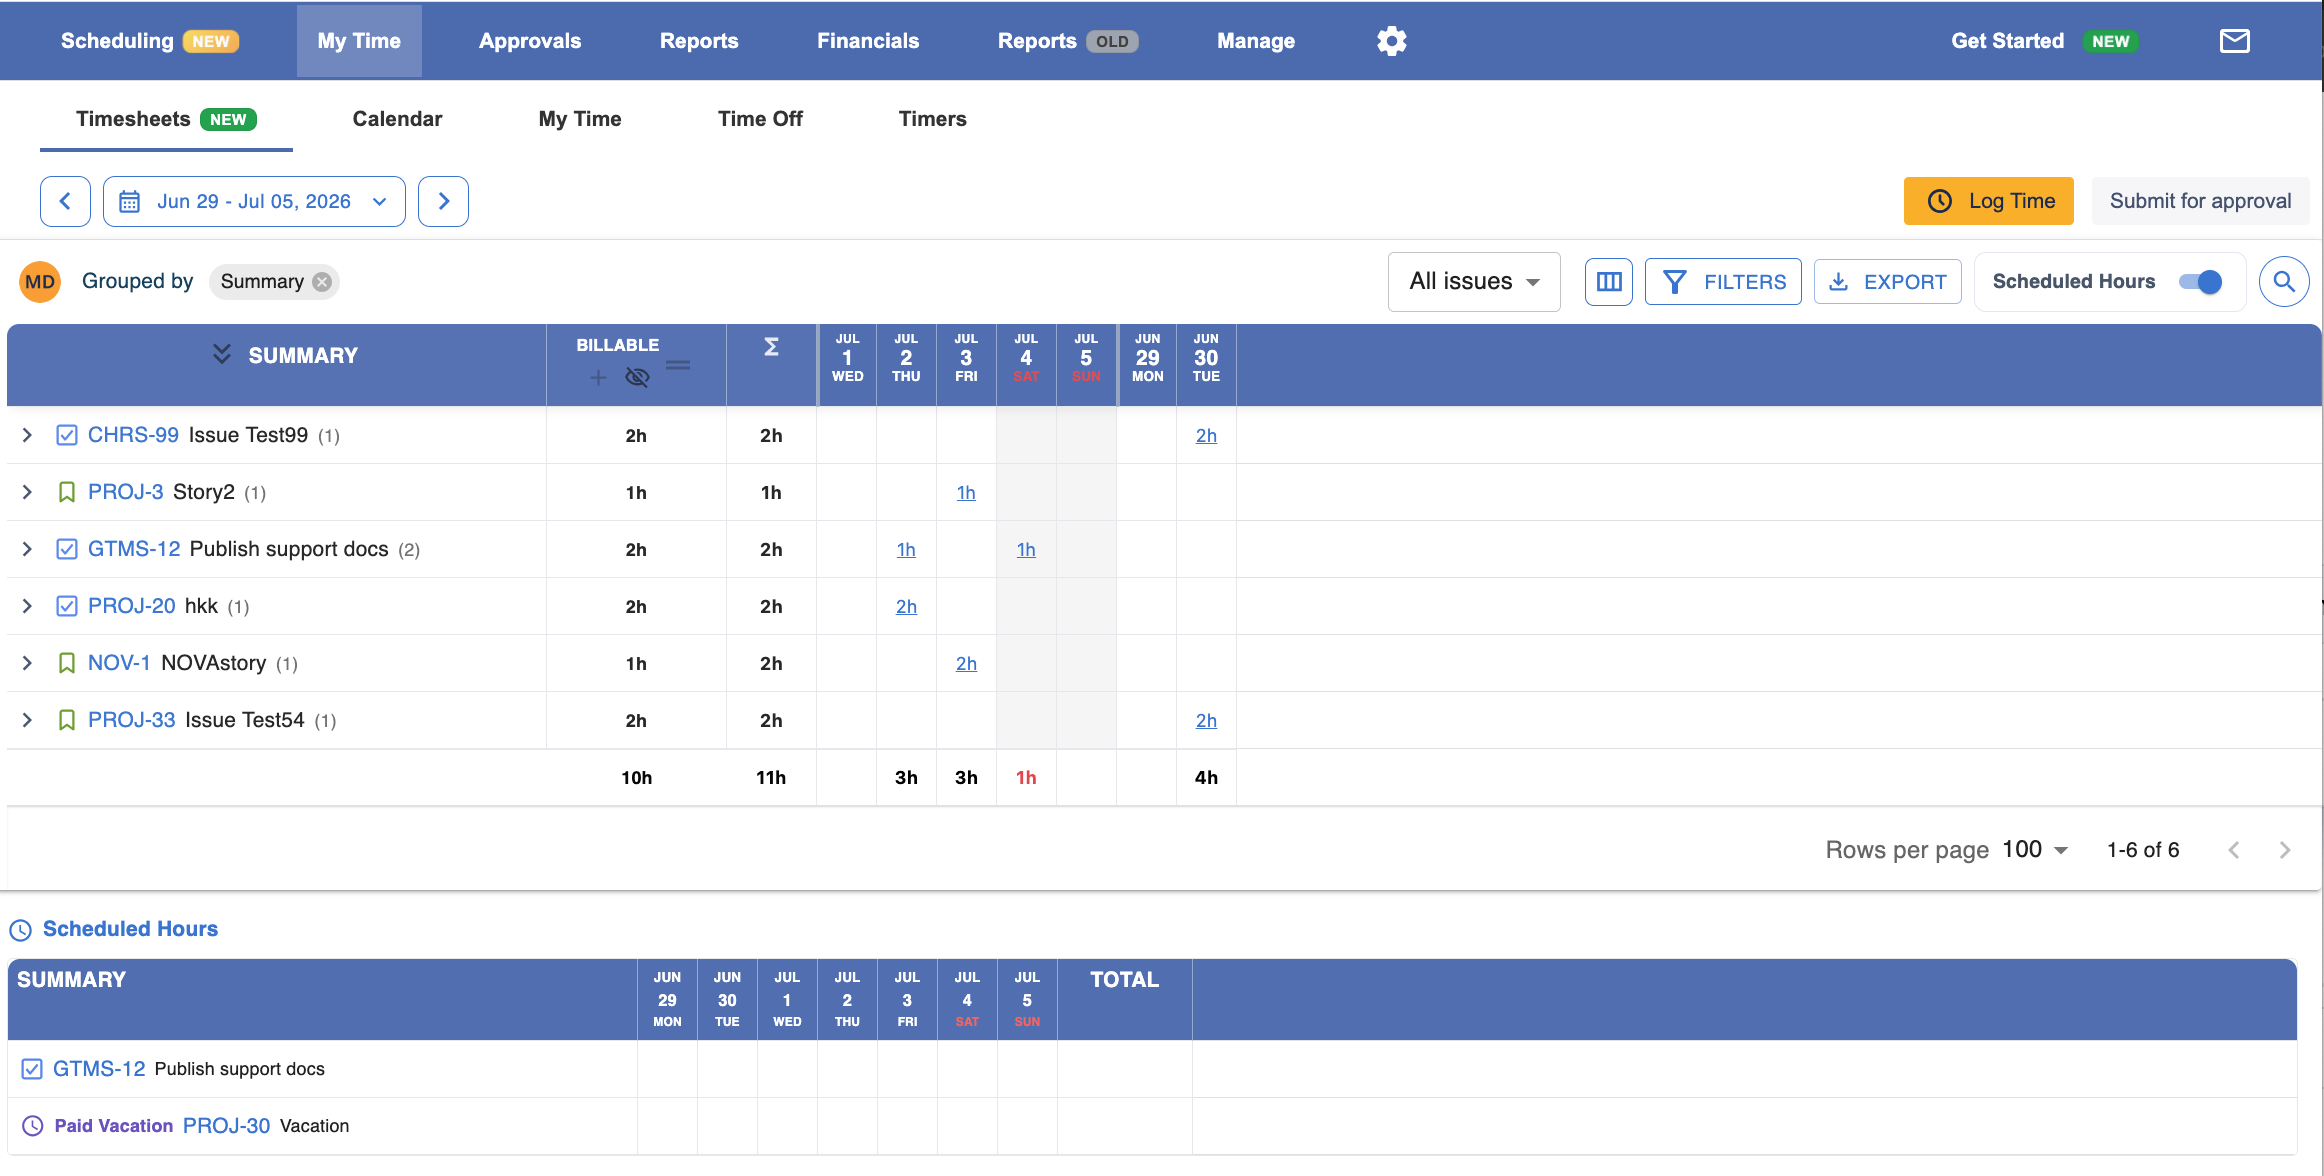
Developers often prefer logging time directly from Jira issues, consultants frequently use the calendar, while project managers appreciate Editable Timesheets for reviewing and adjusting multiple entries efficiently.
Step 5 – Analyze Worklogs and Reports
Once worklogs are collected, they become much more valuable than simply recording hours.
Managers can build reports grouped by:
- Client
- Budget
- Project
- Team
- User
- Billable / Non-billable
- Jira fields
- Custom fields
This makes it easy to answer questions like:
- How many hours did we deliver for Client A?
- Which projects generated the most billable work?
- How much time did each consultant spend this month?
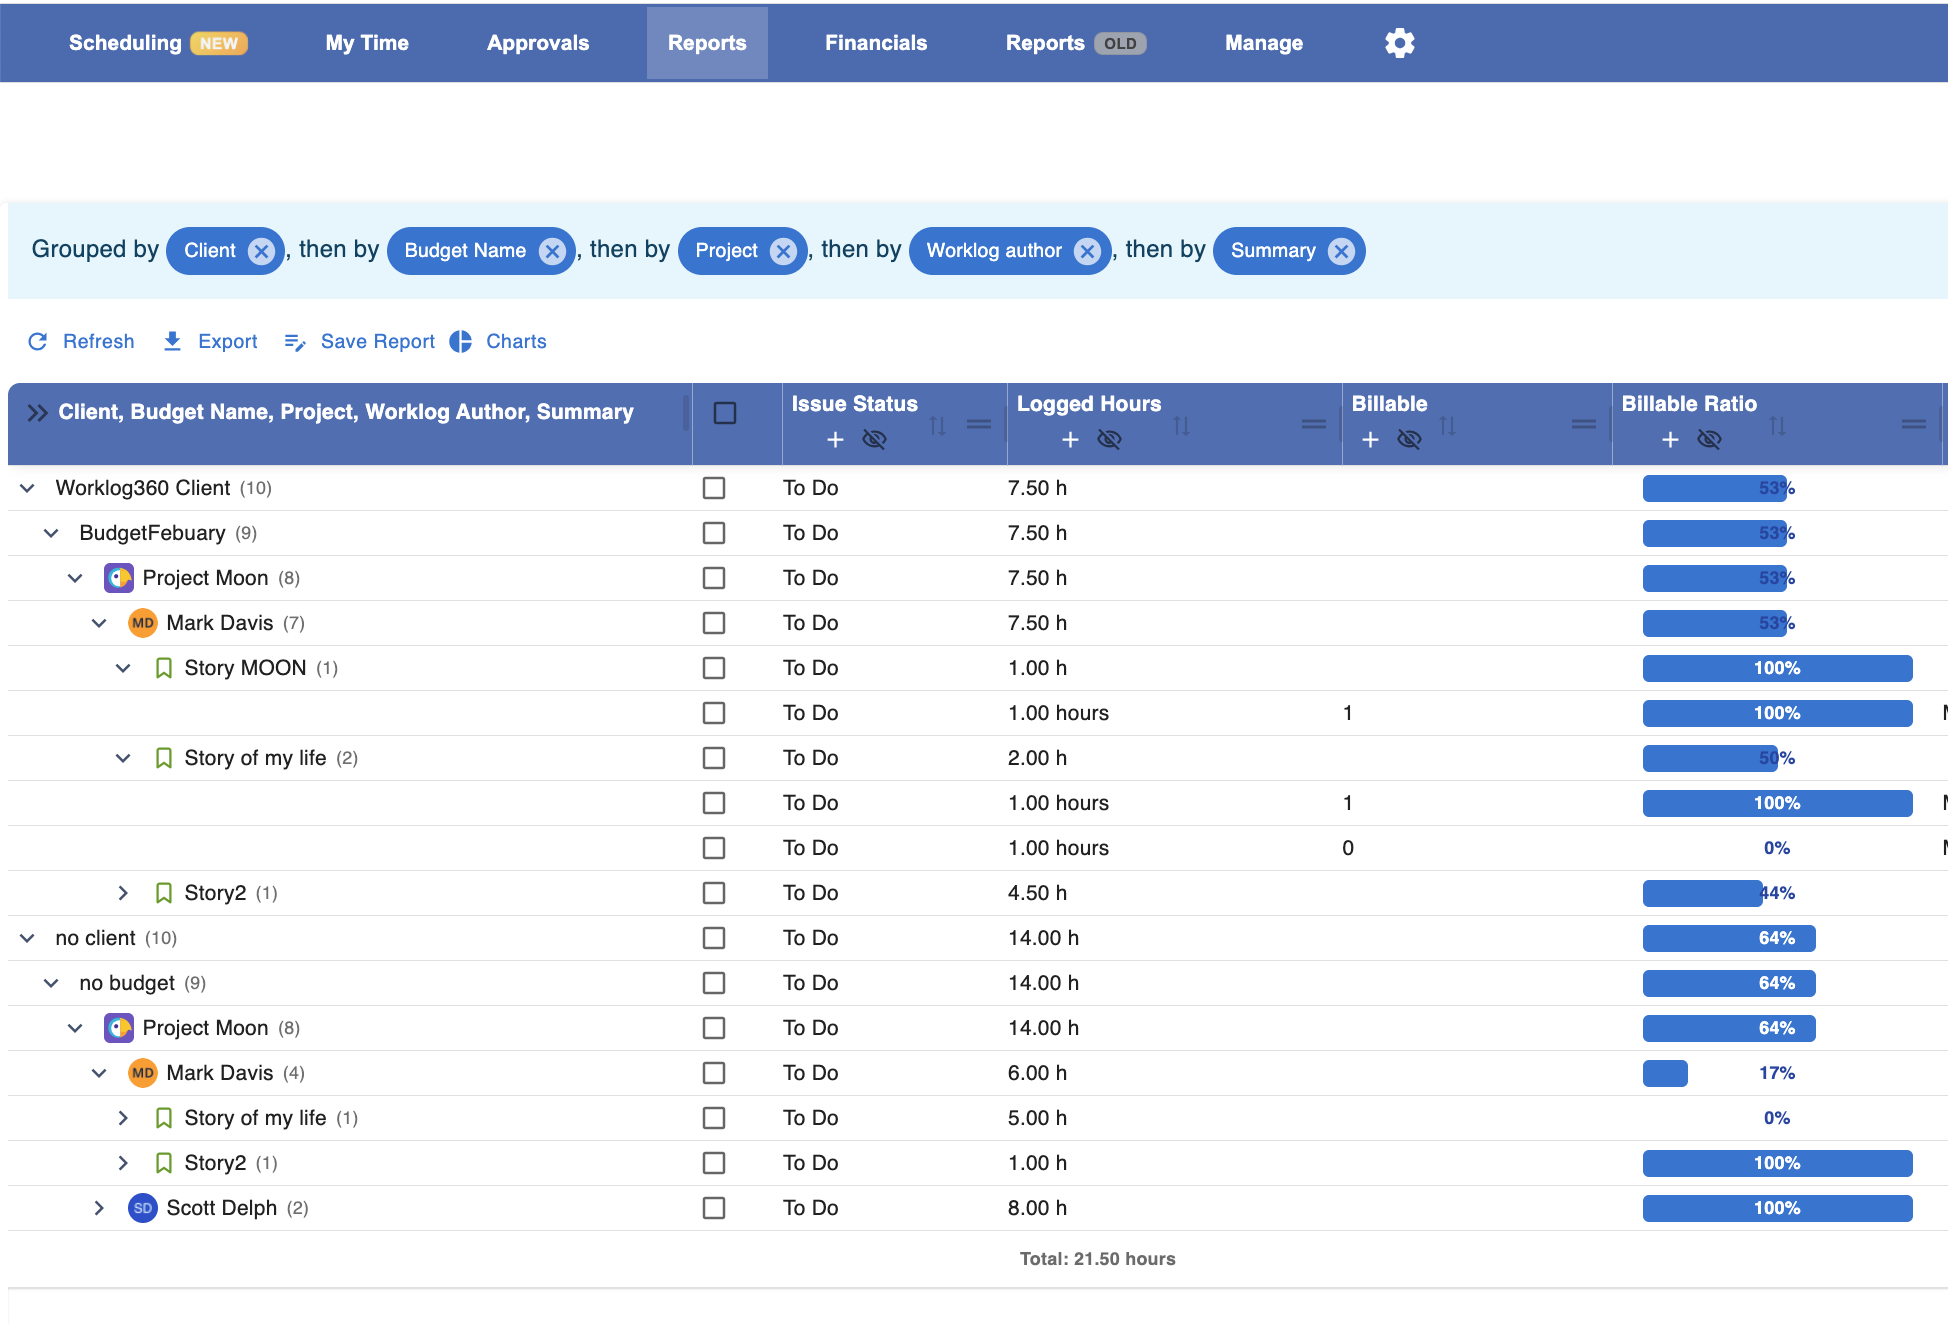
Because every worklog is connected to the client and budget, reporting no longer requires exporting data into spreadsheets.
Step 6 – Monitor Budget Performance
Every worklog automatically updates the associated project budget.
Managers can immediately see:
- Planned vs Logged Hours
- Planned vs Actual Revenue
- Budget Remaining
- Cost
- Profit
This gives project managers early visibility into projects that may exceed their agreed scope.
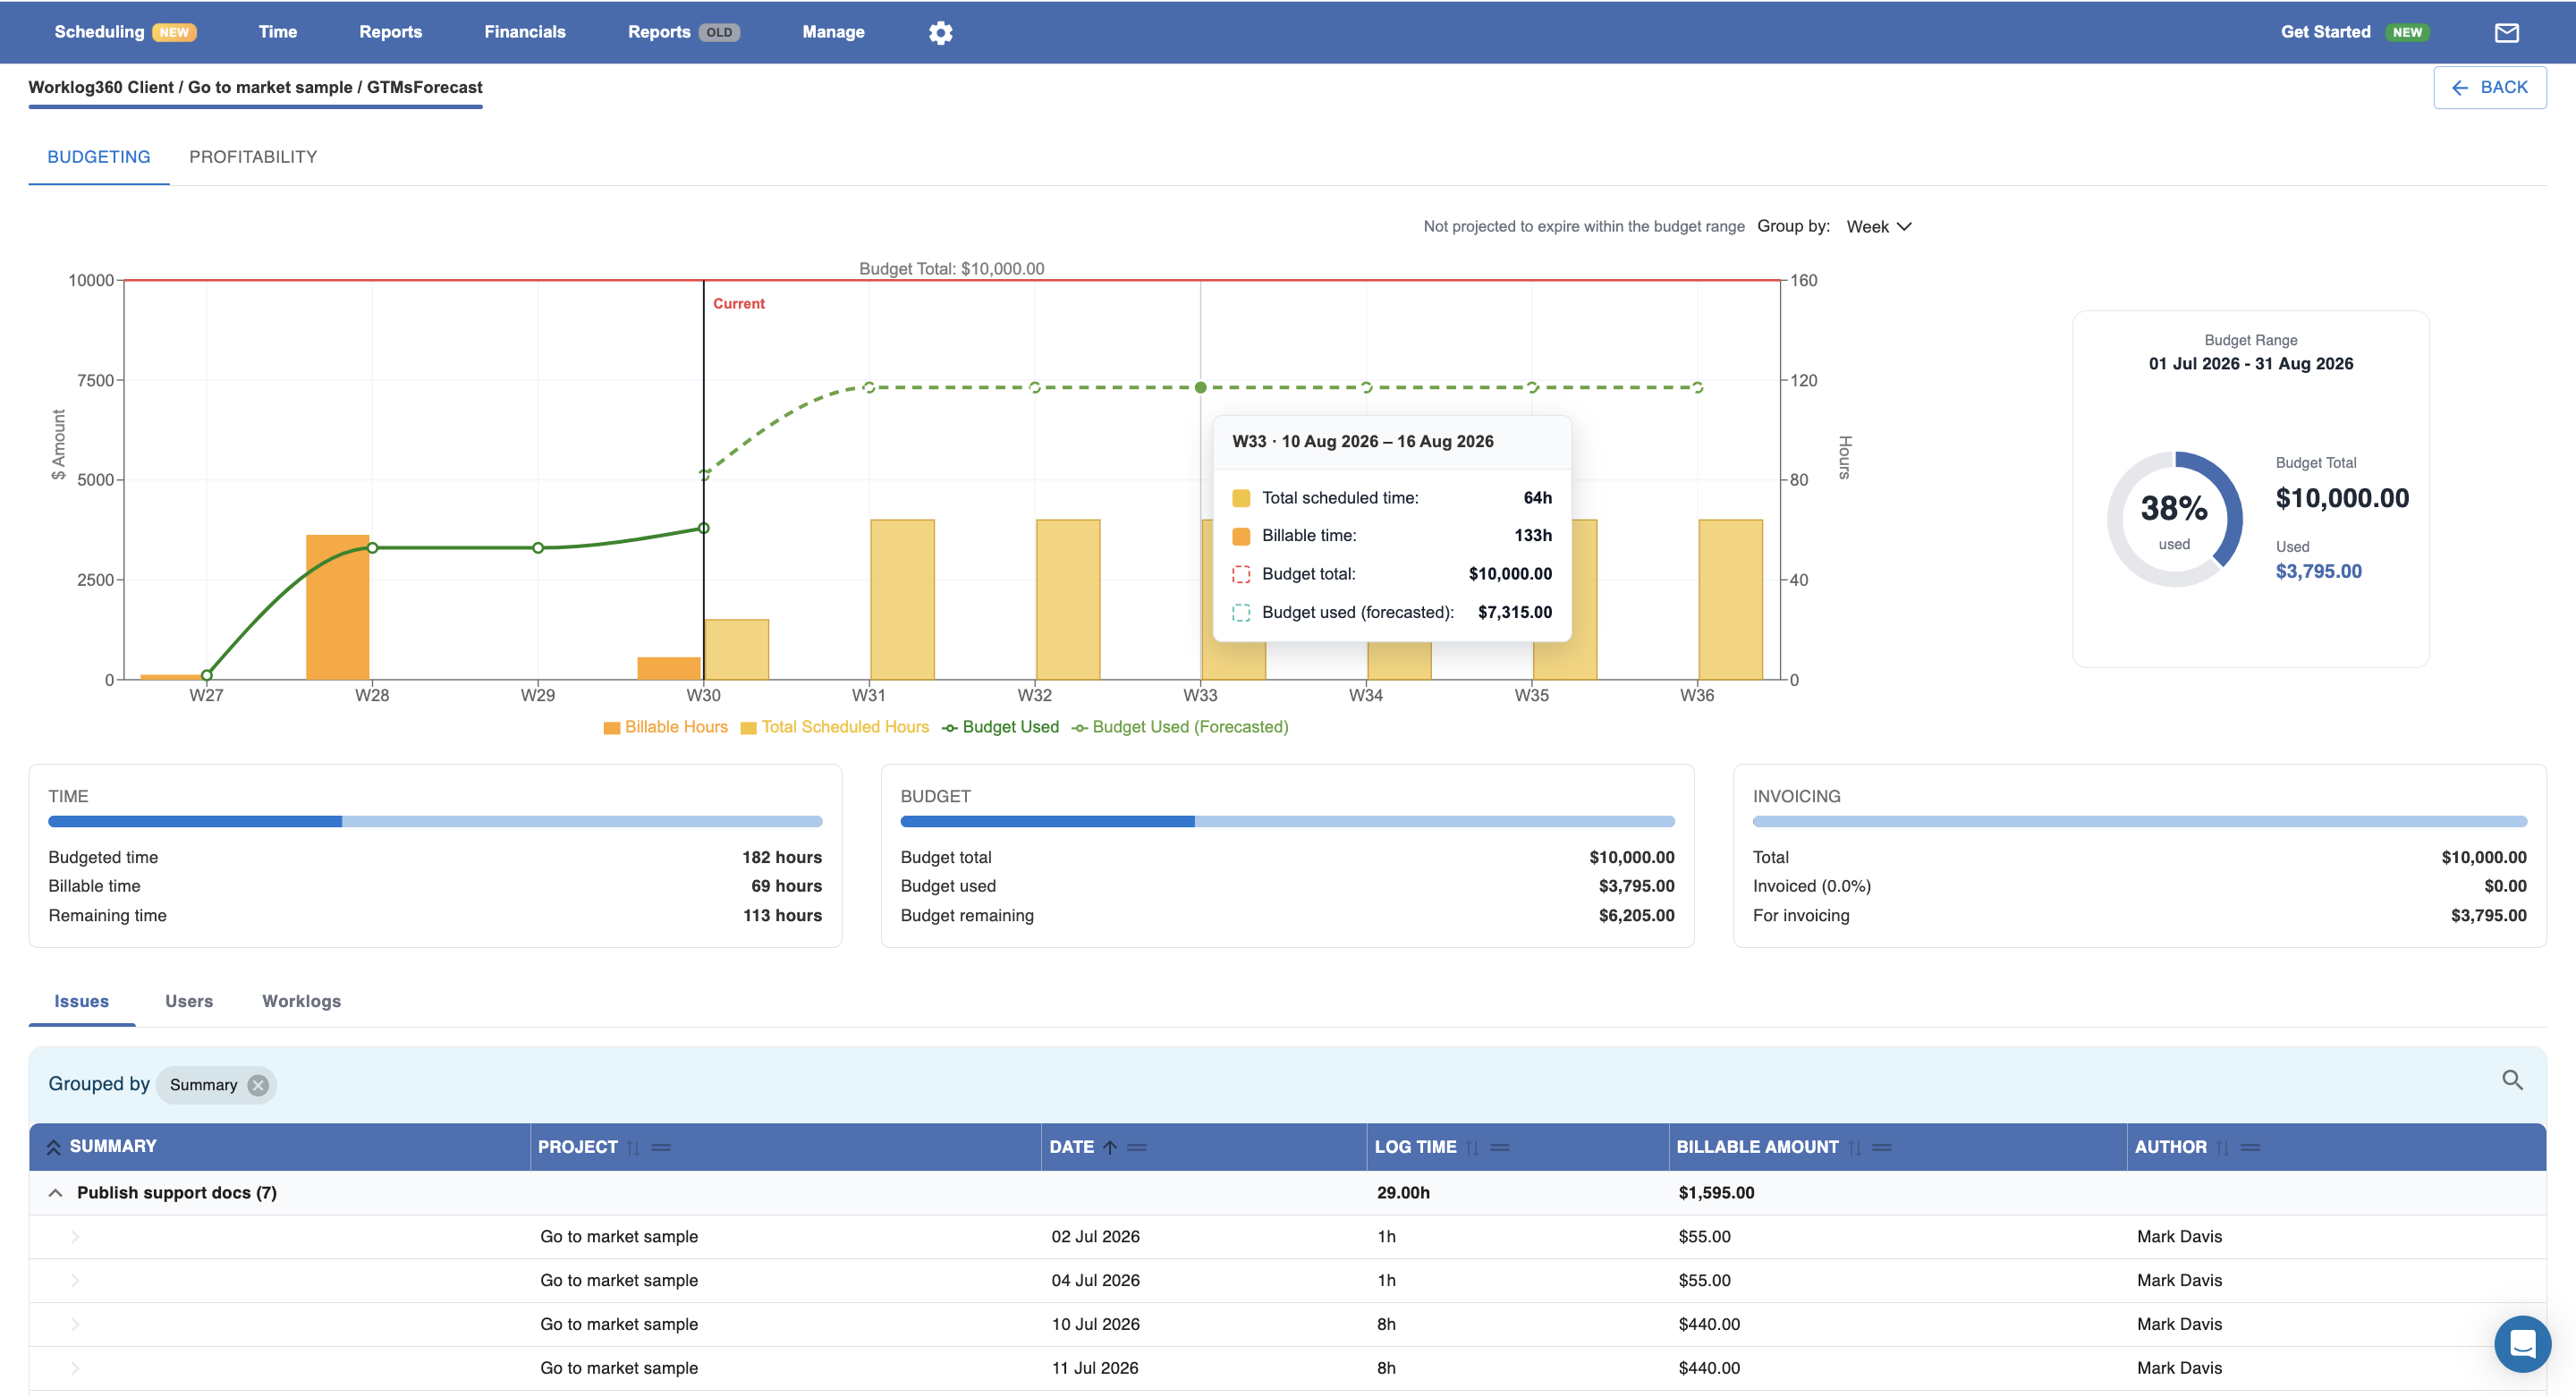
Instead of discovering overruns at the end of the month, teams can react while work is still in progress.
Step 7 – Prepare Work for Billing
Before creating invoices, managers often review which worklogs should actually be billed.
Worklog360 makes it easy to navigate through project worklogs, review billable entries and verify that the correct work will be included in the invoice.
This review process helps ensure that clients are billed accurately and that internal or non-billable work is excluded where necessary.
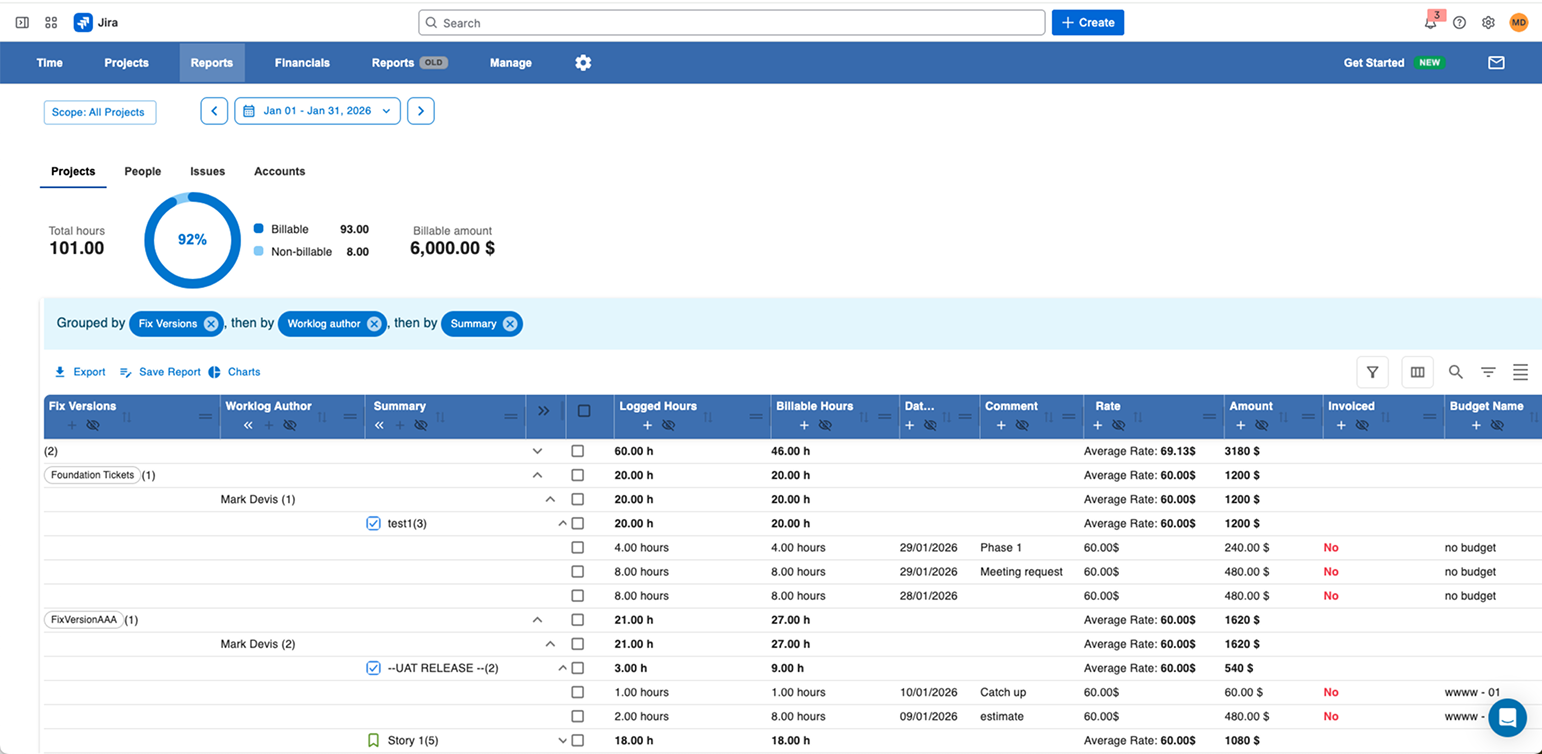
Step 8 – Generate Invoices
Once the work has been reviewed, generating an invoice becomes straightforward.
Simply choose:
- Client
- Budget
- Billing Period
Worklog360 automatically calculates invoice amounts using the project's configured billing rates and the approved billable work.
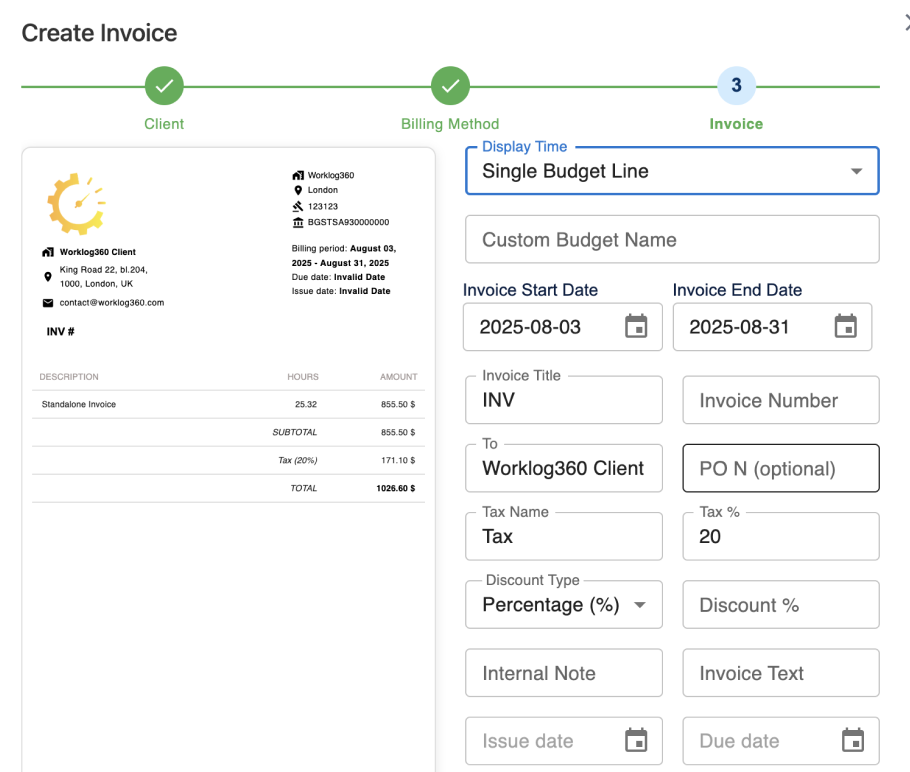
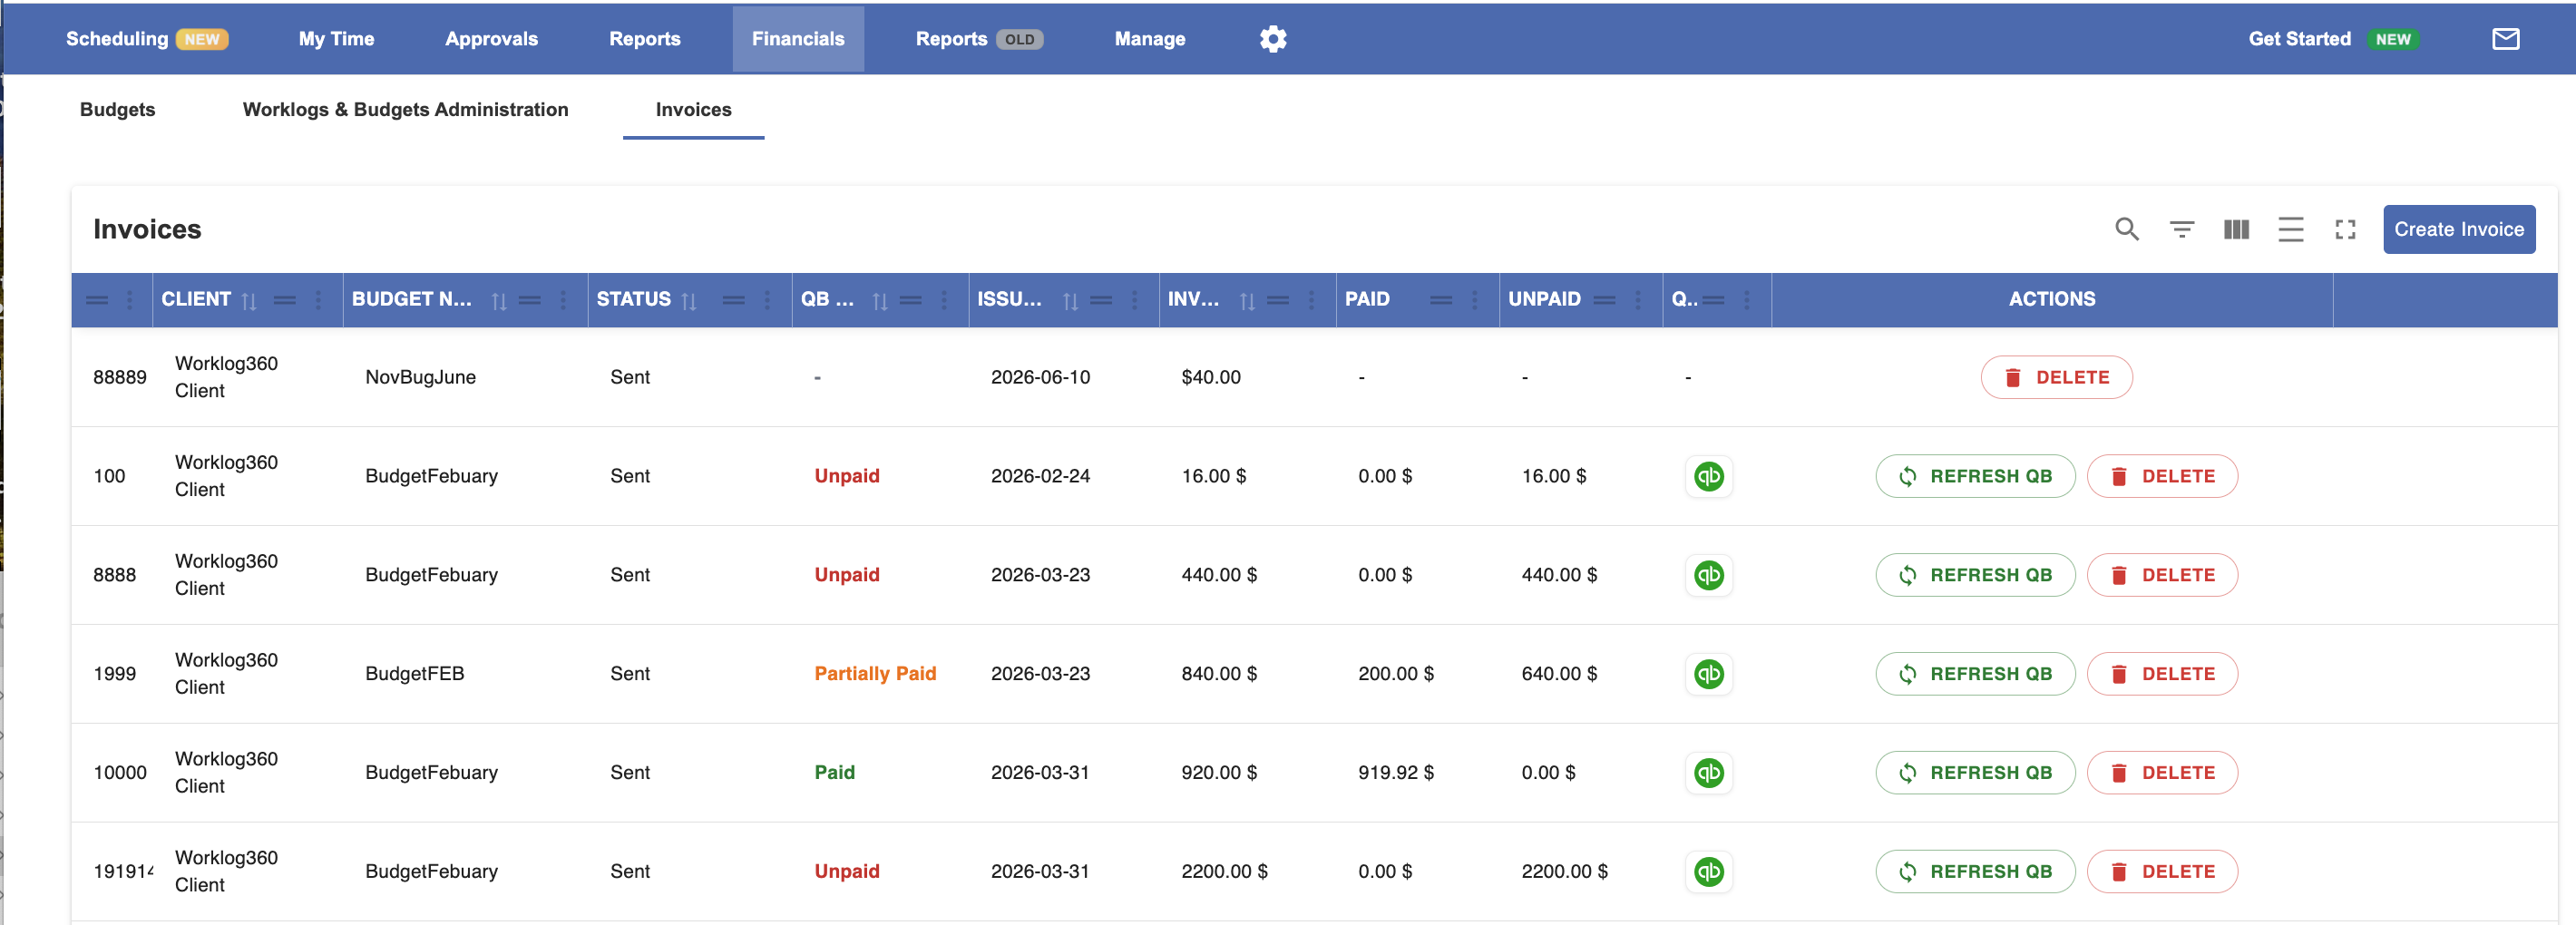
Because invoices are created from the project budget and its associated worklogs, finance teams no longer need to manually gather information from multiple systems.
Final Thoughts
Managing client projects isn't only about completing Jira issues.
Successful consulting teams need to connect clients, budgets, resource planning, time tracking, reporting and invoicing into one continuous workflow.
Worklog360 extends Jira with these capabilities, allowing consulting companies to manage the complete client project lifecycle—from planning resources to generating client invoices—without leaving Jira.
Whether you're delivering fixed-price projects, time and materials engagements or retainers, having all project information connected in one place reduces manual work, improves financial visibility and helps teams deliver profitable client projects.
