The timeline view in Jira helps by showing tasks, dates, and dependencies in one place. It gives you a clearer picture of how work is spread over time.
But there’s still a gap between day-to-day task management and high-level planning. Jira has basic timeline features, but they’re often not enough for teams working across multiple projects. That’s why many teams use Gantt-style views or Jira Premium features for better planning—like managing initiatives above Epics or coordinating work across teams.
This guide explains how to build and manage a clear, high-level plan directly in Jira, so you can see progress, spot risks, and make better decisions.
What is a Jira Project Timeline?
A Jira project timeline shows your project as a schedule. It maps tasks, milestones, and deadlines on a single view.
This makes it easier to:
Instead of looking at scattered tasks, you get a simple visual of the whole project. It helps teams plan ahead, adjust quickly, and keep stakeholders informed.
Why Jira Struggles with High-Level Planning
Jira works well for execution, but not always for strategy. Here are the main issues:
Too much detail
Boards are filled with tasks and sub-tasks. It’s hard to see bigger items like Epics or initiatives.
No clear capacity view
You can see assigned tasks, but not whether your team is overloaded in the future.
Hard to plan scenarios
Testing “what if” plans often means creating fake issues, which clutters your data.
To fix this, you need a timeline that shows the big picture and accounts for team capacity.
Better Planning with Timeline Tools
Jira’s basic timeline works for simple cases. But for complex planning, teams often use tools like ActivityTimeline.
These tools add:
-
resource planning
-
time tracking
-
cross-project visibility
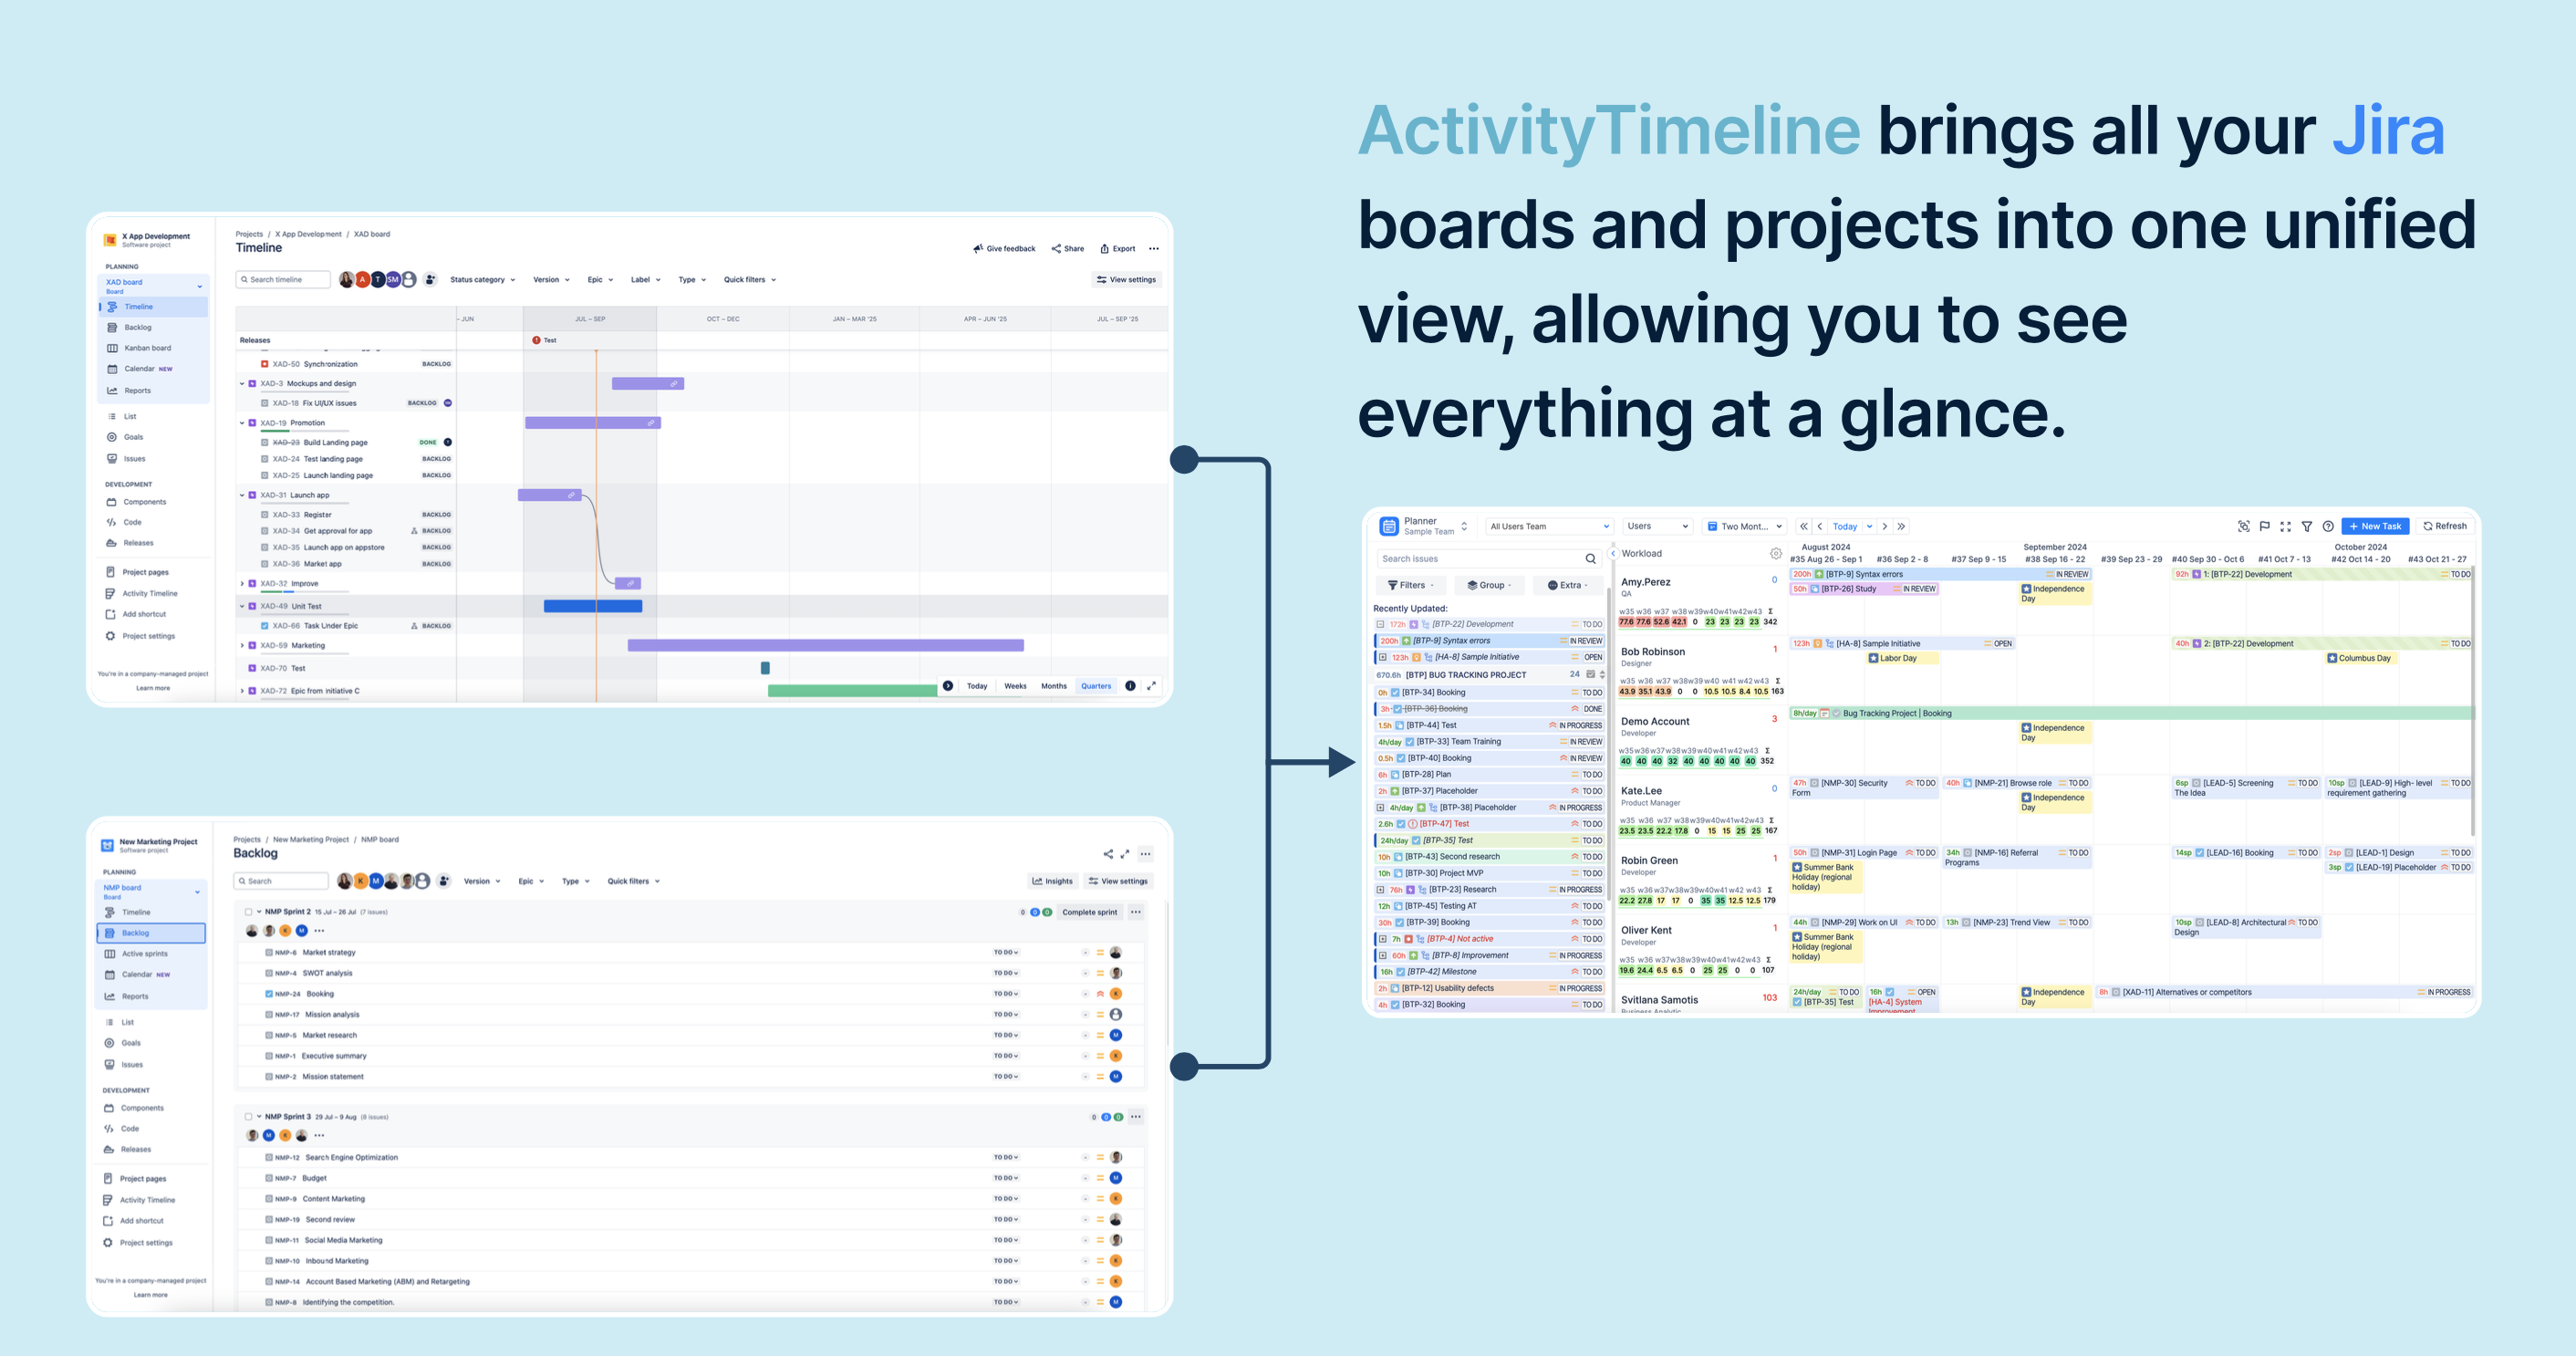
For example, a single timeline can show tasks from multiple projects in one place. You can also filter what you see, so you focus only on relevant work.
Method 1: Plan at the Team Level
Instead of planning for individuals, start with teams.
The Team Panel in ActivityTimeline lets you schedule work for a whole team—even if you don’t know who will do it yet.
How it works:
-
Switch from “Users” view to “Teams”
-
Add Epics or initiatives directly to the team timeline
-
Plan months or quarters ahead
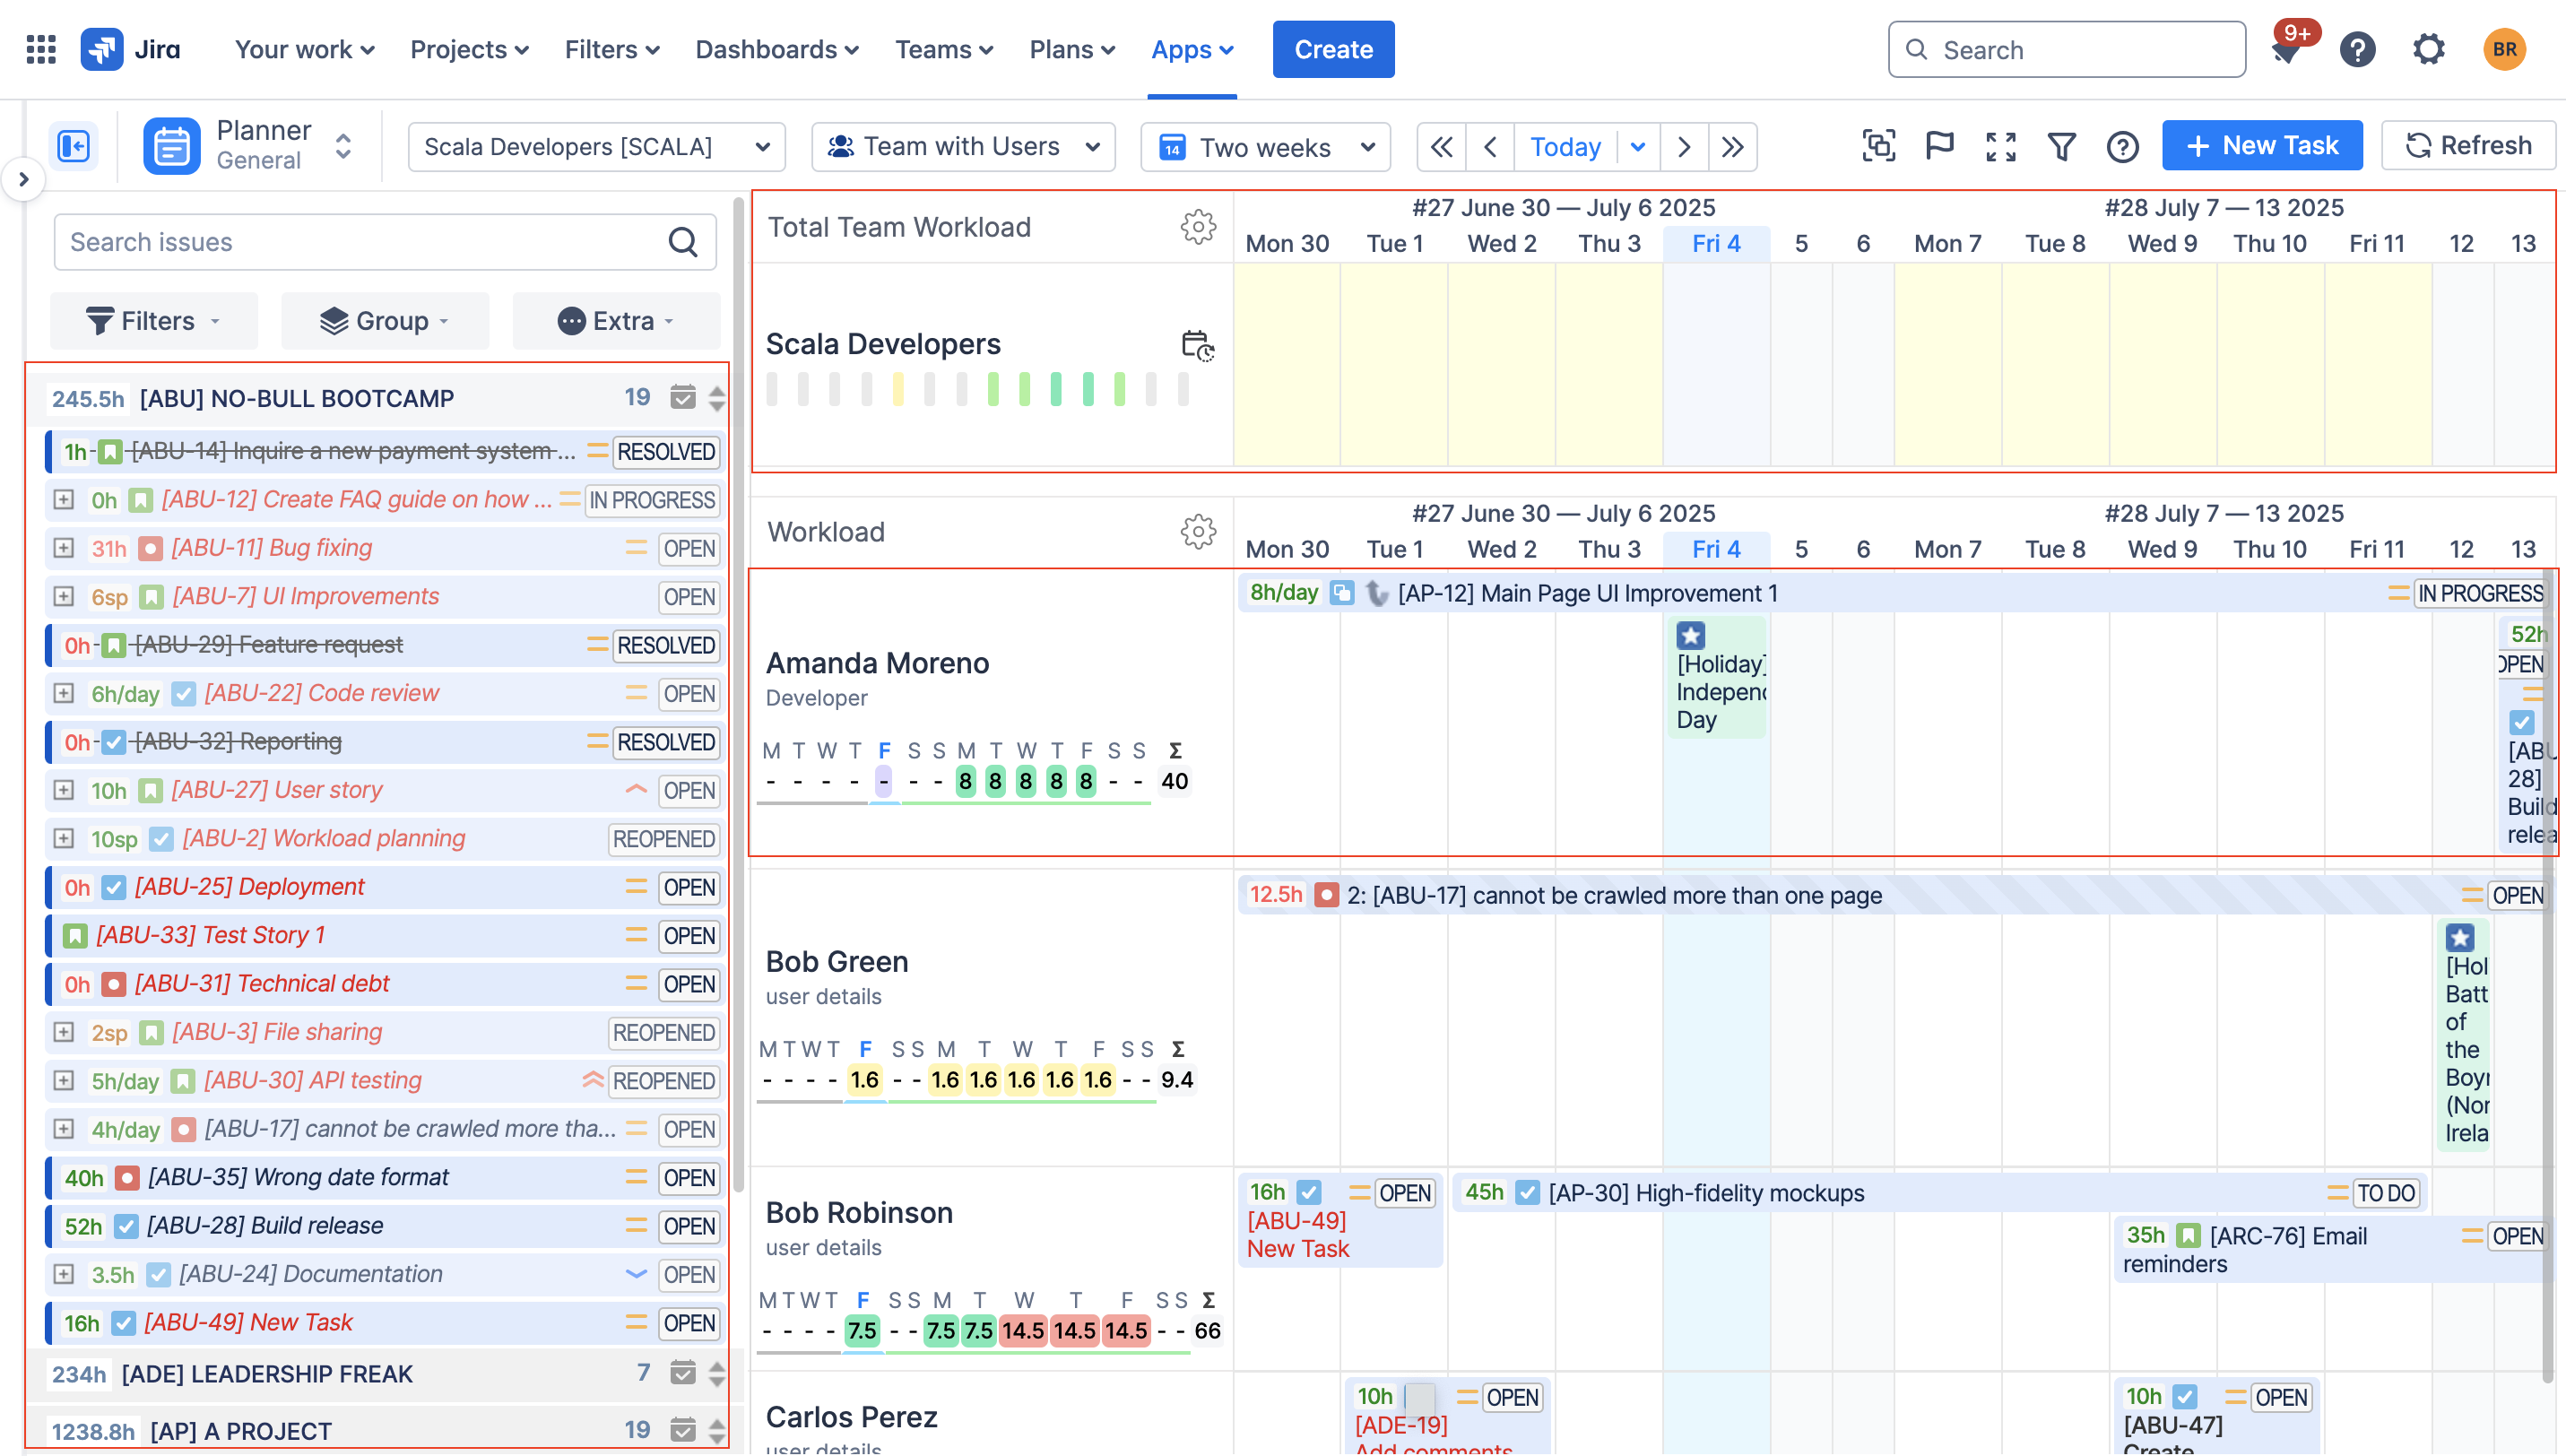
You also see total team capacity compared to planned work. This helps you avoid overloading teams early.
Method 2: Add Milestones and Deadlines
A good plan is driven by key dates.
Use milestones to mark:
-
sprint timelines
-
releases
-
important deadlines
These appear above the timeline and act as reference points.
Examples:
-
Sprints shown as time blocks
-
Releases pulled from Jira Fix Versions
-
Custom events like “Demo” or “Code Freeze”
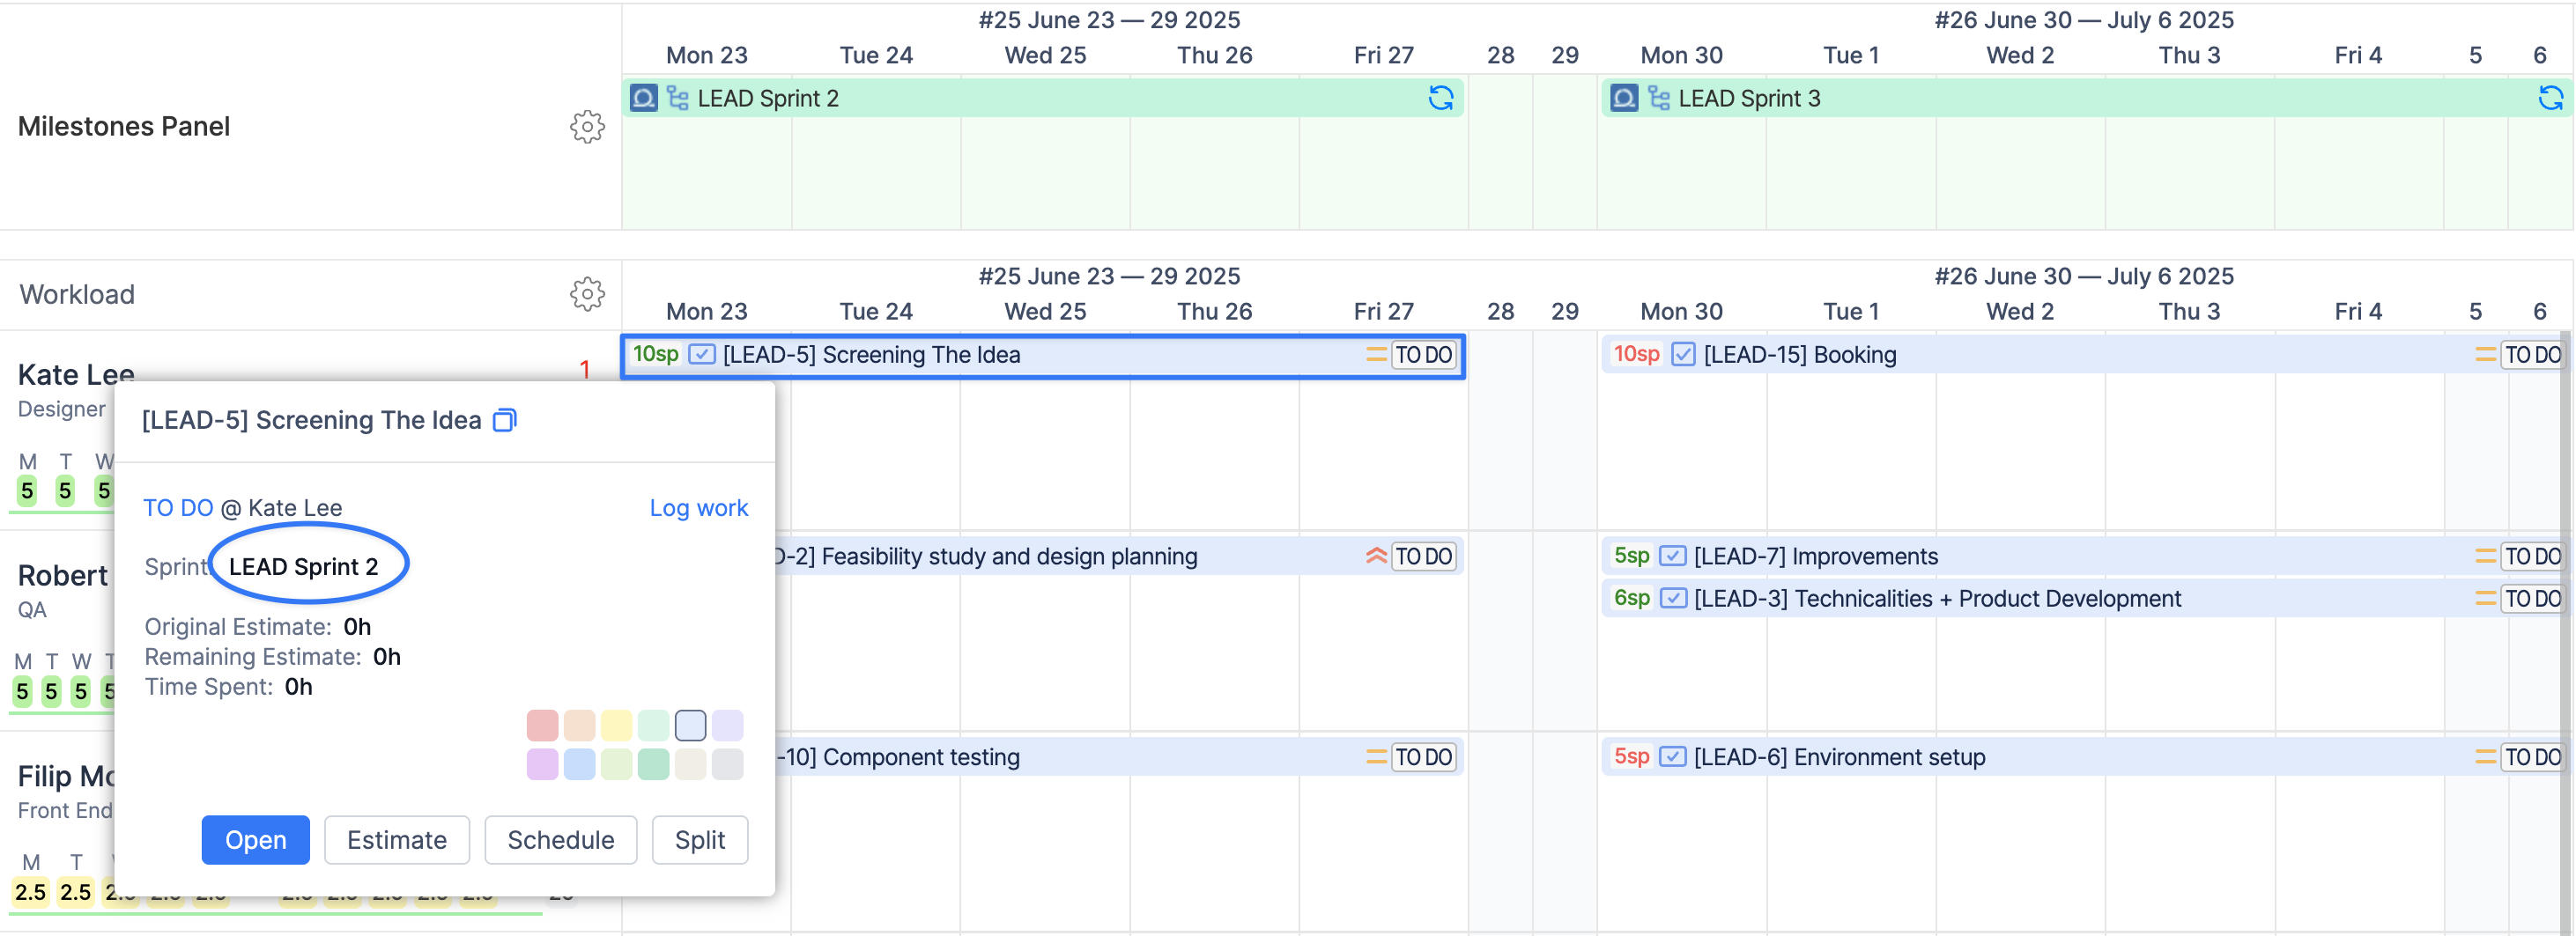
This keeps everyone focused on what matters most.
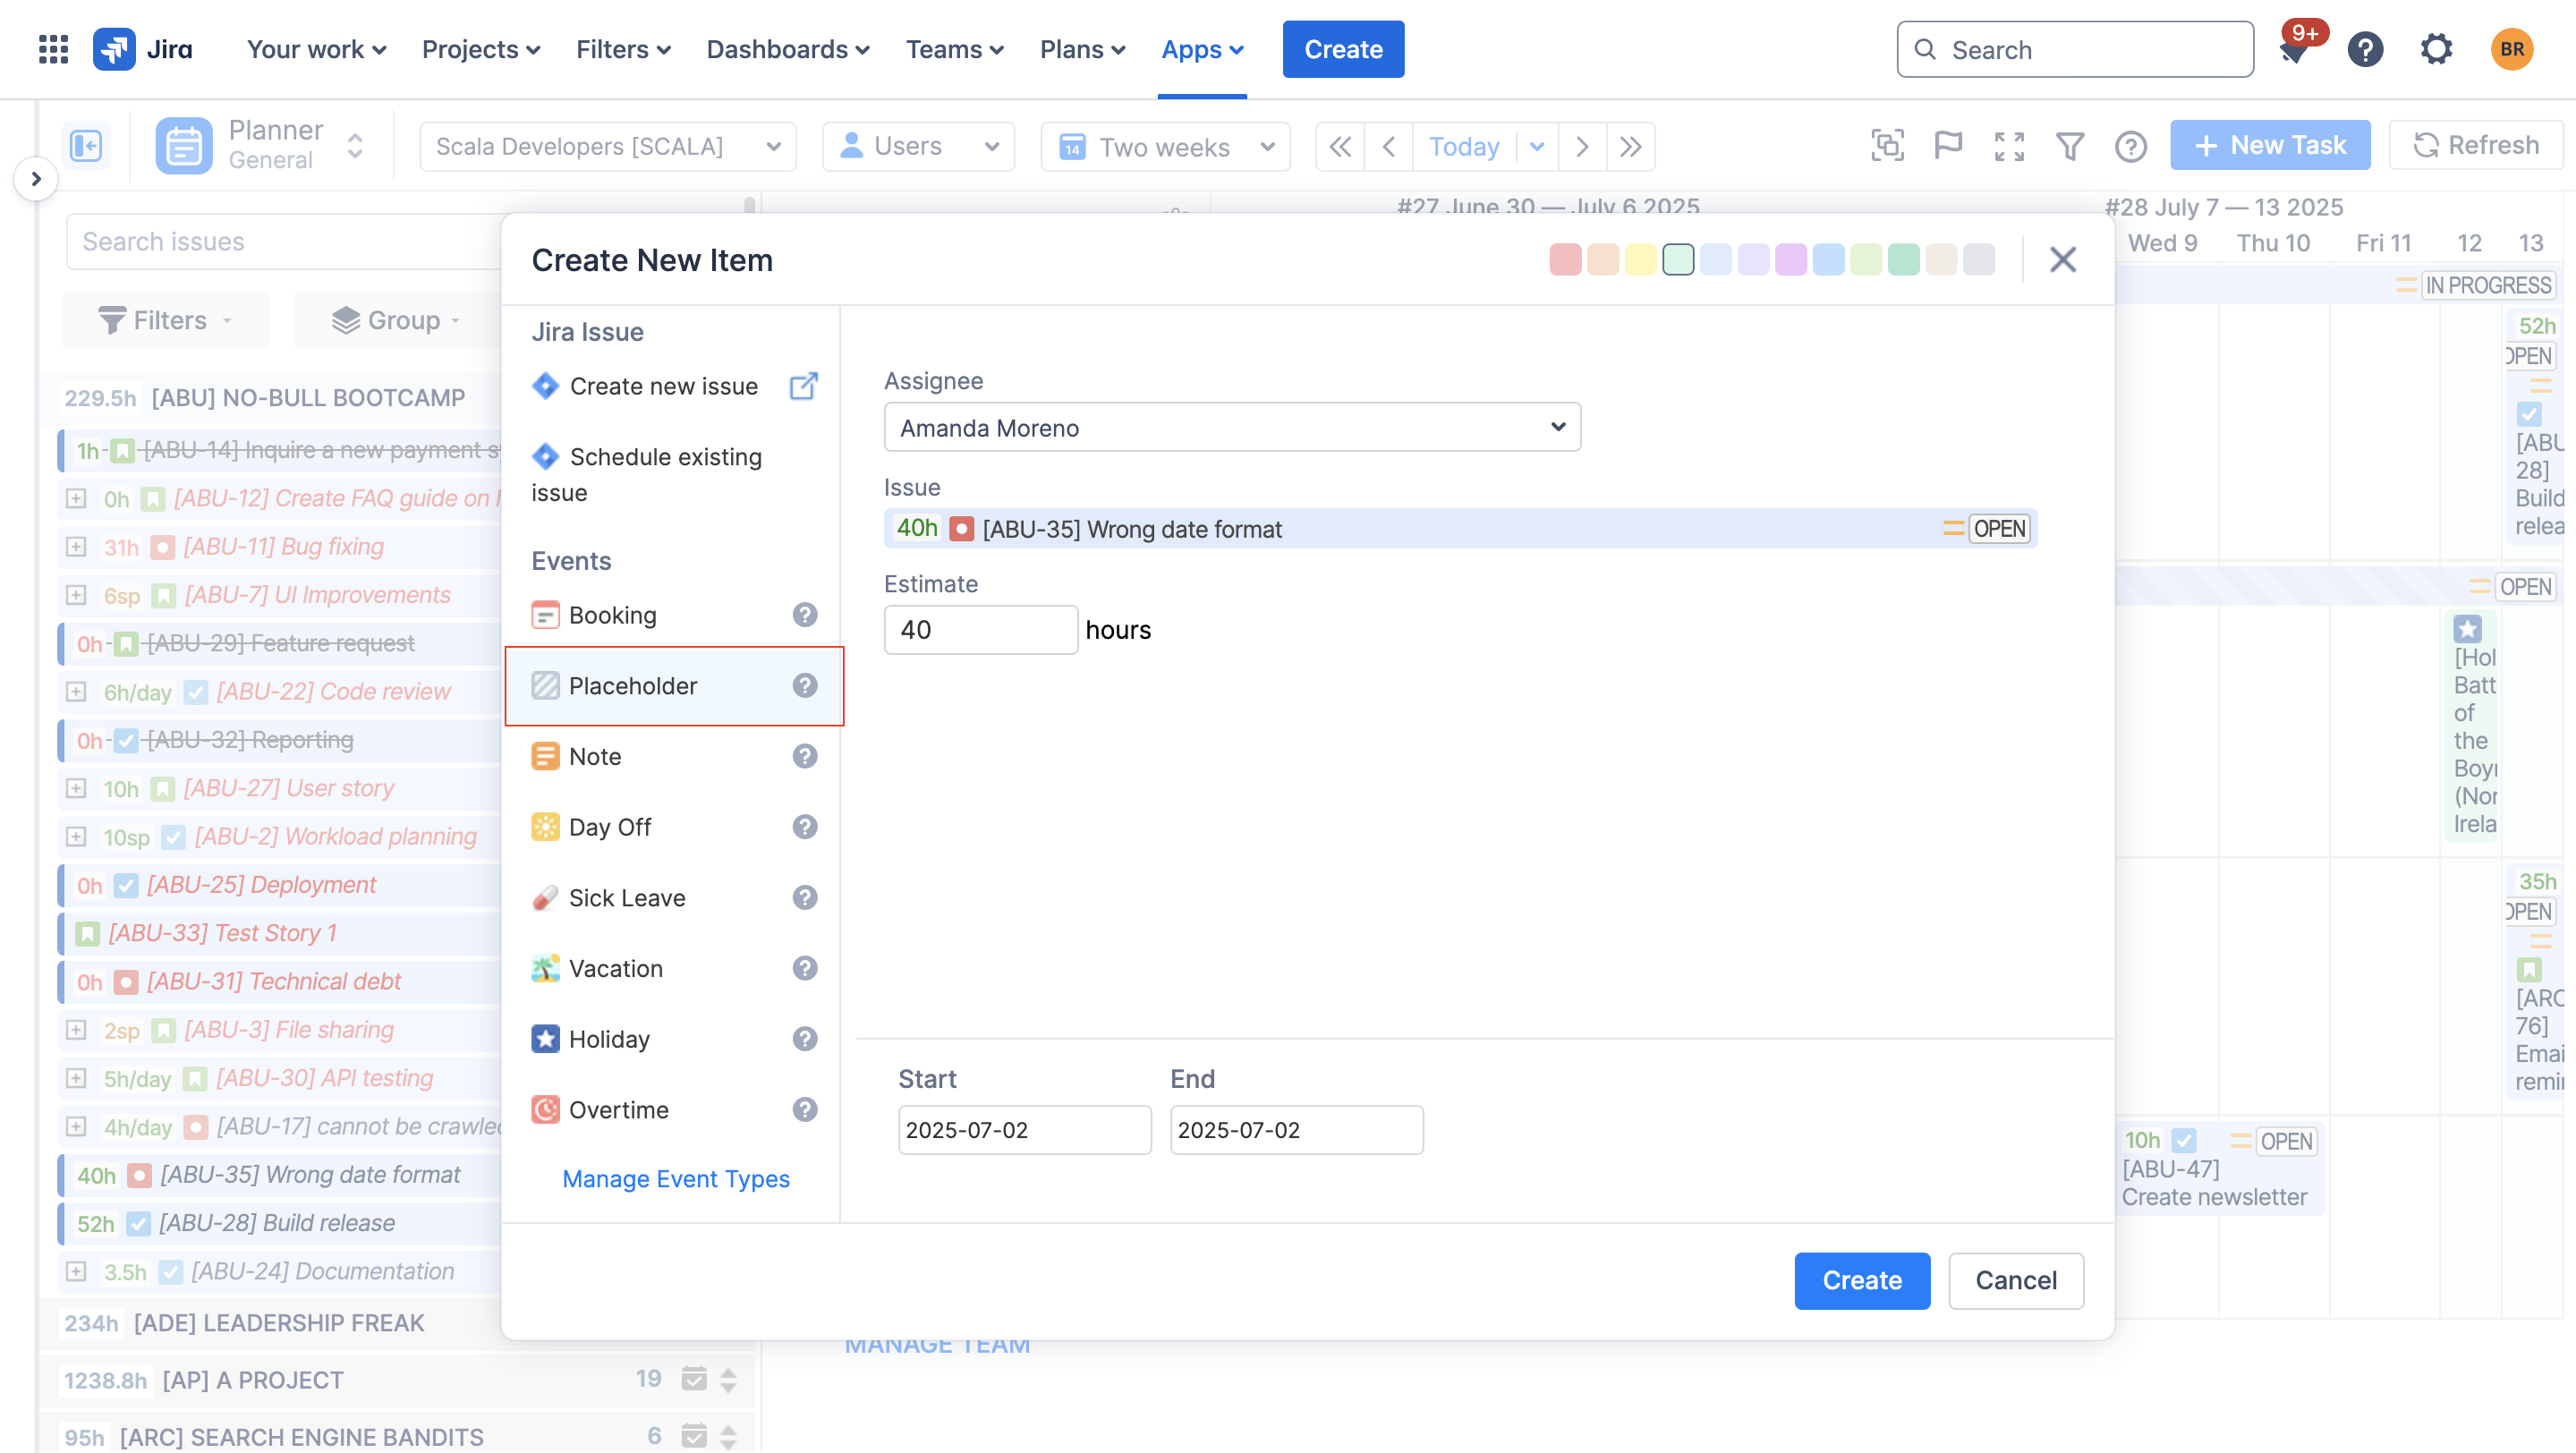
Method 3: Plan Future Scenarios with Placeholders
Not all work is confirmed. But you still need to plan for it.
Placeholders let you block time for potential projects without creating real Jira tasks.
Use them to:
You can also assign placeholders to “roles” (like “Backend Developer”) instead of real people. Once plans are approved, convert them into actual tasks.
Method 4: Use Aggregated Views
When you look at a long timeline, too many tasks can overwhelm you.
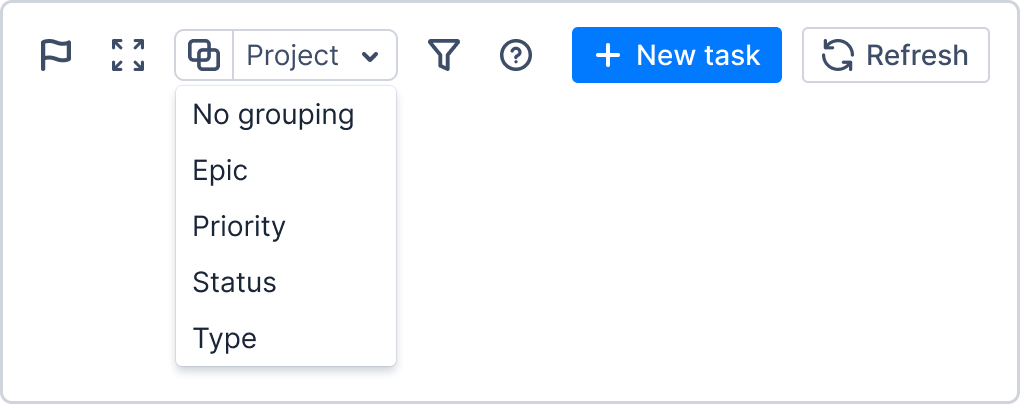
Aggregated views solve this by grouping work into larger blocks—by project or Epic.
Instead of hundreds of tasks, you see a clean roadmap:
-
how long projects run
-
how work overlaps
-
where risks might appear
This is especially useful for yearly planning.
Method 5: Validate Your Plan with Forecasts
A plan only works if it’s realistic.
Forecasting reports help you check that.
Key reports:
These reports help you catch problems early—before they affect delivery.
Best Practices
To make high-level planning work:
-
Keep your plan simple and clear
-
Define key milestones early
-
Check team capacity regularly
-
Track dependencies between tasks
-
Review and update your timeline often
Consistency matters more than complexity.
Conclusion
You don’t need spreadsheets or separate tools to build a strong roadmap in Jira.
With the right approach—and tools like ActivityTimeline—you can plan at a high level while staying connected to real work and team capacity.
That’s the key difference: not just making plans, but making plans you can actually deliver.
