Intro
For agencies and service companies, invoicing should be the easy part — but when your billable hours live in Jira and your invoicing is done elsewhere, it quickly becomes a manual, error-prone headache.
With Worklog360, you can set up your clients, billable rates, budgets, and instantly generate invoices directly from Jira worklogs — with full control and zero spreadsheet juggling.
Here’s the complete process.
Step-by-Step: Jira project invoicing in Worklog360
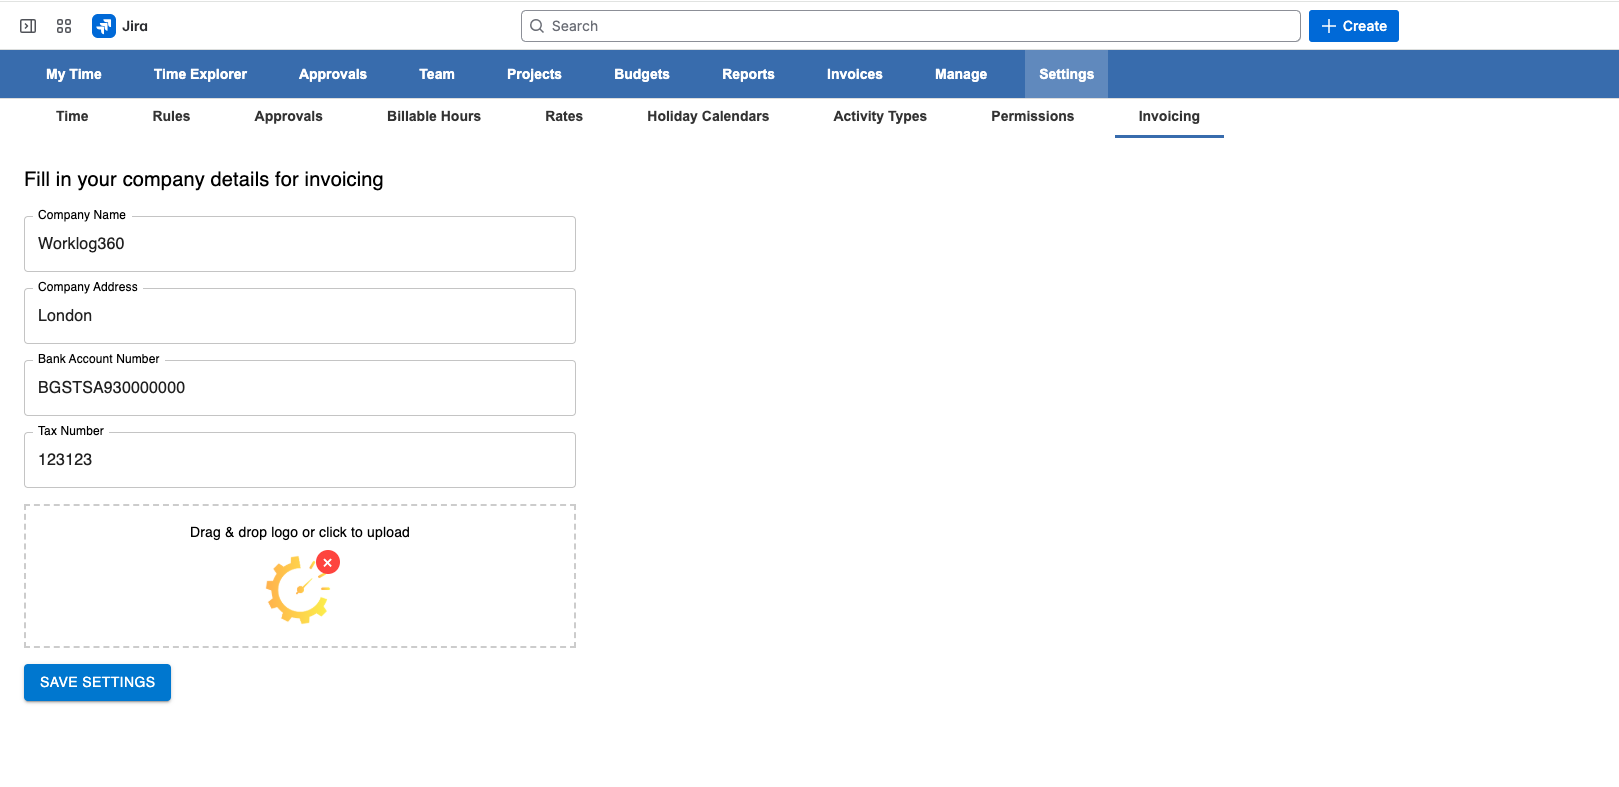
Step 1 – Add Your Organization Details
Before creating any invoices, enter your organization’s name, address, and other billing details. These will automatically appear on your invoices.
Step 2 – Create the Client
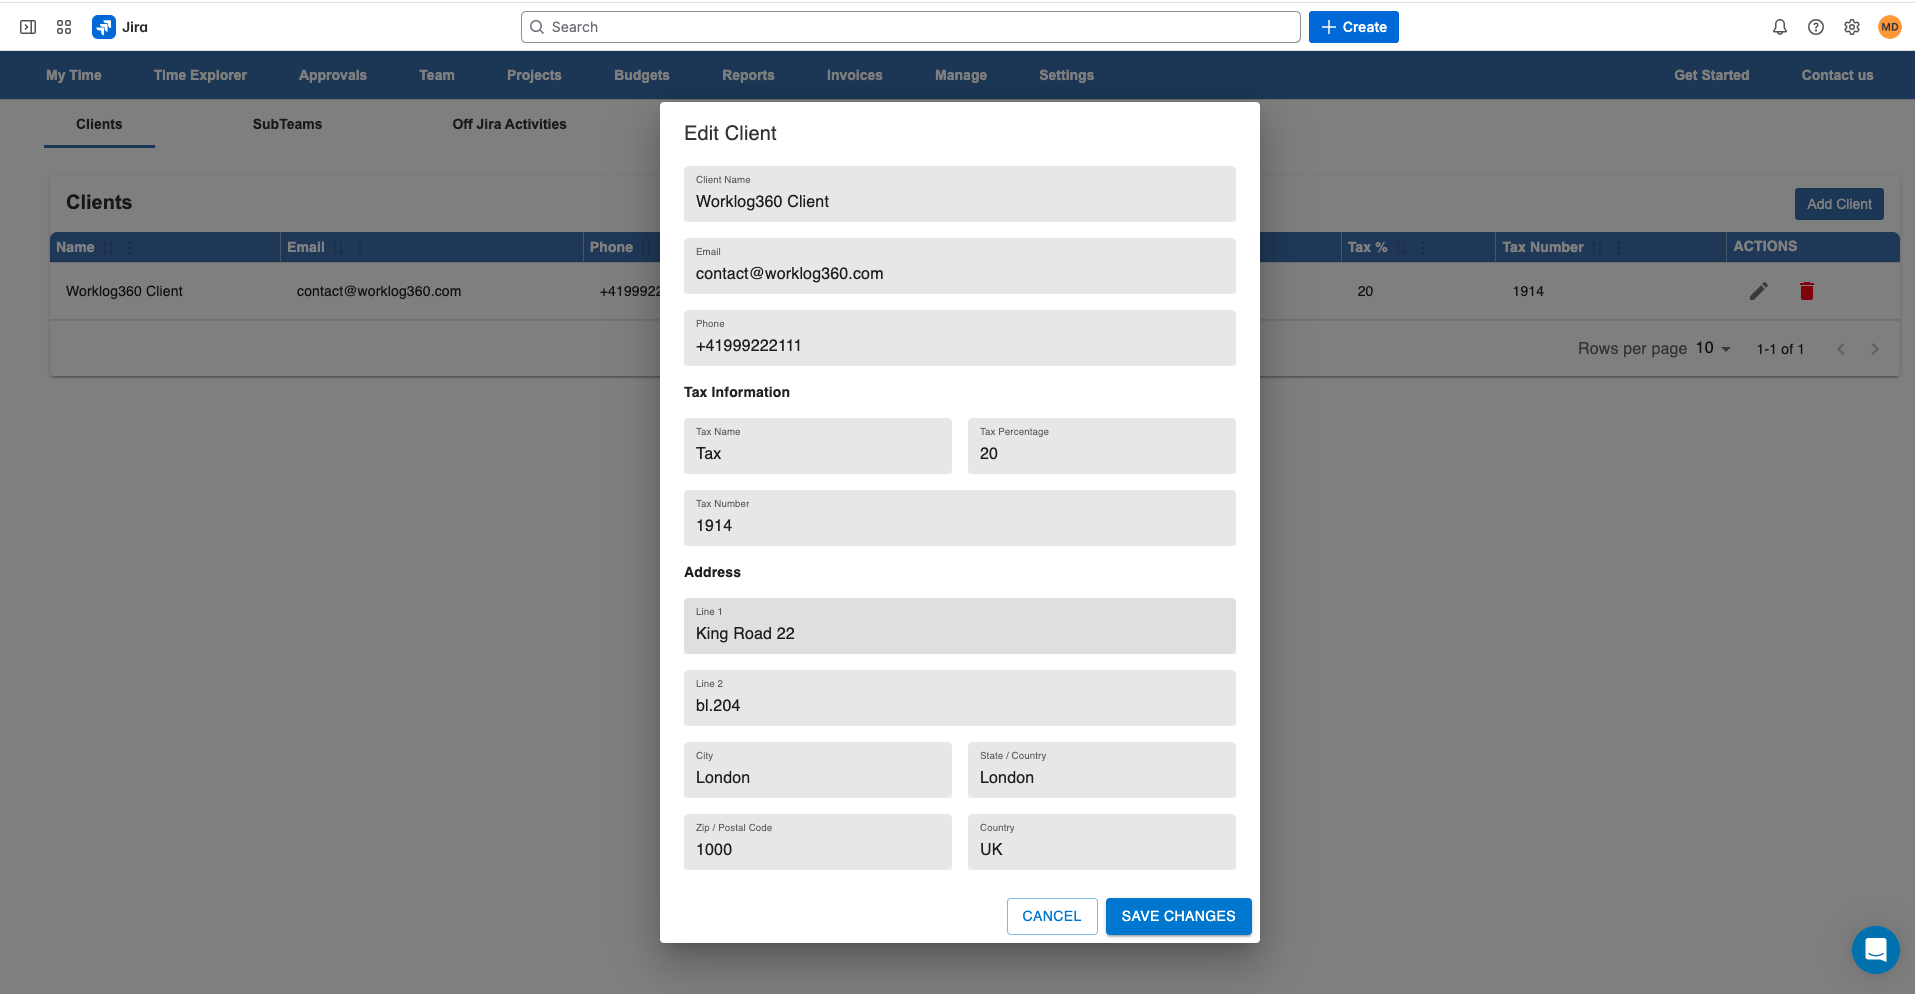
Add your client’s details — company name, billing address, contact person, and preferred currency.
Step 3 – Set Your Billable Rates in Advance
Worklog360 allows you to set billable rates at multiple levels:
- Site level – a default rate for everyone
- Person/role level – different rates per team member or role
- Project/client level – specific rates for certain projects or clients
- Project members level – different rates for different people in a project
- Worklog level – override rates for a specific time entry
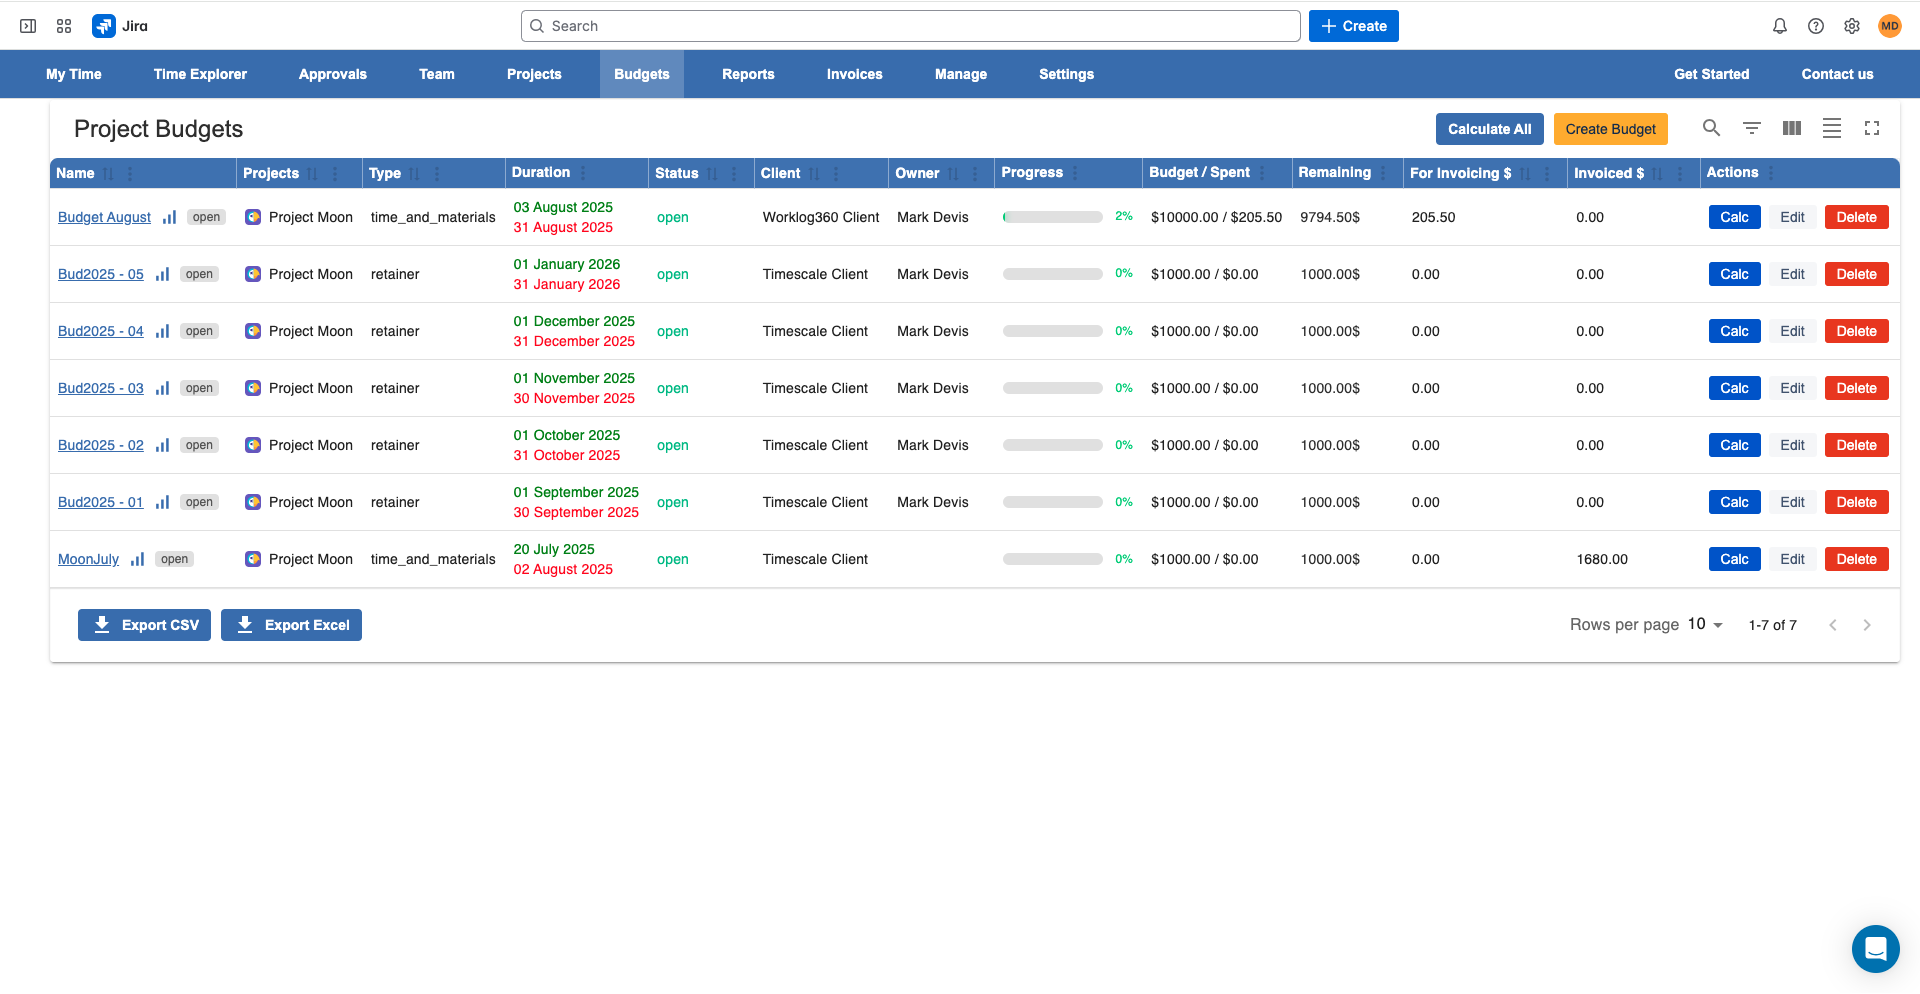
Step 4 – Create and Link a Project Budget
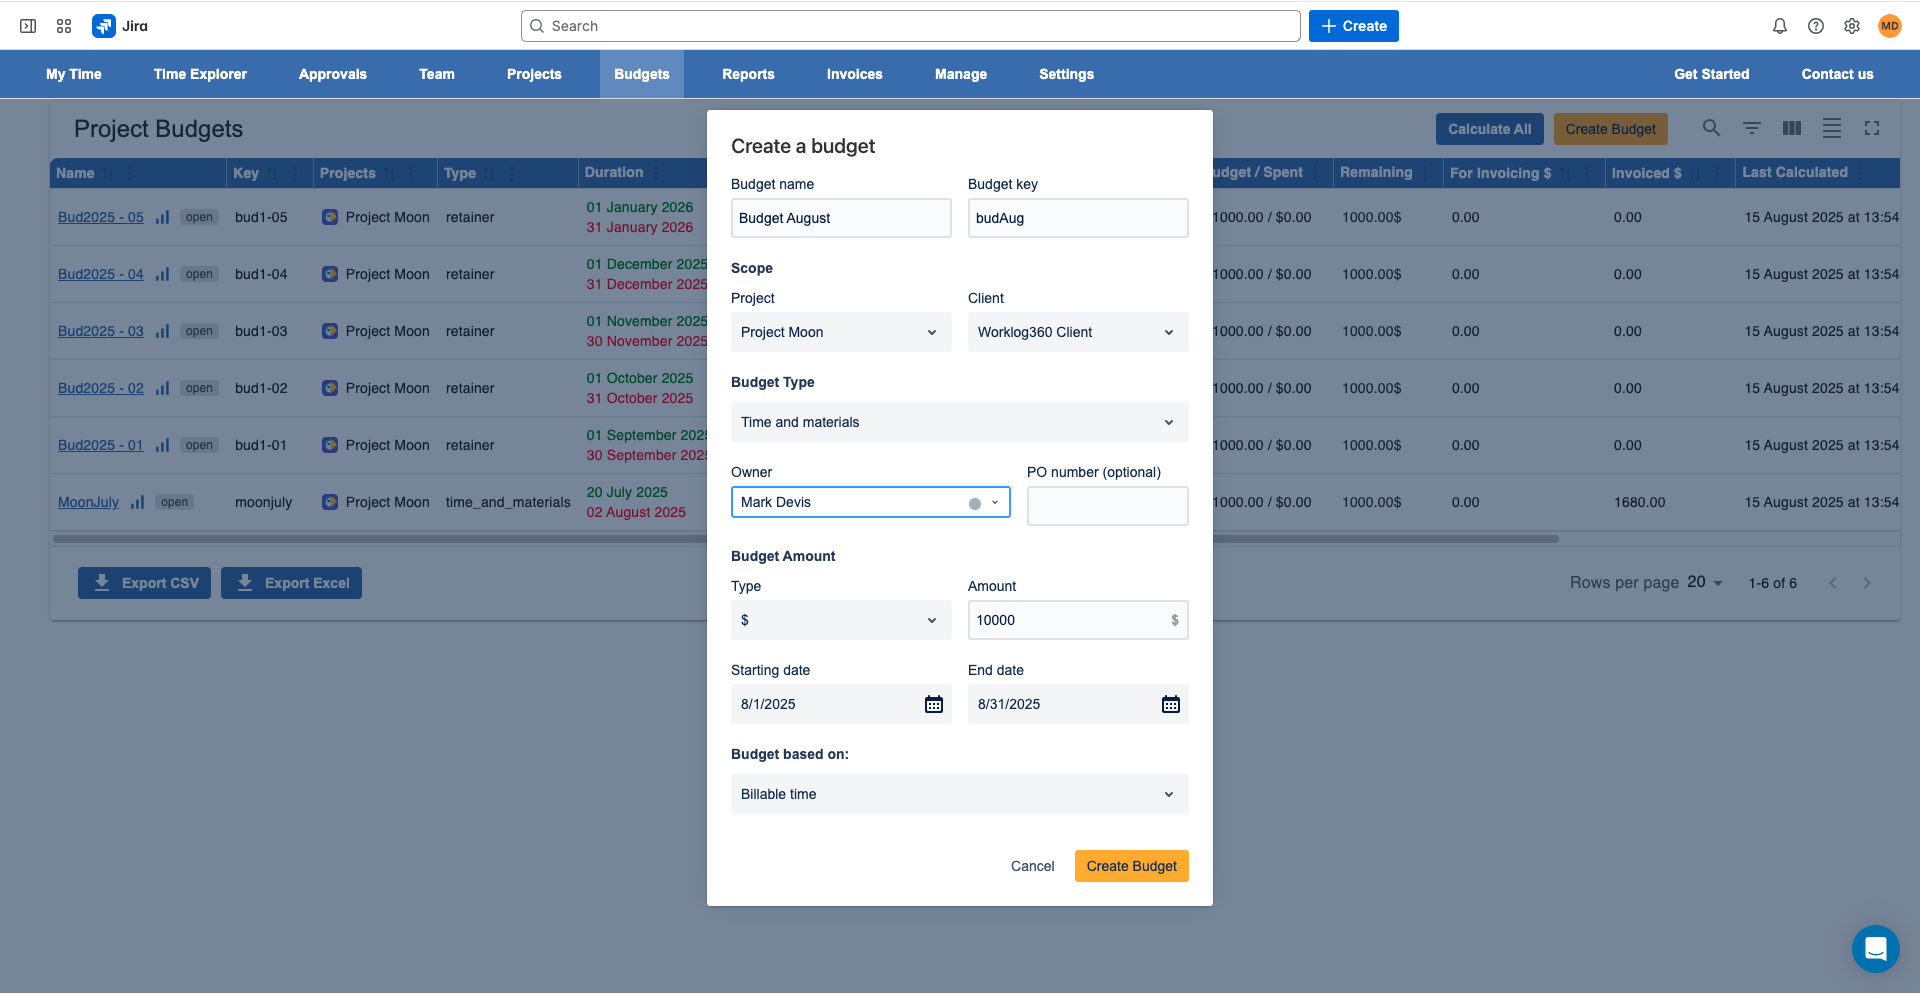
Budgets help track financial performance over a set period.
- Define the budget amount
- Set a start and end date
- Link it to a Jira project and client
Worklog360 automatically assigns worklogs to the correct budget based on the Jira project and the worklog’s start date.
Step 5 – Log Time in Jira
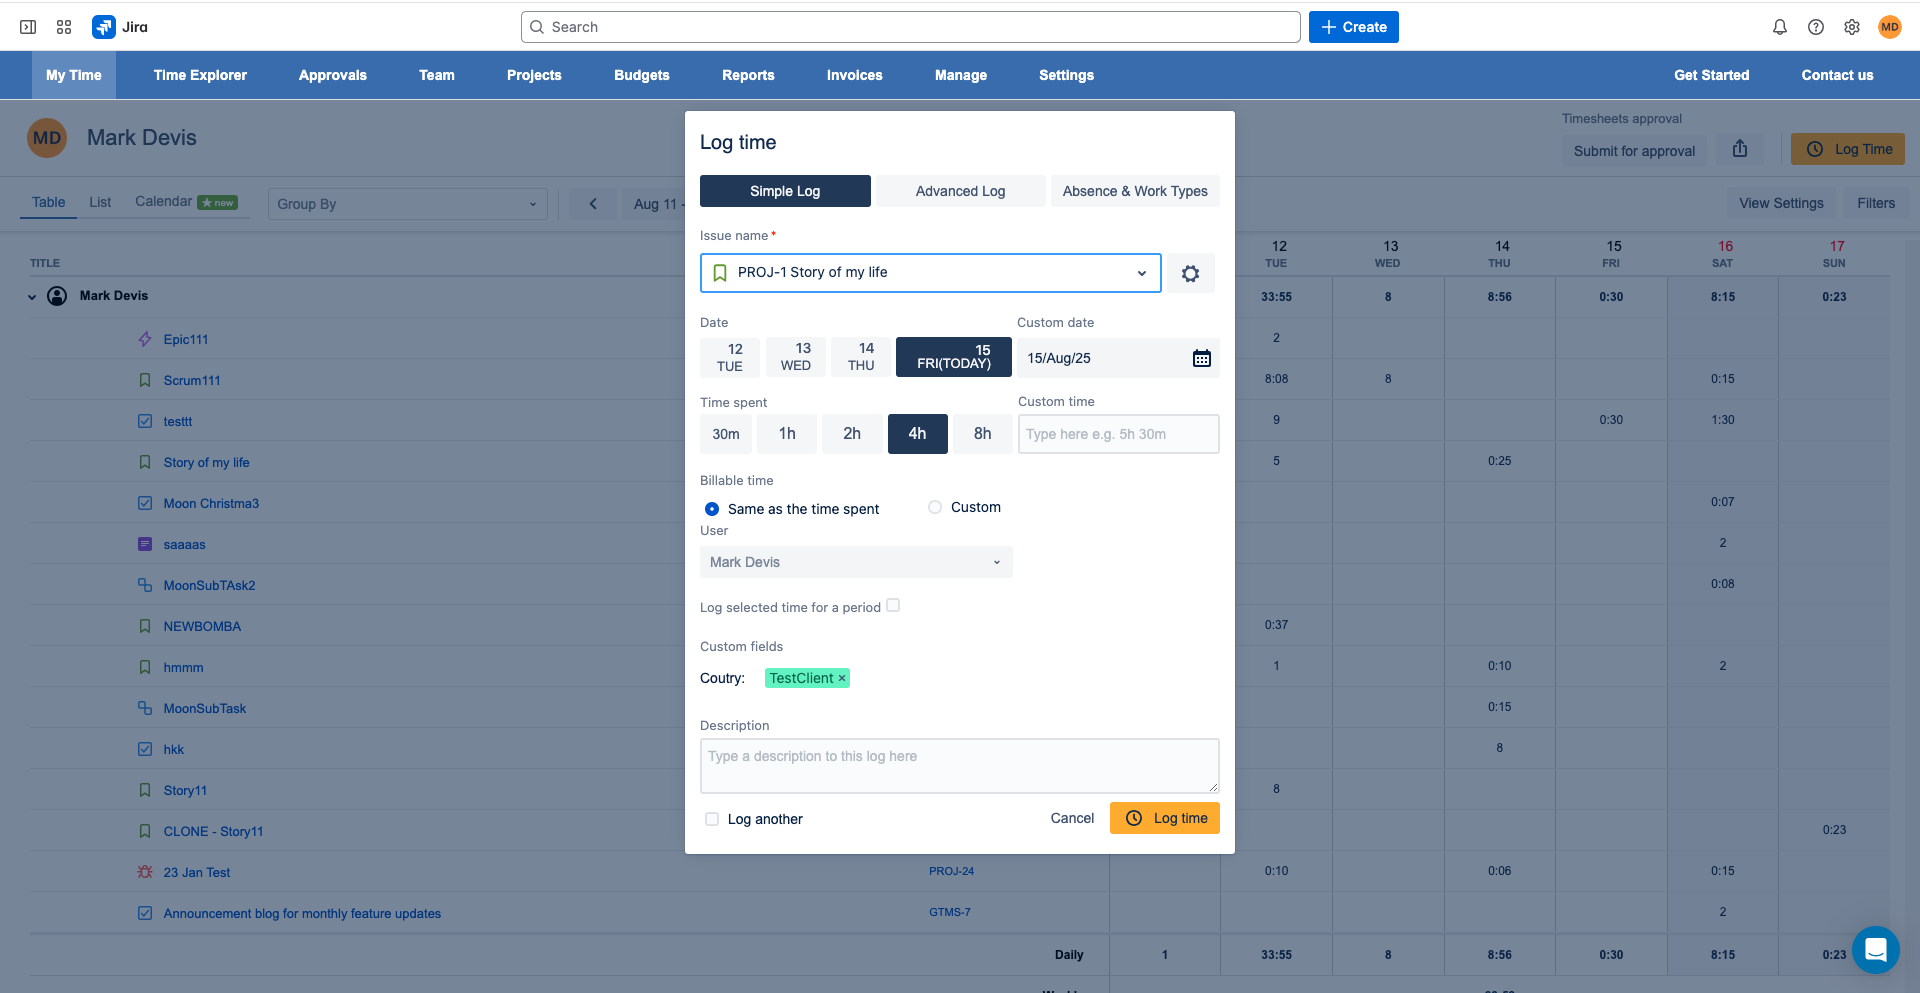
When your team logs time against Jira issues:
- The correct billable rate is applied automatically
- The worklog is linked to the right budget
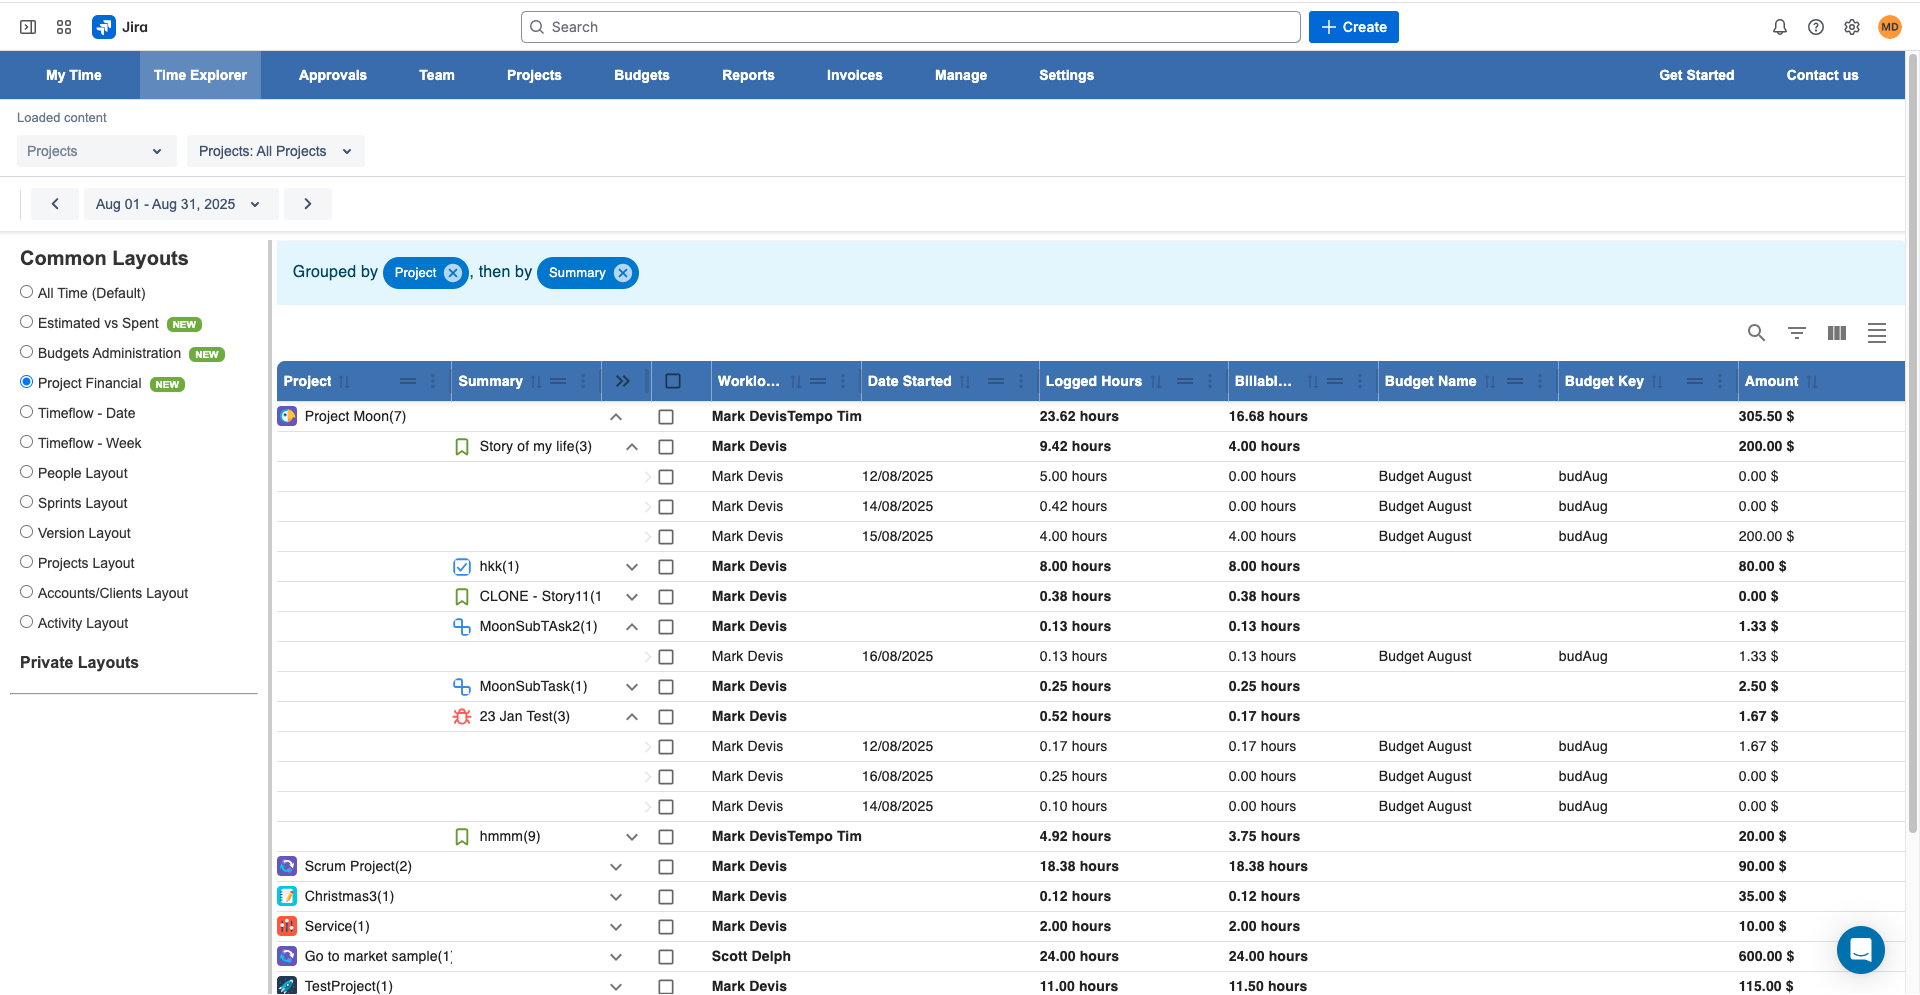
Step 6 – Review Budgets and Worklogs Before Invoicing
You can check budgets and their associated worklogs in the Time Explorer.
Need adjustments? Use Bulk Edit to add/remove worklogs from a budget before invoicing.
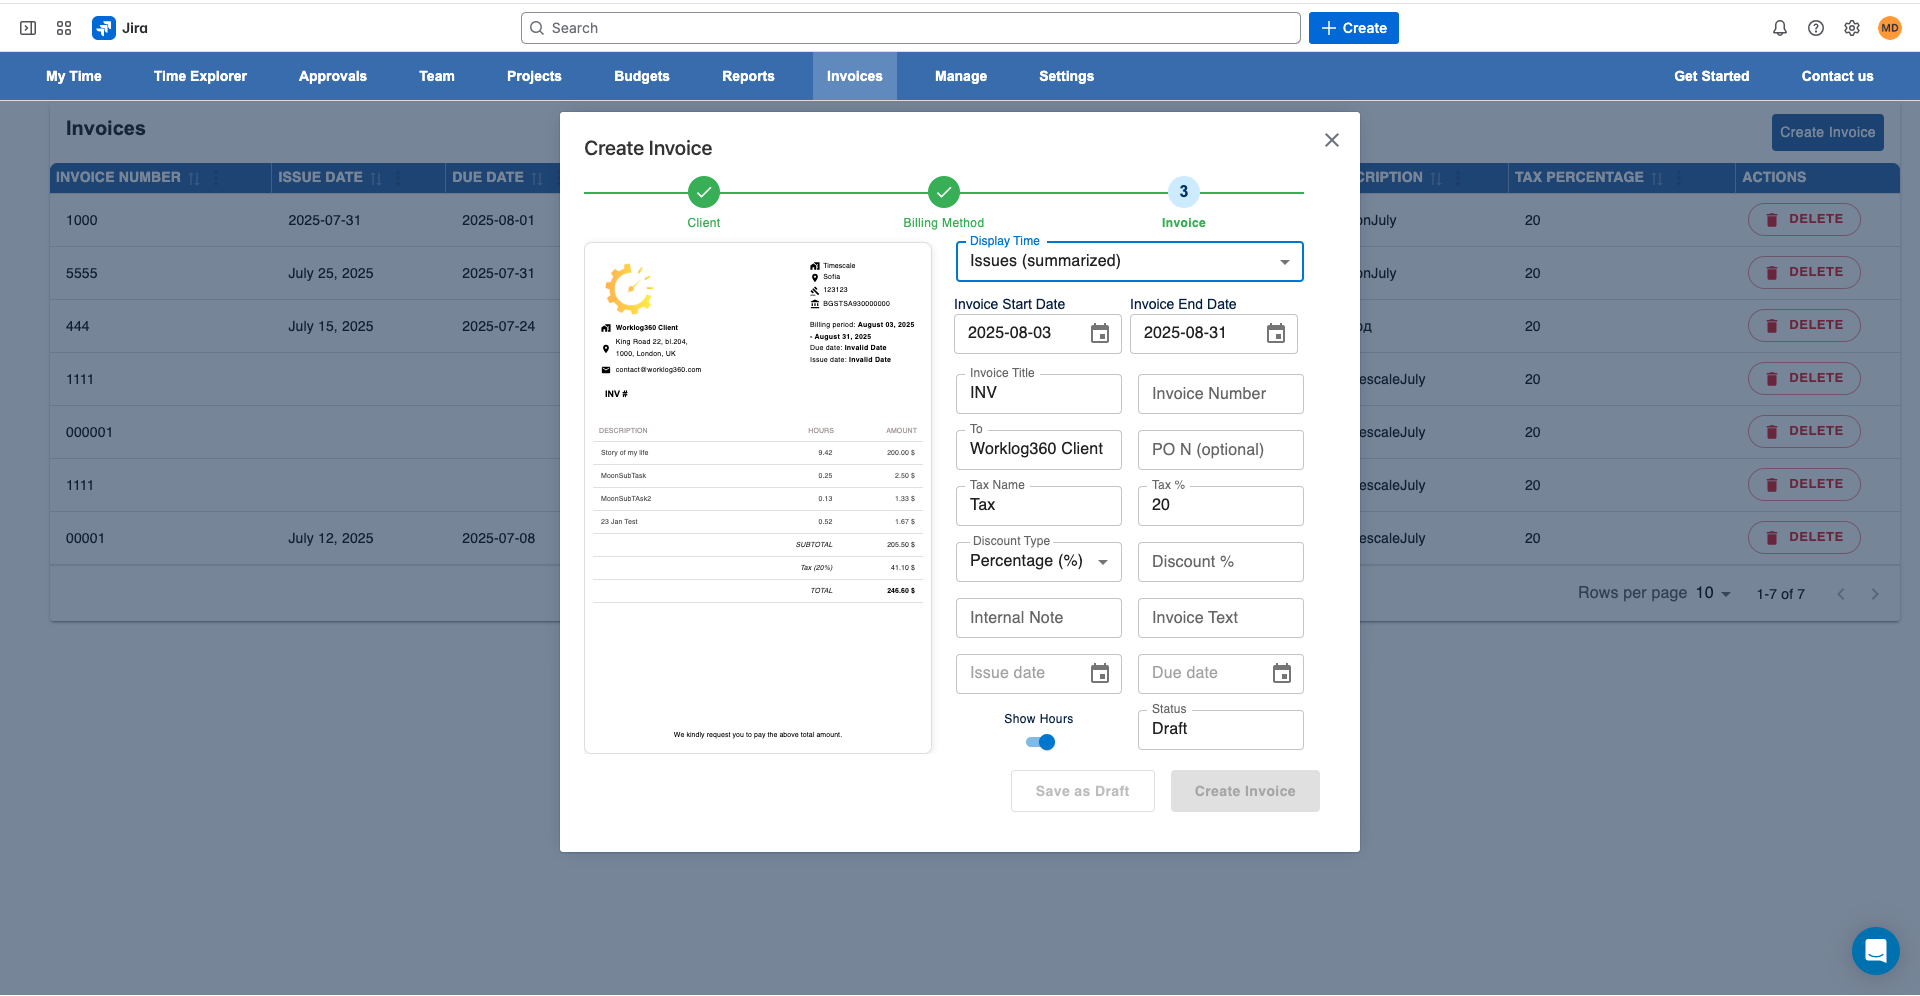
Step 7 – Create the Invoice
- Go to the Budgets section.
- Select the budget you want to invoice.
- Choose which worklogs to include.
- Decide on the invoice granularity (e.g., per worklog, per user, per issue).
- Preview how the invoice will look.
Step 8 – Finalize and Mark Worklogs as Invoiced
Once the invoice is finalized:
- Worklogs are automatically marked as invoiced.
- You can easily track uninvoiced amounts and ensure no billable hour is missed.
Extra Tip for Service Companies
Keep your rates, budgets, and client details up to date — this ensures invoicing is a single-click process at the end of each billing cycle.
Conclusion & CTA
By setting up your clients, rates, and budgets in Worklog360, you turn Jira worklogs into ready-to-send invoices in minutes.
No exports. No manual math. No missed billable hours.
👉 Start your free trial of Worklog360 today and see how effortless Jira invoicing can be.
