Hi, Atlassian Community! 👋🏻 It’s Derya from Appfire.
Are you tired of wrestling with complex SLA configurations? Time to SLA can streamline the process, freeing you from administrative burdens and empowering you to deliver exceptional service.
This guide will walk you through Time to SLA's key features and show you how to set up your first SLA in just three easy steps.
Benefits of Time to SLA
-
Time to SLA's intuitive interface makes creating SLAs quick and painless.
-
Tailor your SLAs to your exact needs with a wide range of options.
-
Gain clear insights into SLA performance by tracking progress with reports and ensuring your teams meet their SLAs with timely notifications.
Creating a Time to First Response SLA
Let's see Time to SLA in action! We'll create a common SLA type: a Time to First Response SLA.
Scenario
Context: BlazeBank requires continuous IT support to manage its operations smoothly. It outsources its IT support needs to FireStream Solutions, which provides global IT services with teams located across various geographical regions.
SLA Requirements: To streamline IT support management across different regions, the companies want a single SLA definition for all teams, eliminating the need for multiple, region-specific SLA definitions.
Configuration Steps in Time to SLA
Step 1: SLA Setup
-
Name Your SLA: Choose a clear and descriptive name, like "Time to First Response”, and optionally, add a description.
-
Projects: Define the scope of the SLA by selecting projects.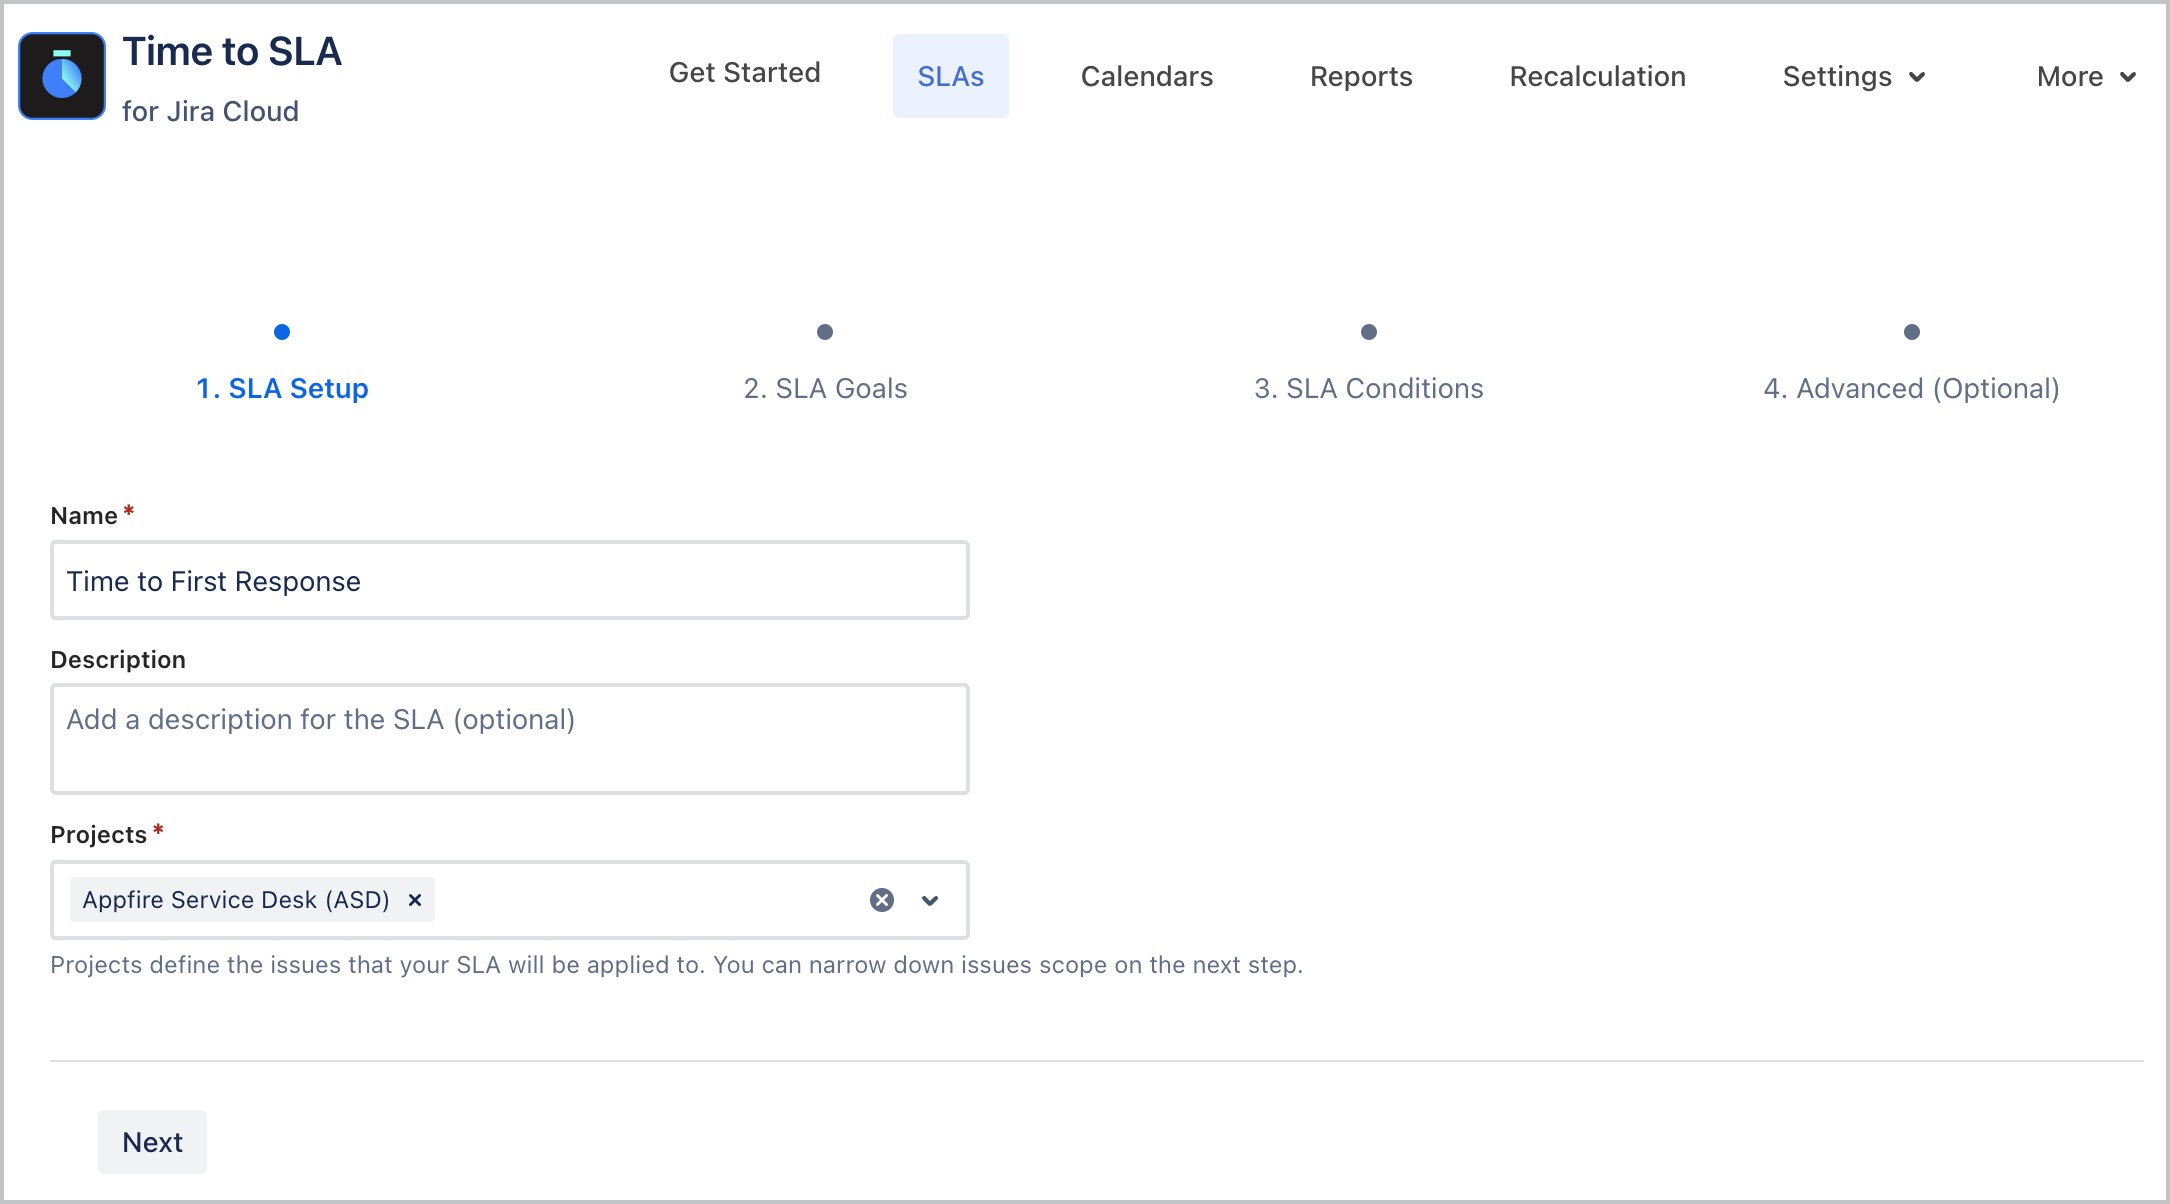
Click Next.
Step 2: SLA Goals
-
Add Goals: Use the "+ Add goal" button to configure goals.
-
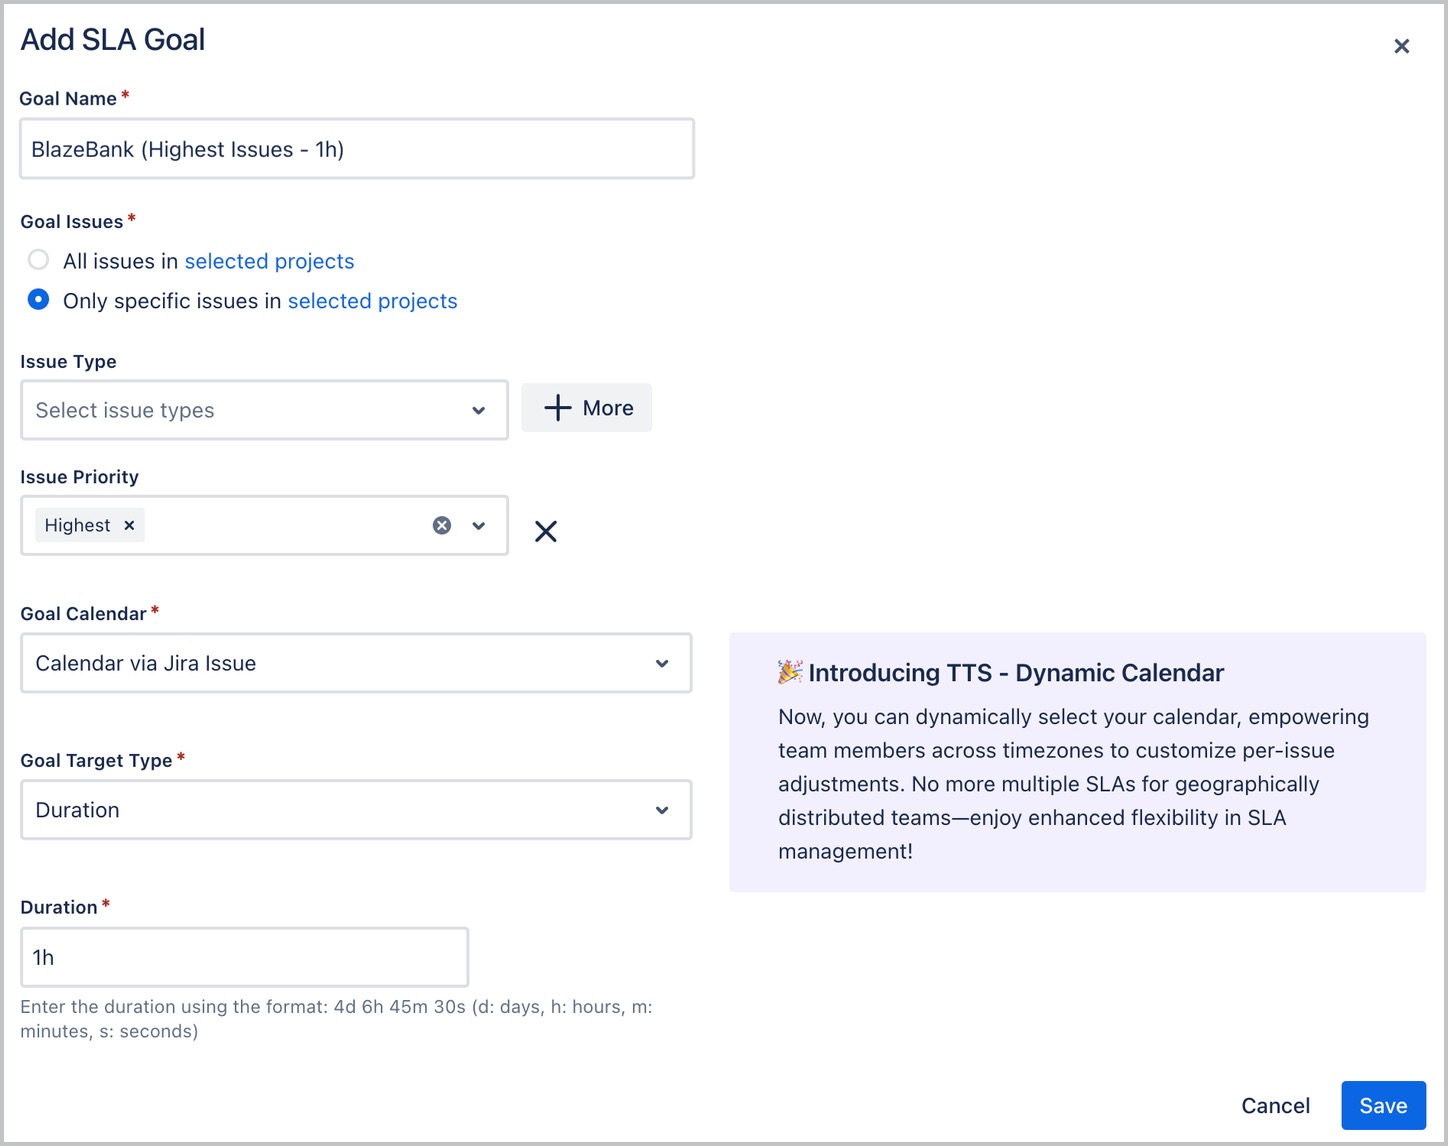
Configure Goals: Each goal represents a specific service level within the SLA. For example, the first goal could be "BlazeBank (Highest Issues - 1h)".
-
Goal Name: Enter the goal name (e.g., "BlazeBank (Highest Issues - 1h)").
-
Goal Issues: issues the goal will apply to. If you select specific issues, select the issue types it will be applied to (e.g., Issue Priority - "Highest").
-
Goal Calendar: Select the goal calendar. Since FireStream Solutions’s IT teams work across time zones, use the “Select calendar via Jira issue” feature to make sure teams can dynamically select their calendar based on their geographical location.
-
Goal Target Type: Select "Duration" and set it to 1 hour.
Add additional goals as needed to reflect all SLA requirements. Once you’re done, your goals should look like this:
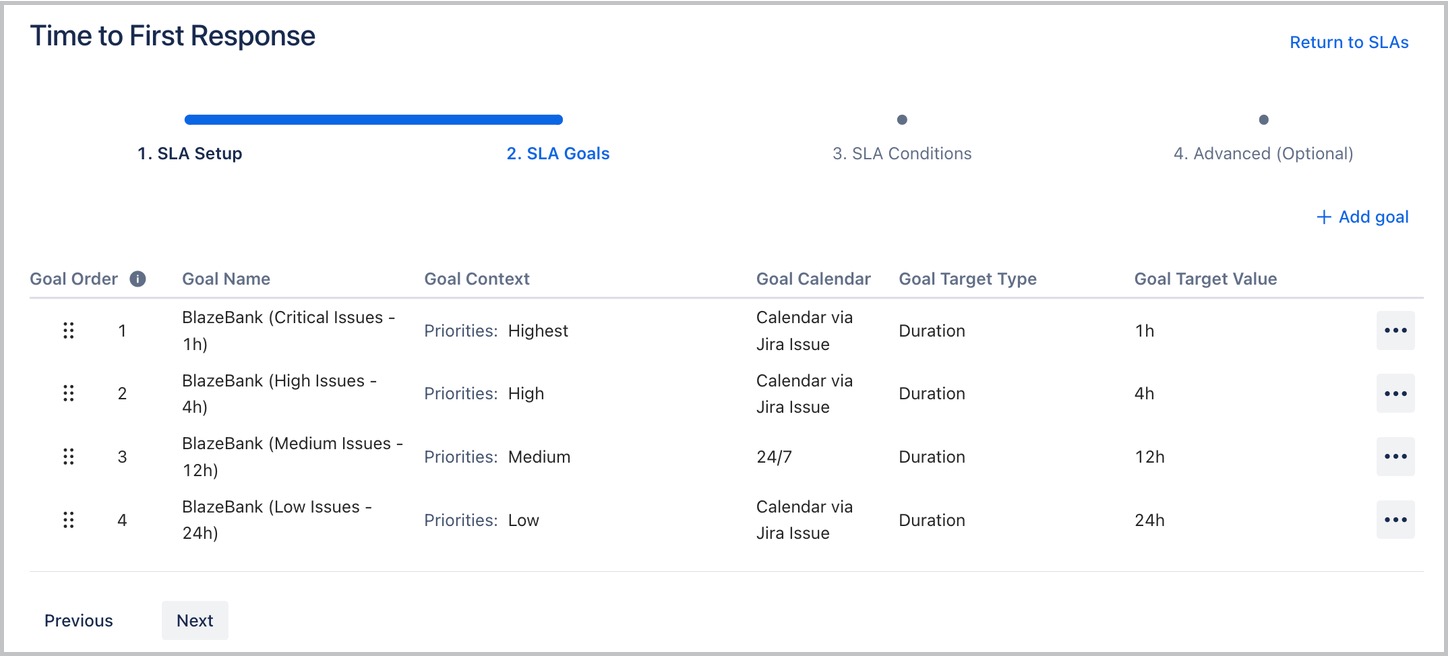
Click Next to continue.
Step 3: SLA Conditions
-
Define Conditions: Time to SLA provides common conditions based on real-world scenarios. You can also use "+ More Condition Types" for more options. In this scenario, our conditions are:
According to the requirements, the SLA condition configuration should look something like this:
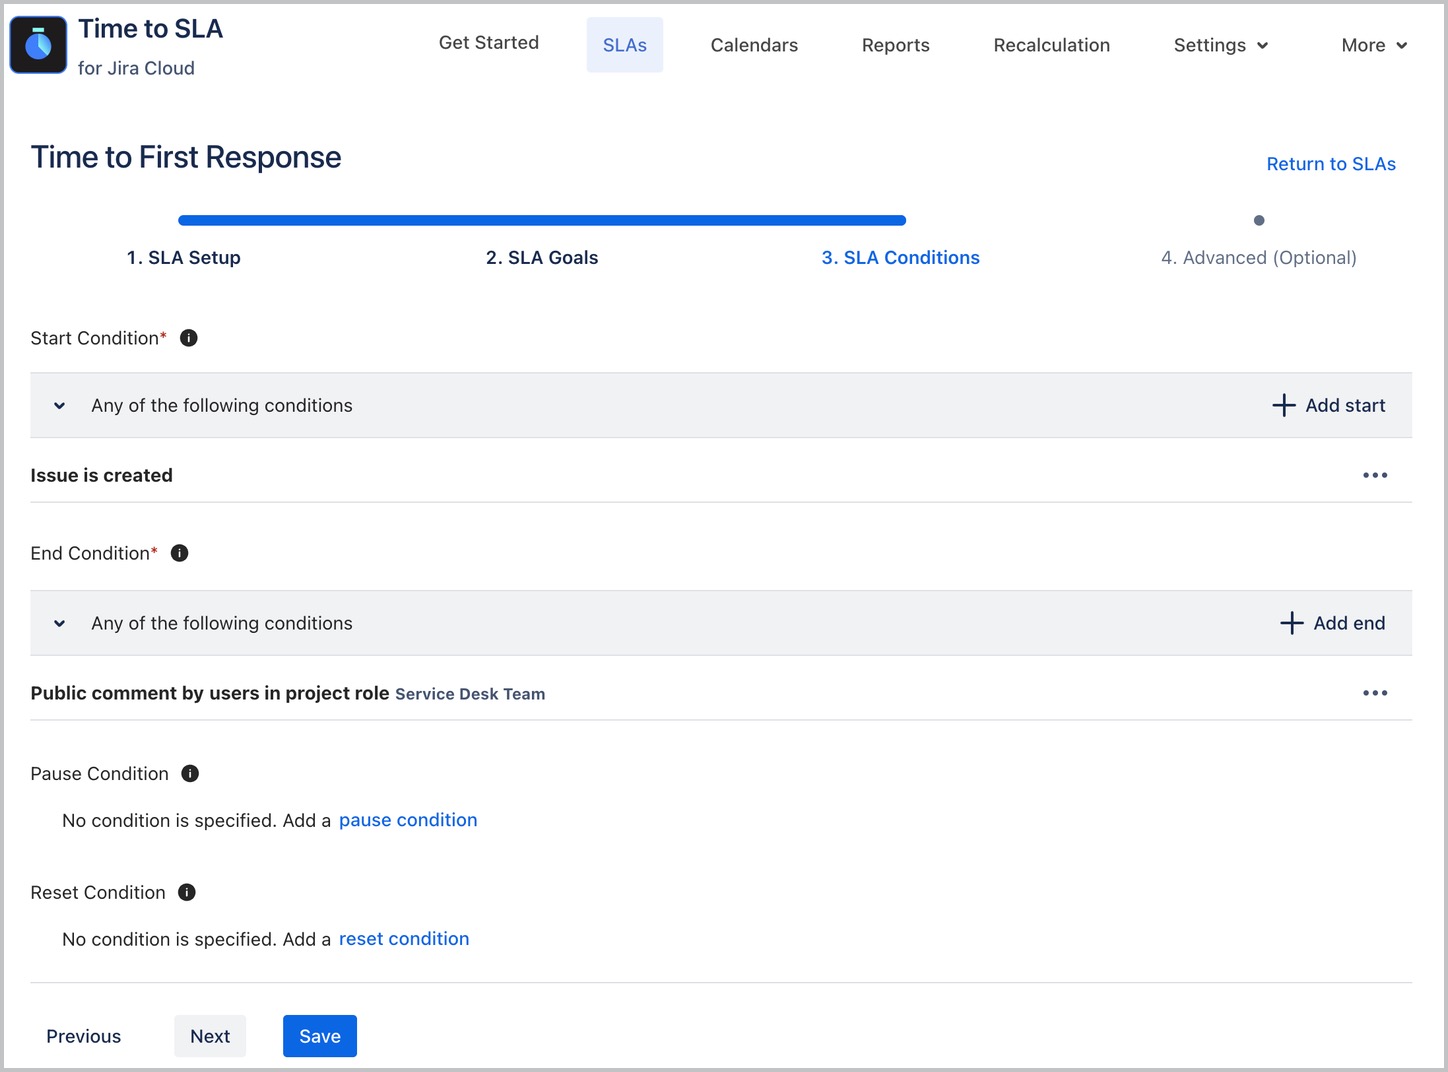
Congratulations! Once you click Save, your SLA will be created! 🎊
As demonstrated, don't let complex SLA configurations slow you down! Try Time to SLA for Jira Cloud today and see the difference for yourself. Free yourself from tedious configurations, ensure you meet critical response times, and focus on what matters most: delivering exceptional service to your customers.


