In managing service level agreements (SLAs), tracking tasks and ensuring they are completed within the agreed timeframe is critical. Agreed upon timelines set deadlines and obligations that must be met to maintain service quality and customer satisfaction. However, without an effective tool for tracking these deadlines, SLA management can become difficult, leading to missed deadlines, poor service quality, and customer dissatisfaction. Fortunately, you can use SLA Time and Report for Jira for these purposes.
The main problems include:
- The lack of a transparent mechanism for tracking deadlines can lead to tasks not being completed on time.
- Difficulty tracking task progress—without a clear control system, it is difficult to determine at what stage the task is in progress.
- Failure to automate notifications of missed deadlines - without automated reminders and alerts, teams may miss important deadlines.
How the “Negotiated Date” feature in the SLA Time And Report for Jira add-on solve the problem
Transparency and control:
- Adding a custom field for date and time lets you track deadlines centrally.
- Tracking the progress of tasks helps to prioritize them.
Resource management:
- The SLA table shows the results of monitoring conditions, making it easier to allocate resources.
- Clear task tracking improves planning.
Communication and coordination:
- Automatic reminders ensure that tasks are completed on time.
- Clearly defined deadlines improve coordination between teams.
Quality of service:
- Timely completion of tasks increases customer satisfaction.
- Fulfilling SLA obligations improves the company's reputation.
How to set up Negotiated Date in SLA Time and Report
Step 1
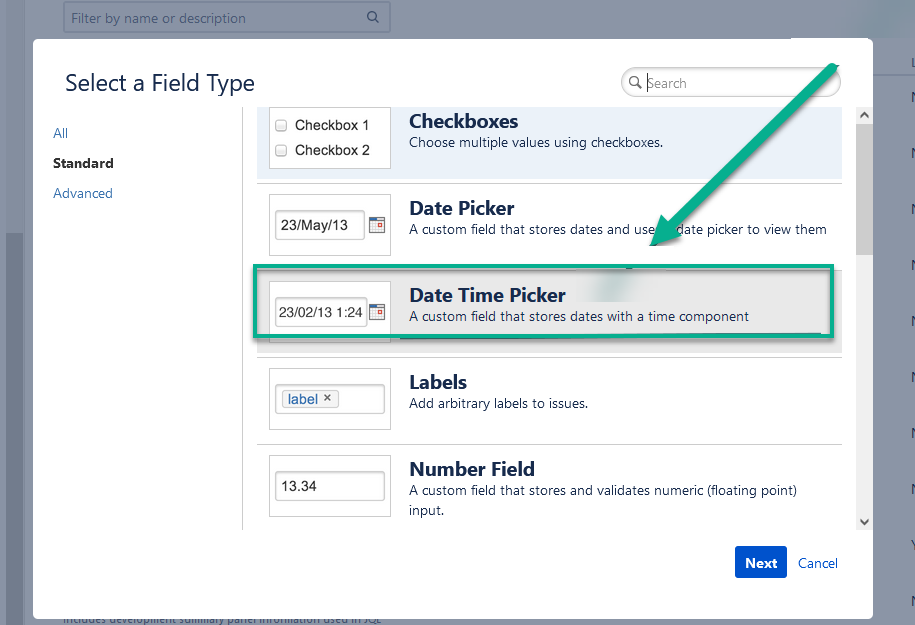
Before creating an SLA config, you need to add an additional custom Date Time picker field.
- Go to the Jira Cloud
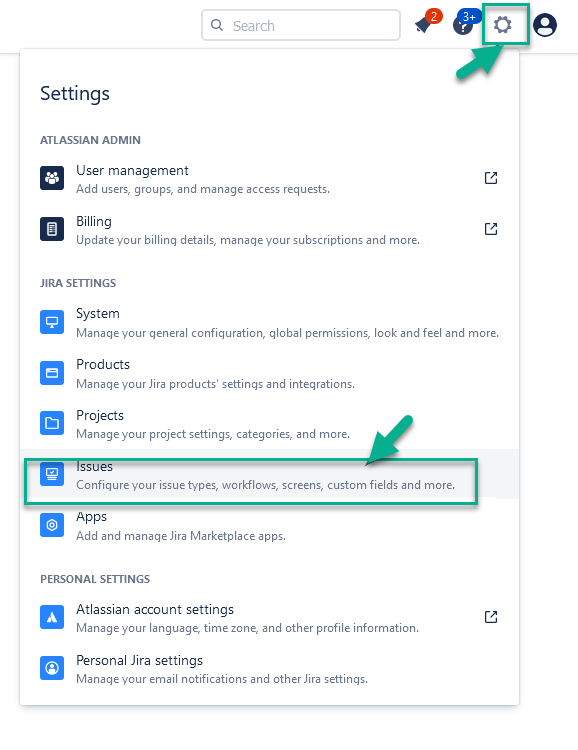
- Click a “Gear” button, choose “Issues” in a menu
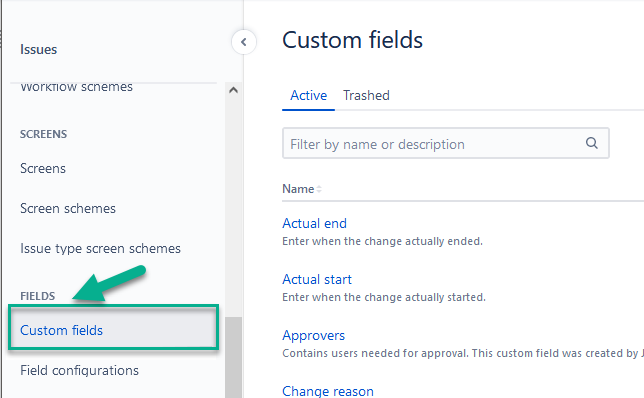
Select “Custom fields” from the list.
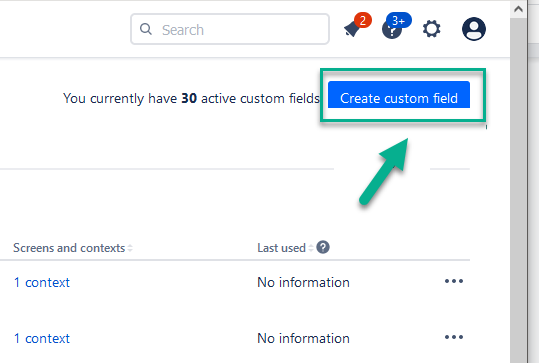
Create a new “Custom field” to specify a desired date and time for task execution.
Choose the Custom field with the determined date and time to point it in a task and take it under control.
Enter the name of the field and its description to find the field you want easily and conveniently.
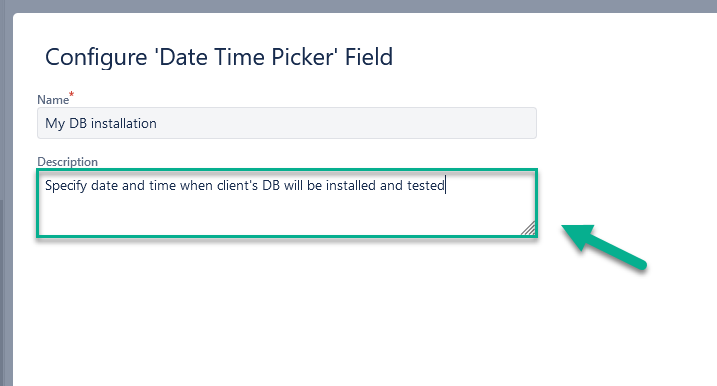
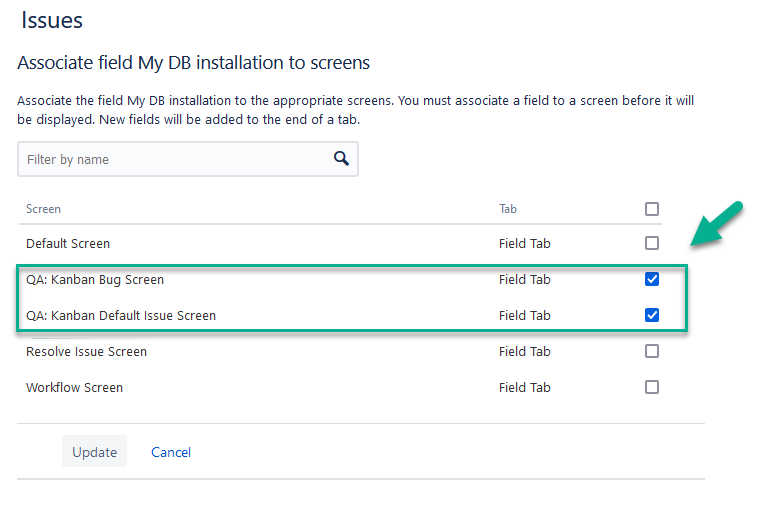
Important!
Remember to assign the Custom field to the Project where you want to control this field for your SLA.
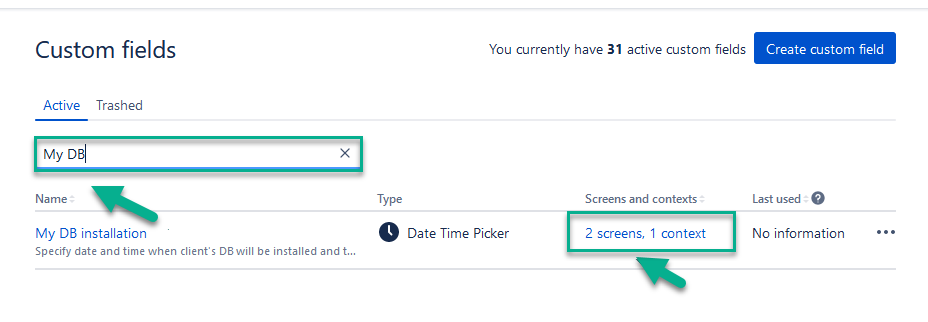
Once the Custom Field is created, it's easy to find by searching in the Custom Fields list in Jira.
To verify that the Custom Field is running in the Project, just create a test task and find your Date and Time field.
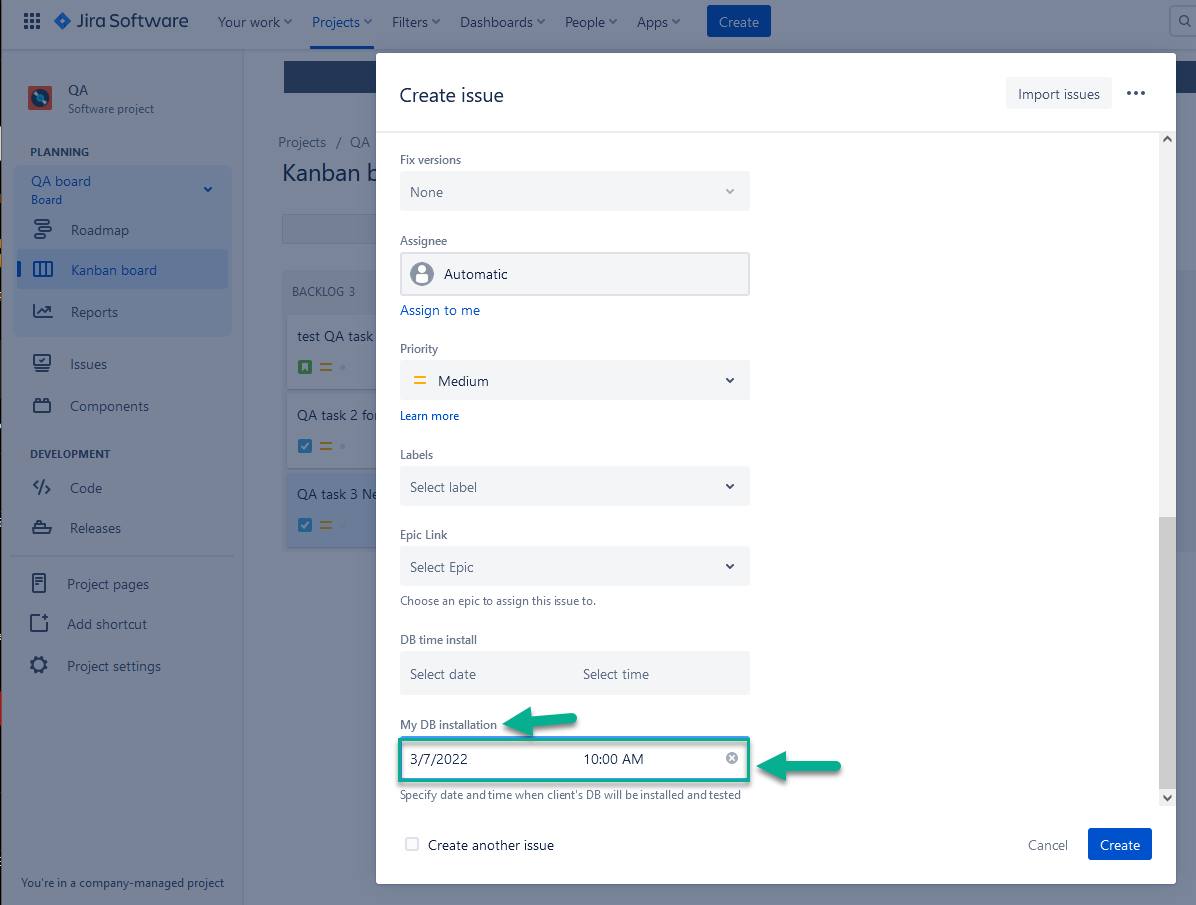
Congratulations, the custom date field works properly.
Step 2 - Create SLA Config for the Negotiated Date
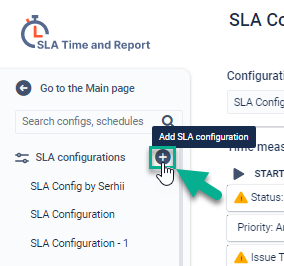
Create a New SLA config - see Add New menu.
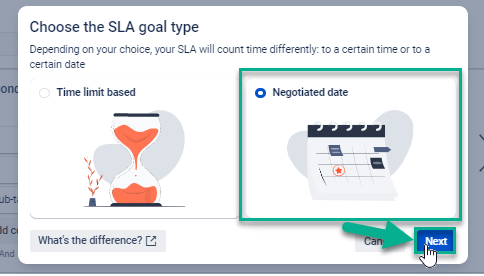
From the beginning, you need to choose the Negotiated Date format if you want to control the execution of the SLA config concerning a scheduled date and time.
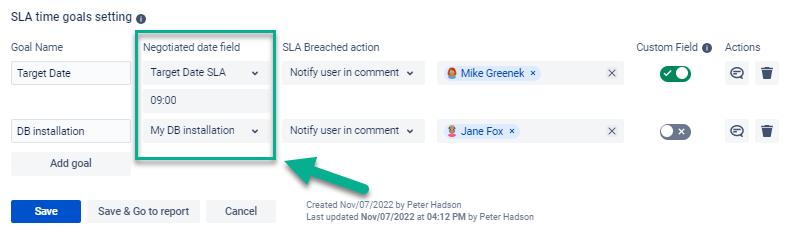
Choose a custom field that has been created to take conditions under control.
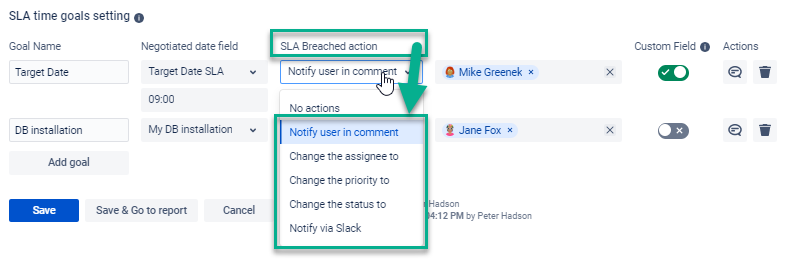
Remember to choose the action to complete for this field when the condition works. We will inform a user via comment when the condition works (as shown in the example below).
Save your SLA Config and see the results of the SLA control conditions on the Dashboard.
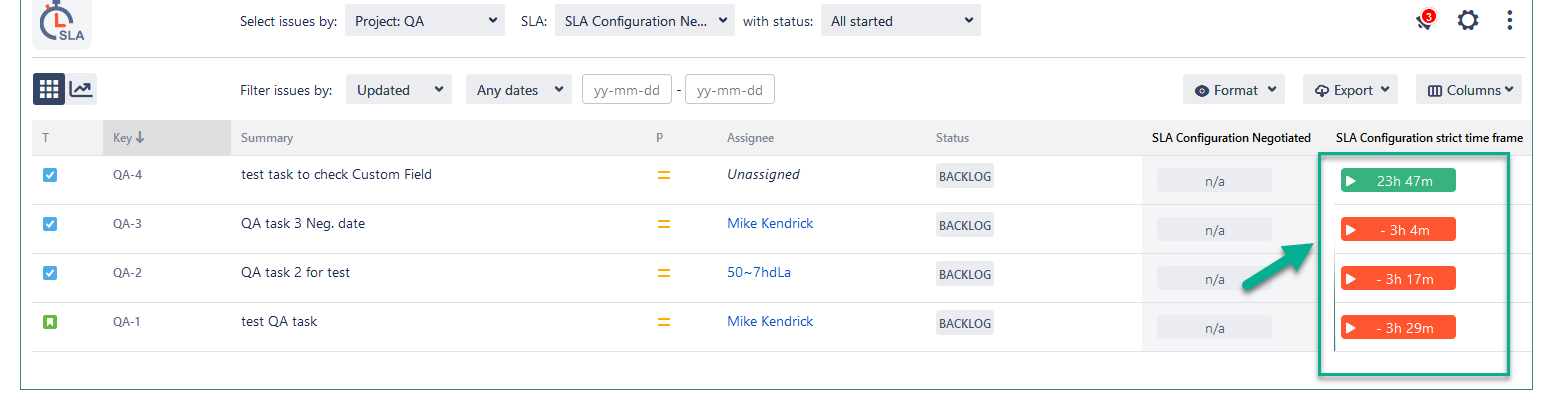
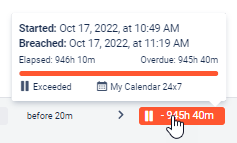
When everything is configured, the SLA table shows the following results:
How does the SLA config + Negotiated Date connection work in general?
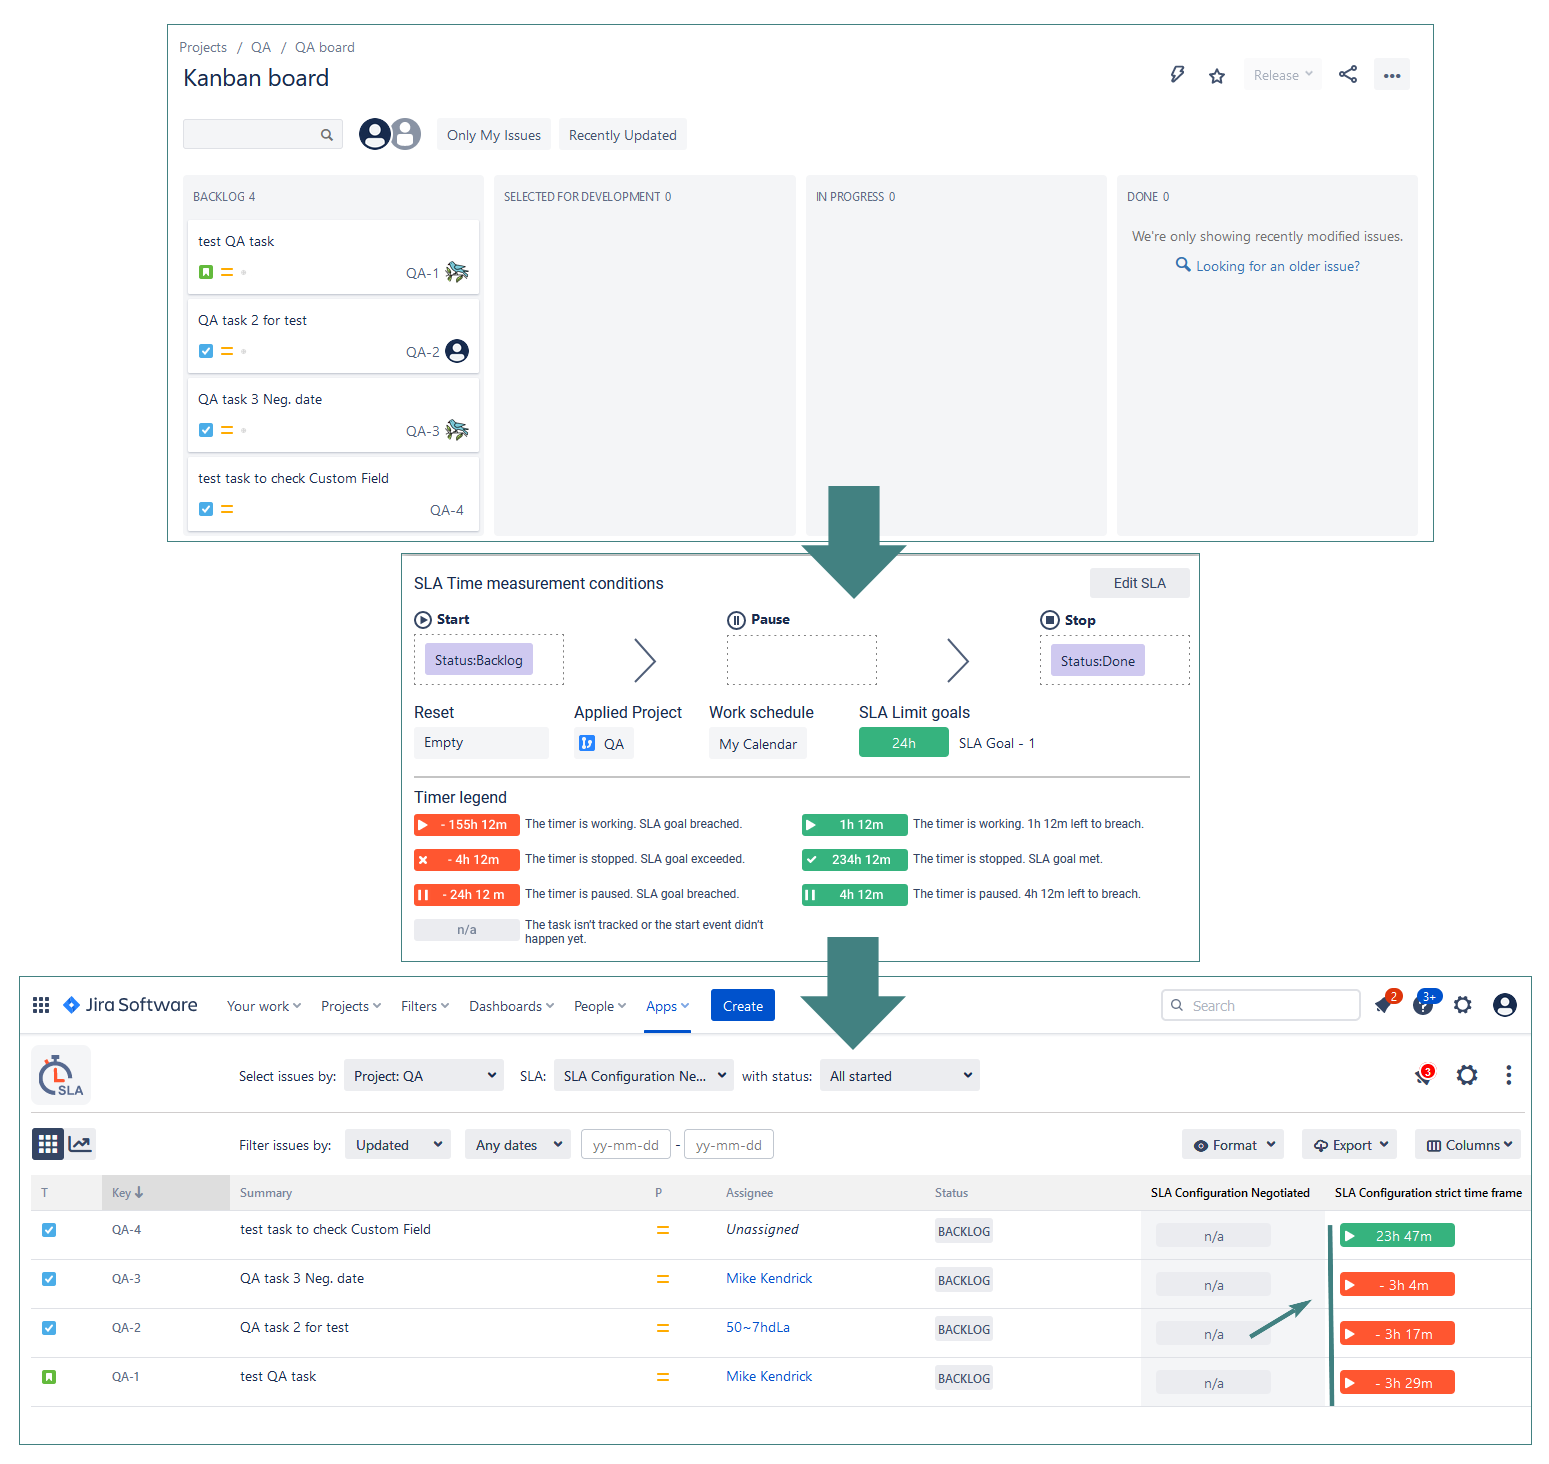
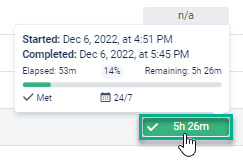
If a task is in a Backlog - a trigger will launch. (see. a green color on a table)
If the task execution time is overdue and the task has not passed all the SLA stages - you will see the exceeded time limit on the grid. (see. red color on the table)
That’s all!
Conclusion
Effectively managing negotiated dates within SLAs is crucial for meeting commitments and maintaining service quality. By following the steps outlined above and leveraging the features provided by SLA Time and Report for Jira, teams can ensure timely task completion and enhance customer satisfaction.
