Do you want to monitor the last comment added to the issue? If you're a Jira user and it’s essential for you to get to know who and when has added the last comment, follow this short step-by-step guide.
Step 1 Create a Custom Field
- Navigate to your Jira project settings.
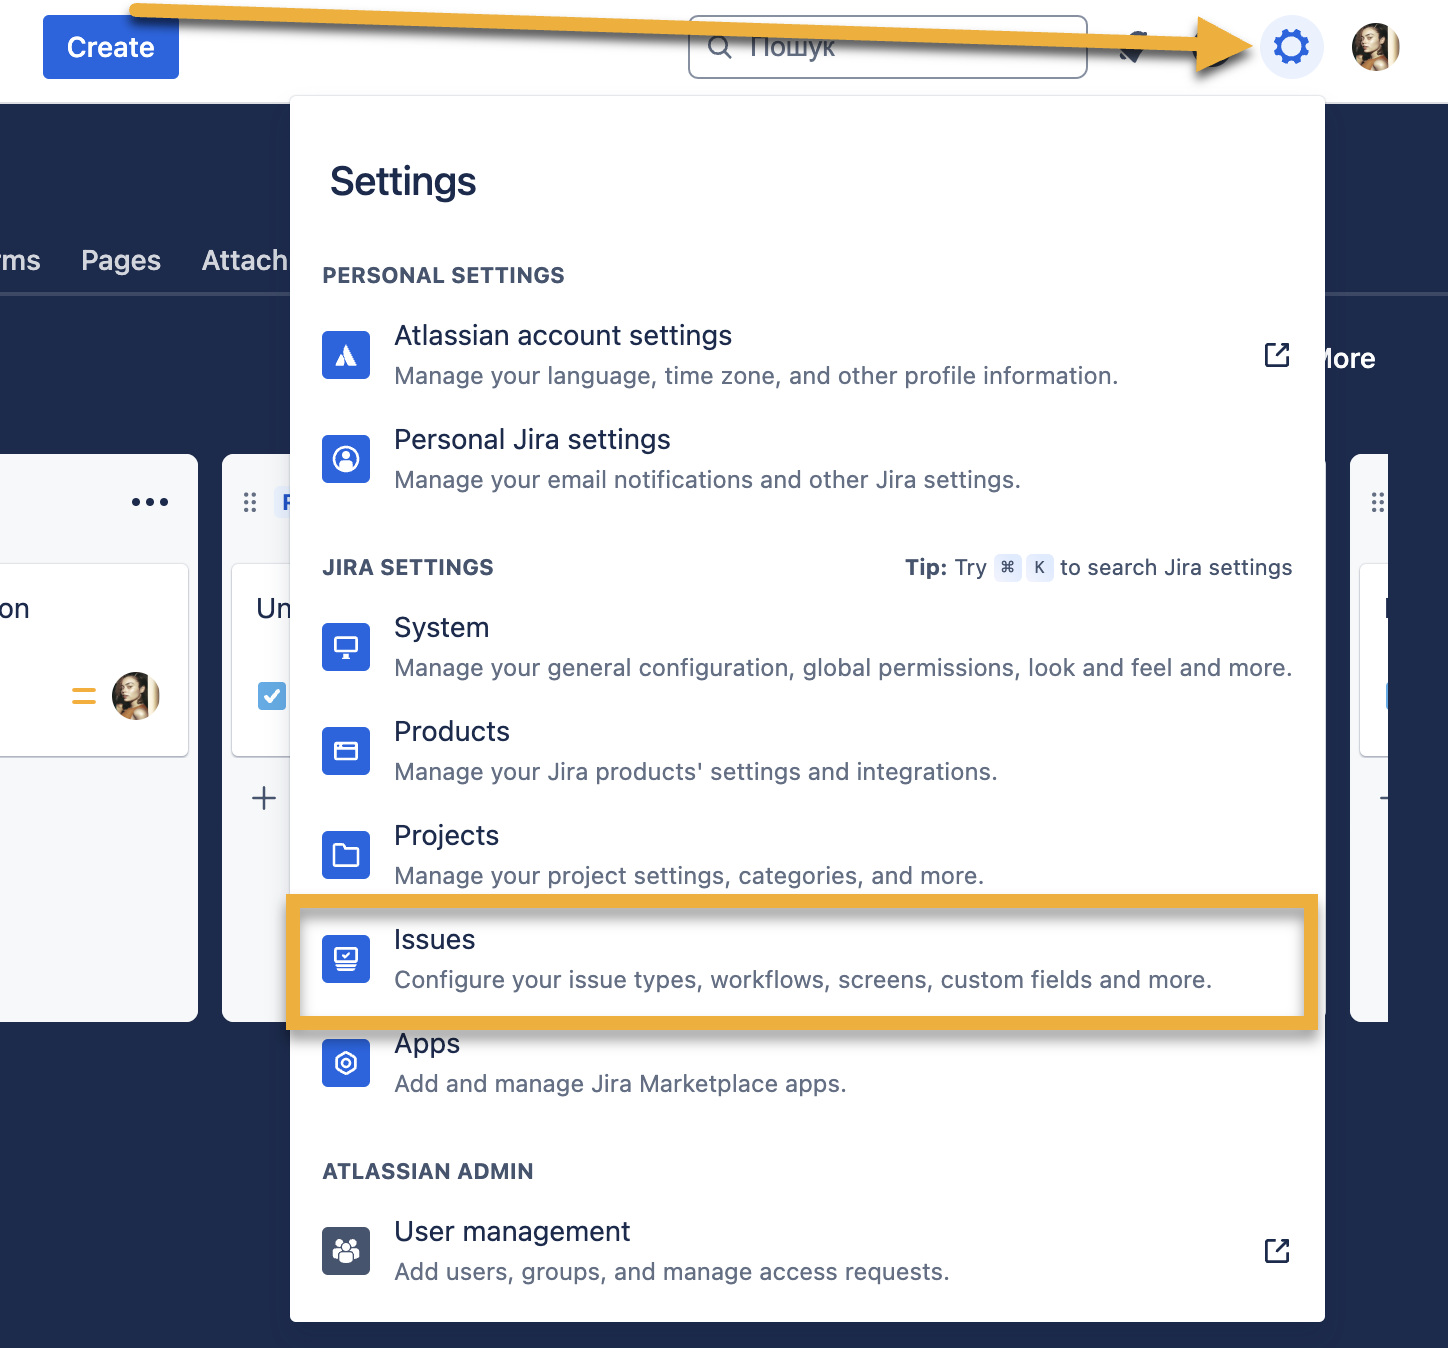
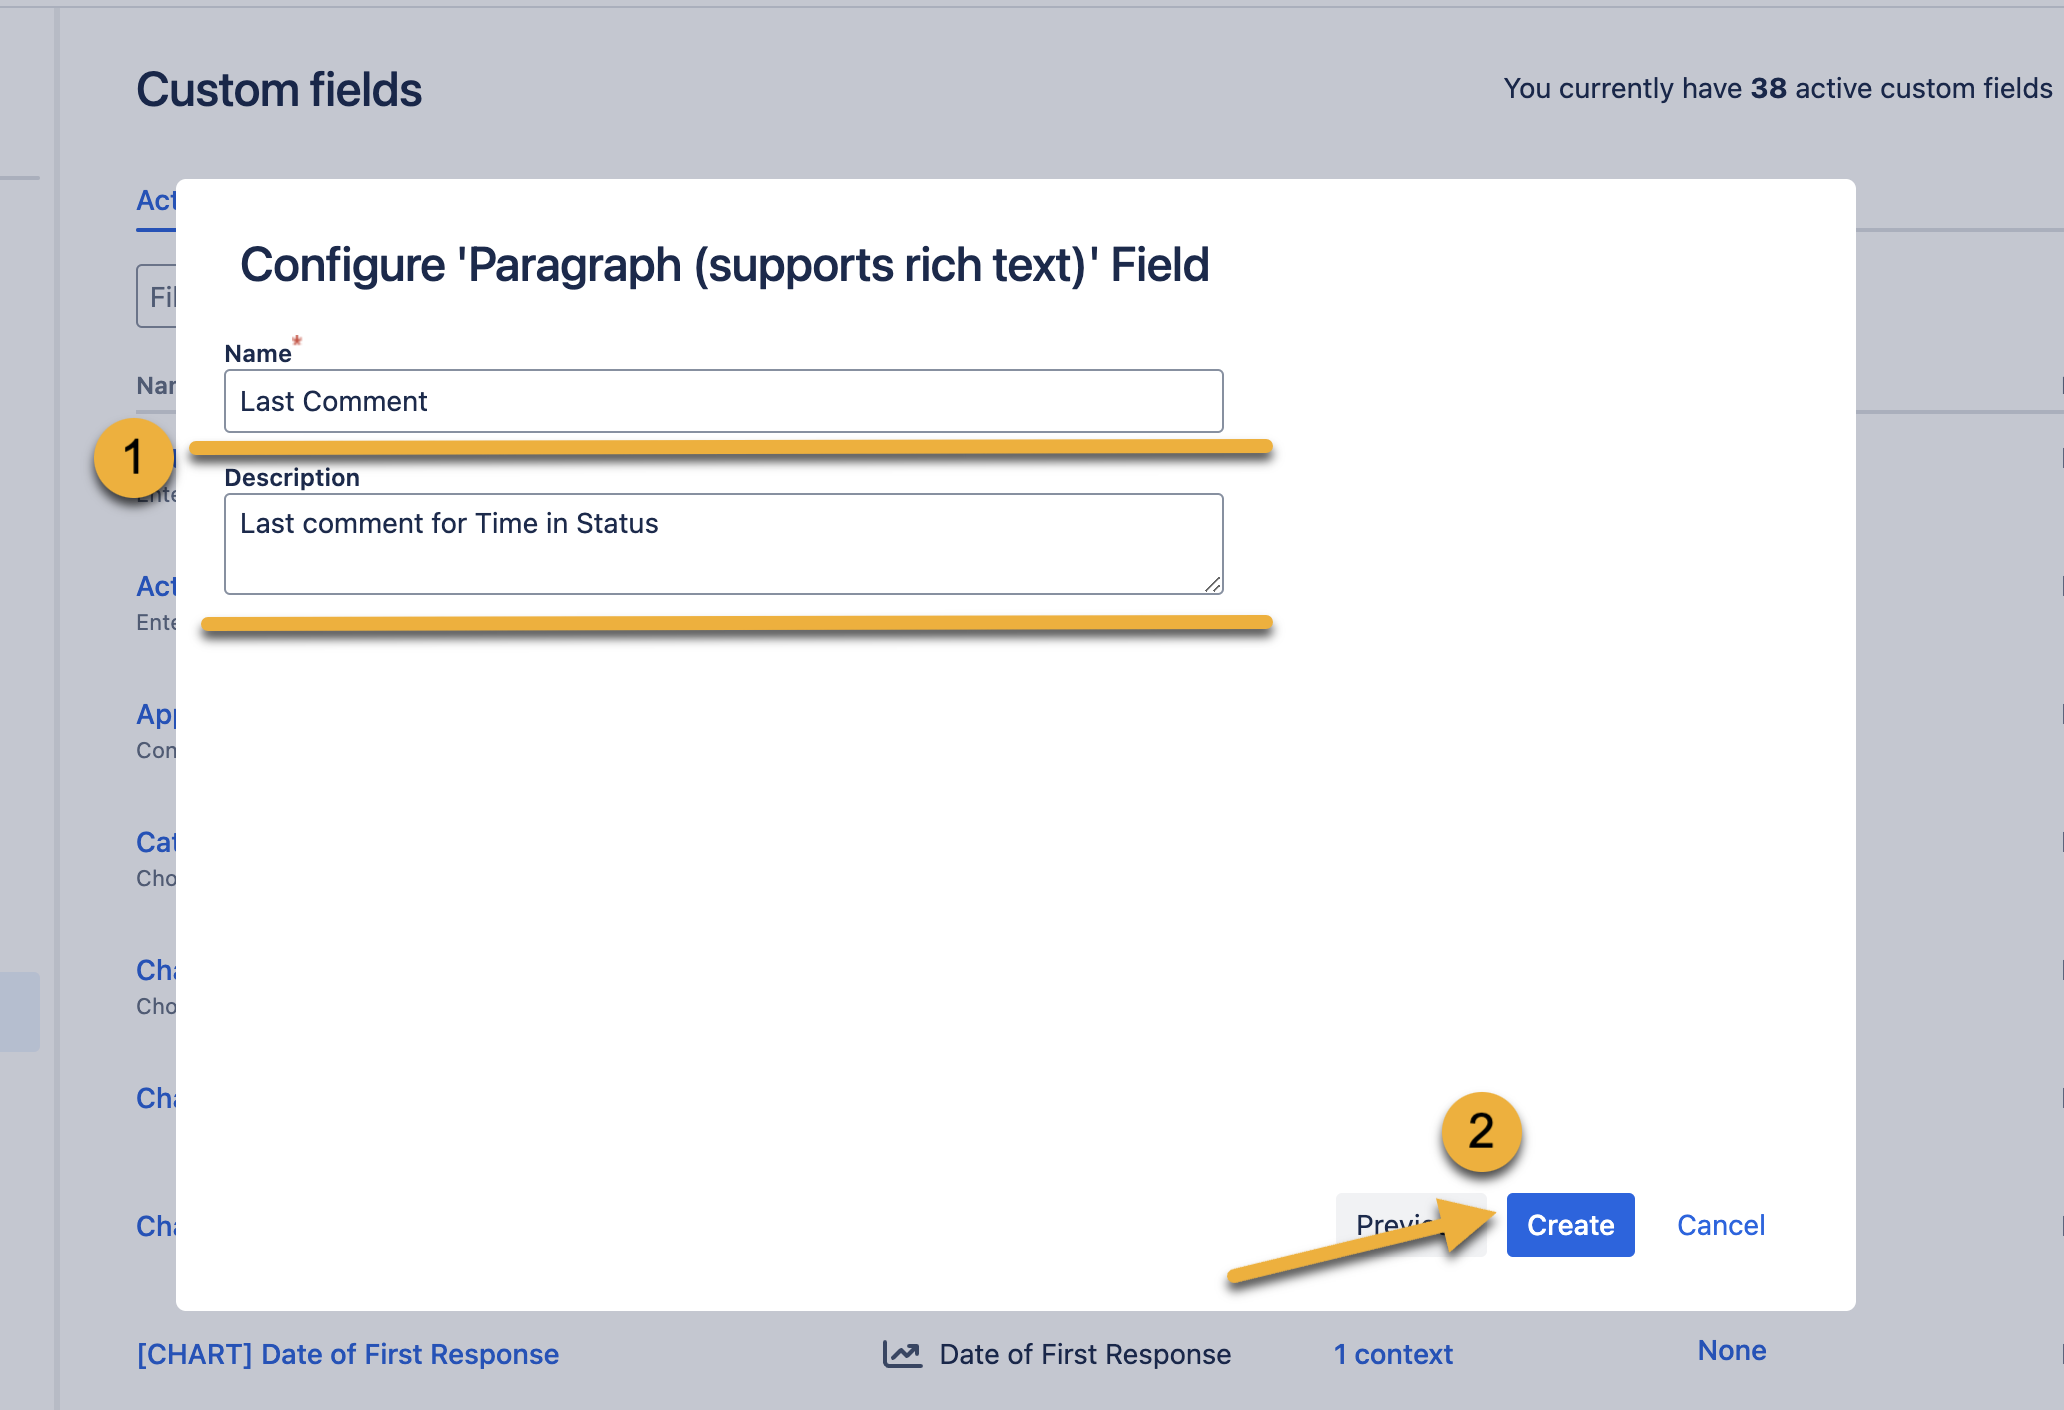
2. Create a new custom field for and select "Paragraph" as the field type to accommodate comment text.
 3. Name the custom field "Last Comment" and create it
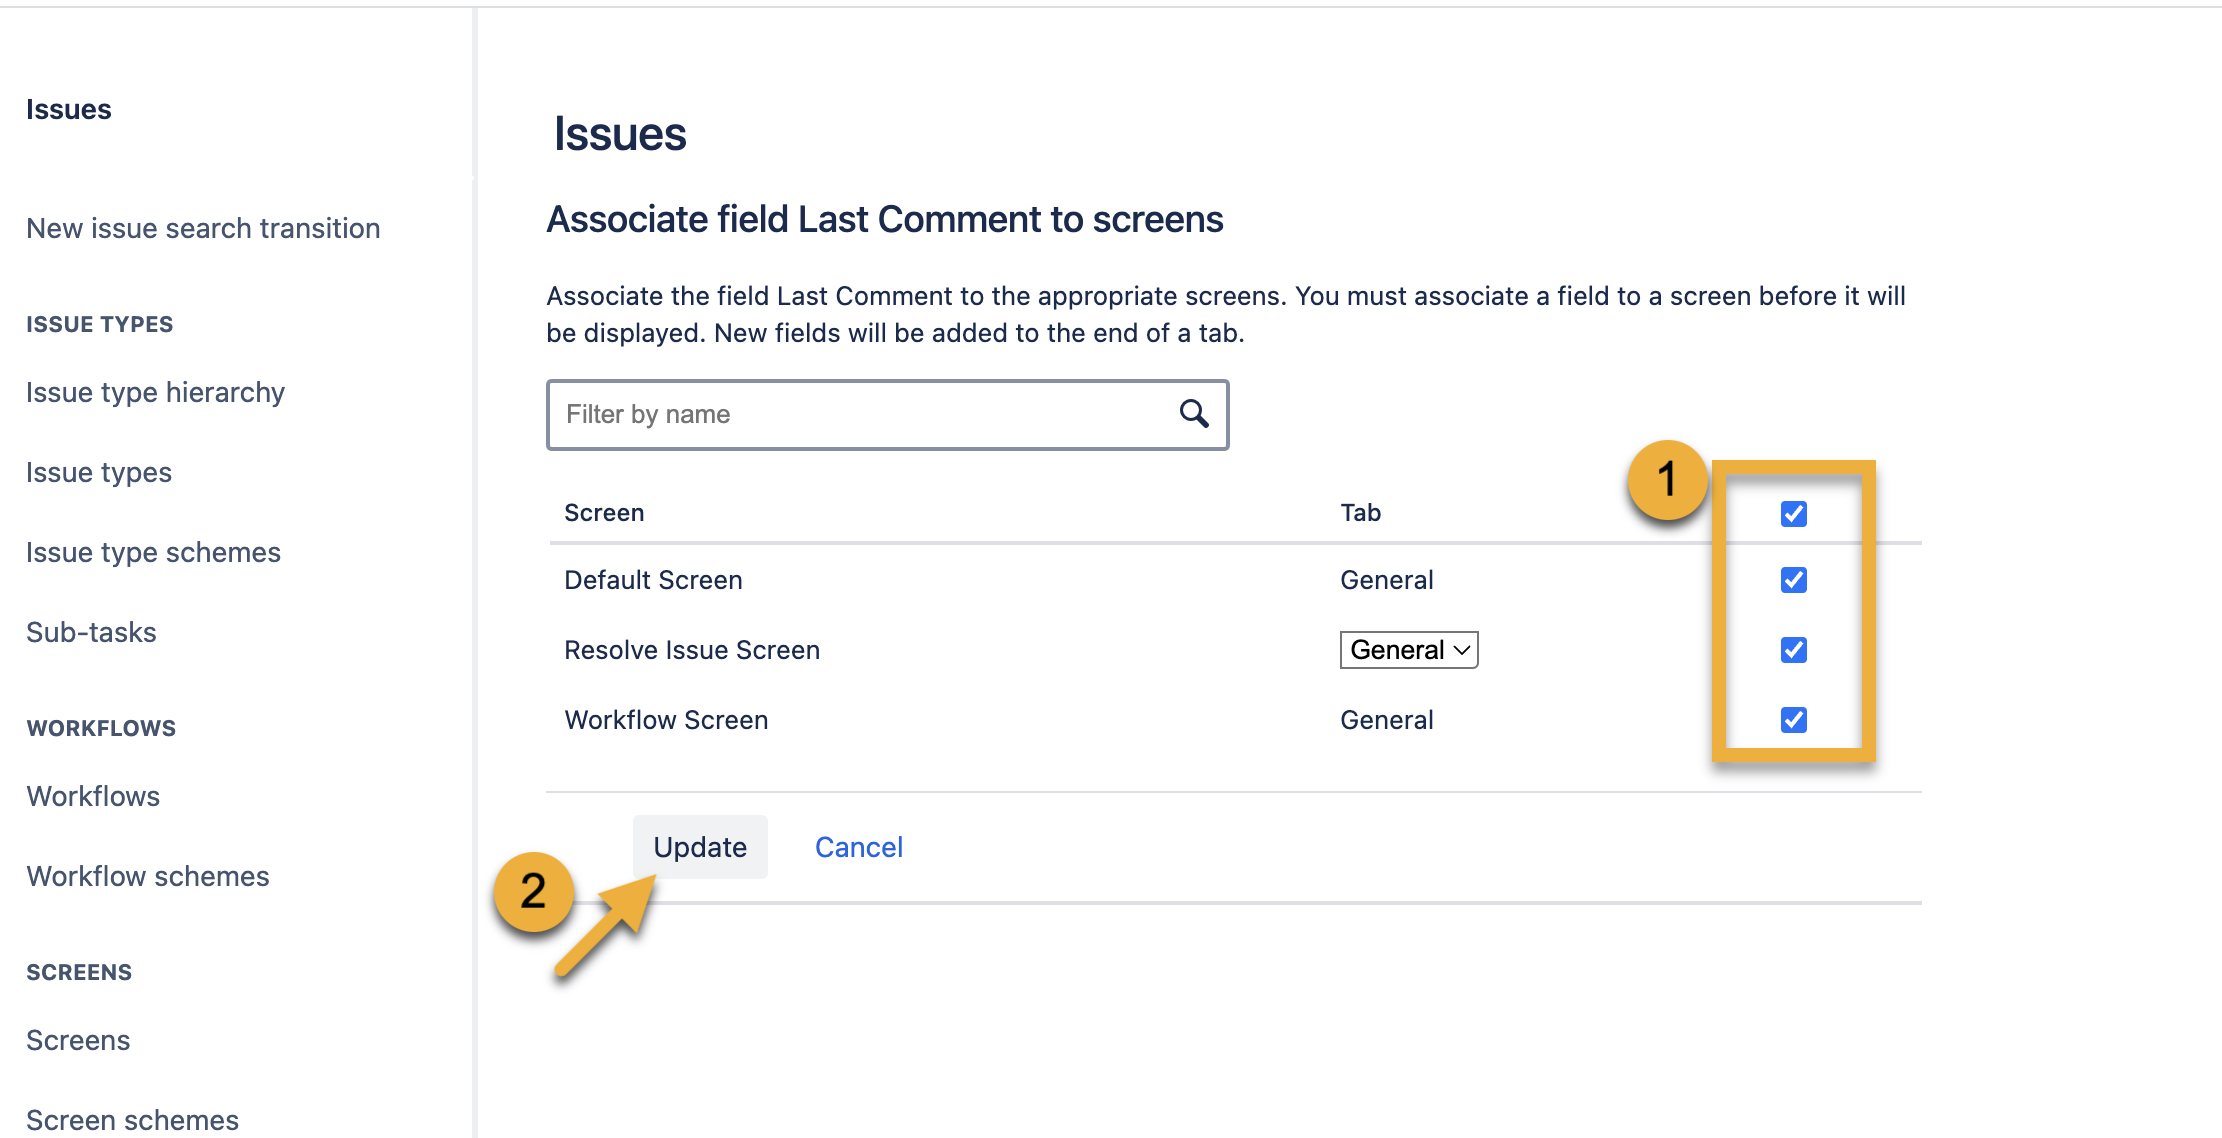
4. Associate the field Last Comment to the screens and click Update
Step 2 Set Up Automation
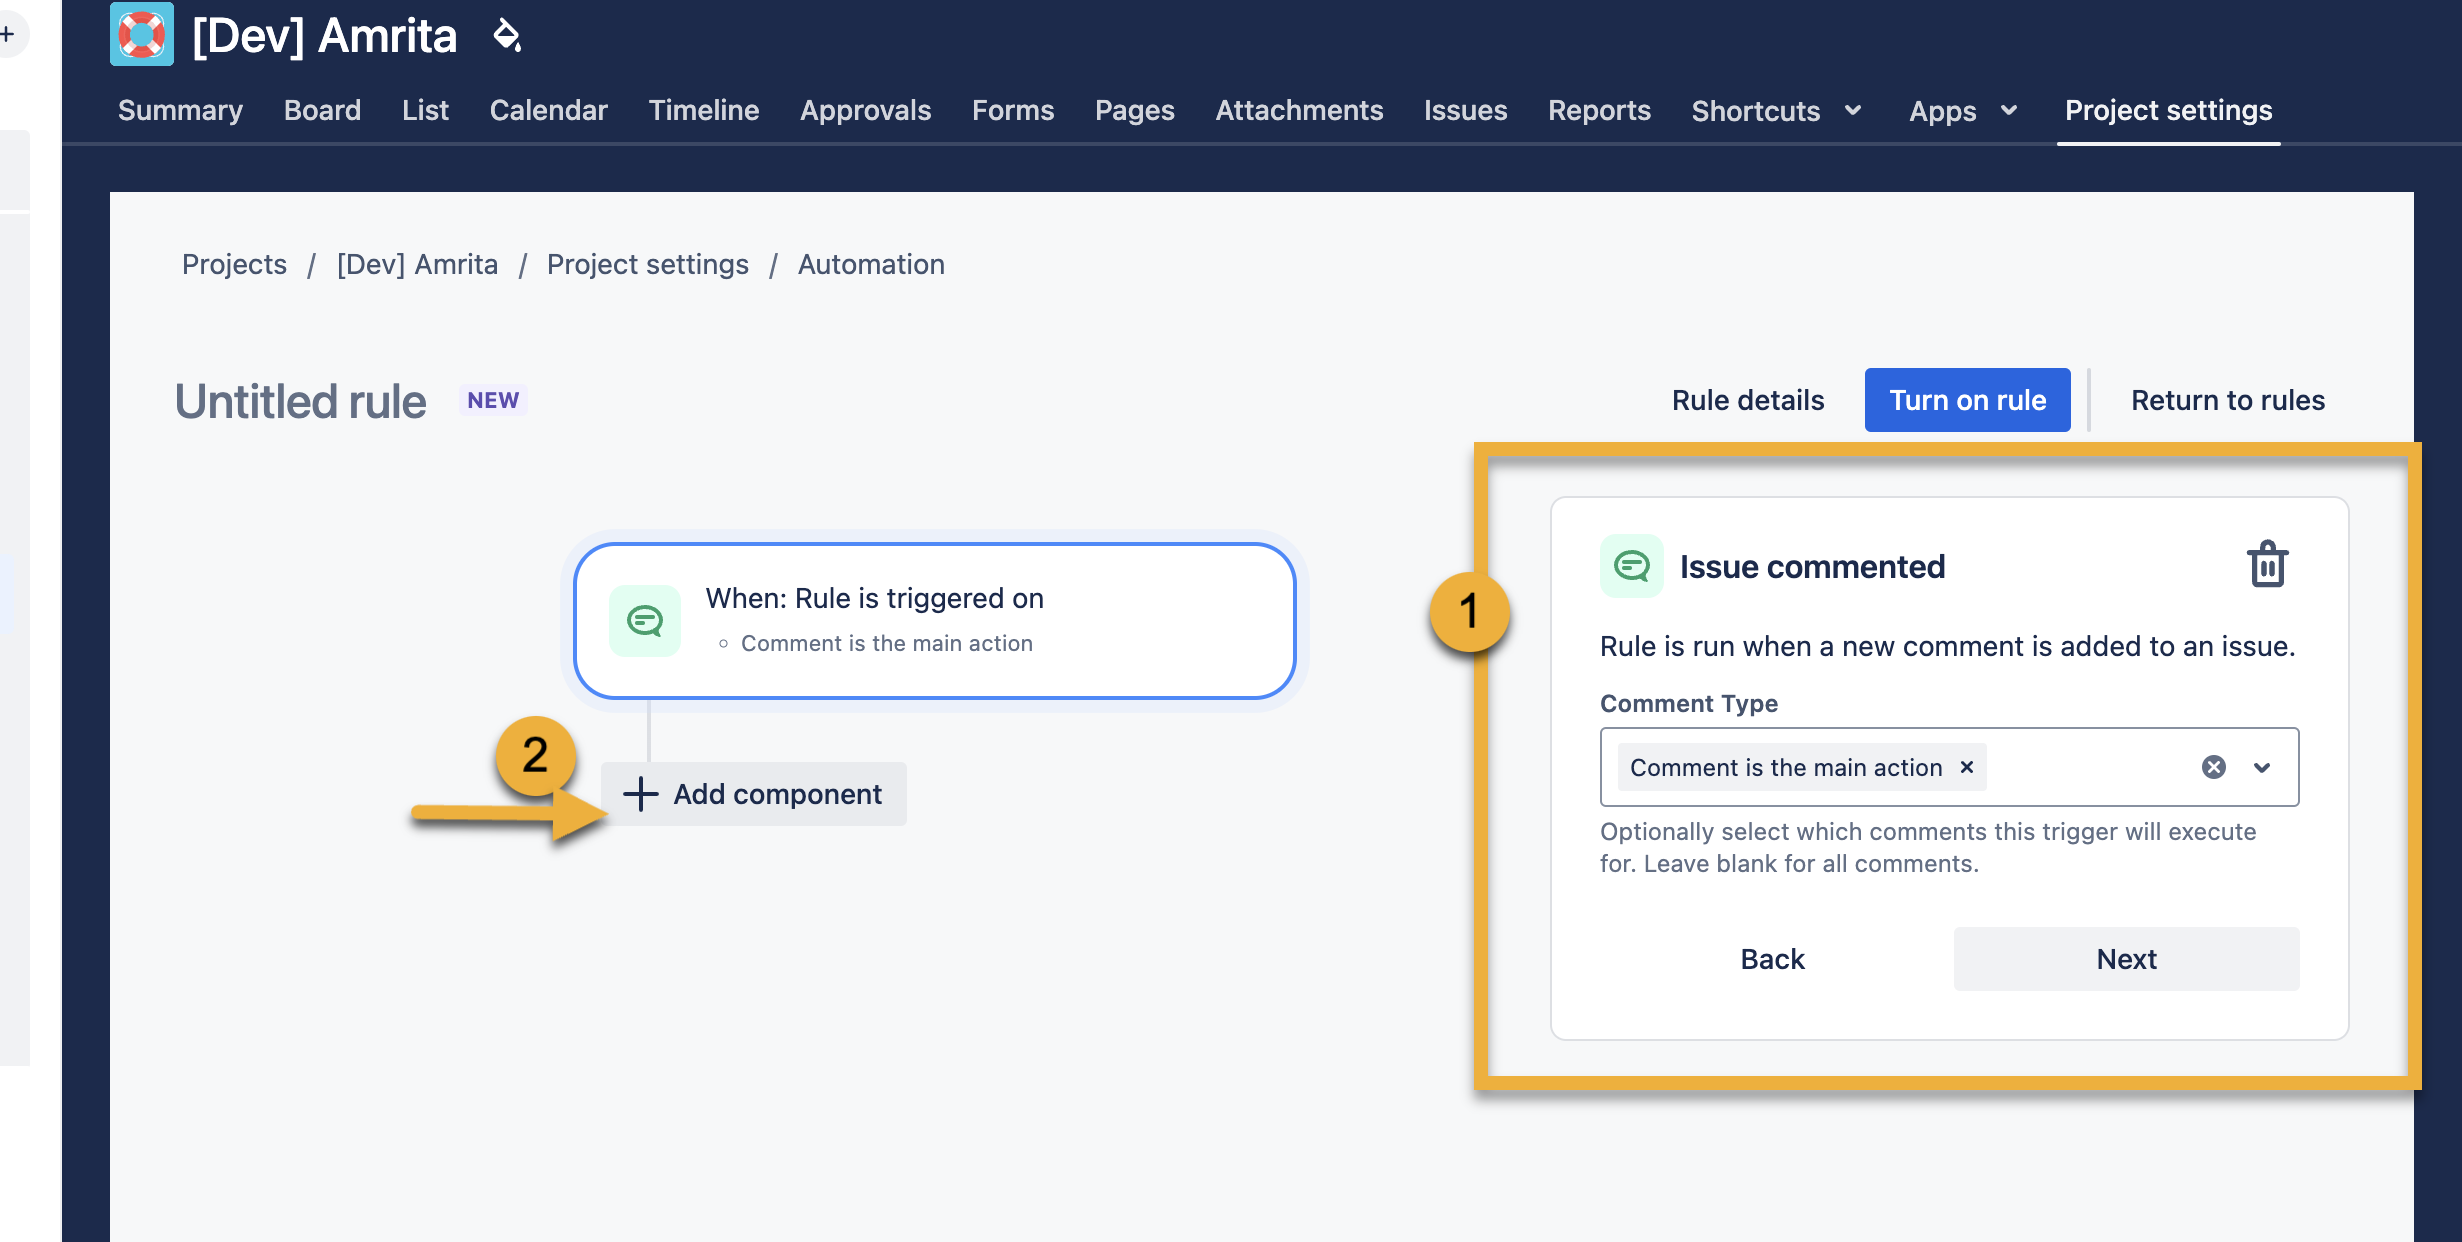
- Go to Project Settings -> Automation -> Create Rule.
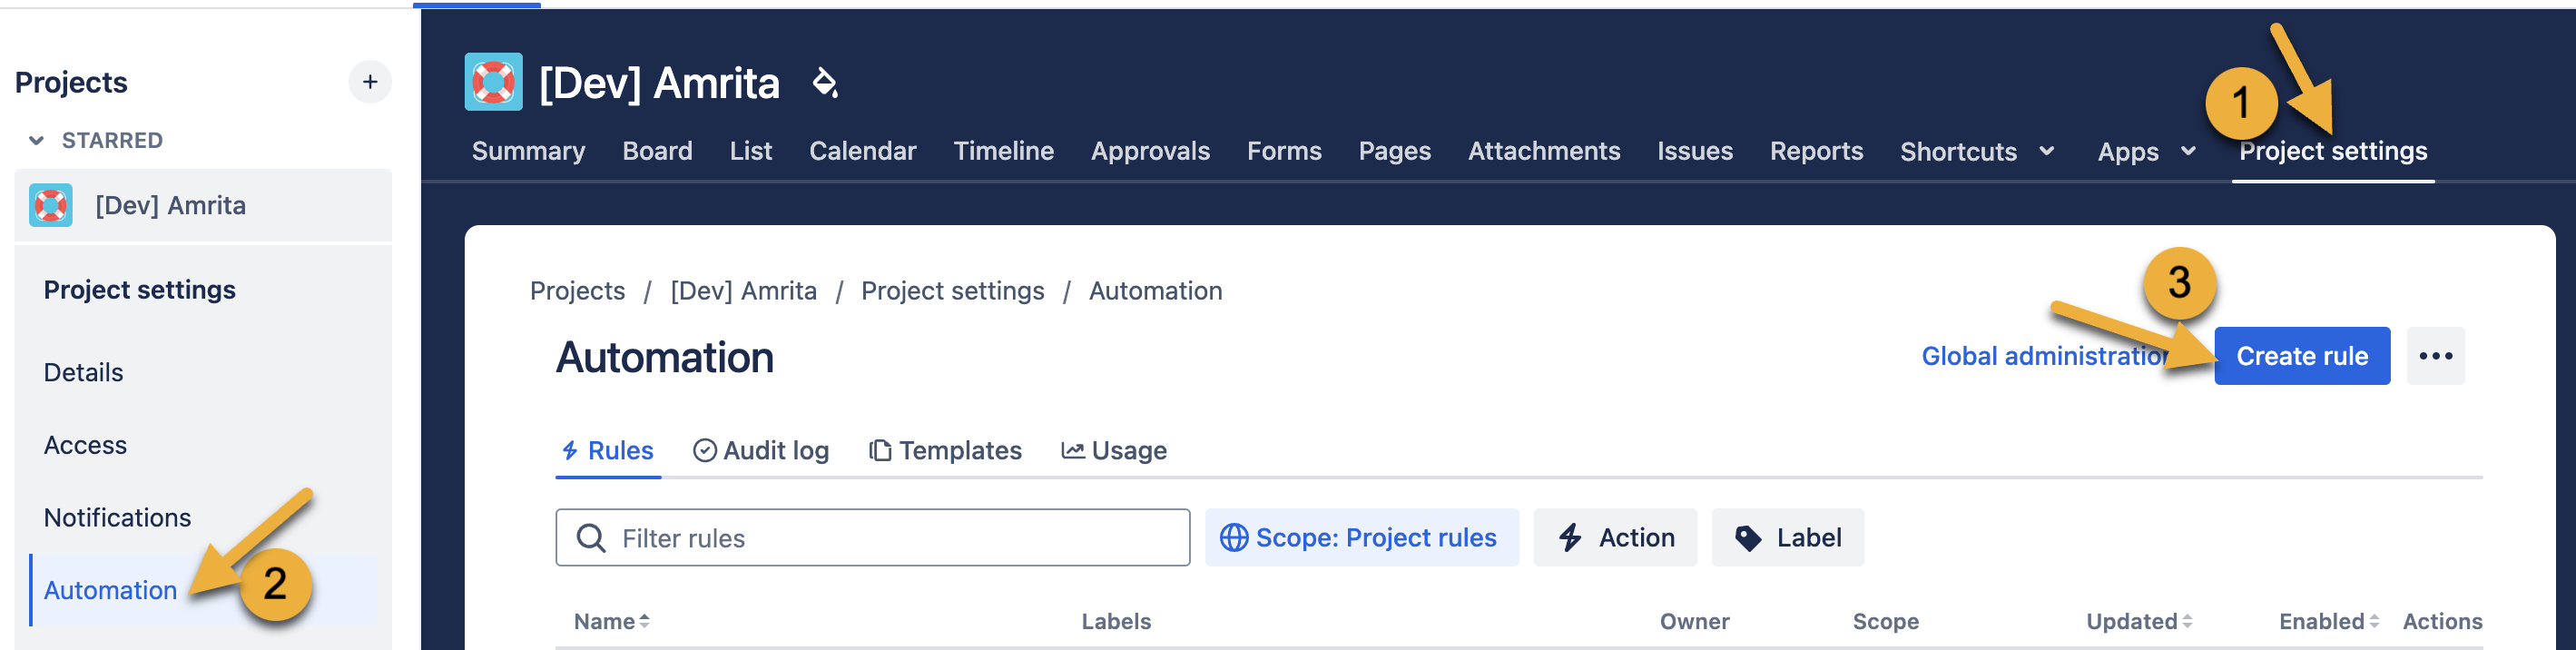
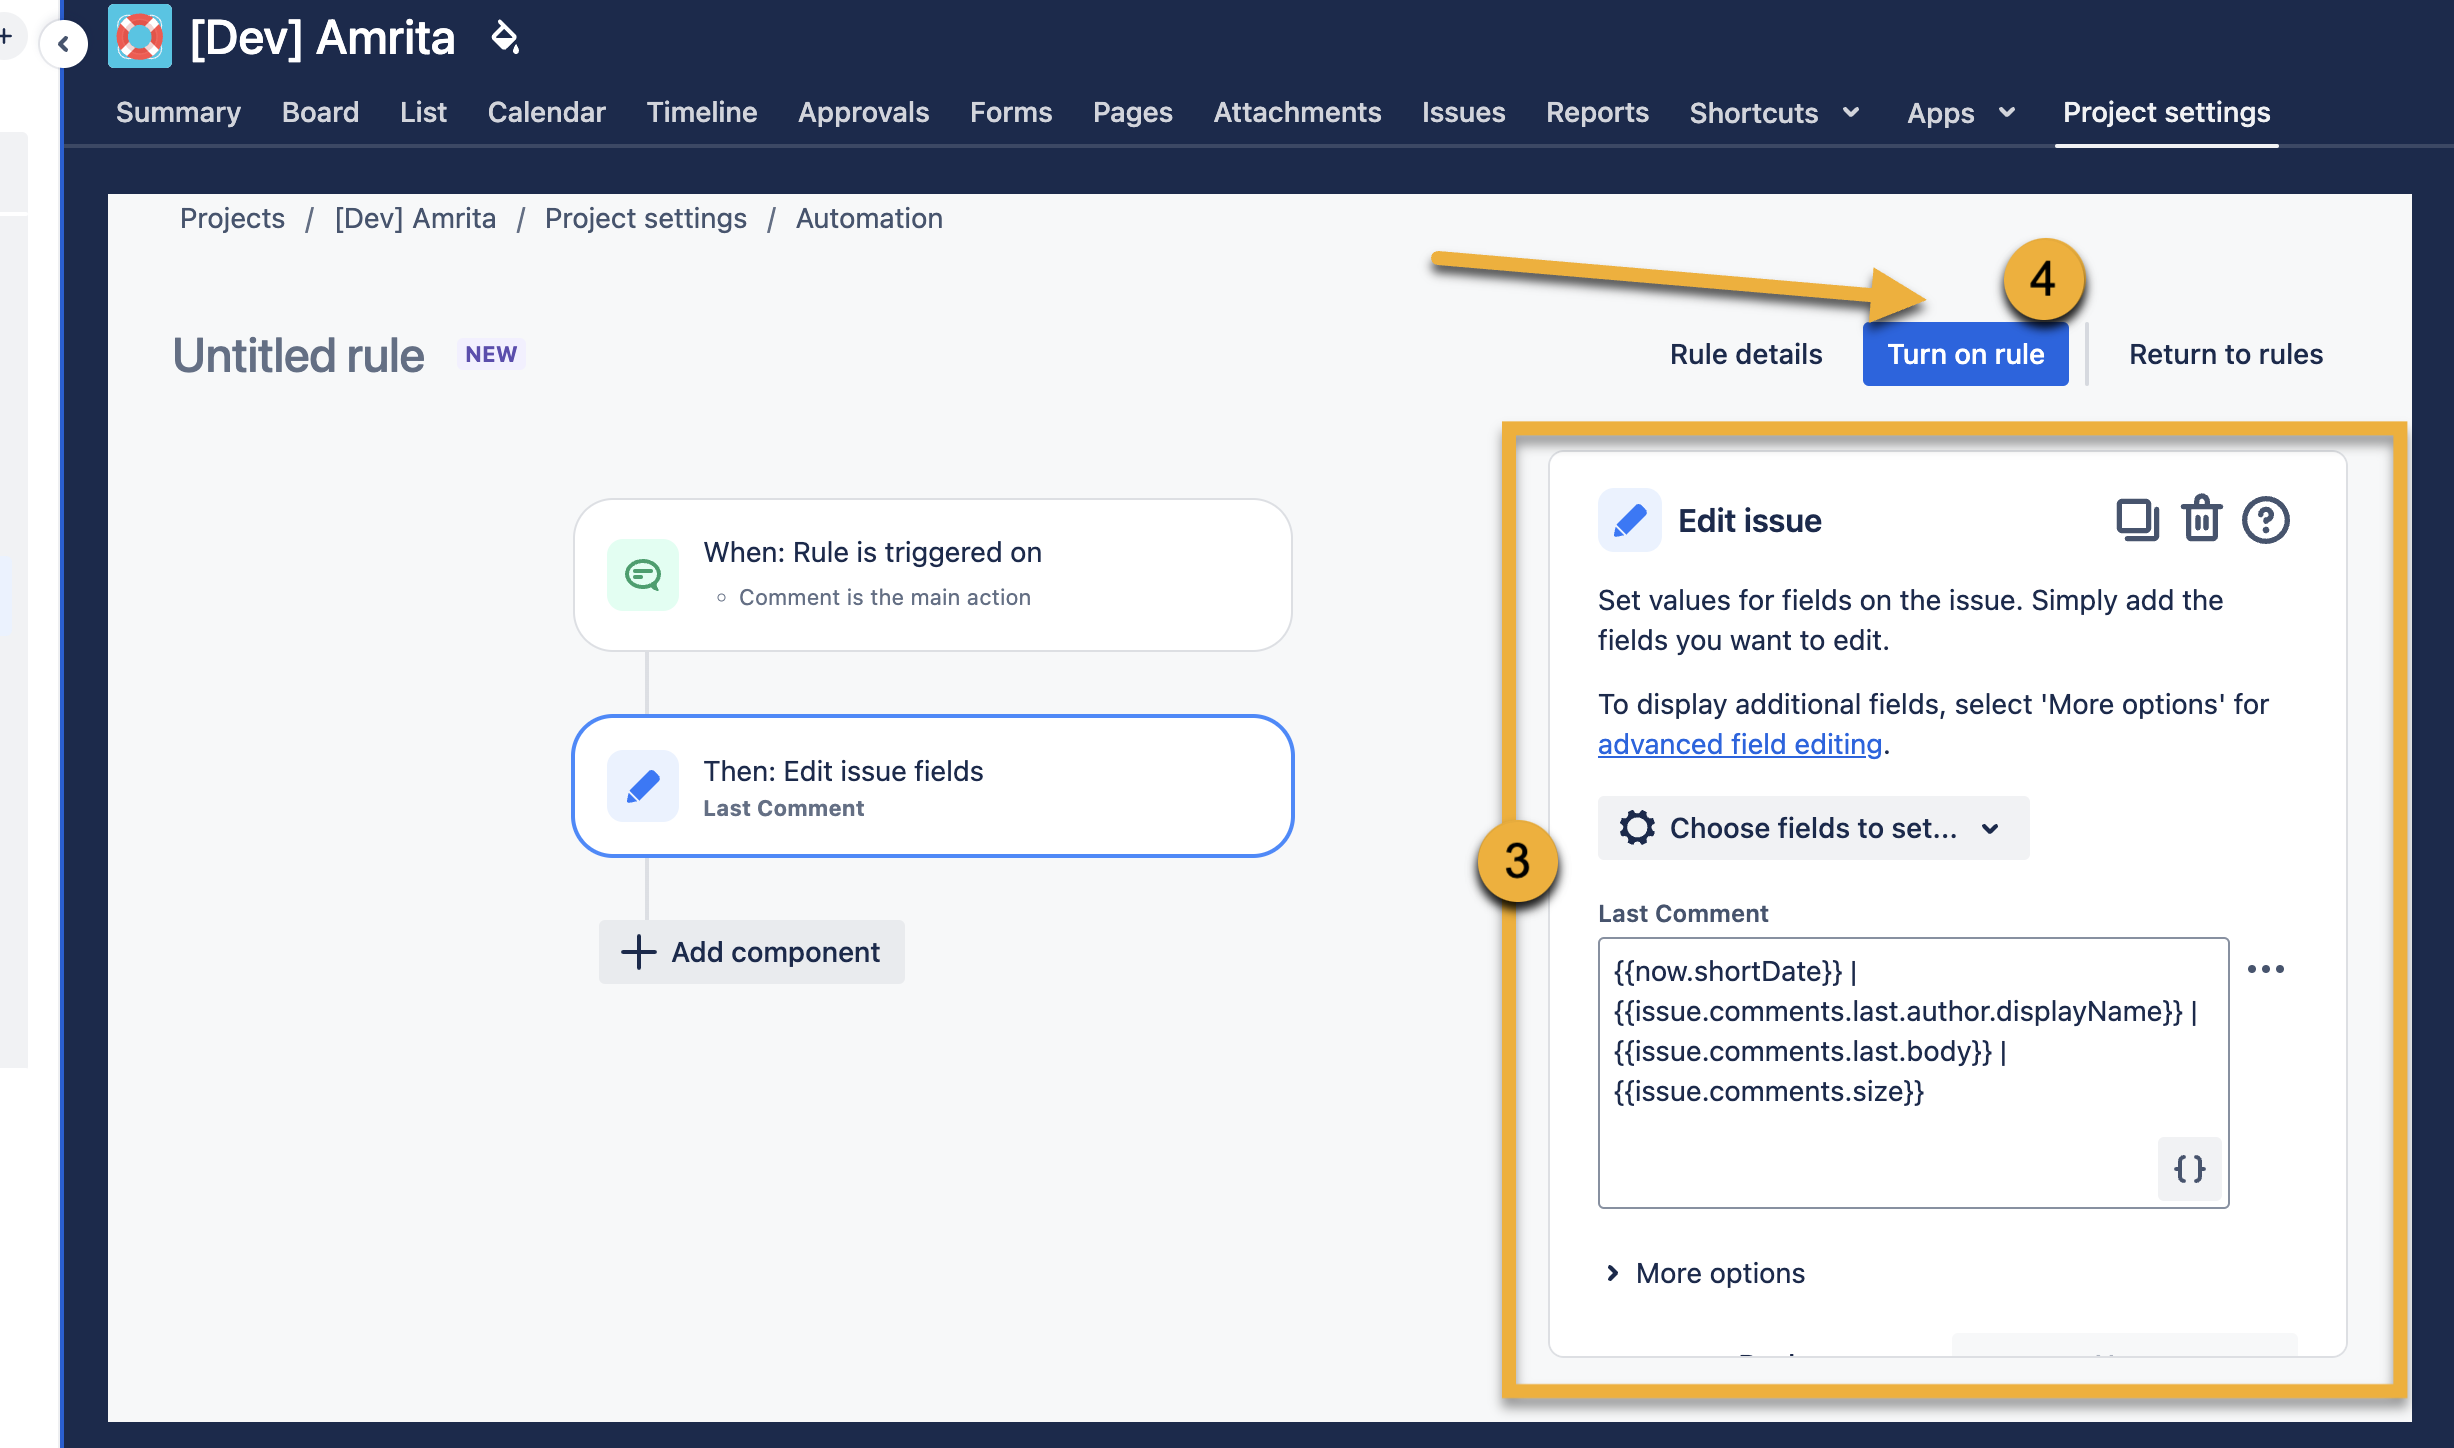
2. Create a new automation rule triggered by the event of an issue being commented on.
Add
{{now.shortDate}} | {{issue.comments.last.author.displayName}} | {{issue.comments.last.body}} | {{issue.comments.size}}
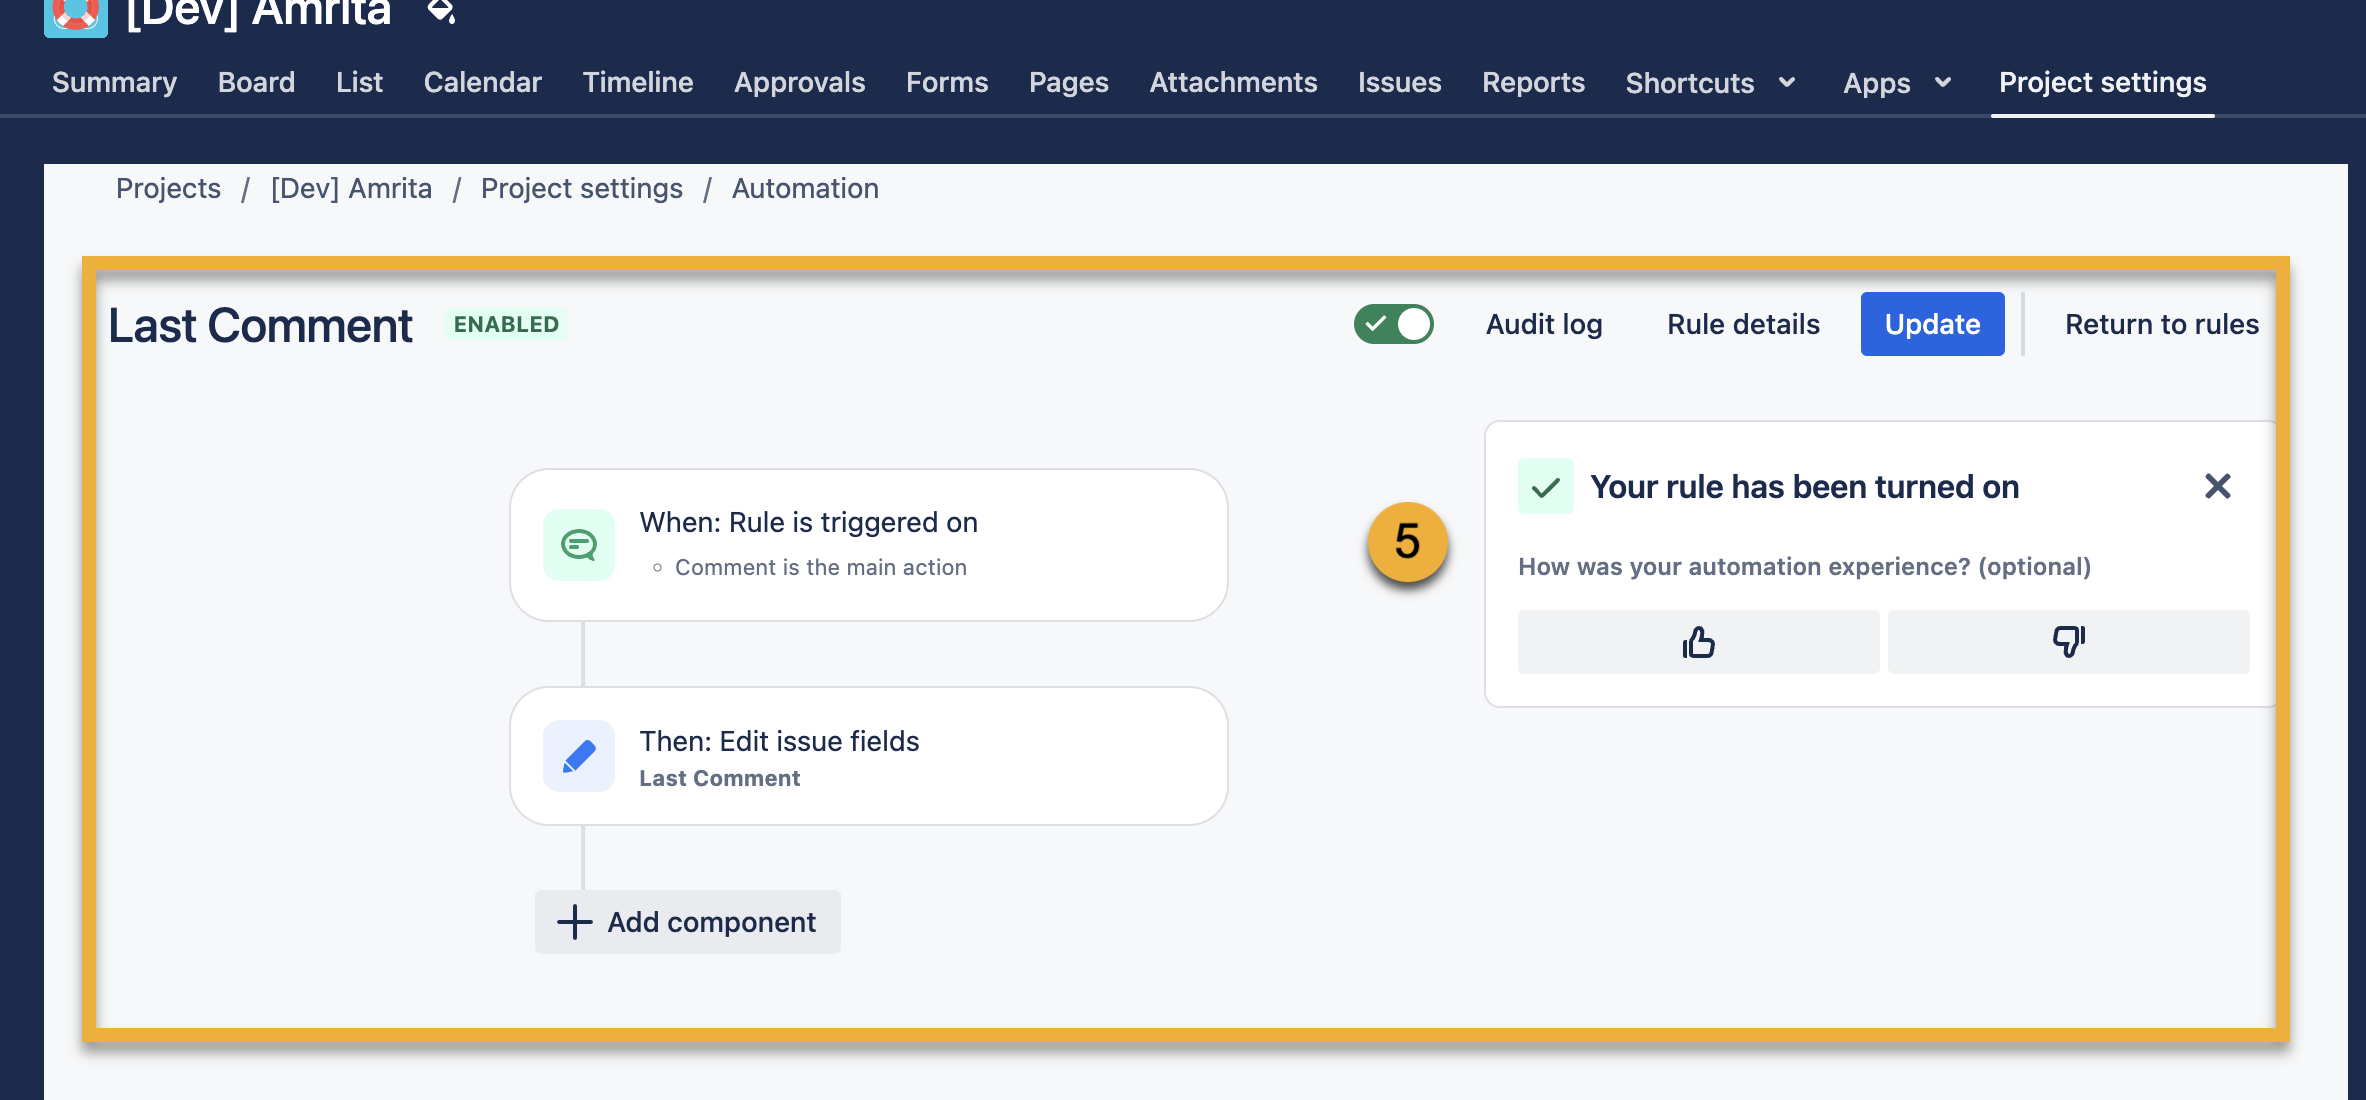
3. Here is a result!
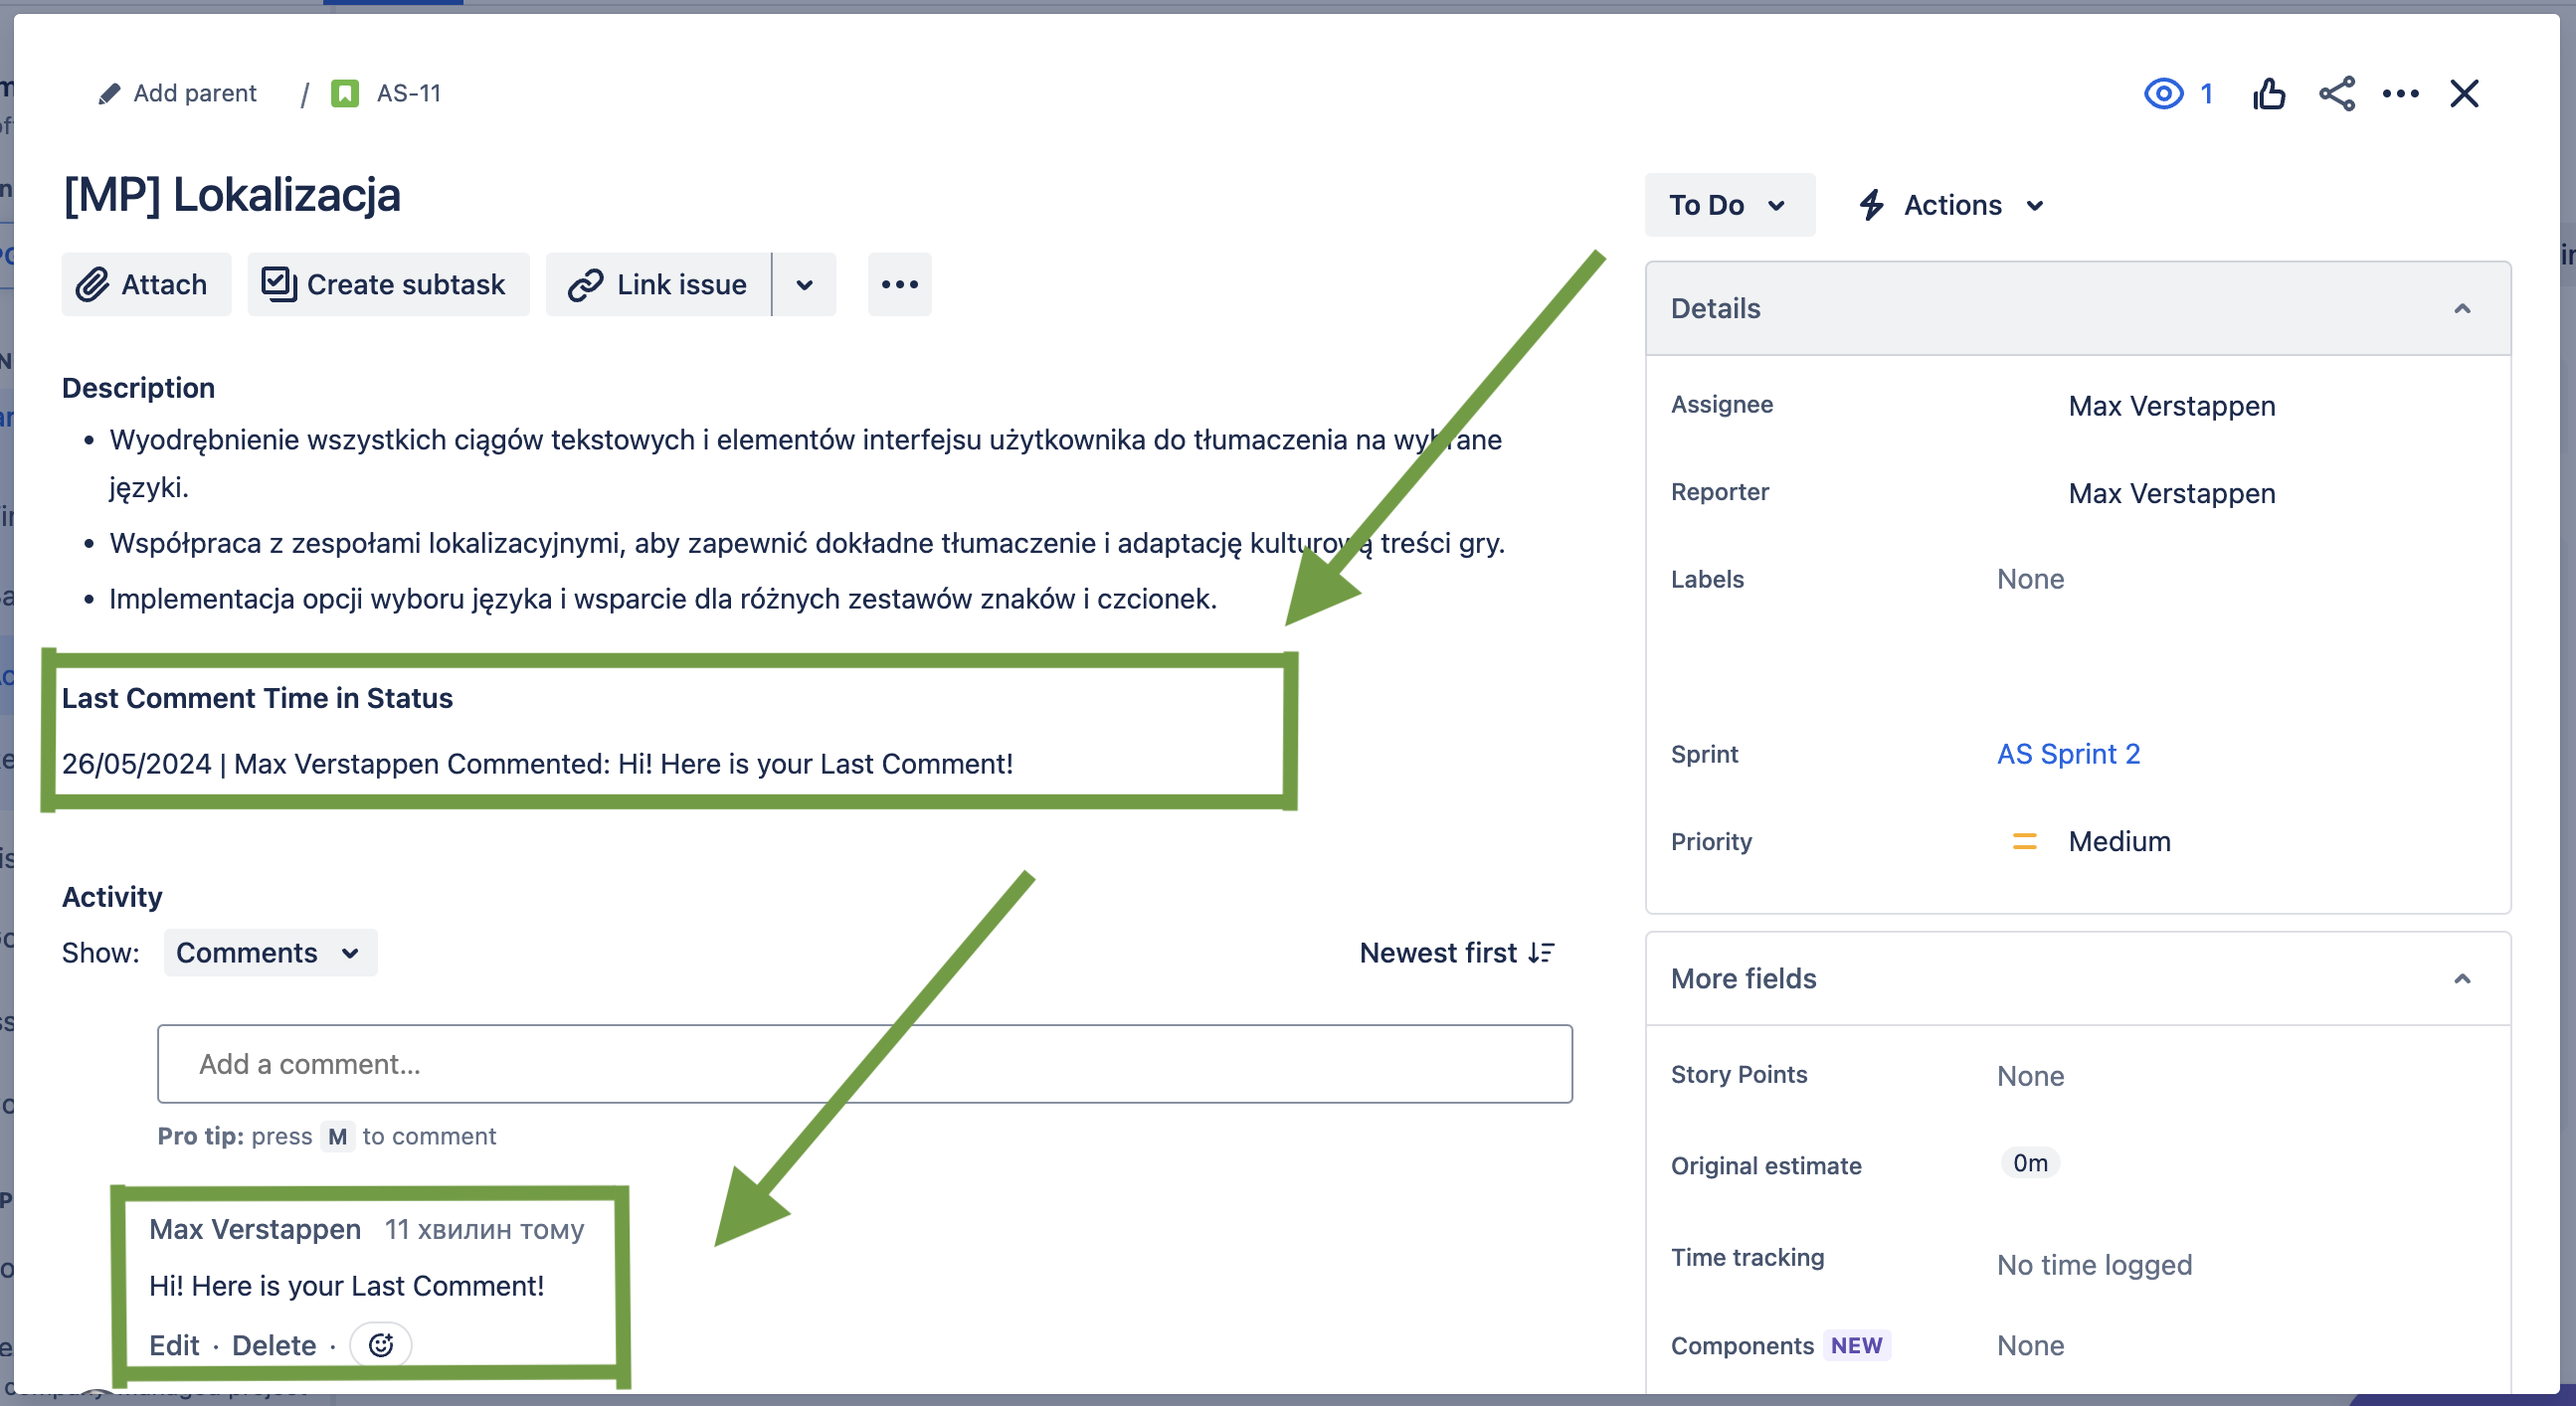
Step 3 Add the "Last Comment" field to your search columns
- In Jira Query Language (JQL) or any native search functionality, add the "Last Comment" field to your search columns.
- Alternatively, use an add-on like Time in Status. This can help display the latest comment and track additional metrics such as time frames and team efficiency.
Also, for enhance your reports, I suggest you try Time in Status (developed by my SaaSJet team) with 7 types of status time reports
Here are all of them:
- Time in Status,
- Assignee Time,
- Average Time,
- Status Entrance Date,
- Status Count,
- Transition Count,
- Time in Status per Date.
I am pleased to offer you a 30-day trial of Time in Status. Furthermore, our add-on is free for up to 10 users, allowing you to evaluate its effectiveness in your service processes.


