With a Jira Azure DevOps integration, teams can stay aligned on important information and use these tools to their fullest capacity. This includes keeping deployment or testing cycles in Azure DevOps aligned with dev workflows in Jira.
To bring out the best in both these tools, I have come across companies implementing some pretty advanced integrations.
But at the basic level, they all follow some simple steps first to connect Microsoft Azure DevOps with Atlassian Jira. After that, they can configure the sync any way they want.
Let's look into the steps to integrate Jira with Azure DevOps Cloud using Exalate.
There are a few template-based no-code apps on the Atlassian marketplace that help you integrate Azure DevOps and Jira. But they lack the advanced integration capabilities that tools like Exalate have. To bring this to light, I'll share some advanced Jira Azure DevOps integration use cases we've helped customers with.
Why Integrate Jira and Azure DevOps?
Teams often use Jira for project management and Azure DevOps for their DevOps, software development, or testing. Without a reliable connection, teams rely on manual updates, leading to delays, miscommunication, and status mismatches.
A well-configured Jira Azure DevOps integration helps you:
- Automatically sync work items between platforms so both teams see the latest updates without manual copy-paste
- Keep dev and product teams aligned with real-time status changes, comments, and attachments flowing both ways
- Map Azure DevOps work item types (Tasks, Bugs, Features) to Jira work item types (Stories, Bugs, Epics) with custom rules
- Maintain end-to-end traceability from feature request to release across both tools
- Let each team stay in their preferred platform while data flows automatically
Common use cases include bug escalation, sprint synchronization, QA handoffs, cross-company vendor collaboration, and MSP client management.
4 Easy Steps to Set Up Your Azure DevOps Jira Integration
Step 1: Log In to Exalate and Create a Workspace
Go to exalate.app and log in to your Exalate account. If you're new, you can create an account using your email or Google sign-in.
Once logged in, create a workspace to organize your integrations. Click the "+ Create Workspace" button, enter a name and description, and confirm.
Step 2: Connect Jira to Azure DevOps
From your workspace, click "+ Add Connections" > "Create new connection".
Enter the name for your first system (System A). You can designate either Jira or Azure DevOps as System A. Enter your system's URL and authenticate. Jira uses OAuth, and Azure DevOps uses API tokens.
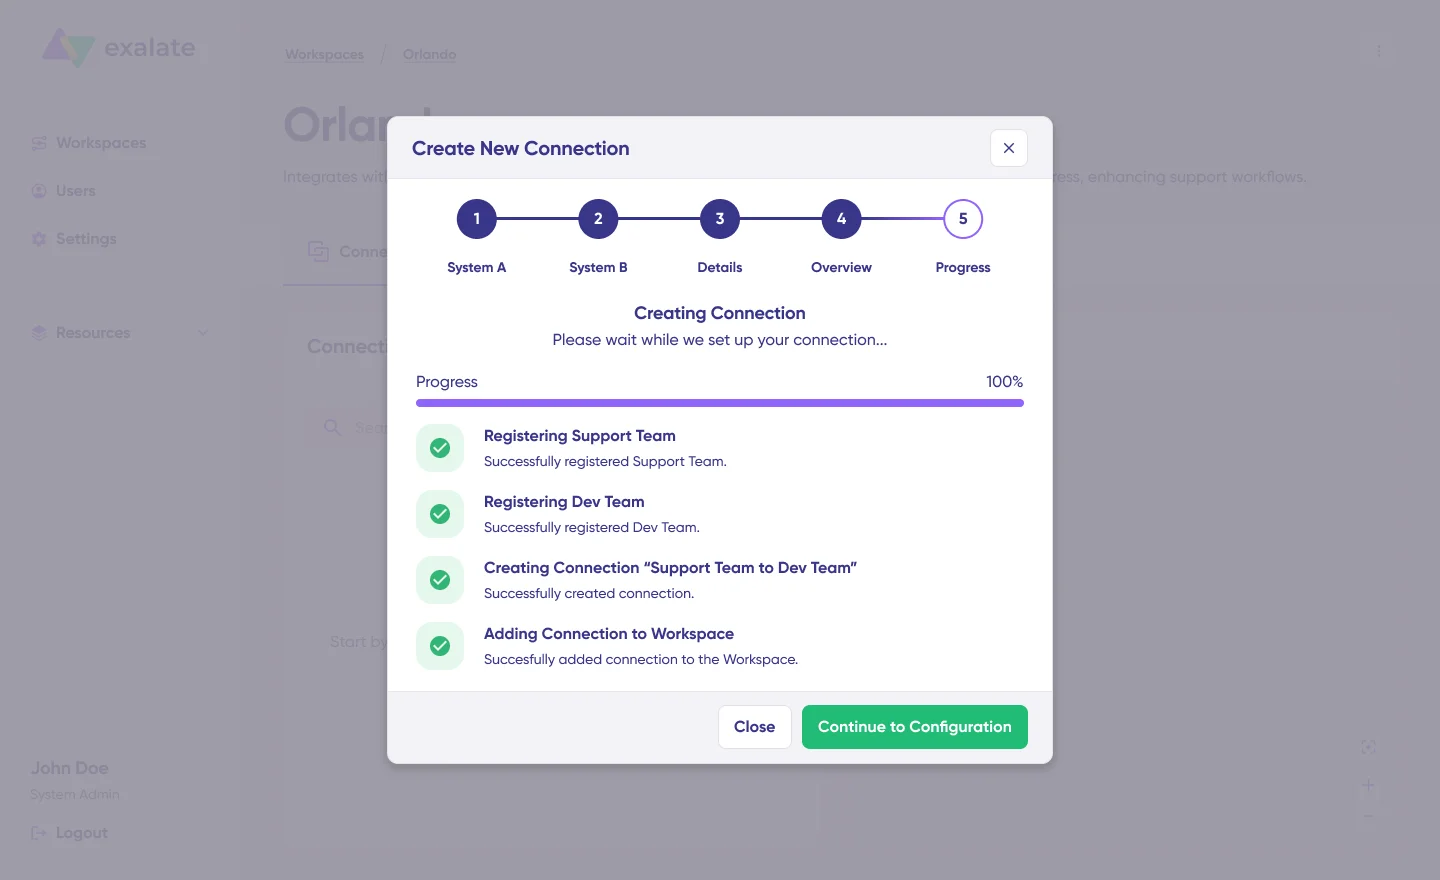
Complete the same setup for the second system (System  . Give your connection a name and description, review the details, and click "Create connection".
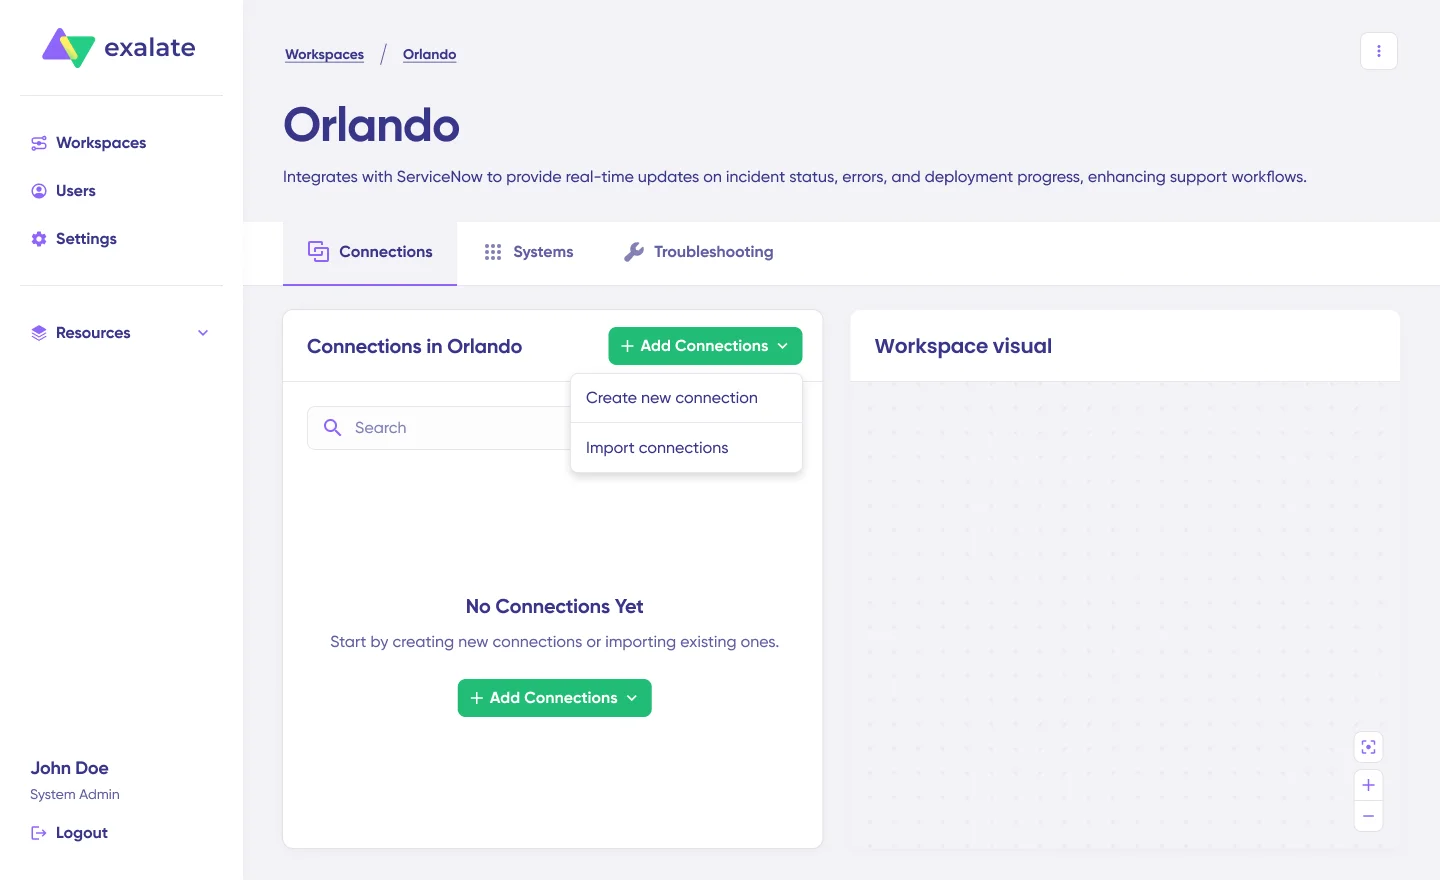
Once the connection is created, select "Continue to configuration" and choose the Jira project you want to use for synchronization.
Step 3: Set Up Your Sync Rules
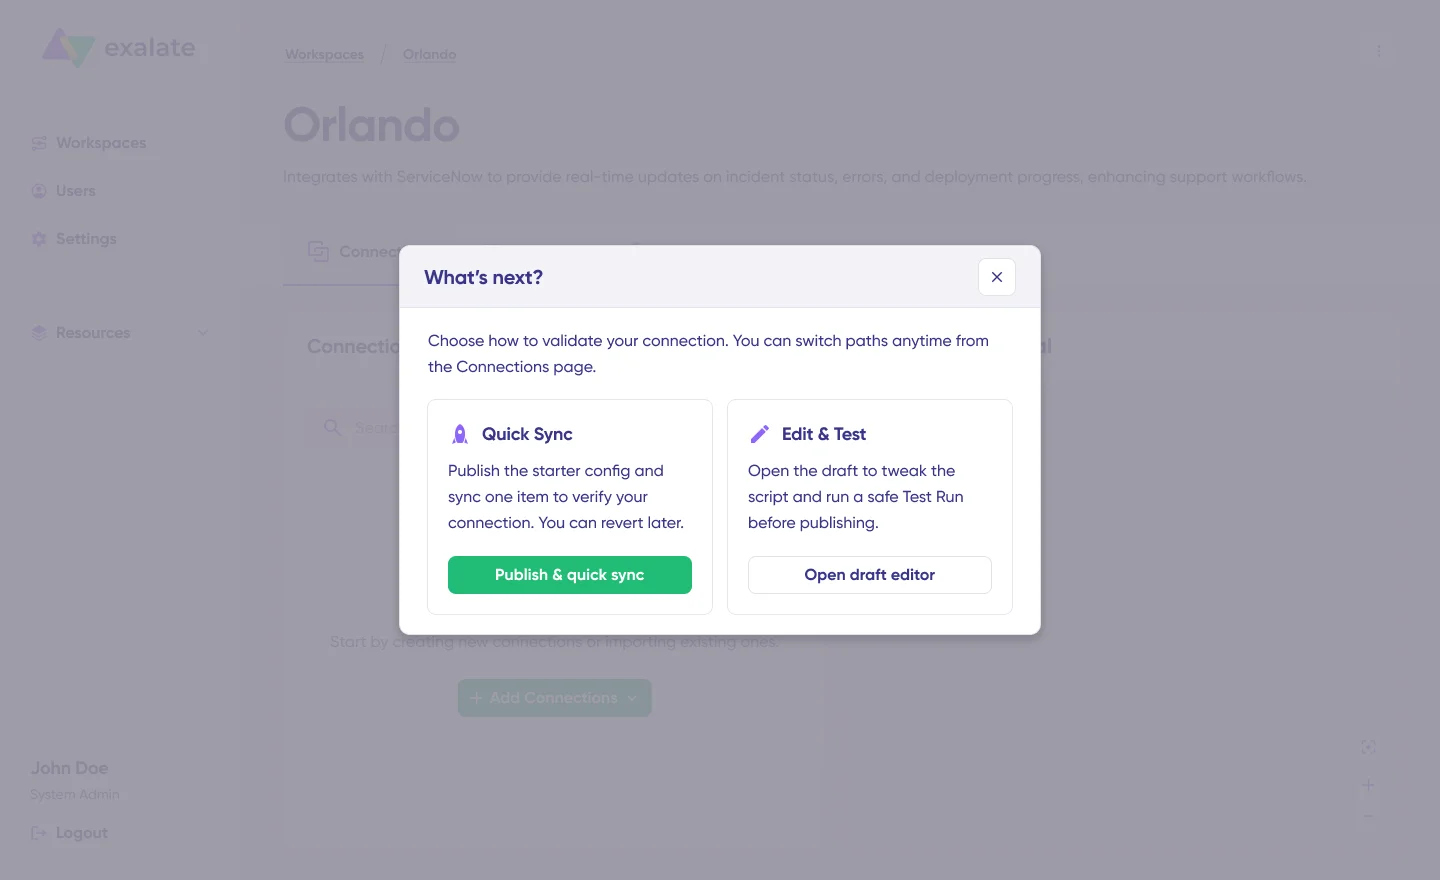
After creating your connection, you have two configuration paths: "Quick Sync" and "Edit & Test".
Quick Sync lets you publish the starter configuration and sync one work item between Jira and Azure DevOps to verify that your connection works properly.
Edit & Test opens the draft editor, where you can customize your sync rules. Click "Create a new version" to start editing without affecting your live configuration. Changes in the draft are saved automatically.
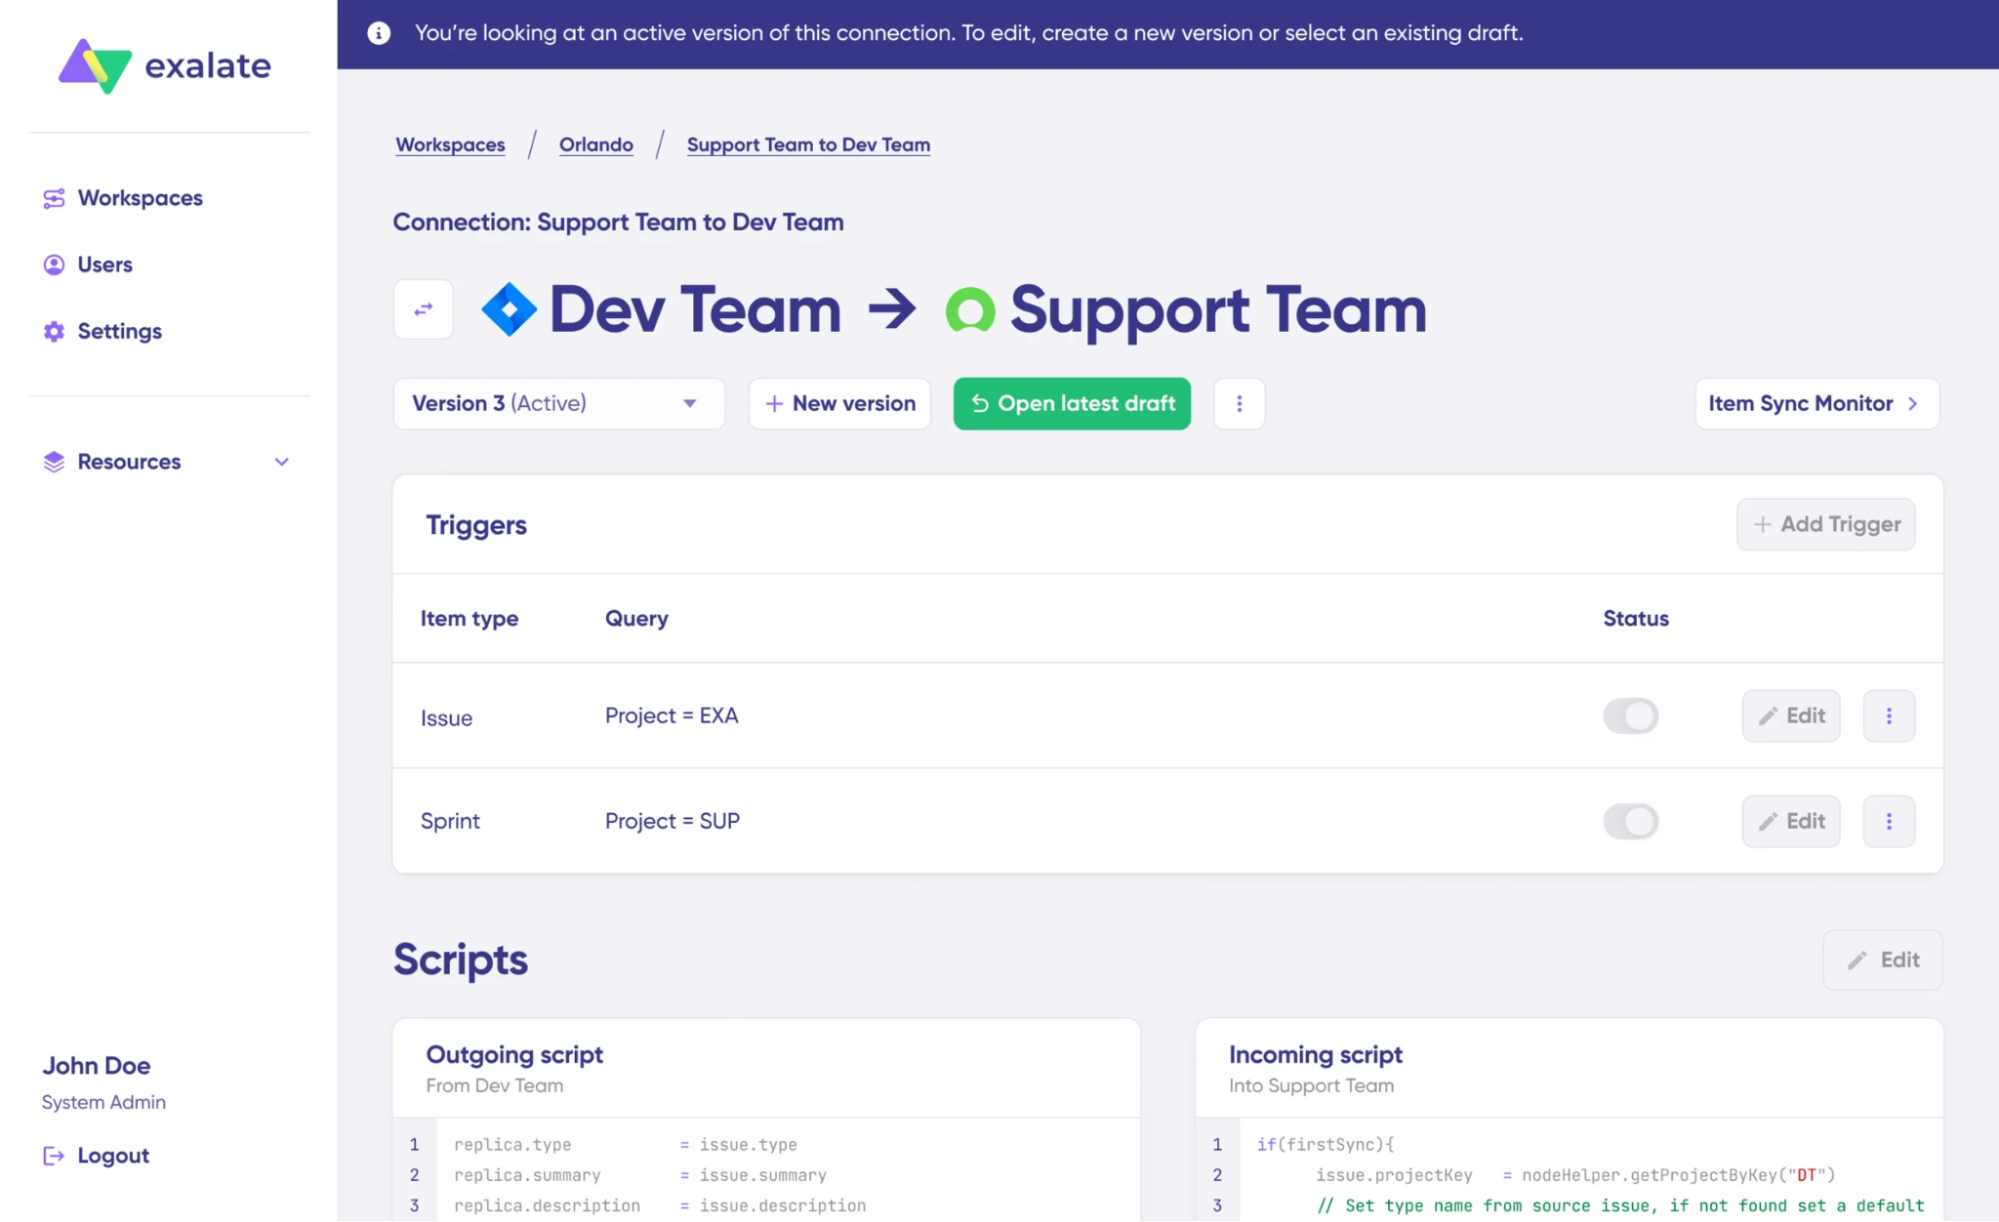
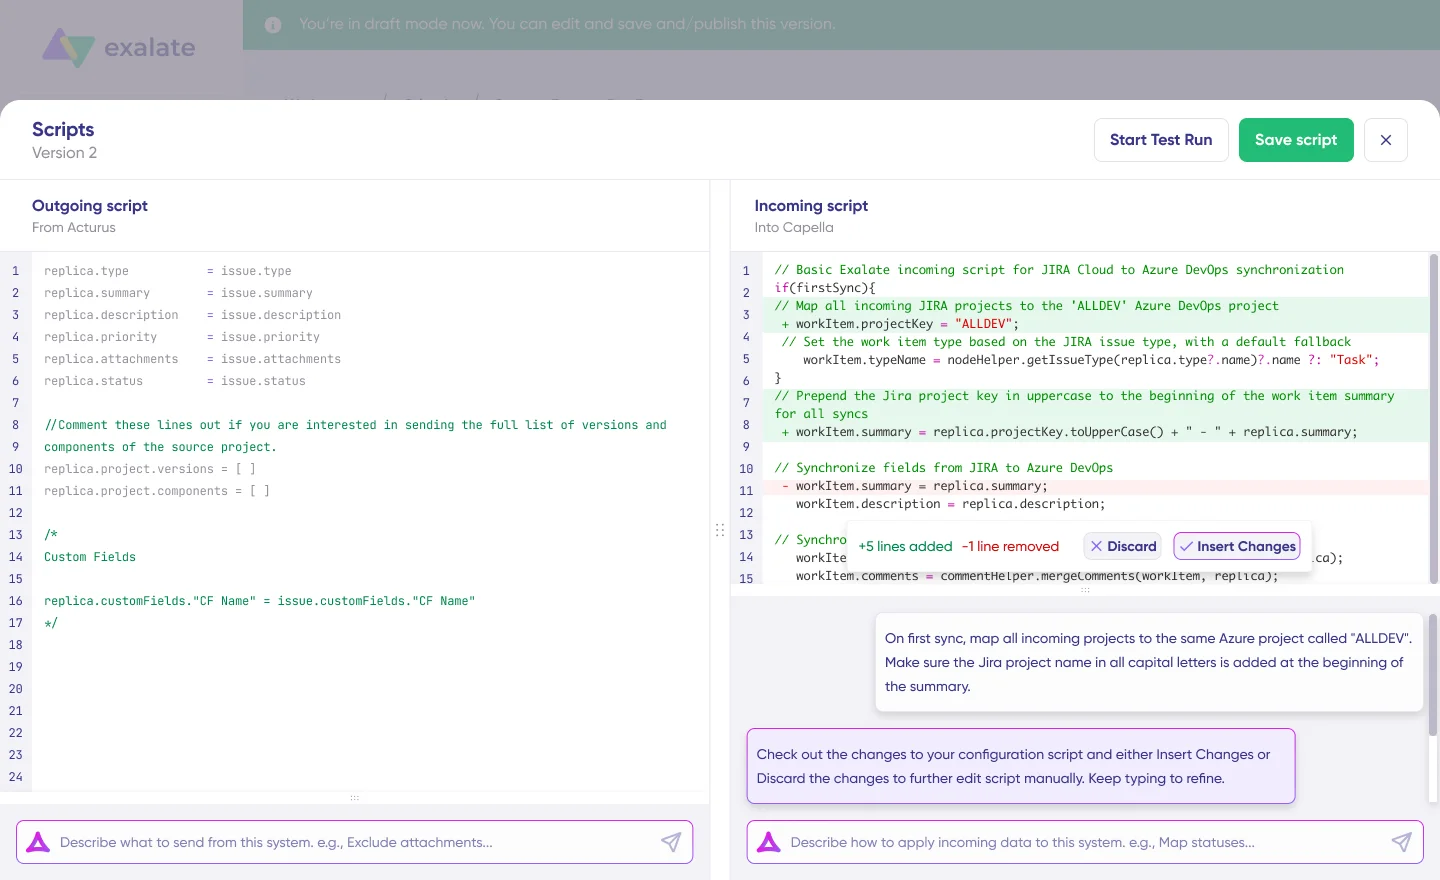
Sync rules are based on Groovy scripts. These scripts let you add custom data logic, field mapping, and conditional flows for any complex workflow.
The scripts are divided into incoming and outgoing scripts:
- Outgoing script: Defines what data leaves your system and gets sent to the other side
- Incoming script: Defines how data coming from the other side is mapped in your system
For instance, to send a custom field from Jira to Azure DevOps, add it to the outgoing Jira sync:
replica.customFields."CF name" = issue.customFields."CF name"
On the Azure DevOps side, you get to decide the field that'll display the Jira custom value.
AI-Assisted Configuration with Aida
Instead of manually writing scripts, you can use Aida to generate them faster. Aida is available in both incoming and outgoing script sections.
- For outgoing scripts: Describe what data should leave your system. For example, "Exclude attachments" or "Only sync high-priority work items."
- For incoming scripts: Describe how incoming data should be applied. For example, "Map statuses" or "Set a default assignee if the user can't be found."
Based on Exalate's scripting API and your existing scripts, Aida generates working Groovy scripts with proper field mappings. Review the suggested changes (green highlights for additions, red for removals), then choose to "Insert" or "Discard" them.
Test Run: Validate Before Production
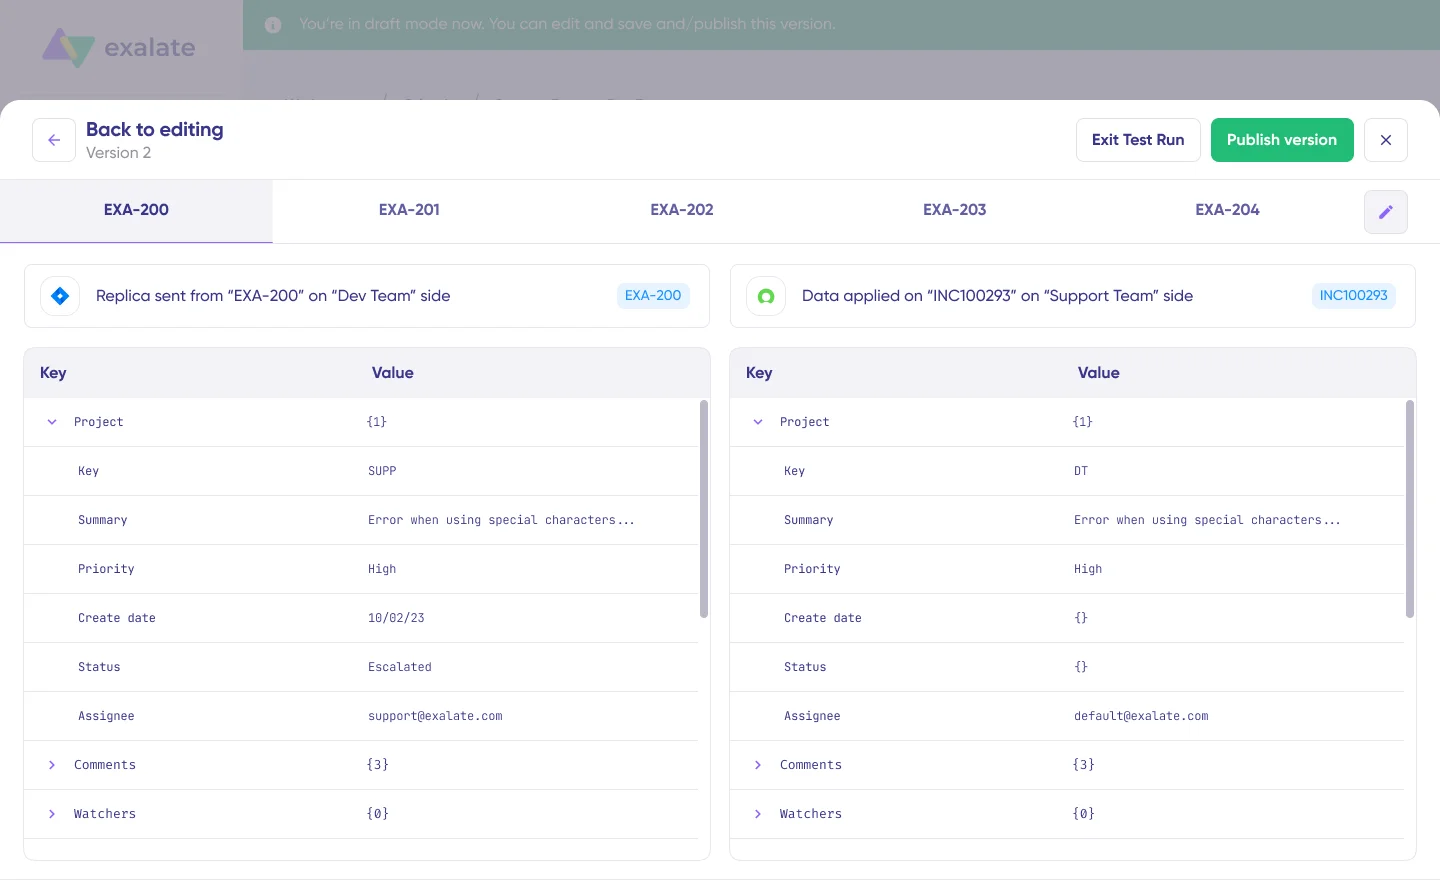
Once your scripts are ready, use the "Start Test Run" option to validate your configuration against real data without affecting production. Select the work items you want to test, run the test, and review how the sync will be applied. Deploy only when you're confident everything works correctly.
Once satisfied, click "Publish Version" to apply the updated configuration to your live synchronization.
Step 4: Automate Your Sync with Triggers
To filter out which work items get transferred between Jira and Azure DevOps, set conditions as triggers. These triggers automate your sync process.
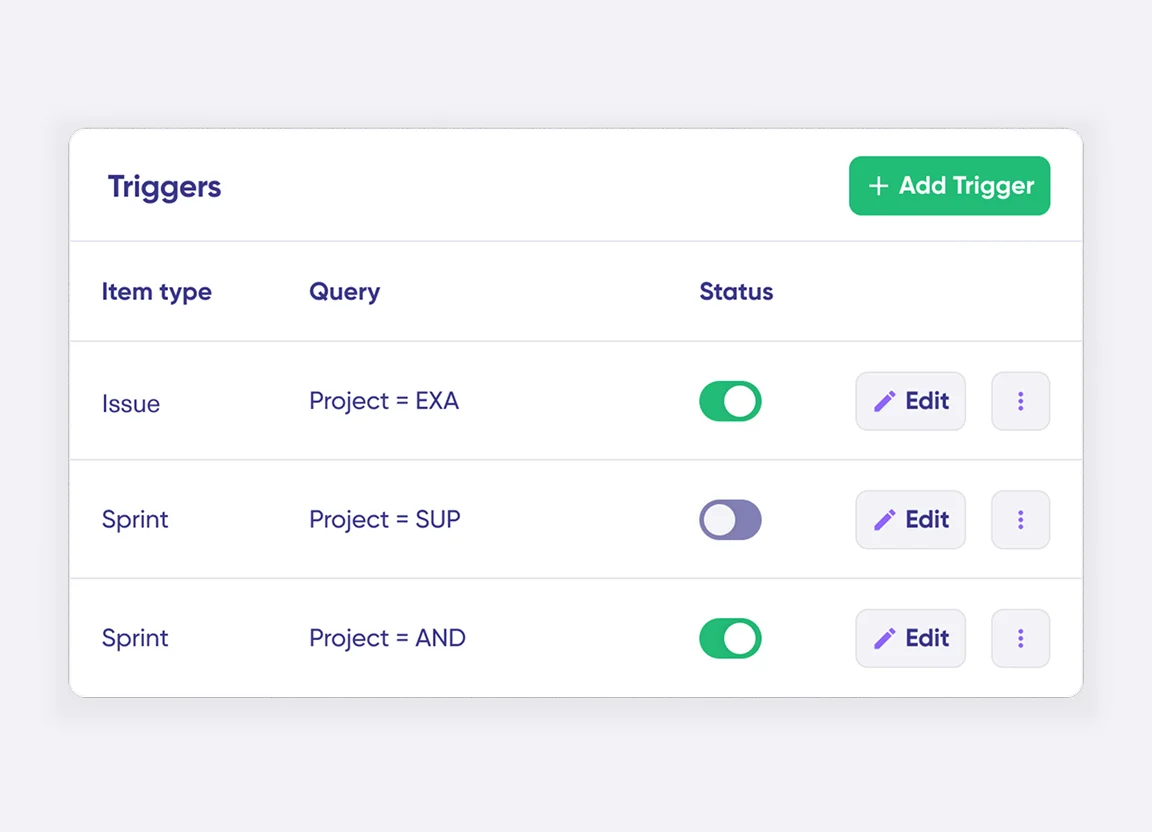
These triggers are platform-specific:
- For Jira: Use Jira Query Language (JQL) to specify conditions for work items
- For Azure DevOps: Use Work Item Query Language (WIQL) to apply conditions
Some common Jira triggers in JQL:
- project = DEMO AND labels = sync
- project = DEMO AND reporter = 623aa86b7910a200718add3c
- project = DEMO AND issuetype IN (Story, Task) AND created > "2023-01-05"
- project IN (DEMO, Discovery, EDN) AND issuetype = Bug AND priority = Highest
- project = "Exalate Demo" AND status = "In Progress"
Some common Azure DevOps triggers in WIQL:
- By work item type: [Work Item Type] = 'Task'
- By multiple work item types: [Work Item Type] in ('Feature', 'Epic', 'User Story', 'Task')
- By status: State = 'To do'
- By multiple statuses: State in ('To do', 'Doing')
That's it! Your data will sync automatically based on the rules and triggers you have set.
Troubleshooting with Aida
If you run into sync errors, go to the "Troubleshooting" tab of your workspace. Hover over the error and click on the Aida icon. Aida provides a short explanation of the error and a proposed solution, including context-aware suggestions to resolve the problem quickly.
Advanced Jira Azure DevOps Integration Use Cases
As promised, here are some unique ways our customers have implemented their Jira Azure DevOps synchronization. The following use cases really make implementing such an integration worth the effort.
- Sync and maintain work item links, relations, and subtask mappings between Jira and Azure DevOps
- Maintain parent-child hierarchy when integrating Jira with Azure DevOps
- Sync area and iteration paths in Azure DevOps as custom fields in Jira
- Sync epics between Jira and Azure DevOps
- Map and sync statuses between Jira and Azure DevOps
- Map and sync Jira work item types with Azure DevOps work item types
- Advanced comment sync between Jira and Azure DevOps
- Sync any work item field available via REST APIs
- Multi-instance hub-and-spoke architectures connecting multiple Jira instances to a single Azure DevOps environment (or vice versa), all managed from a unified console
Exalate supports integrations across Jira, Jira Service Management, ServiceNow, Azure DevOps Cloud, Azure DevOps Server, Salesforce, Zendesk, Freshservice, Freshdesk, Asana, GitHub, and custom connectors.
If you want to learn more about what you can sync between Jira and Azure DevOps, don't hesitate to get in touch with our team to discuss your use case.


