Community resources
Community resources


- Community
- Products
- Jira Software
- Articles
- Implement the Kanban Technology with Jira
Implement the Kanban Technology with Jira
Audience: Software team members and Tech startup founders
Requirement: Know the basics of Kanban Methodology, you can find it here
In my last article, The Kanban Methodology and why you need it for your Software Team!, I explained the Kanban Methodology and why you should use it in your software team. However, to implement the Kanban methodology digitally, you’ll need a software. In this article, I will introduce and explain a powerful software with which you can implement the Kanban methodology. This tool happens to be my favorite project management software.
If you’d like to follow along, I’d advice you create a Jira account at https://www.atlassian.com/software/jira
STEP 1: Create a Project
The first thing to do after creating an account and signing in is to create a Project of type “Kanban”. Once you have created an account on Jira, look around at the top menu to find the “Create” option. For the purpose of this tutorial, we’ll be using the Classic option, so go ahead and select that option and don’t forget to chose Kanban software development project.
If you followed this step strictly, at this point you should have your Kanban software development project and the very first thing you see should be your team’s Kanban board.
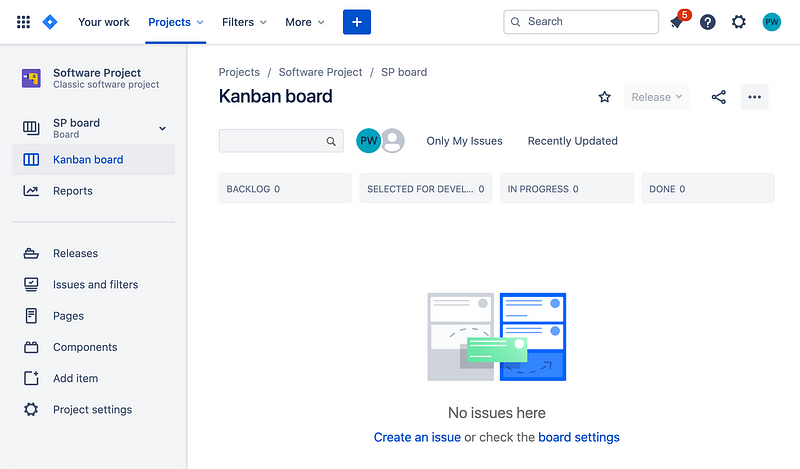
This is how the default Kanban board looks like and you must have noticed that apart from the column headings, everything looks empty. The way your Kanban board will look at the end depends on your team structure and project configuration which takes us to the next step.
Step 2: Configure Project Workflow
For the sake of this tutorial, I will add the QA(quality assurance) also known as testing column in the present flow. To configure the workflow, locate the 3 dots icon in Kanban board image, beside the share icon. The first option once you click it is the board setting link, follow the link to be able to configure your present workflow. When you click the link, you will have a bunch of menu with which you can achieve a lot. To be able to add the QA link, click the “add column” link.
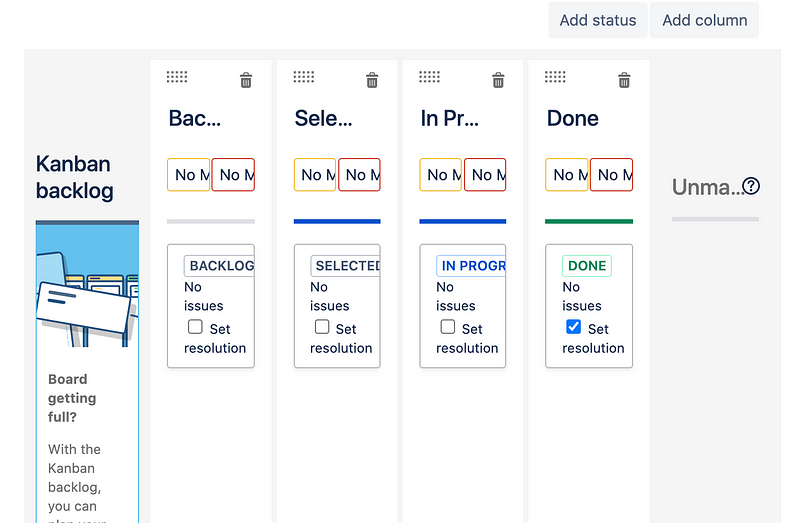
Scroll a little below the page where you can see this section. With the “Add column” link with which I can add the QA column. There are many other things one can achieve from the setting, like the Work in Progress Limit, card colors, working days, card layout, etc. Feel free to play around.
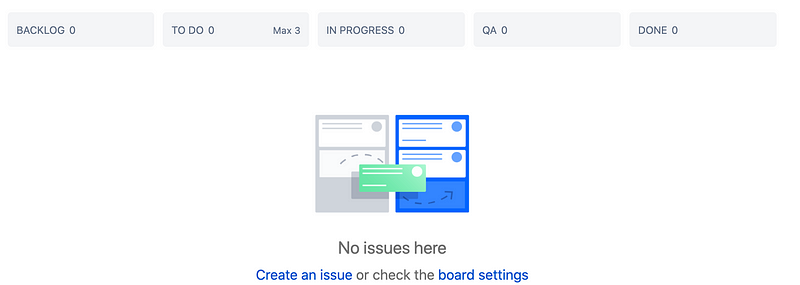
Notice the QA column added, also notice that I have set Max value of 3 for the Todo Column to reduce bottle necks. I also changed the “selected for development” to “To Do”. You can always name the columns what ever you chose but the the names should have a significant meaning subjective to the team’s project.
Before we move further, recall the goal of the Kanban Methodology from the previous tutorial which is to move tickets or issues from the commitment point(BACKLOG) to the delivery(DONE) point as fast as possible. But here we can’t even move any tickets because we don’t have any. That takes us to the next step.
Step 3: Backlog Planning and Prioritization
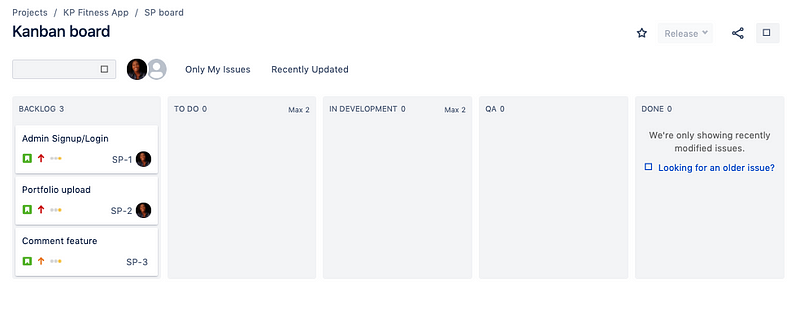
The backlog is the commitment point from which the team members pick issues or tickets to work on. Note that the backlog should always have the issues/tickets with higher priority at the top and this is where prioritization comes in. The product/growth team is always in charge of deciding the issues with high priorities from user research carried out.I advice you think of a sample project to use if you don’t have a real project, in this case I have used “KP Fitness App”. Now for that project, define the aim and note that the issues that will appear on top of the backlog are issues with higher priority and will help you achieve the aim of your product faster. Start creating issues by clicking the “Create” button at the top. Fill the modal form that pops out after clicking the create button and submit. You can create as many issues as you want depending on your project need.
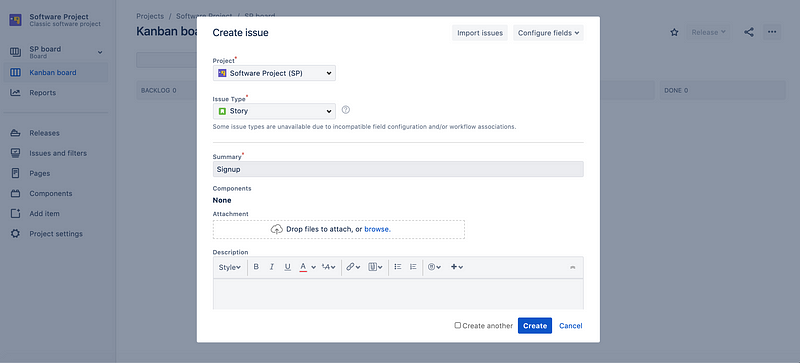
We’re using story as the issue type in this tutorial. Story, bug, task and epic come by default, you can add any other issue type like design, Local-dev, In-Production, etc, depending on the structure of the project. This can be done from the project setting.
A user story is a very high-level definition of a requirement, containing just enough information so that the developers can produce a reasonable estimate of the effort to implement it. — agilemodelling.com . It usually comes in this format: As a <type of user>, I want to <perform some task>, so that I can <achieve some goal>. A user story can have other components like design mockups, acceptance criteria, etc. but what I have used is the most basic form of a user story. User stories are mapped out by the project/product manager with the cooperation of the team in detailing out the requirements. When you are done creating the issues, you should now have some tickets in your backlog.
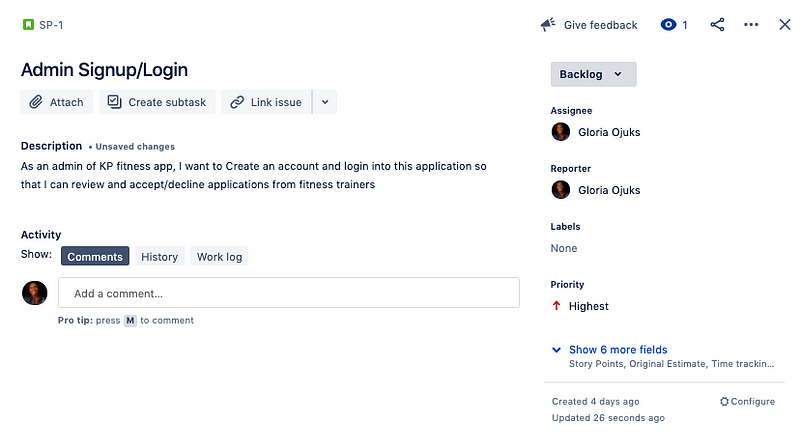
Once you’re done with creating each ticket with the user story, they appear in the backlog column by default.
You can chose to add as many issues/tickets as you need depending on your project. By default, issues will start in the “Backlog” column of your Kanban board until the team members start picking them up to start working.
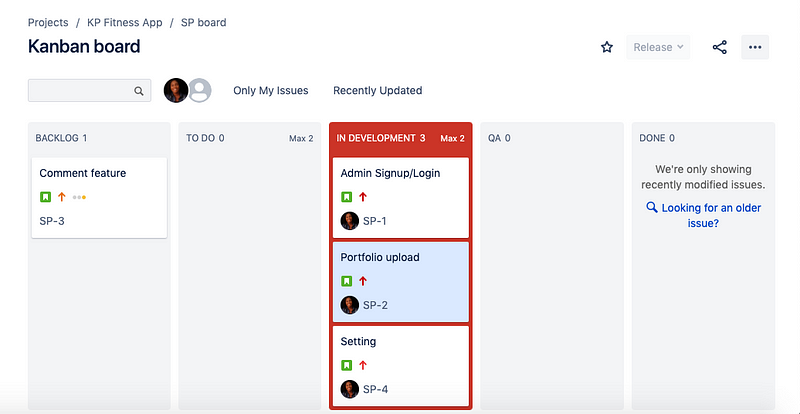
Notice that for this app, in the backlog,I have prioritized the admin signup/login to be the highest and the comment feature to be the lowest. So in order to make sure that the team is working on the most important things at each point in time, you can easily prioritize the tickets by dragging the ones with higher priority to the top.This will depend solely on your project and the vision.
Step 4: Start Work by Selecting Tickets/Issues from the Backlog
If the tickets/issues remain in the Backlog, the Work will never get done and the aim of the project will never be achieved. So in order to get the lead time counting and get work DONE, team members start to pick the tickets they are concerned with from the backlog. One important thing the Product Manager must ensure is that team members avoid bottle necks. This can be achieved by setting the WIP(work in progress) limit. For example for this project, we can say that the developer must not have more than 2 tickets on the “in development column” since working on too many things at the same time can lead to bottlenecks. So if the WIP is set to 2, that column will turn red as a flag to the Product Manager and the team that the developer is experiencing a bottle neck. From the image below, you can easily see that “IN DEVELOPMENT” column is experiencing a bottleneck haven gone above the set limit. The Product owner will always have to come in at this point to find out what the issue is. This process gives value to the customer sooner, which makes WIP limits a valuable tool in agile development.
It is the product owner’s duty to define what it means for issues to be DONE, these tickets will then be tested against the criteria and success metrics by the QA testers. In a more defined Kanban board, the testers will pick tickets from a “ready for QA column” after he which he/she moves them to either the “passed tests” column or the “failed tests” column. These iterations will continue until all the work is done and all the tickets can be seen aligned on the DONE column. At this point, the LEAD TIME is reached, the customer is satisfied and all the features can then be pushed to PRODUCTION.Note that, even in PRODUCTION, changes can still take place since we are practicing the Agile methodology.
If you made it to this stage, good job you now know how to effectively implement the Kanban methodology with Jira, however for advanced practices and better performances, we are going to explore some more steps.
Further Steps
- Hold Team meetings: Meetings usually known as “daily stand-ups” are very necessary but optional in Kanban. It helps the team members to hear from each other where presently they are in the project. While these meetings are necessary, the product owner should make sure to do this not more than 15 minutes ideally in the morning to avoid boredom. Three questions are usually answered in the daily stand-up as follows;
- What did you do yesterday?
- What are you working on today
- What blocker did you encounter or encountering?
- Cumulative Flow Diagram: Jira makes things super awesome here by providing options to create many different charts and graphs for your project, one of which is the Cumulative Flow Diagram. This Diagram will help your team quickly visualize their effort, and measure it against the progress of the project. Bottlenecks encountered will always appear as a sudden change of the issue statuses in the diagram .When predicting potential bottlenecks, this flow diagram is a sure tool that gives you the right analysis. To locate this tool, click on the “reports” menu option at the left hand side and select the Cumulative Flow Diagram.
- The Control Chart: The Control chart is another powerful data analysis tool that helps you read 2 main things;
- The cycle count: this is the average amount of time a ticket or issue takes to be completed.
- A rolling average of your team’s cycle time. This will enable you to measure the improvement of your tea members as relates to speed overtime. In general the Control Chart helps you read the visibility, predictability and efficiency of your project and team members.
In summary, the Jira Software is a very powerful software with which you can achieve as much digital transformation as possible, aside the Kanban Methodology. Rome they say was not built in a day so take it step by step. Kindly follow me to get more of my articles. If you have followed and practiced all through to this point, you deserve a drink(lol), however, if you could not follow along, but read to this point, bookmark this article and you can always reference this article.
To reach out to me kindly find me on twitter or send me an email .
Was this helpful?
Thanks!
Gloria Ojukwu

About this author
Product/Project Manager| Atlassian Lover I Community Builder
Phreetech
Nigeria
5 accepted answers
Community showcase
Atlassian Community Events
- FAQ
- Community Guidelines
- About
- Privacy policy
- Notice at Collection
- Terms of use
- © 2024 Atlassian
1 comment