Community resources
Community resources


- Community
- Products
- Crowd
- Discussions
- Compatibility Issue with Crowd Data Center
Compatibility Issue with Crowd Data Center

Dear all,
Here I'd like to share our own experience of overcoming difficulties we faced in the process of creation Data Center edition for the Crowd plugin. You can hardly find any other guides on the topic. We can affirm this as not so long ago we studied plenty of web pages to no avail. Hope our solution will save you a lot of time and effort.
Well, Crowd has never been on the list of Atlassian's priorities. We guess that is the reason why it's easier to find a unicorn in a current megapolis than technical documentation and guides teaching how to make a plugin compatible with Crowd Data Center.
Here are the numbers for your consideration - there are 19 apps for Crowd Server on Atlassian Marketplace and zero for Crowd Data Center. The numbers for Jira are - 1760 and 420 accordingly.
Plugin Testing Requirements
For stress testing of the plugin, we need a working Crowd Data Center "which is deemed sufficiently large".Anybody knows how much is "sufficiently large"?
There is no accurately stated number. Atlassian's article on testing an app on a large instance shows numbers only for three main products.
We tried to research this on forums but got no replies.
Are there any standards where Atlassian says what it would consider a "sufficiently large" instance…?If the numbers for Crowd are the same, it's obvious that a separate plugin is needed for data generation. It will inhabit the server with groups and users. We had to develop it specifically for this purpose and shared the source code of Data Generator for Crowd with you.
The data generation should take place on Amazon Instance (in the Cloud) which will be tested.
Another Option that Doesn't Actually Work
You can generate data on another computer and transfer the content as an XML file. We can tell you that this does not work. If the database is large, Crowd starts to return errors to console while the XML file is being generated. As a result, it's impossible to generate the required file. We tried to launch Crowd with larger Java Heap size (default - 512MB, tested in up to 2GB) but it didn't help. Taking more RAM might help but you would have to try it yourself.
The Working Way to Generate Data
To generate data you need to deploy Crowd Data Center in the Cloud, for instance in AWS. Good for us, templates for deployment have been already requested from Atlassian which frees us from manual work.
Work with Crowd in AWS requires a specific approach. The next section of our tutorial describes the steps and techniques to overcome obstacles you may stumble upon when working with Crowd in AWS.
How to Work with Amazon Web Services
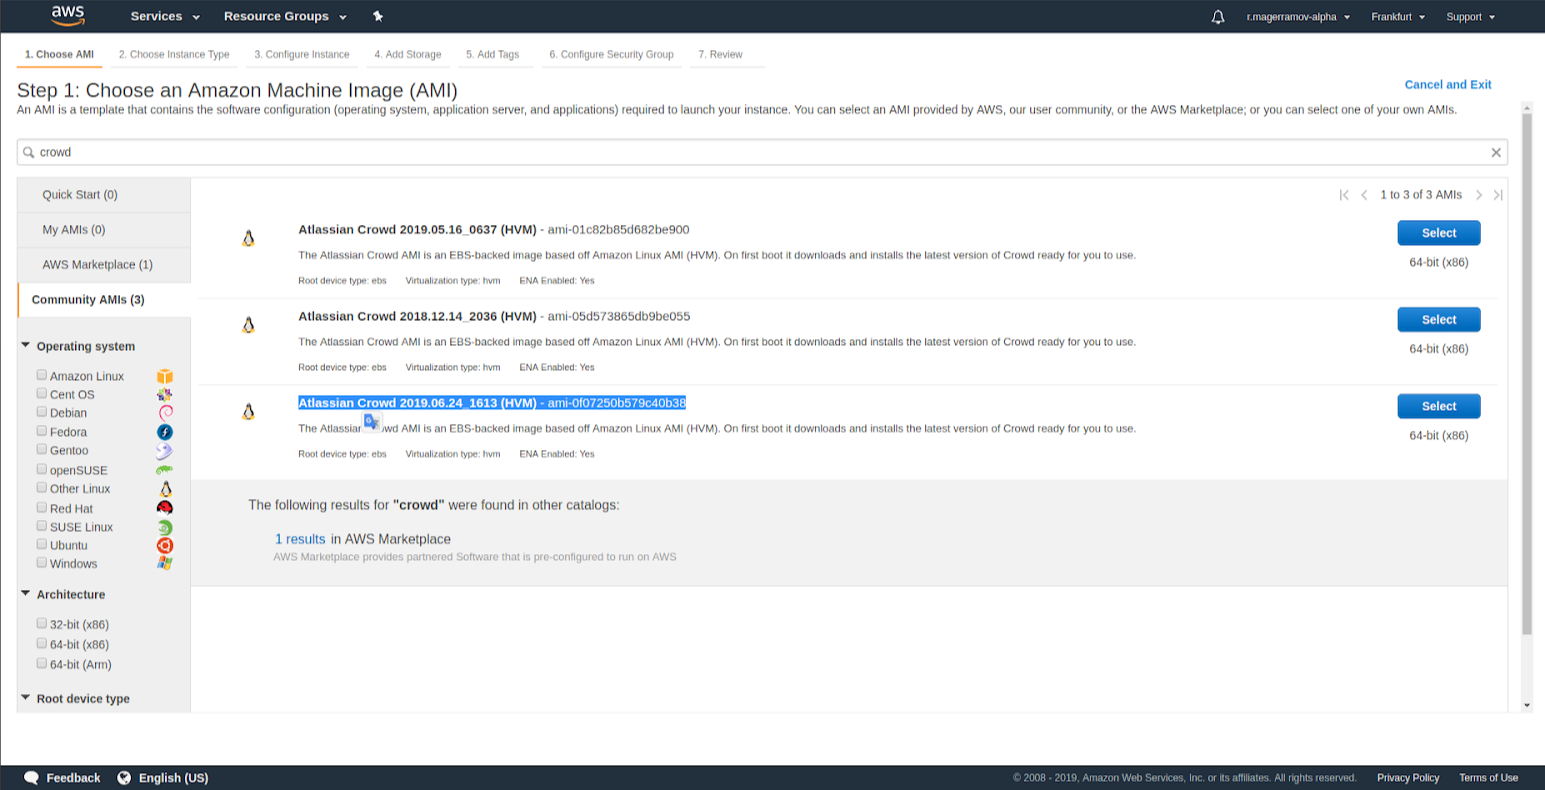
- We used this link to start Crowd in AWS and then this template for the Crowd on top of ASI. Use t2.small and db.t2.small for EC2 and RDS because it seems like Crowd requirements are not as high as the ones for Jira. You need to change the standard template to fit your needs better.
- The standard Crowd download path referring to some resources inside AWS doesn't work. You need to state it clearly. The field for a download link is in "Optional parameters" of a stack creation page.
This is a field inside "unnecessary" options during Stack creation:
https://www.atlassian.com/software/crowd/downloads/binary/atlassian-crowd-3.3.5.tar.gz
3. You can use the following JDBC format for connecting database when initially setting up Crowd:
URLjdbc:postgresql://crowddc.cziypodriov1.eu-central-1.rds.amazonaws.com:5432/crowd?reWriteBatchedInserts=true
Please note that crowddc.cziypodriov1.eu-central-1.rds.amazonaws.com is taken here: Port 5432 or another is taken here:
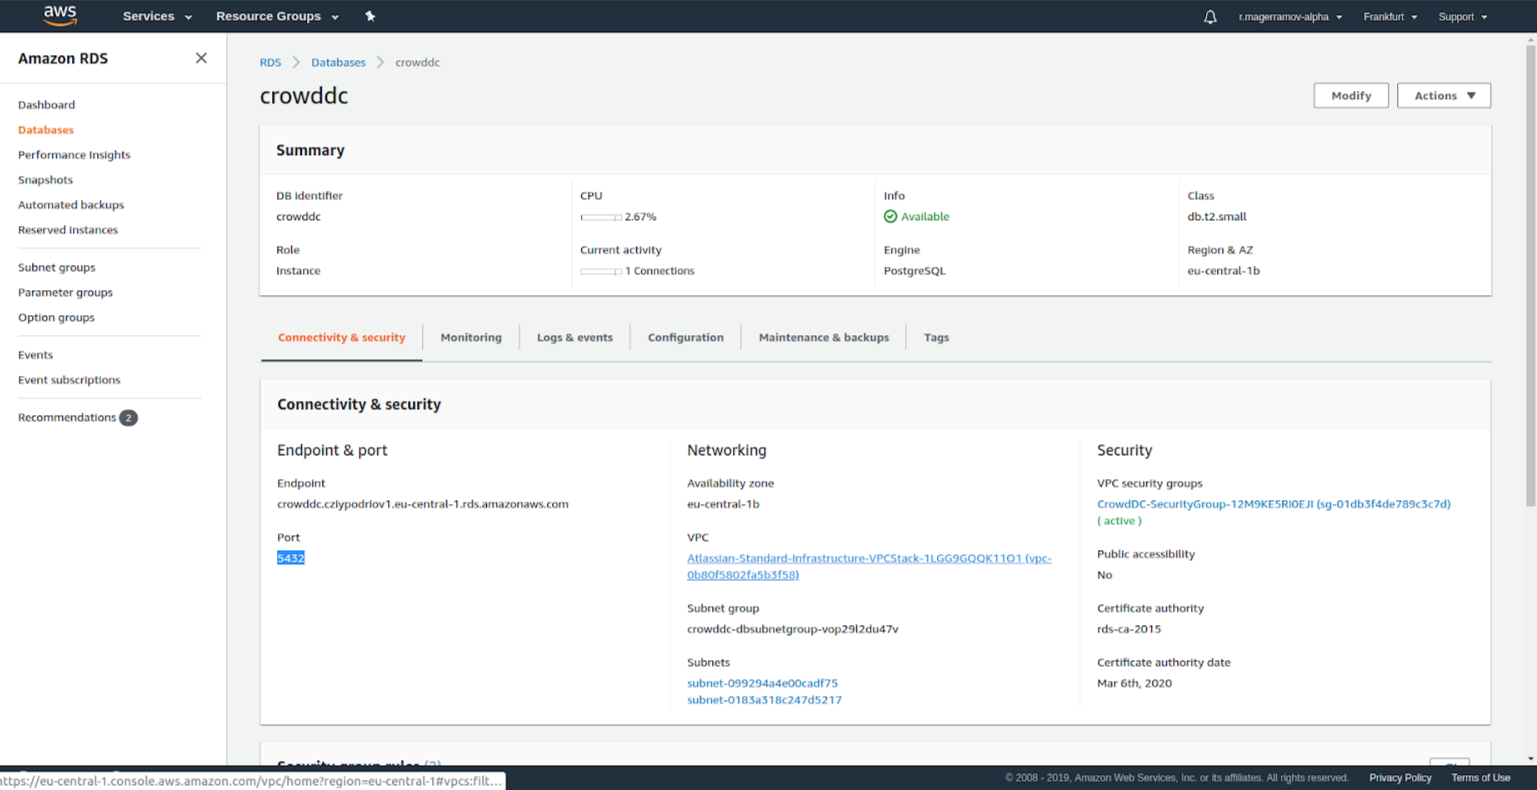 A part of the URL is filled at the selection of the database.
The default for Crowd - Postgres.
The user name can be found here: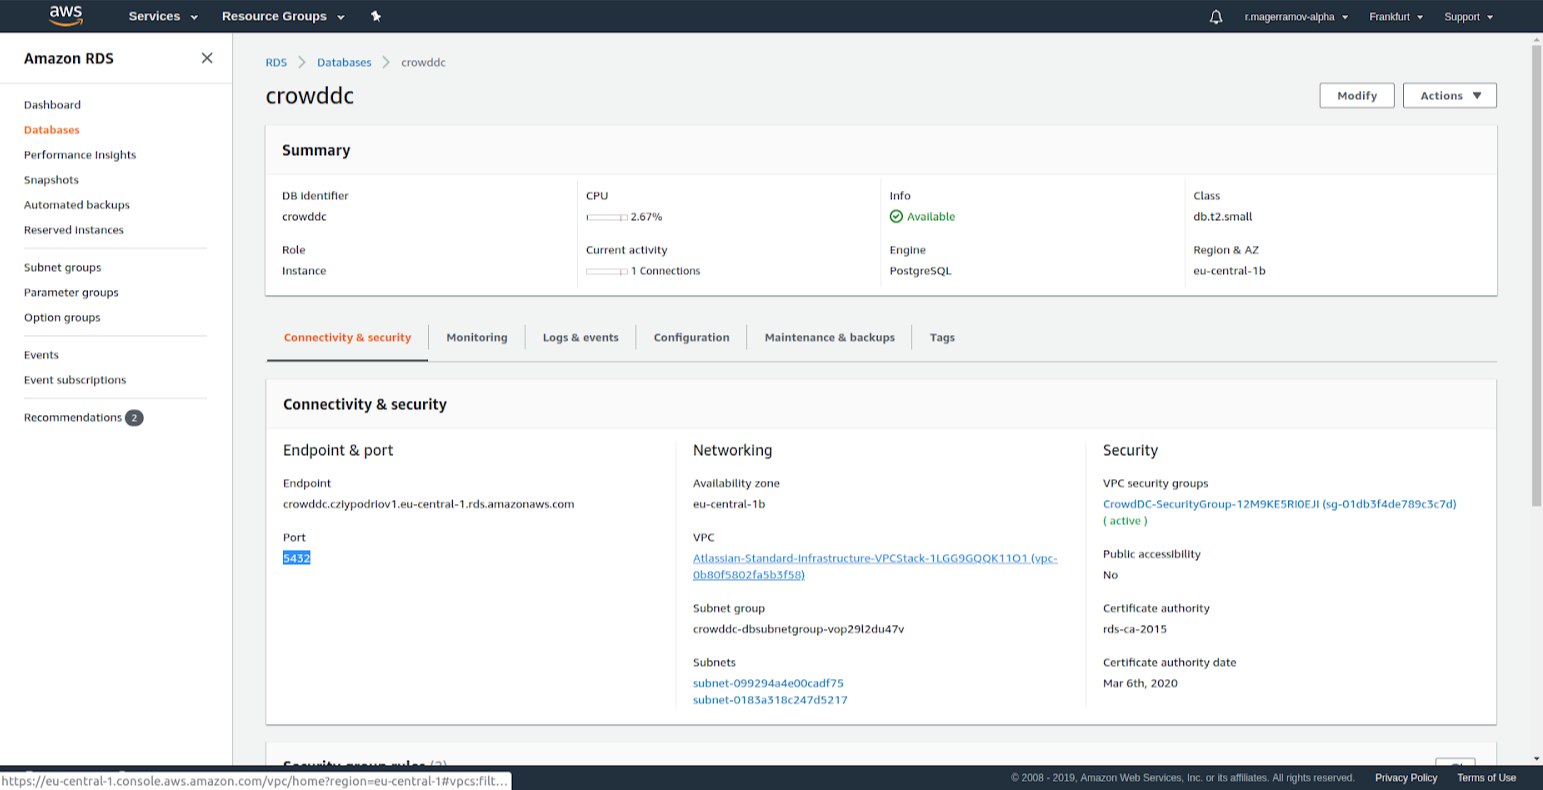 The database password is stated at the setup of Stack Crowd from this template:
CrowdDataCenter.template.yaml
Read how to Create and Connect to a PostgreSQL Database.
4. You may use "ssh" and "scp" attributes to upload plugin into Crowd for connecting to a particular instance and upload (or download) files.
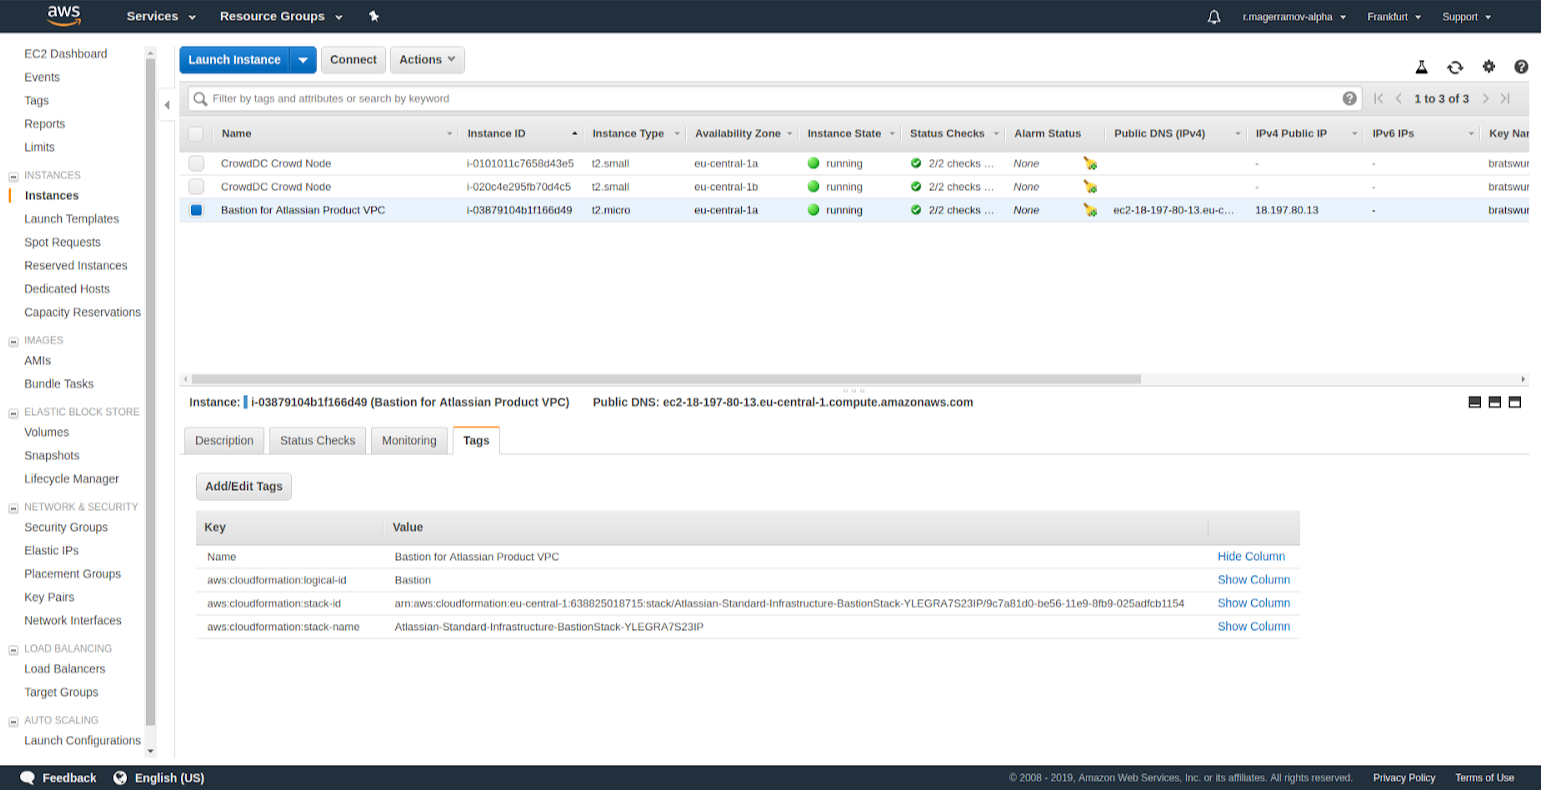 File * "bratswurst-key.pem"* is a key generated by user before creating stacks. It is required for ssh connections in one of the subsections of EC2 Dashboard.ec2-user, which is a type of user on behalf of which we act on EC2 instance. It depends on the OS.
Please read a detailed description here:
https://docs.aws.amazon.com/AWSEC2/latest/UserGuide/connection-prereqs.html
At the default installation, CROWD_HOME is being installed to the /opt/atlassian/application-data/crowd folder. While you should place .jar file of the plugin to /opt/atlassian/application-data/crowd/shared/plugins/.
There was no Universal Plugin Manager in Crowd before version 3.7.0. There was no opportunity to upload plugins dynamically. That's why, after .jar file is copied to */shared/plugins, you need to reboot Crowd. For this, you may reboot both instances in EC2 console or use file "crowd" in /etc/init.d folder like this: "./crowd stop", and then "./crowd start".
This doesn't happen immediately. Probably, LoadBalancerURL will return HTTP 503 error till the server is not fully launched.
After all the above actions Crowd with running plugin will be available for usage.
5. This item is especially important. It's extremely difficult to reveal this bug.
After re-balancing of the Crowd stack, you may start to get HTTP 503 errors when trying to connect to Stack Output Url. This happens because by default at auto-scaling Crowd instances are created with a certain type of specifications. This type may differ from the one stated at the initial configuration. For example, user name, on behalf of which instance connects to the base. You need to check if the data is correct in CROWD_HOME/shared/crowd.cfg.xml. In particular, you need to check this line: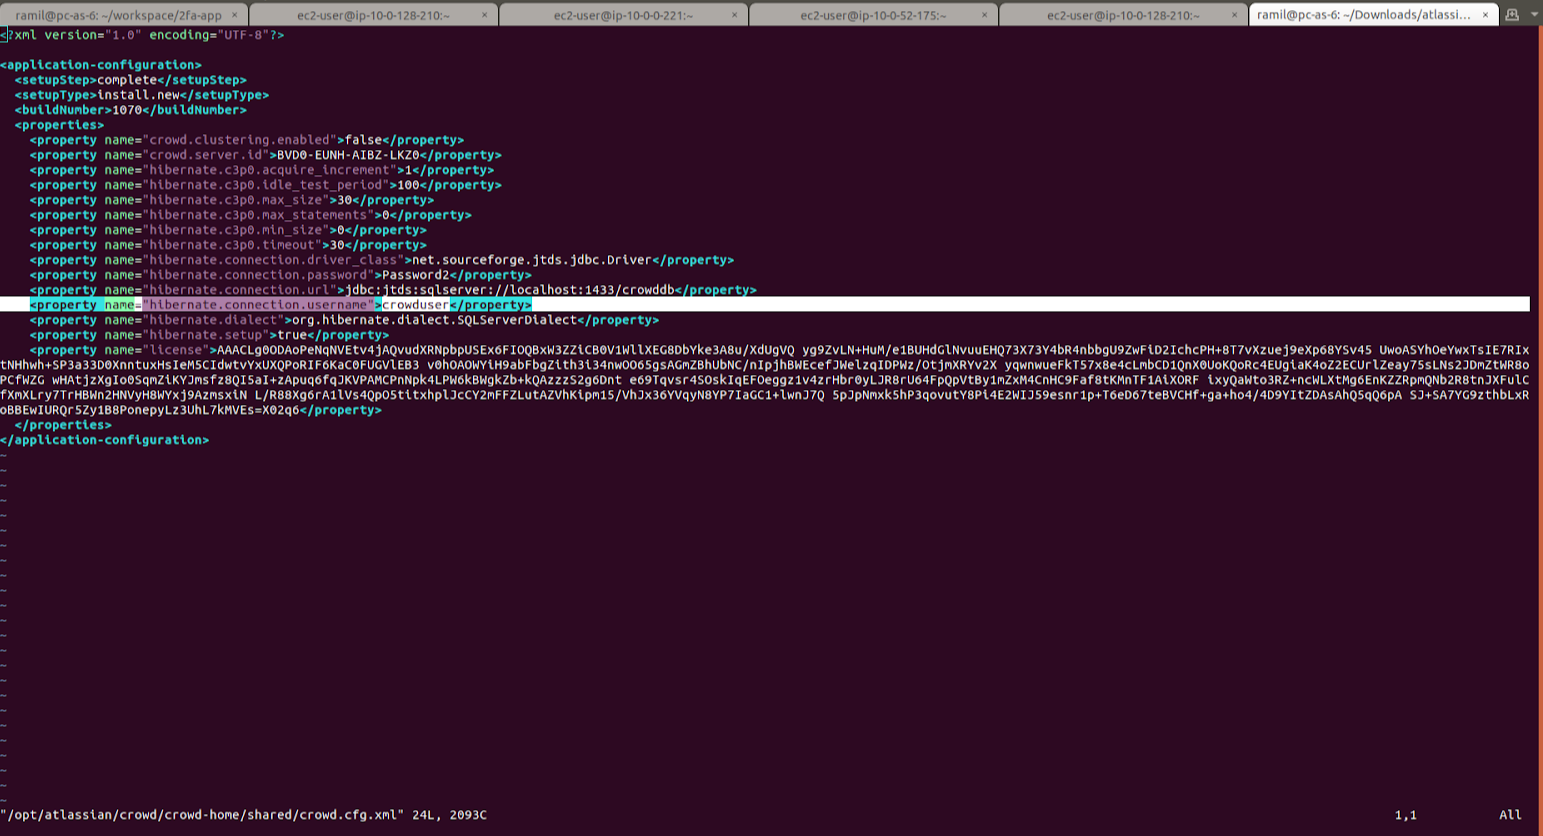 6. If you need to test in a single node, ASI will block this requiring at least 2 Availability Zones. If you are starting Crowd on top of this ASI, you need at least 2 nodes, otherwise, Load Balancer will not redirect requests and you will get 503 error.
Here is an alternative way for you. Run a separate EC2 instance with the Atlassian form of services. For this, at the creation of instance you need to input a product name (for example - Crowd) in search and go ahead by points. Access key is a mandatory point, required in the end right before the creation of node.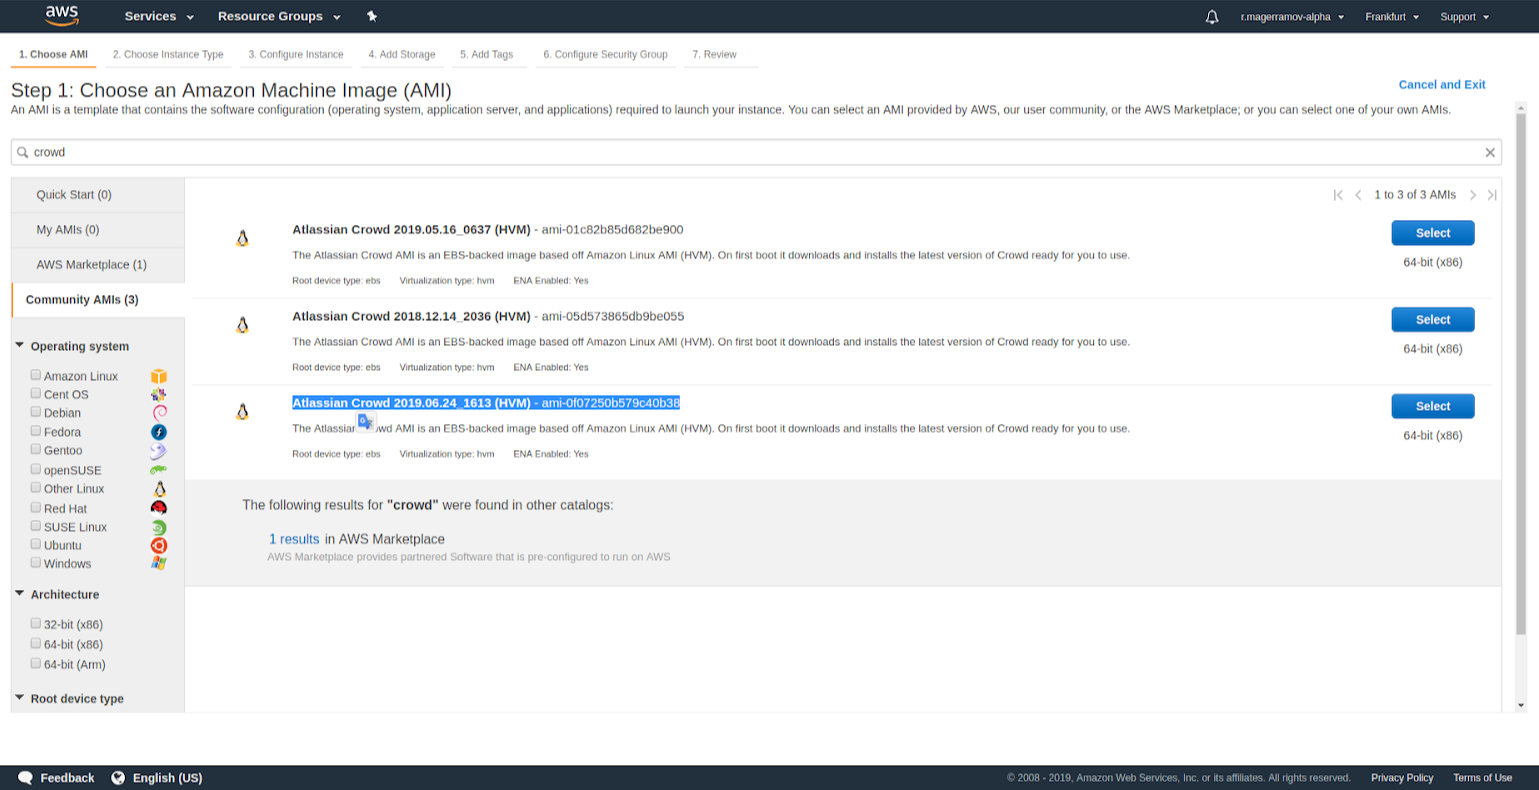 Please note that similar to ASI, a standard download Crowd path won't work. You need to state it clearly, as we described in the first point. Initialization file can be found in /etc/init.d/, its name is atl-init-crowd, it can be activated with "start" argument. You need to change the download path in it.
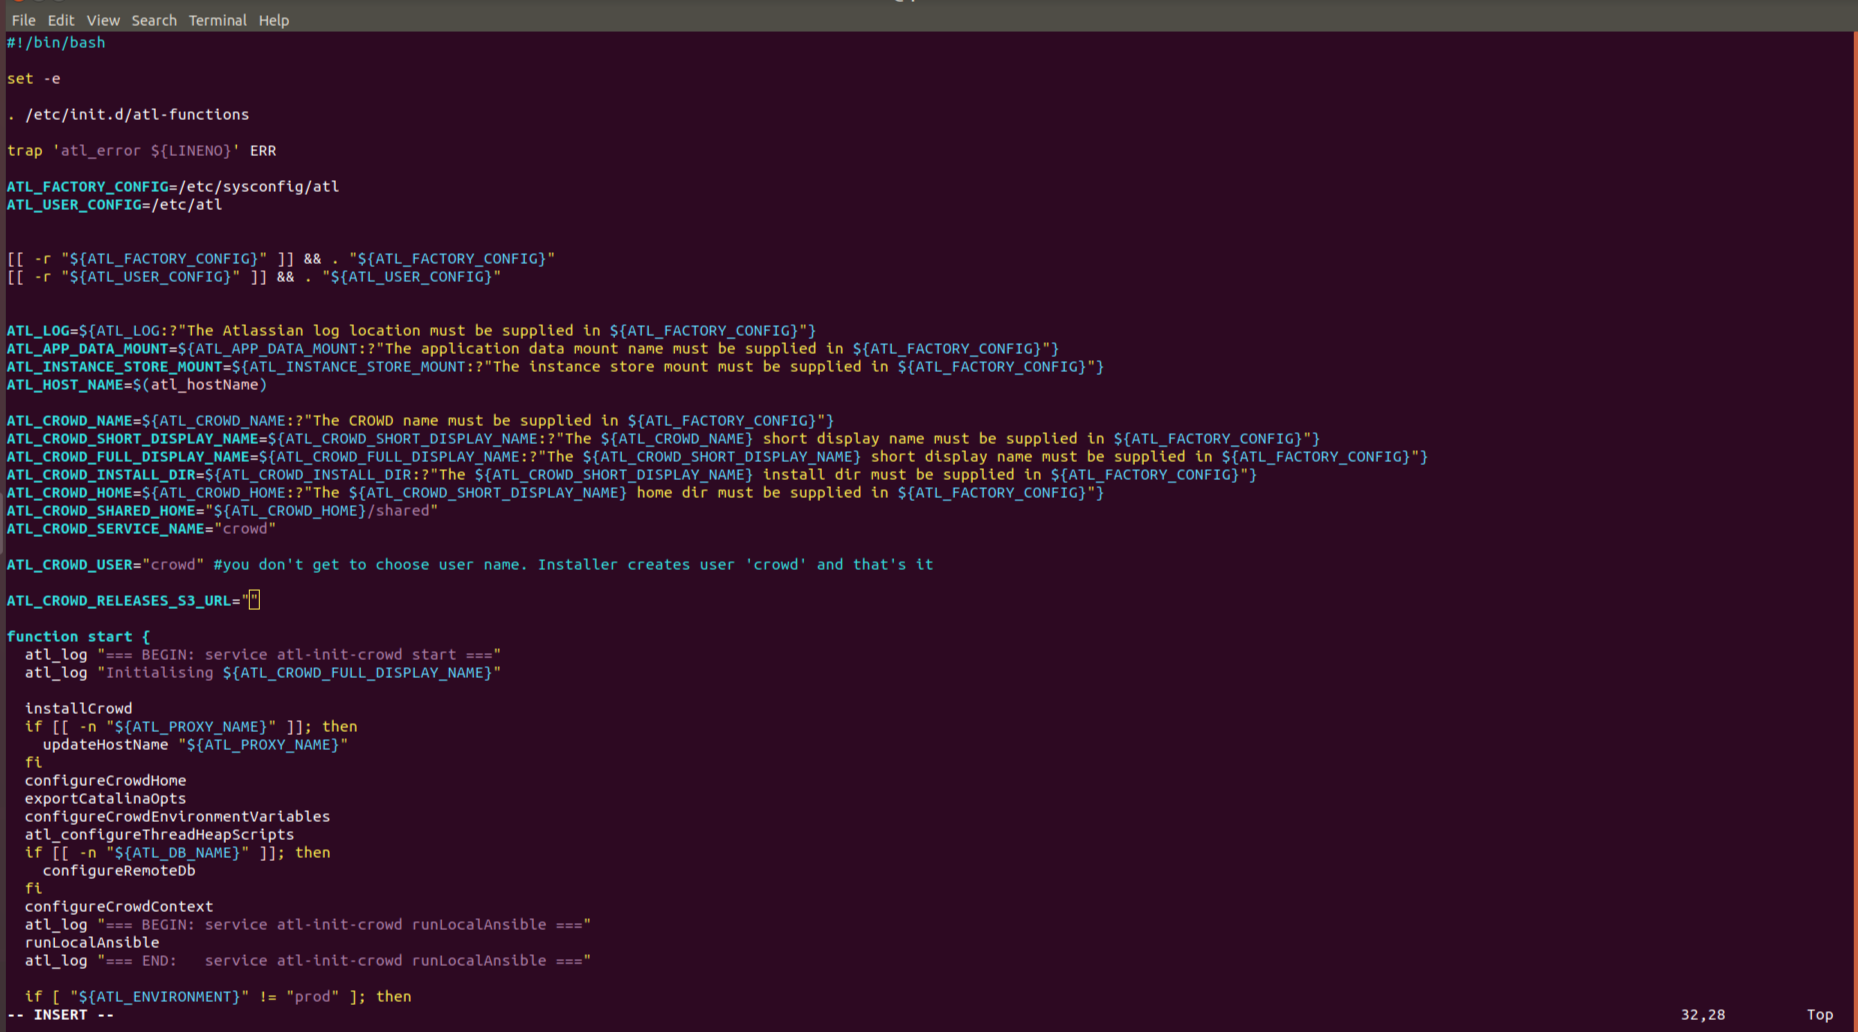
 After starting atl-init-crowd, server will be started on port :8095 and basic path /crowd. Database is either imported from XML (more on this in the next point) or by means of replacing an empty database with ready-made one (with generated data created from a snapshot).
Tip: We used it as were short on time.
If you will try to connect Crowd to the filled base, you will get an error and server will require the rights to "overwrite data". You need to connect it to the empty base, log in, switch off crowd via /etc/init.d/crowd stop, then replace the names of full and empty bases, and then start Crowd via /etc/init.d/crowd start (or /opt/atlassian/crowd/start_crowd.sh) command. If you are not a fan of hacks, you will need to generate data from scratch or import data from XML file if you already have one. This way, at the next launch Crowd will connect to the base under the name given to the instance RDS with generated data.
7. The following will only work for small data sets (less than 100000 users). Please refer to the fifth point.
All Atlassian products we worked with have the option of Import/Export data for backup to/from .xml file. You can place everything needed for restoration in case of mistakes there, including database content. You can use this method to transfer data between instances if you want to save and not to keep many stacks switched on. It's obvious that the transfer is not immediate, however, this method is faster than generation on the working AWS.
Furthermore, you can generate data on the working machine and then upload instance damp on the cloud. Please note that product versions must be identical.
8. Sometimes you need to set up the connection via https. Please find exhaustive instructions for starting a server via https in this tutorial. You can read how to set the variable $JAVA_HOME in /usr/lib/jvm/java.
Additional Useful Info
The points below are just random chunks of helpful info which we couldn't fit into our step-by-step guides.
1. Stacks can interact only within the same region. If ASI stack is located in Frankfurt (eu-central-1), Crowd stack should be also located there. The same applies to the keys.
2. You can't directly connect to Crowd instances. You can do it exclusively via "Bastion instance". This happens because of the VPC settings, which are created automatically by ASI. You can connect manually with the help of the key (for example "bratswurst-key.pem" as described in the guides) or set up SSH tunneling.
3. You can start/switch off Crowd from /etc/init.d/crowd or CROWD_HOME/bin/(start|stop)_crowd.sh. The second option allows to read "live" logs with the help of the argument "-fg". Alternatively, you can find logs in CROWD_HOME/logs.
4. CROWD_HOME by default is located in /opt/atlassian/application-data/crowd.
5. The form used for single node creation:

6. Attached Resources: Atlassian AWS Forge - video is accessible only via the link.
Over to You
We hope our experience will be useful for you. Please leave comments here if you also faced a similar issue with testing your plugin for DC approval. Maybe you have your own hacks to share with the community?
0 comments
Was this helpful?
Thanks!
- FAQ
- Community Guidelines
- About
- Privacy policy
- Notice at Collection
- Terms of use
- © 2024 Atlassian